Grizzly G8749 User manual

MODEL G8749
DRUM/FLAP SANDER
OWNER'S MANUAL
WARNING: NO PORTION OF THIS MANUAL MAY BE REPRODUCED IN ANY SHAPE
OR FORM WITHOUT THE WRITTEN APPROVAL OF GRIZZLY INDUSTRIAL, INC.

4HISMANUALPROVIDESCRITICALSAFETYINSTRUCTIONSONTHEPROPERSETUP
OPERATIONMAINTENANCEANDSERVICEOFTHISMACHINEEQUIPMENT
&AILURETOREADUNDERSTANDANDFOLLOWTHEINSTRUCTIONSGIVENINTHIS
MANUALMAYRESULTINSERIOUSPERSONALINJURYINCLUDINGAMPUTATION
ELECTROCUTIONORDEATH
4HEOWNEROFTHISMACHINEEQUIPMENTISSOLELYRESPONSIBLEFORITS
SAFEUSE4HISRESPONSIBILITYINCLUDESBUTISNOTLIMITEDTOPROPER
INSTALLATIONINASAFEENVIRONMENTPERSONNELTRAININGANDUSAGE
AUTHORIZATIONPROPERINSPECTIONANDMAINTENANCEMANUALAVAILABILITY
ANDCOMPREHENSIONAPPLICATIONOFSAFETYDEVICESBLADECUTTERINTEG
RITYANDTHEUSAGEOFPERSONALPROTECTIVEEQUIPMENT
4HEMANUFACTURERWILLNOTBEHELDLIABLEFORINJURYORPROPERTYDAMAGE
FROMNEGLIGENCEIMPROPERTRAININGMACHINEMODIFICATIONSORMISUSE
3OMEDUSTCREATEDBYPOWERSANDINGSAWINGGRINDINGDRILLINGAND
OTHERCONSTRUCTIONACTIVITIESCONTAINSCHEMICALSKNOWNTOTHE3TATE
OF#ALIFORNIATOCAUSECANCERBIRTHDEFECTSOROTHERREPRODUCTIVE
HARM3OMEEXAMPLESOFTHESECHEMICALSARE
s ,EADFROMLEADBASEDPAINTS
s #RYSTALLINESILICAFROMBRICKSCEMENTANDOTHERMASONRYPRODUCTS
s !RSENICANDCHROMIUMFROMCHEMICALLYTREATEDLUMBER
9OURRISKFROMTHESEEXPOSURESVARIESDEPENDINGONHOWOFTENYOU
DOTHISTYPEOFWORK4OREDUCEYOUREXPOSURETOTHESECHEMICALS
7ORKINAWELLVENTILATEDAREAANDWORKWITHAPPROVEDSAFETYEQUIP
MENTSUCHASTHOSEDUSTMASKSTHATARESPECIALLYDESIGNEDTOFILTER
OUTMICROSCOPICPARTICLES

INTRODUCTION............................................................................................................................... 2
SECTION 1: SAFETY....................................................................................................................... 5
SECTION 2: CIRCUIT REQUIREMENTS ........................................................................................ 8
SECTION 3: SETUP ......................................................................................................................... 9
SECTION 4: OPERATIONS ........................................................................................................... 15
SECTION 5: ACCESSORIES......................................................................................................... 17
SECTION 6: MAINTENANCE......................................................................................................... 18
SECTION 7: SERVICE ................................................................................................................... 20
SECTION 8: WIRING...................................................................................................................... 22
SECTION 9: PARTS....................................................................................................................... 24
WARRANTY AND RETURNS ........................................................................................................ 29
Table of Contents

INTRODUCTION
Contact Info
Functional OverviewManual Accuracy
your machine may not exactly match
the manual
www.grizzly.com
Figure 1
Figure 2
Figure 1.
Figure 2.

Identification
Figure 3.

MODEL G8749
DRUM/FLAP SANDER
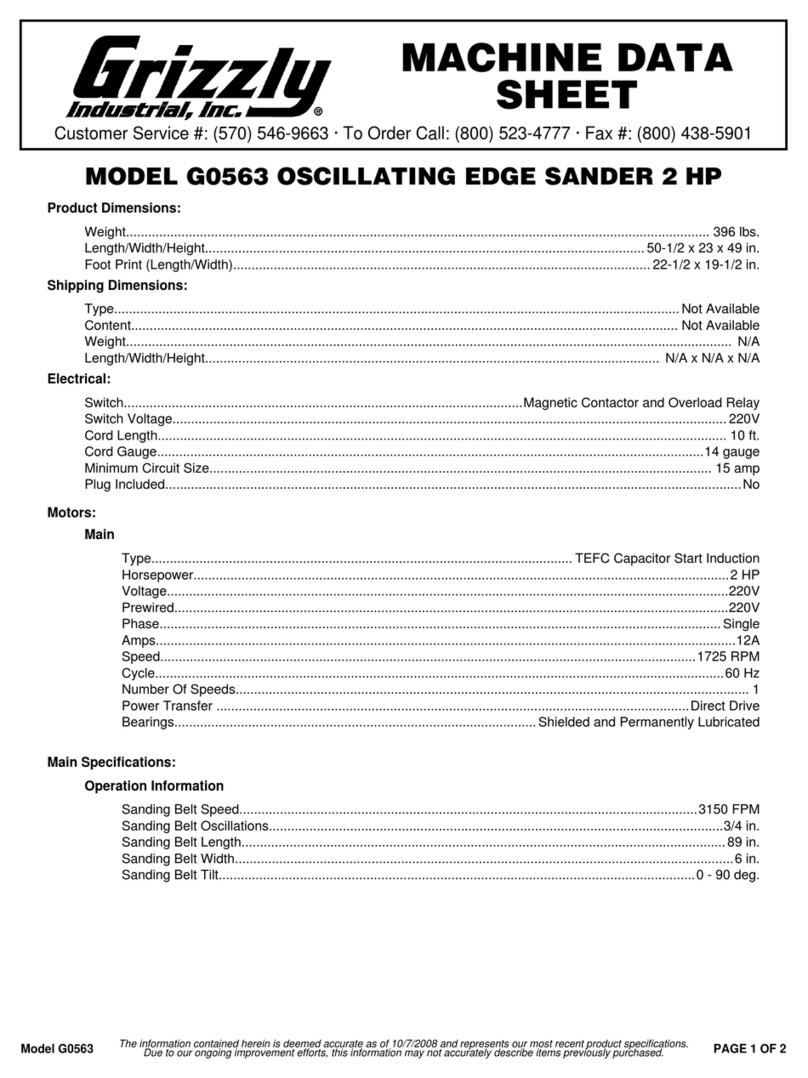
Product Dimensions:
LZ^\]i############################################################################################################################################################################# *,aWh#
AZc\i]$L^Yi]$=Z^\]i######################################################################################################################################(%m,
&¿'m&%
&¿'
;ddiEg^ciAZc\i]$L^Yi]############################################################################################################################################## .m+
&¿'
Shipping Dimensions:
IneZ###########################################################################################################################################################################8VgYWdVgY
8dciZci########################################################################################################################################################################## BVX]^cZ
LZ^\]i############################################################################################################################################################################## +.aWh#
AZc\i]$L^Yi]$=Z^\]i############################################################################################################################################&%m(&m&*
Electrical:
Hl^iX]##################################################################################################################### DC$D;;EVYYaZl^i]Hl^iX]9^hVWa^c\@Zn
Hl^iX]KdaiV\Z################################################################################################################################################################### &&%K
8dgYAZc\i]##########################################################################################################################################################################+[i#
8dgY<Vj\Z#################################################################################################################################################################&+\Vj\Z
B^c^bjb8^gXj^iGZfj^gZbZci############################################################################################################################################## &*6
>cXajYZYEaj\########################################################################################################################################################################NZh
Eaj\IneZ>cXajYZY################################################################################################################################################## C:B6*"&*
Motor:
IneZ######################################################################################################################################### I:;88VeVX^idgHiVgi>cYjXi^dc
=dghZedlZg#########################################################################################################################################################################&=E
KdaiV\Z############################################################################################################################################################################### &&%K
E]VhZ################################################################################################################################################################################H^c\aZ
6beh#################################################################################################################################################################################### &%6
HeZZY#########################################################################################################################################################################&,*%GEB
8nXaZ################################################################################################################################################################################# +%=o
CjbWZgD[HeZZYh###################################################################################################################################################################&
EdlZgIgVch[Zg########################################################################################################################################################9^gZXi9g^kZ
7ZVg^c\h############################################################################################################################### H]^ZaYZYVcYEZgbVcZcianHZVaZY
Other Specifications:
8djcignd[Dg^\^c############################################################################################################################################################### 8]^cV
LVggVcin########################################################################################################################################################################### &NZVg
HZg^VaCjbWZgAdXVi^dc################################################################################################################## BVX]^cZ>9AVWZadcBdidg
6hhZbWanI^bZ######################################################################################################################################################### &%B^cjiZh
Features:
;aVeHVcYZgHjeea^ZYl$&+*<g^iHVcYeVeZg
(
&¿)9^VbZiZgVcY)
(¿)9^VbZiZg>c[aViVWaZHVcY^c\9gjbhl$&'%<g^iHVcY^c\HaZZkZh
Id\\aZDC$D;;Hl^iX]l$Hl^iX]9^hVWa^c\@Zn
AZ[iVcYG^\]iHe^cYaZh
8jhidbZgHZgk^XZ/*,%*)+".++(IdDgYZg8Vaa/-%%*'("),,,;Vm/-%%)(-"*.%&
MACHINE DATA
SHEET
Machine Data Sheet

Safety Instructions for Machinery
!,7!93 53% (%!2).' 02/4%#4)/.
7(%./0%2!4).' -!#().%29
BVX]^cZgn cd^hZ XVc XVjhZ eZgbVcZci
]ZVg^c\adhh#
7%!2 02/0%2 !00!2%, 9D CDI
lZVgaddhZXadi]^c\!\adkZh!cZX`i^Zh!g^c\h!
dg_ZlZagn i]ViXVc XViX] ^cbdk^c\ eVgih#
LZVg egdiZXi^kZ ]V^g XdkZg^c\ id XdciV^c
adc\]V^gVcYlZVgcdc"ha^e[ddilZVg#
.%6%2 /0%2!4% -!#().%29 7(%.
4)2%$/25.$%24(%).&,5%.#%/&
$25'3/2!,#/(/,7ZbZciVaanVaZgi
ViVaai^bZhl]Zcgjcc^c\bVX]^cZgn#
2%!$4(%%.4)2%-!.5!,"%&/2%
34!24).'-!#().%29BVX]^cZgnegZh"
Zcih hZg^djh ^c_jgn ]VoVgYh id jcigV^cZY
jhZgh#
!,7!93 53% !.3) !002/6%$
3!&%49',!33%37(%./0%2!4).'
-!#().%29 :kZgnYVn ZnZ\aVhhZh dcan
]VkZ ^beVXi gZh^hiVci aZchZh·i]Zn VgZ
CDIhV[Zin\aVhhZh#
!,7!93 7%!2 ! .)/3( !002/6%$
2%30)2!4/2 7(%. /0%2!4).'
-!#().%29 4(!4 02/$5#%3 $534
BdhiineZhd[YjhilddY!bZiVa!ZiX#XVc
XVjhZhZkZgZgZhe^gVidgn^aacZhhZh#
&OR9OUR/WN3AFETY2EAD)NSTRUCTION
-ANUAL"EFORE/PERATINGTHIS-ACHINE
4HEPURPOSEOFSAFETYSYMBOLSISTOATTRACTYOURATTENTIONTOPOSSIBLEHAZARDOUSCONDITIONS4HIS
MANUALUSESASERIESOFSYMBOLSANDSIGNALWORDSINTENDEDTOCONVEYTHELEVELOFIMPORTANCE
OFTHESAFETYMESSAGES4HEPROGRESSIONOFSYMBOLSISDESCRIBEDBELOW2EMEMBERTHATSAFETY
MESSAGESBYTHEMSELVESDONOTELIMINATEDANGERANDARENOTASUBSTITUTEFORPROPERACCIDENT
PREVENTIONMEASURES
)NDICATESAPOTENTIALLYHAZARDOUSSITUATIONWHICHIFNOTAVOIDED
-!9RESULTINMINORORMODERATEINJURY)TMAYALSOBEUSEDTOALERT
AGAINSTUNSAFEPRACTICES
)NDICATESAPOTENTIALLYHAZARDOUSSITUATIONWHICHIFNOTAVOIDED
#/5,$RESULTINDEATHORSERIOUSINJURY
)NDICATESANIMMINENTLYHAZARDOUSSITUATIONWHICHIFNOTAVOIDED
7),,RESULTINDEATHORSERIOUSINJURY
4HISSYMBOLISUSEDTOALERTTHEUSERTOUSEFULINFORMATIONABOUT
PROPEROPERATIONOFTHEMACHINE
./4)#%
3AFETY)NSTRUCTIONSFOR-ACHINERY
3%#4)/.3!&%49

/.,9 !,,/7 42!).%$ !.$ 02/0
%2,9 350%26)3%$ 0%23/..%, 4/
/0%2!4% -!#().%29 BV`Z hjgZ
deZgVi^dc^chigjXi^dchVgZhV[ZVcYXaZVgan
jcYZghiddY#
+%%0#(),$2%.!.$6)3)4/23!7!9
@ZZe Vaa X]^aYgZc VcY k^h^idgh V hV[Z Y^h"
iVcXZ[gdbi]Zldg`VgZV#
-!+%7/2+3(/0 #(),$02//&JhZ
eVYadX`h! bVhiZg hl^iX]Zh! VcY gZbdkZ
hiVgihl^iX]`Znh#
.%6%2 ,%!6% 7(%. -!#().% )3
25..).'IjgcedlZg/&&VcYVaadlVaa
bdk^c\eVgih idXdbZ idV XdbeaZiZhide
WZ[dgZaZVk^c\bVX]^cZjcViiZcYZY#
$/ ./4 53% ). $!.'%2/53
%.6)2/.-%.43 9D CDI jhZ bVX]^c"
Zgn ^c YVbe! lZi adXVi^dch! dg l]ZgZ Vcn
[aVbbVWaZdgcdm^djh[jbZhbVnZm^hi#
+%%07/2+!2%!#,%!.!.$7%,,
,)'(4%$8ajiiZgVcYYVg`h]VYdlhbVn
XVjhZVXX^YZcih#
53%!'2/5.$%$ %84%.3)/. #/2$
2!4%$&/24(%-!#().%!-0%2!'%
<gdjcYZYXdgYh b^c^b^oZh]dX` ]VoVgYh#
JcYZgh^oZY XdgYh XgZViZ ZmXZhh^kZ ]ZVi#
6alVnhgZeaVXZYVbV\ZYZmiZch^dcXdgYh#
!,7!93 $)3#/..%#4 &2/- 0/7%2
3/52#% "%&/2% 3%26)#).'
-!#().%29#BV`ZhjgZ hl^iX] ^h^c
D;;
edh^i^dcWZ[dgZgZXdccZXi^c\#
-!).4!). -!#().%29 7)4( #!2%
@ZZeWaVYZhh]VgeVcYXaZVc[dgWZhiVcY
hV[ZhieZg[dgbVcXZ#;daadl^chigjXi^dch[dg
ajWg^XVi^c\VcYX]Vc\^c\VXXZhhdg^Zh#
-!+% 352% '5!2$3 !2% ). 0,!#%
!.$ 7/2+ #/22%#4,9 "%&/2%
53).'-!#().%29
3AFETY)NSTRUCTIONSFOR-ACHINERY
2%-/6% !$*534).' +%93 !.$
72%.#(%3BV`ZV]VW^id[X]ZX`^c\[dg
`ZnhVcY VY_jhi^c\lgZcX]Zh WZ[dgZijgc"
^c\bVX]^cZgn/.#
#(%#+ &/2 $!-!'%$ 0!243
"%&/2%53).'-!#().%298]ZX`[dg
W^cY^c\dgb^hVa^\cZYeVgih!Wgd`ZceVgih!
addhZWdaih!VcYVcndi]ZgXdcY^i^dchi]Vi
bVn ^beV^g bVX]^cZ deZgVi^dc# GZeV^g dg
gZeaVXZYVbV\ZYeVgihWZ[dgZdeZgVi^dc#
53% 2%#/--%.$%$ !##%33/2)%3
GZ[Zgidi]Z^chigjXi^dcbVcjVa[dggZXdb"
bZcYZY VXXZhhdg^Zh# >begdeZg VXXZhhd"
g^Zh^cXgZVhZg^h`d[^c_jgn#
$/ ./4 &/2#% -!#().%29 Ldg` Vi
i]ZheZZY[dgl]^X]i]ZbVX]^cZdgVXXZh"
hdgnlVhYZh^\cZY#
3%#52% 7/2+0)%#% JhZ XaVbeh dg
V k^hZ id ]daY i]Z ldg`e^ZXZ l]Zc egVXi^"
XVa# 6 hZXjgZY ldg`e^ZXZ egdiZXih ndjg
]VcYhVcY[gZZhWdi]]VcYhiddeZgViZi]Z
bVX]^cZ#
$/./4/6%22%!#(BV^ciV^c hiVW^a^in
VcYWVaVcXZViVaai^bZh#
-!.9 -!#().%3 #!. %*%#4
7/2+0)%#%3 4/7!2$ /0%2!4/2
@cdlVcYVkd^YXdcY^i^dchi]ViXVjhZi]Z
ldg`e^ZXZid`^X`WVX`#
!,7!93 ,/#+ -/"),% "!3%3
)& 53%$ "%&/2% /0%2!4).'
-!#().%29#
#%24!). $534 -!9 "% (!:!2$/53
id i]Z gZhe^gVidgn hnhiZbh d[ eZdeaZ VcY
Vc^bVah!ZheZX^Vaan[^cZYjhi#7ZVlVgZd[
i]Z ineZ d[ Yjhi ndj VgZ ZmedhZY id VcY
ValVnhlZVgVgZhe^gVidgYZh^\cZYid[^aiZg
i]ViineZd[Yjhi#
Additional Safety Instructions Sanders
1. FEEDING WORKPIECE.
2. ENTANGLEMENT HAZARD.
3. HAND PROTECTION.
4. INSPECTING WORKPIECES.
5. PROTECTIVE EQUIPMENT.
No list of safety guidelines can be complete.
Every shop environment is different. Always
consider safety first, as it applies to your
individual working conditions. Use this and
other machinery with caution and respect.
Failure to do so could result in serious per-
sonal injury, damage to equipment, or poor
work results.
Like all machinery there is potential danger
when operating this machine. Accidents are
frequently caused by lack of familiarity or
failure to pay attention. Use this machine
with respect and caution to decrease the
risk of operator injury. If normal safety pre-
cautions are overlooked or ignored, serious
personal injury may occur.
6. ROTATION DIRECTION.
7. UNATTENDED OPERATION.
OFF
8. ADJUSTMENT, MAINTENANCE, AND
SERVICE.
9. SANDING ATTACHMENTS.
10. EXPERIENCING DIFFICULTIES.

Figure 4.
<gdjcY^c\Egdc\^h
Adc\Zhid[i]ZI]gZZ
Egdc\h
8jggZci
8Vggn^c\Egdc\h <gdjcYZY
DjiaZi
110V Operation
Full Load Amperage Draw
Power Supply Circuit Requirements
If you are unsure about the
wiring codes in your area or you plan to con-
nect your machine to a shared circuit, consult
a qualified electrician.
This machine MUST have a ground prong in
the plug to help ensure that it is grounded.
DO NOT remove ground prong from plug
to fit into a two-pronged outlet! If the plug
will not fit the outlet, have the proper outlet
installed by a qualified electrician.
Extension Cords
SECTION 2: CIRCUIT REQUIREMENTS
Serious personal injury could occur if you
connect the machine to power before com-
pleting the setup process. DO NOT connect
the machine to the power until instructed
later in this manual.
Electrocution or fire could
result if machine is not
grounded and installed in
compliance with electrical
codes. Compliance MUST
be verified by a qualified
electrician!
Power Connection Device
Figure 4

Wear safety glasses dur-
ing the entire setup pro-
cess!
This machine presents
serious injury hazards
to untrained users. Read
through this entire manu-
al to become familiar with
the controls and opera-
tions before starting the
machine!
Setup Safety
SECTION 3: SETUP
Description Qty
Page 11
Items Needed for
Setup
please imme-
diately call Customer Service at (570) 546-9663
for advice.
Otherwise, filing a freight claim can be difficult.
Unpacking

Inventory
Note: If you can't find an item on this list, check
the mounting location on the machine or examine
the packaging materials carefully. Occasionally
we pre-install certain components for shipping
purposes.
Component Inventory: (Figure 5) Qty
A.
B.
C.
D.
E.
F.
G.
SUFFOCATION HAZARD!
Immediately discard all plas-
tic bags and packing materi-
als to eliminate choking/suf-
focation hazards for children
and animals.
Workbench Load
Machine Data Sheet
Placement Location
Figure 6
Children and visitors may be
seriously injured if unsuper-
vised around this machine.
Lock entrances to the shop
or disable start switch or
power connection to prevent
unsupervised use.
Site Considerations
Figure 6.
(%
.
Figure 5.

Mounting
-ACHINE"ASE
7ORKBENCH
AV\HXgZl
;aViLVh]Zg
Figure 8.
-ACHINE"ASE
7ORKBENCH
7dai
;aViLVh]Zg
;aViLVh]Zg
AdX`LVh]Zg
=ZmCji
Figure 7.
Test Run
TroubleshootingPage 20
To test run the machine:
1.
2.
3.
4.
ON

5. OFF
6.
Figure 9
7.
Figure 9.
Assembly
Attaching Flap Sander
1.
2.
Note: If the brushes should come loose
from the end plates during this step, refer
to Replacing Flap Sandpaper/Brushes on
Page 19 for detailed instructions on how to
put the assembly back together.
3.
Figure 10
Figure 10.
4.
Figure 10
Note: This arbor bolt has left-hand threads
and tightens by rotating it counterclockwise.

Reversing Sleeve Rotation
To reverse the sleeve rotation:
1.
2.
Figure 11
3.
4.
Always check the sanding
drum air pressure before
using it. Only use a
hand-operated air pump
to inflate the sanding
drum to 10 PSI. If the
drum is over-inflated,
the drum may burst with
considerableforce, which
could cause serious
personal injury.
Mounting Sanding Drum
To check air pressure and mount the sanding
drum:
1.
2.
Figure 12
Figure 12.
Figure 11.

3.
4.
Figure
13
Note: The left spindle uses the arbor bolt with
left-hand threads, which tightens by rotating it
counterclockwise. The right spindle arbor bolt
has right-hand threads and tightens by rotat-
ing it clockwise.
Figure 13.
5.
Note: One end cap also has left-hand threads
and is mounted on the left side of the machine.
The other cap has right-hand threads for the
right side of the machine.

SECTION 4: OPERATIONS
Damage to your eyes and lungs could result
from using this machine without proper pro-
tective gear. Always wear safety glasses and
a respirator when operating this machine.
NOTICE
If you have never used this type of machine
or equipment before, WE STRONGLY REC-
OMMEND that you read books, trade maga-
zines, or get formal training before begin-
ning any projects. Regardless of the con-
tent in this section, Grizzly Industrial will
not be held liable for accidents caused by
lack of training.
Operation Safety
Loose hair, clothing, or
jewelry could get caught
in machinery and cause
serious personal injury.
Keep these items away
from moving parts at all
times to reduce this risk.
To reduce the risk of
serious injury when using
this machine, read and
understand this entire
manual before beginning
any operations.
Sanding Tips
Follow these rules when sanding:
ON

ON/OFF Switch
Figure 14
OFF
OFF
ON
Drum Sanding
Figure 15.
Flap Sanding
Figure 15
Figure 16
Figure 16.
Figure 14.

SECTION 5: ACCESSORIES
G9956—Remote Controlled Heavy-Duty
Hanging Air Filter
Figure 17.
Figure 18.
T20514—Small Half-Mask Respirator
T20515—Medium Half-Mask Respirator
T20516—Large Half-Mask Respirator
Aluminum Oxide Sanding Sleeves
G9196—3
1⁄4" Diameter, 60 Grit
G9197—3
1⁄4" Diameter, 80 Grit
G9198—3
1⁄4" Diameter, 100 Grit
G9199—3
1⁄4" Diameter, 120 Grit
G9200—3
1⁄4" Diameter, 150 Grit
G9201—3
1⁄4" Diameter, 180 Grit
G9208—4
3⁄4" Diameter, 60 Grit
G9209—4
3⁄4" Diameter, 80 Grit
G9210—4
3⁄4" Diameter, 100 Grit
G9211—4
3⁄4" Diameter, 120 Grit
G9212—4
3⁄4" Diameter, 150 Grit
G9213—4
3⁄4" Diameter, 180 Grit
6" x 60" J Weight Aluminum Oxide Rolls for
Flap Sander
G9187—120 Grit
G9188—180 Grit
G9189—220 Grit
H2491—Replacement Flap Brushes, Set of 12
T20501—Face Shield Crown Protector 4"
T20502—Face Shield Crown Protector 7"
T20503—Face Shield Window
T20448—Economy Clear Safety Glasses
T20452—"Kirova" Anti-Reflective Glasses
T20456—"Dakura" Clear Safety Glasses
H0736—Shop Fox®Safety Glasses
Figure 19.
T20448
H0736
T20452
T20502
T20503
T20456

SECTION 6: MAINTENANCE
Always disconnect power
to the machine before
performing maintenance.
Failure to do this may
result in serious person-
al injury.
Daily Check:
Daily Maintenance:
•
Schedule
Cleaning
Lubrication
Replacing Sanding
Sleeves
To replace the sanding sleeve:
1.
2.
Figure 20
Figure 20.
3.
Note: Make sure the sanding sleeve does not
extend beyond either end of the drum.
4.
Other manuals for G8749
2
Table of contents
Other Grizzly Sander manuals

Grizzly
Grizzly G1014Z User manual

Grizzly
Grizzly G1014Z User manual

Grizzly
Grizzly G0472 User manual

Grizzly
Grizzly G0716 User manual

Grizzly
Grizzly H8253 User manual

Grizzly
Grizzly G9984 User manual

Grizzly
Grizzly T32004 User manual

Grizzly
Grizzly G0449 User manual

Grizzly
Grizzly G1531 User manual

Grizzly
Grizzly H7761 Quick start guide

Grizzly
Grizzly G9983 User manual

Grizzly
Grizzly G0449 User manual

Grizzly
Grizzly G0474 Quick start guide

Grizzly
Grizzly G0775 User manual

Grizzly
Grizzly T27417 User manual

Grizzly
Grizzly G1066R User manual

Grizzly
Grizzly H2881 User manual

Grizzly
Grizzly G1095 User manual

Grizzly
Grizzly G1183 User manual

Grizzly
Grizzly G1014Z User manual