manuals.online logo
Brands
  1. Home
  2. •
  3. Brands
  4. •
  5. Grohe
  6. •
  7. Kitchen & Bath Fixture
  8. •
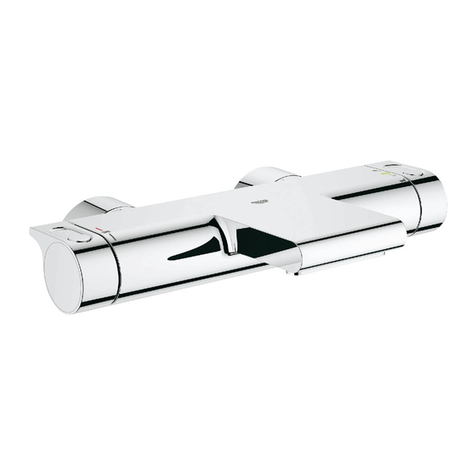
  9. Grohe Eurosmart 32 644 User manual

Grohe Eurosmart 32 644 User manual

D.....1 N.....5 H.....9 LV .....13
GB .....2 FIN .....6 RUS .....10 LT .....14
S.....3 PL .....7 BG .....11
DK .....4 CZ .....8 EST .....12
Design & Quality Engineering GROHE Germany
Eurosmart
Eurosmart
96.443.031/ÄM 211243/11.11
32 645
32 644
USA .....1 CZ .....5 HR .....9 LT .....13
F.....2 H.....6 BG .....10 RO .....14
E.....3 RUS .....7 EST .....11
PL .....4 SLO .....8 LV .....12
I
S.v.p remettre cette instruction à l'utilisateur de la robinetterie!
Entregue estas instrucciones al usario final de la grifería!
Please pass these instructions on to the end user of the fitting!
32 644
32 645
II
5
24mm
24mm
24mm
29mm
19mm
24mm
24mm
29mm
13mm
4mm
D
E
27mm
2
C
B
F
1
A
46mm
A1
B
B1
46mm
30mm
32mm
32mm
41mm
T
U
V
W
8
17mm
6
L
J
K
4
13mm
13mm
24mm
J
G
K
L
9
7O
N
M
P
R
S
3mm
32mm
32mm
I
G
H
I1
3
24mm
1
USA
Application
Operation is possible in conjunction with:
• Pressurized storage heaters
• Thermally controlled instantaneous heaters
• Hydraulically controlled instantaneous heaters
Operation with low-pressure storage heaters (displacement
water heaters) is not possible.
Specifications
• Max. flow
- Spout approx. 24 l/min or 6.3 gpm
- Handshower max. 9.5 l/min or 2.5 gpm
• Flow pressure
-min. 7.25psi
- recommended 14.5 - 72.5 psi
- greater than 72.5 psi, fit with pressure reducing valves
• Max. operating pressure 145 psi
• Test pressure 232 psi
• Temperature
- max. (hot water inlet) 176 °F
- Scalding protection possible by fitting a handle rotation
stop (see replacement parts fold-out page I, order
no. 46 308).
• Water connection cold - Right hand
hot - Left hand
Notes
• Installation of backflow protection must comply with local
codes and regulations.
• An access panel must be provided for access to diverting
unit and hose connections.
• Major pressure differences between cold and hot water
supply should be avoided.
Installation
Layout dimensions to establish centers and proper clearences,
see dimensional drawing on fold-out page I.
Flush pipes thoroughly!
Installing faucet body
- Fit faucet body (A) with mounting set (A1), see fold-out
page II, fig. [1].
Installing spout, see figs. [1] and [2].
1. Fit shank (B) with mounting set (B1), see fig. [1].
2. Fit spout (C) to the shank (B), tighten set screw (D)
with 4mm allen wrench and screw on cover cap (E),
see fig. [2].
3. Screw diversion part (F) on shank (B).
Installing hose guide and hand shower, see figs. [3] and [4].
1. Unscrew guide (G) and remove escutcheon (H), see fig. [3].
2. Fit hose guide (I) with mounting set (I1).
3. Fit escutcheon (H) and screw on guide (G).
4. Screw coupling piece (J) onto shower hose (K), see fig. [4].
5. Screw handshower (L) to coupling piece (J).
Connecting the faucet, see figs. [5] and [6].
The hot water supply should be connected on the left, the cold
water supply on the right side.
Open cold and hot water supply and check connections
for leakage.
Operation
a) Lever
Pull lever = open (water flow)
Press lever down = closed
Turn lever right = cold water
Turn lever left = hot water
b) Diverter
Pulling the lever will release water supply.
Water will emerge from the bath spout first.
Pull diverter knob = to divert flow from bath spout to
shower outlet
Press diverter knob = to divert flow from shower outlet to
bath spout
Flow is diverted automatically from shower outlet to bath spout
when the mixer is turned off.
Maintenance
Inspect and clean all parts, replace as necessary and grease
with special grease.
Shut off cold and hot water supply!
I. Replacing the cartridge, see fig. [7].
1. Lever out plug (M).
2. Loosen set screw (N) with 3mm allen wrench and pull off
lever (O).
3. Unscrew cap (P).
4. Remove screws (R).
5. Replace complete cartridge (S).
Assemble in reverse order.
Observe the correct installation position.
Make sure that the cartridge seals engage in the grooves on
the housing. Fit screws (R) and tighten evenly and
alternately.
II. Diverter, see fig. [8].
1. Pull off cover cap (T).
2. Screw out screw (U) and detach diverter knob (V).
3. Unscrew diverter (W) by using a 17mm socket wrench.
III. Shower hose, see fig. [9].
1. Pull out shower hose (K) and unscrew handshower (L) from
coupling piece (J).
2. Unscrew guide (G) with integrated shower seal.
IV. Unscrew and clean flow control (13 907), see fold-out
page I.
Assemble in reverse order.
Replacement parts, see fold-out page I ( * = special
accessories).
Care
Instructions for care of this faucet will be found in the Limited
Warranty supplement.

Other manuals for Eurosmart 32 644

1

This manual suits for next models

1

Other Grohe Kitchen & Bath Fixture manuals

Grohe EUROSMART COSMOPOLITAN E 36 315 User manual

Grohe

Grohe EUROSMART COSMOPOLITAN E 36 315 User manual

Grohe Eurosmart Cosmopolitan 19 381 User manual

Grohe

Grohe Eurosmart Cosmopolitan 19 381 User manual

Grohe RED DUO User manual

Grohe

Grohe RED DUO User manual

Grohe Eurodisc 33 330 User manual

Grohe

Grohe Eurodisc 33 330 User manual

Grohe Bridgeford 25 079 User manual

Grohe

Grohe Bridgeford 25 079 User manual

Grohe EUROSMART 33 161 User manual

Grohe

Grohe EUROSMART 33 161 User manual

Grohe VITALIO 27 685 User manual

Grohe

Grohe VITALIO 27 685 User manual

Grohe Eurodisc SE 36 233 User manual

Grohe

Grohe Eurodisc SE 36 233 User manual

Grohe Eurosmart 33 490 User manual

Grohe

Grohe Eurosmart 33 490 User manual

Grohe Ondus 31 053 User manual

Grohe

Grohe Ondus 31 053 User manual

Grohe 19 491 User manual

Grohe

Grohe 19 491 User manual

Grohe Eggeman Eurotec 41 206 User manual

Grohe

Grohe Eggeman Eurotec 41 206 User manual

Grohe EURODISC JOYSTICK 23 430 User manual

Grohe

Grohe EURODISC JOYSTICK 23 430 User manual

Grohe GROHE Blue HOME 31 454 User manual

Grohe

Grohe GROHE Blue HOME 31 454 User manual

Grohe Geneva 25 506 User manual

Grohe

Grohe Geneva 25 506 User manual

Grohe Euroeco Special 32 776 User manual

Grohe

Grohe Euroeco Special 32 776 User manual

Grohe EUROSMART COSMOPOLITAN E 36 324 User manual

Grohe

Grohe EUROSMART COSMOPOLITAN E 36 324 User manual

Grohe Ladylux Pro 32 245 User manual

Grohe

Grohe Ladylux Pro 32 245 User manual

Grohe ALLURE 23 534 User manual

Grohe

Grohe ALLURE 23 534 User manual

Grohe Arden 20121 User manual

Grohe

Grohe Arden 20121 User manual

Grohe Eurocube 20 370 User manual

Grohe

Grohe Eurocube 20 370 User manual

Grohe EUROSMART COSMOPOLITAN 31161 User manual

Grohe

Grohe EUROSMART COSMOPOLITAN 31161 User manual

Grohe MintaTouch 31 358 User manual

Grohe

Grohe MintaTouch 31 358 User manual

Grohe 30 314 User manual

Grohe

Grohe 30 314 User manual

Popular Kitchen & Bath Fixture manuals by other brands

Sanela SLU 92B Instructions for use

Sanela

Sanela SLU 92B Instructions for use

FRANZ VIEGENER Nerea Installation

FRANZ VIEGENER

FRANZ VIEGENER Nerea Installation

IKEA LANGSKAR manual

IKEA

IKEA LANGSKAR manual

Nobili Hera 2005 Using instructions

Nobili

Nobili Hera 2005 Using instructions

Peerless Faucet P88LF-L quick start guide

Peerless Faucet

Peerless Faucet P88LF-L quick start guide

Delta Touch2O 1914T Series manual

Delta

Delta Touch2O 1914T Series manual

Glacier bay F51A0074CP Installation and care guide

Glacier bay

Glacier bay F51A0074CP Installation and care guide

Miomare 296071 Assembly, operating and safety instructions

Miomare

Miomare 296071 Assembly, operating and safety instructions

Franke F5 Series Installation and operating instructions

Franke

Franke F5 Series Installation and operating instructions

PEERLESS PTT14023 Series manual

PEERLESS

PEERLESS PTT14023 Series manual

Belanger Essential Style SVE78CMBG installation instructions

Belanger

Belanger Essential Style SVE78CMBG installation instructions

JADO New Classic 888/003 Series installation instructions

JADO

JADO New Classic 888/003 Series installation instructions

Kalia BF1800 installation instructions

Kalia

Kalia BF1800 installation instructions

Axor Citterio M 34448 1 Series Installation/User Instructions/Warranty

Axor

Axor Citterio M 34448 1 Series Installation/User Instructions/Warranty

Sanela SLU 08B Instructions for use

Sanela

Sanela SLU 08B Instructions for use

baliv KI-1060 N 415760 instruction manual

baliv

baliv KI-1060 N 415760 instruction manual

Spectrum Brands Pfister Saxton LG89-XGL Maintenance & Care Guide

Spectrum Brands

Spectrum Brands Pfister Saxton LG89-XGL Maintenance & Care Guide

Symmons Canterbury 45-458-TRM Operation and maintenance manual

Symmons

Symmons Canterbury 45-458-TRM Operation and maintenance manual

manuals.online logo
manuals.online logoBrands
  • About & Mission
  • Contact us
  • Privacy Policy
  • Terms and Conditions

Copyright 2025 Manuals.Online. All Rights Reserved.