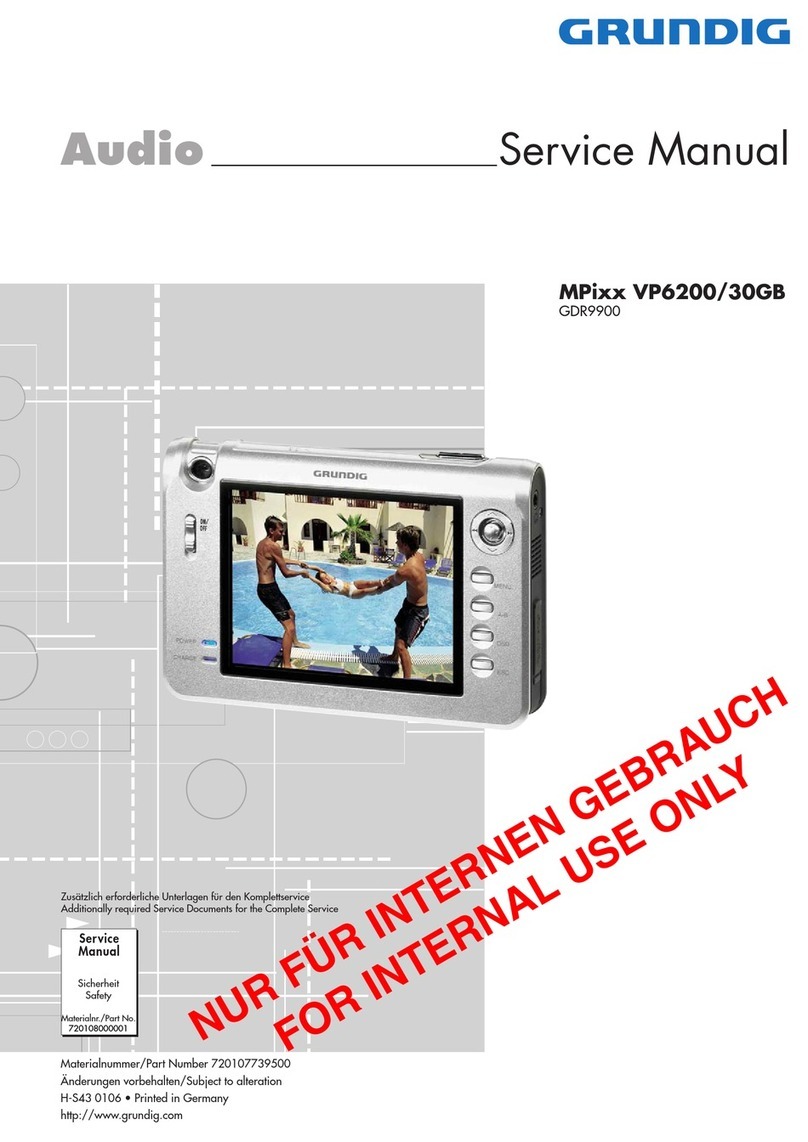
Grundig GDV 130/4 User manual

Video Service Manual
Materialnummer/Part Number 72010 537 9500
Änderungen vorbehalten/Subject to alteration • Printed in Germany
E-BS34 1100
http://www.grundig.com
Grundig Service
Hotline Deutschland...
TV
TV
SAT
VCR/LiveCam
HiFi/Audio
Car Audio
Telekommunikation
Fax:
Planatron
(8.00-22.00
Uhr)
0180/52318-41
0180/52318-49
0180/52318-48
0180/52318-42
0180/52318-43
0180/52318-44
0180/52318-45
0180/52318-51
0180/52318-99
...Mo.-Fr. 8.00-18.00 Uhr
0180/52318-40
0180/52318-50
Telefon:
Fax:
Technik:
Ersatzteil-Verkauf: ...Mo.-Fr. 8.00-19.00 Uhr
GDV 130
GMI6300
GDV 130/2
GMI6400
GDV 130/4
GMI6500
Zusätzlich erforderliche Unterlagen für den Komplettservice
Additionally required Service Documents for the Complete Service
Service
Manual
Sicherheit
Safety
Materialnr./Part No.
72010 800 0000
ʀ
DVD / VIDEO CD / CD PLAYER
ǵ
ON/
Ǽ
DISC OPEN/CLOSE
Ǽ
MENU
DISPLAY
GDV 130
PLAY
SELECT

Allgemeiner Teil / General Section GDV 130…
1 - 2 GRUNDIG Service
Es gelten die Vorschriften und Sicherheitshinweise
gemäß dem Service Manual "Sicherheit", Material-
nummer 72010 800 0000, sowie zusätzlich die even-
tuell abweichenden, landesspezifischen Vorschriften!
The regulations and safety instructions shall be valid
as provided by the "Safety" Service Manual, part
number 72010 800 0000, as well as the respective
national deviations.
GB
Table of Contents
Page
General Section ................................. 1-3…1-17
Test Equipment / Jigs ................................................................. 1-3
Specifications .............................................................................. 1-3
Disassemly Instructions .............................................................. 1-4
Service Instructions ..................................................................... 1-4
Operating Hints ......................................................................... 1-12
Layout of PCBs
and Circuit Diagrams ........................ 2-1…2-19
DVD ATAPI Loader ...................................................................... 2-1
IC Block Diagrams ....................................................................... 2-2
Wiring Diagram ............................................................................ 2-6
Power Supply ............................................................................... 2-7
Chassis Board .............................................................................. 2-9
•Main Circuit Diagram .............................................................. 2-11
•Control Unit ............................................................................. 2-12
•Audio / Video ........................................................................... 2-13
•Audio / Video Decoder ............................................................ 2-14
•Interface .................................................................................. 2-16
Keyboard Control .............................................................. 2-12, 2-18
Oscillograms .............................................................................. 2-19
Exploded View and
Spare Parts List ................................... 3-1…3-2
D
Inhaltsverzeichnis
Seite
Allgemeiner Teil ................................ 1-3…1-11
Messgeräte / Messmittel ............................................................. 1-3
Technische Daten ....................................................................... 1-3
Ausbauhinweise .......................................................................... 1-4
Servicehinweise .......................................................................... 1-4
Bedienhinweise ........................................................................... 1-6
Platinenabbildungen
und Schaltpläne ................................ 2-1…2-19
DVD ATAPI Loader ...................................................................... 2-1
IC-Blockdiagramme ..................................................................... 2-2
Verdrahtungsplan ........................................................................ 2-6
Netzteil ........................................................................................ 2-7
Chassisplatte .............................................................................. 2-9
•Hauptschaltplan ...................................................................... 2-11
•Steuereinheit ........................................................................... 2-12
•Audio / Video ........................................................................... 2-13
•Audio / Video Decoder ............................................................ 2-14
•Interface .................................................................................. 2-16
Bedieneinheit .................................................................... 2-12, 2-18
Oszillogramme ........................................................................... 2-19
Explosionszeichnung
und Ersatzteilliste ................................ 3-1…3-2
„Dolby“, „Dolby Pro Logic“, „AC 3“ ist gefertigt unter Lizenz von Dolby Laboratories
Licensing Corporation.
„Dolby“, „Dolby Pro Logic“, „AC 3“ und das Doppel-D-Symbol „ij“ sind Warenzei-
chen der Dolby Laboratories Licensing Corporation. Copyright 1992 Dolby
Laboratories, Inc. Alle Rechte vorbehalten.
“Dolby“, “Dolby Pro Logic“, “AC 3” manufactured under license from Dolby
Laboratories Licensing Corporation.
“Dolby“, “Dolby Pro Logic“, “AC 3” and the double-D symbol “ij” are trademarks of
the Dolby Laboratories Licensing Corporation. Copyright 1992 Dolby Laboratories,
Inc. All rights reserved.

GDV 130…Allgemeiner Teil / General Section
GRUNDIG Service 1 - 3
Technische Daten
Netzspannung: 110V …230V~, 50Hz
Leistungsaufnahme: ca. 25W
Umgebungstemperatur: +10°C …+35°C
Relative Luftfeuchte: ≤80%
Wiedergabe-Norm: PAL, 50Hz, 625 Zeilen
NTSC, 60Hz, 525 Zeilen
Wiedergabe-System: DVD-Video, Video-CD, Audio-CD
Multistandard PAL/NTSC,
CD-R, CD-RW
DVD Disk Format: Durchmesser 8cm und 12cm
Video Format
Signal: Digital
Digital compression: MPEG2 für DVD
MPEG1 für VCD
DVD 50Hz 60Hz
Horiz. Auflösung: 720 Pixel 720 Pixel
Vert. Auflösung: 576 Zeilen 480 Zeilen
VCD 50Hz 60Hz
Horiz. Auflösung: 352 Pixel 352 Pixel
Vert. Auflösung: 288 Zeilen 240 Zeilen
Audio Format
Digital: MPEG/AC-3 Compressed Digital
PCM 16, 20, 24 bit
48 / 96kHz
Analog: Stereoton, Dolby Surround, 3D Sound
Audio Performance
Signal: Analog
DVD: fs 96kHz 4Hz …44kHz
fs 48kHz 4Hz …22kHz
VCD: fs 44,1kHz 4Hz …20kHz
CD: fs 44,1kHz 4Hz …20kHz
Rauschabstand (1kHz): >110dB
Dynamik (1kHz): >100dB
Übersprechdämpfung (1kHz): >115dB
Anschlußbuchsen/Umschalter
Digital-Audio-Buchse: 1 Cinch
2 Audio-Buchsen: 2 Cinch
Video-Buchse: 1 Cinch
FBAS 1VSS / 75Ω
S-Video-Buchse: 1 Hosiden
Luminanz 1VSS / 75Ω
Chrominanz 0,3VSS / 75Ω
Euro-AV-Buchse: 21-polig
mit RGB-Ausgang 0,7VSS / 75Ω
Specifications
Supply Voltage: 110V …230V~, 50Hz
Power Requirement: ca. 25W
Ambient Temperature: +10°C …+35°C
Relative Air Humidity: ≤80%
Playback Norm: PAL, 50Hz, 625 lines
NTSC, 60Hz, 525 lines
Playback System: DVD-Video, Video-CD, Audio-CD
Multi-standard PAL/NTSC
CD-R, CD-RW
DVD Disc Format: Diameter 8cm and 12cm
Video Format
Signal: Digital
Digital compression: MPEG2 for DVD
MPEG1 for VCD
DVD 50Hz 60Hz
Horiz. resolution: 720 pixel 720 pixel
Vert. resolution: 576 lines 480 lines
VCD 50Hz 60Hz
Horiz. resolution: 352 pixel 352 pixel
Vert. resolution: 288 lines 240 lines
Audio Format
Digital: MPEG/AC-3 Compressed Digital
PCM 16, 20, 24 bit
48 / 96kHz
Analog: Stereoton, Dolby Surround, 3D Sound
Audio Performance
Signal: Analog
DVD: fs 96kHz 4Hz …44kHz
fs 48kHz 4Hz …22kHz
VCD: fs 44.1kHz 4Hz …20kHz
CD: fs 44.1kHz 4Hz …20kHz
Signal-to-noise ratio (1kHz): >110dB
Dynamic range (1kHz): >100dB
Crosstalk damping (1kHz): >115dB
Connection sockets/Switches
Digital Audio Socket: 1 Cinch
2 Audio Sockets: 2 Cinch
Video Sockets: 1 Cinch
CVBS 1VPP / 75Ω
S-Video Sockets: 1 Hosiden
Luminance 1VPP / 75Ω
Chrominance 0.3VPP / 75Ω
Euro-AV Socket: 21 pin
with RGB output 0.7VPP / 75Ω
General Section
Test Equipment / Jigs
Variable isolating transformer Dual channel oscilloscope
Digital multimeter
Please note the Grundig Catalog "Test and Measuring Equipment"
obtainable from:
Allgemeiner Teil
Messgeräte / Messmittel
Regeltrenntrafo Zweikanaloszilloskop
Digitalmultimeter
Beachten Sie bitte das Grundig Messtechnik-Programm, das Sie unter
folgender Adresse erhalten:
Grundig AG
Geschäftsbereich Instruments
Test- und Mess-Systeme
Würzburger Str. 150, D 90766 Fürth
Tel.: 0911 / 703-4540; Fax: 0911 / 703-4130
eMail: [email protected]
Internet: http://www.grundig-instruments.de

Allgemeiner Teil / General Section GDV 130…
1 - 4 GRUNDIG Service
Ausbauhinweise
Öffnen der Schublade bei defektem Laufwerk
–Hebel Hauf der Unterseite des Gerätes (Fig. 4) mit dünnen
Schraubendreher in Pfeilrichtung bis zum Anschlag drücken.
–Die Schublade kann jetzt herausgezogen werden.
1. Gehäuseoberteil
–7 Schrauben F(Fig. 2) herausdrehen.
–Gehäuseoberteil abnehmen.
2. Frontblende
–Schublade öffnen, Blende I(Fig. 5) ausrasten und abnehmen.
–7 Schrauben D(Fig. 1 und Fig. 4) herausdrehen.
–Rasthaken E(Fig. 1 und Fig. 4) lösen und Frontblende abnehmen.
–Gegebenenfalls Steckverbindungen lösen.
3. Bedieneinheit ausbauen
–Frontblende abnehmen (Pkt. 2).
–5 Schrauben L(Fig. 6) herausdrehen.
–Bedieneinheit aus der Blende nehmen.
4. Chassisplatte ausbauen
–4 Schrauben A(Fig. 1) und Schraube G(Fig. 3) herausdrehen.
–Chassisplatte herausnehmen.
–Gegebenenfalls Steckverbindungen lösen.
5. Netzteil ausbauen
–4 Schrauben C(Fig. 1) herausdrehen.
–Netzteil aus dem Gerät nehmen.
–Gegebenenfalls Steckverbindungen lösen.
Achtung: Beim Einbau ist darauf zu achten, dass der Abstandshalter
Nund die Kunststoffabdeckung M(Fig. 7) angebracht ist.
6. Laufwerk ausbauen
–4 Schrauben B(Fig. 1) herausdrehen.
–Laufwerk in Richtung Geräterückseite aus dem Gerät nehmen.
–Gegebenenfalls Steckverbindungen lösen.
Disassembly Instructions
Opening the Tray when the Drive is defective
–Push the lever Hon the bottom of the unit (Fig. 4) in the direction
of the arrow to its end stop using a thin screw driver.
–The tray can be pulled out now.
1. Cabinet Upper Part
–Undo 7 screws F(Fig. 2).
–Remove the upper part of the cabinet.
2. Front Panel
–Open the tray, unlock the trim I(Fig. 5) then remove it.
–Undo the 7 screws D(Fig. 1 and Fig. 4).
–Undo the locking hook E(Fig. 1 and Fig. 4) and remove the front
trim.
–Unplug the connectors if necessary.
3. Removing the Keyboard Control Unit
–Remove the front trim (Point 2).
–Undo the 5 screws L(Fig. 6).
–Remove the control unit from the trim.
4. Removing the Chassis Board
–Undo the 4 screws A(Fig. 1) and the screw G(Fig. 3).
–Remove the chassis board.
–Unplug the connectors if necessary.
5. Removing the Power Supply
–Undo the 4 screws C(Fig. 1).
–Remove the power supply from the unit.
–Unplug the connectors if necessary.
Attention: When reassembling take care to refit the distance piece N
and the plastic cover M(Fig. 7).
6. Removing the Drive Mechanism (CD Drive)
–Undo 4 screws B(Fig. 1).
–Push the CD drive to the back of the cabinet and remove it.
–Unplug the connectors if necessary.
Servicehinweise
GDV 130, GDV 130/2
Wiederherstellen der Gerätefunktion nach Austausch des
EEPROMs (U204) oder der Chassisplatte
–CD-Schublade öffnen
–Die folgenden Tasten nacheinander drücken:
"SETUP", "2", "2", "0", "0", "0", "STEP", "SHUFFLE", "NEXT"
GDV 130/4
Wiederherstellen der Gerätefunktion nach Austausch des
EEPROMs (U204) oder der Chassisplatte
–CD-Schublade öffnen
–Die folgenden Tasten nacheinander drücken:
"SETUP", "4", "2", "0", "0", "0", "STEP", "SHUFFLE", "NEXT"
Wichtige Masseverbindungen!
Beim Zusammenbau des Gerätes ist darauf zu achten, dass die
Masseverbindungen zwischen den einzelnen Platinen und dem Rah-
men sowie dem Laufwerk und dem Rahmen gewährleistet sind.
Durchführen von Messungen
Bei Messungen mit dem Oszilloskop an Halbleitern sollten Sie nur
Tastköpfe mit 10:1 - Teiler verwenden. Außerdem ist zu beachten,
dass nach vorheriger Messung mit AC-Kopplung der Koppelkonden-
sator des Oszilloskops aufgeladen sein kann. Durch die Entladung
über das Messobjekt können diese Bauteile beschädigt werden.
Messwerte und Oszillogramme
Bei den in den Schaltplänen und Oszillogrammen angegebenen
Messwerten handelt es sich um Näherungswerte!
Service Instructions
GDV 130, GDV 130/2
Reactivation of the DVD-Player after exchanging the EEPROMs
(U204) or the Chassis board
–open CD tray
–Press successively the following keys:
"SETUP", "2", "2", "0", "0", "0", "STEP", "SHUFFLE", "NEXT"
GDV 130/4
Reactivation of the DVD-Player after exchanging the EEPROMs
(U204) or the Chassis board
–open CD tray
–Press successively the following keys:
"SETUP", "4", "2", "0", "0", "0", "STEP", "SHUFFLE", "NEXT"
Important: Chassis Connections!
When reassembling the machine it is essential to observe that the
chassis connections between the individual circuit boards and the
frame as well as between the Drive Mechanism and the frame are in
good order.
Carrying out Measurements
When making measurements on semi-conductors with an oscillo-
scope, ensure that the test probe is set to 10:1 dividing factor. Further,
please note that if the previous measurement is made on AC input, the
coupling capacitor in the oscilloscope will be charged. Discharge via
the item being checked can damage components.
Measured Values and Oscillograms
The measured values given in the circuit diagrams and oscillograms
are approximates!

GDV 130…Allgemeiner Teil / General Section
GRUNDIG Service 1 - 5
Fig. 2
Fig. 1
Fig. 3
Fig. 4
Fig. 6
B
A
CC
E
F
F
F
G
L
T
D
D
D
E
H
L
I
D DE
EE
Fig. 5
Fig. 7
MN
T

Allgemeiner Teil / General Section GDV 130…
1 - 6 GRUNDIG Service
DEUTSCH
5
Die Vorderseite des DVD-Players
AUF EINEN BLICK
______________________________________________________
ON 9Schaltet den DVD-Player aus Stand-by ein und wieder aus
(Stand-by).
Der DVD-Player wird beim Ausschalten nicht vollständig vom
Stromnetz getrennt.
Schublade ür DVD/CD.
Anzeige.
•9Stand-by Anzeige.
OPEN CLOSE əZum Ö nen und Schließen der Schublade.
ľľ Schaltet während der Wiedergabe au Bildsuchlau
rückwärts in verschiedene Geschwindigkeiten;
wählt in den Menüs verschiedene Funktionen.
ŃWählt den nächsten Titel oder Abschnitt während der Wieder-
gabe;
wählt in den Menüs verschiedene Funktionen.
ıı Schaltet während der Wiedergabe au Bildsuchlau
vorwärts in verschiedene Geschwindigkeiten;
wählt in den Menüs verschiedene Funktionen.
ĽWählt den vorherigen Titel oder Abschnitt während der Wie-
dergabe;
wählt in den Menüs verschiedene Funktionen.
PLAY SELECT Startet die Wiedergabe;
bestätigt in den Menüs angewählte Funktionen.
7
Einmal drücken, unterbricht jede Lau unktion;
zweimal drücken, schaltet au „STOPP“.
MENU Ru t während der Wiedergabe das Titelmenü der DVD/ Video-
CD au .
Ƙ
Standbild und Standbild ortschaltung bei DVDs und Video-CDs;
Pause bei MP3-CDs und Audio-CDs.
DISPLAY Blendet während der Wiedergabe verschiedene In ormationen
(zum Beispiel Titel-/ Kapitelnummer, Spielzeit) au dem Bild-
schirm des Fernsehgerätes ein.
B
A
DVD / VIDEO CD / CD PLAYER
ǵ
ON/
Ǽ
DISC
OPEN/CLOSE
Ǽ
MENU
DISPLAY
GDV 130
PLAY
SELECT
AB
6
Audio OUT L R Ton-Ausgangsbuchsen (linker/rechter Kanal) zum Anschlie-
ßen einer HiFi-Anlage.
Video OUT Bild-Ausgangsbuchse, zum Anschließen eines Fernsehgerä-
tes mit Video-Buchse.
DIGITAL AUDIO OUT Ton-Ausgangsbuchse (koaxial) ür PCM/MPEG2/AC3/
COAXIAL DTS Signale, zum Anschließen eines digitalen Mehrkanal
Audio-/Videoverstärkers.
S-Video OUT Bild-Ausgangsbuchse, zum Anschließen eines Fernsehgerä-
tes mit S-VHS-Buchse.
SCART Connector Bild-/Ton-Ausgangsbuchse, zum Anschließen eines Fern-
To TV sehgerätes.
ÜNetzkabel.
Vorsicht:
Schließen Sie keine Geräte an, wenn der DVD-Player eingeschaltet ist.
Berühren Sie nicht die Innenseite der Buchsen und Stecker der Verbindungskabel.
Eine elektrostatische Entladung kann den DVD-Player beschädigen.
Die Rückseite des DVD-Players
AUF EINEN BLICK______________________________________________________________________
Audio
OUT
Video
OUT
coaxial
DIGITAL AUDIO OUT
S-Video
OUT
L
R
SCART Connector
To T V
Bedienhinweise Dieses Kapitel enthält Auszüge aus der Bedienungsanleitung. Weitergehende Informationen entnehmen Sie bitte der
gerätespezifischen Bedienungsanleitung, deren Materialnummer Sie in den entsprechenden Ersatzteillisten finden.

GDV 130…Allgemeiner Teil / General Section
GRUNDIG Service 1 - 7
DEUTSCH
7
AUF EINEN BLICK
______________________________________________________________________
Die Fernbedienung
OPEN CLOSE
əZum Ö nen und Schließen der Schublade.
9Schaltet den DVD-Player aus Stand-by ein (die rote Anzeige am
DVD-Player leuchtet) und wieder aus (Stand-by).
ANGLE Wählt während der Wiedergabe verschiedene Blickwinkel (Kamera-
Standorte) von bestimmten Szenen oder Passagen der DVD.
SUBTITLE Zum Anwählen und Einblenden von Untertitel der DVD während der
Wiedergabe.
AUDIO Schaltet während der Wiedergabe um zwischen Original- und
Synchronsprache einer DVD.
3D SOUND Wählt während der Wiedergabe den 3D Sound.
PREV 5a Wählt während der Wiedergabe den vorherigen Titel /Abschnitt.
NEXT s6 Wählt während der Wiedergabe den nächsten Titel/Abschnitt.
ZOOM Vergrößert Szenen bei der Wiedergabe.
STEP
Ƙ
Standbild und Standbild ortschaltung bei DVDs und Video-CDs;
Pause bei MP3-CDs und Audio-CDs.
FR SR 3Schaltet während der Wiedergabe au Bildsuchlau rückwärts in ver-
schiedene Geschwindigkeiten.
FF SF 4Schaltet während der Wiedergabe au Bildsuchlau vorwärts in ver-
schiedene Geschwindigkeiten.
DISPLAY Blendet während der Wiedergabe verschiedene In ormationen (zum
Beispiel Titel-/ Kapitelnummer, Spielzeit) au dem Bildschirm des
Fernsehgerätes ein.
PLAY PAUSE
8!
Startet die Wiedergabe;
Standbild bei DVDs und Video-CDs; Pause bei Audio-CDs.
STOP RETURN
7
Einmal drücken, unterbricht jede Lau unktion;
zweimal drücken, schaltet au „STOPP“.
MARKER Markiert Szenen der DVD und Abschnitte der Audio-CD.
a sAS
Wählen in den Menüs verschiedene Funktionen.
SELECT Bestätigt in den Menüs angewählte Funktionen.
SETUP Ru t die Menüs des DVD-Players au .
TITLE Ru t das Hauptmenü der DVD/Video-CD au (aus Stopp).
MENU PBC Ru t während der Wiedergabe das Titelmenü der DVD/ Video-CD
au .
A-B Zum Markieren und wiederholten Abspielen von Abschnitten.
1 … 0, +10 Zi ern-Tasten ür verschiedene Eingaben.
REPEAT Wiederholt Abschnitte oder Titel.
PROGRAM Zum Programmieren von Titel oder Kapitel einer Video- oder Audio-
CD.
SHUFFLE Zum Wiedergeben der Titel/Kapitel einer Video- oder Audio-CD in
zu älliger Reihen olge.
DIGEST Blendet den jeweiligen An ang eines Kapitels als Standbild ein.
CLEAR Löscht Titel oder Kapitel aus dem Video- oder Musik-Programm.
– VOLUME + Zum Einstellen der Lautstärke.
Ǽ
OPEN/CLOSE
ANGLE SUBTITLE AUDIO 3D SOUND
ZOOM
STEP
PREV
NEXT
FR/SR
FF/SF
D
I
S
P
L
A
Y
P
L
A
Y
/
P
A
U
S
E
S
T
O
P
/
R
E
T
U
R
N
M
A
R
K
E
R
SETUP
TITLE MENU/PBC
A-B
SELECT
ǵ
123
456
789
0
REPEAT
PROGRAM
SHUFFLE
DIGEST
VOLUME
CLEAR
+10
Tele Pilot 84 D
12
WIEDERGABE EINER DVD VIDEO-CD
____________________________________
DVD Video-CD einlegen
1
»OPEN CLOSEə« drücken.
– Die Schublade ö net sich, Anzeige am DVD-Player: »OPEN«.
2Gewünschte DVD/Video-CD mit dem Au druck nach oben in die Schublade
einlegen.
3»OPEN CLOSEə« drücken.
– Anzeige am DVD-Player: »CLOSE«, »LOAD«, danach »DVD« oder
»VCD«, das aktuelle Kapitel und die abgelau ene Spielzeit der
DVD/Video-CD.
Die Wiedergabe startet automatisch.
Hinweise:
Ist die Kindersicherung aktiviert und die DVD/Video-CD wurde nicht reige-
geben (siehe Kapitel „KINDERSICHERUNG“ au Seite 25), muß die Geheim-
zahl eingegeben werden.
Wenn das Symbol »-« au dem Bildschirm des Fernsehgerätes erscheint,
ist die gewählte Funktion mit dieser DVD/Video-CD nicht möglich.
Wiedergabe eines Titels
1Nach dem Schließen der Schublade und dem „Einlesen” der DVD startet die
Wiedergabe automatisch.
2Au Wiedergabe-Pause (Standbild) mit »PLAY PAUSE
8!
« schalten.
3Wiedergabe mit »PLAY PAUSE
8!
« ortsetzen.
4Wiedergabe mit »
STOP RETURN
7
« beenden.
Hinweise:
Abhängig von der verwendeten DVD/Video-CD kann es notwendig sein,
aus einem Inhaltsverzeichnis der DVD/Video-CD Titel oder Kapitel auszu-
wählen.
Zum Auswählen benutzen Sie die Tasten »
A
«, »
S
«, »
a
« oder »
s
«, zum
Aktivieren die Taste »SELECT«.
Ist die Auswahl numeriert, verwenden Sie die Tasten »1 … 0, +10«.
Informationen aufrufen
Sie können In ormationen über Titel, Kapitel und Spielzeit au den Bildschirm
einblenden.
1In o-Zeile mit »DISPLAY« einblenden.
2Weitere In ormationen au ru en, dazu »DISPLAY« wiederholt drücken.
3In o-Zeile mit »DISPLAY« ausblenden.
VIDEO CD / CD PLAYER
DISC
OPEN/CLO
S
Ǽ
ı
WIEDERGABE
II PAUSE
STOP
Ç01 02 ›002 045

Allgemeiner Teil / General Section GDV 130…
1 - 8 GRUNDIG Service
DEUTSCH
13
WIEDERGABE EINER DVD VIDEO-CD
____________________________________
Titel oder Kapitel anwählen ...
Wenn eine DVD/Video-CD mehrere Titel und/oder Kapitel enthält, können Sie
diese anwählen.
... mit der Info-Zeile des DVD-Players
1In o-Zeile mit »DISPLAY« einblenden.
2Anzeige »Ç« ( ür Titel) mit »
a
« anwählen, Titel mit »
S
« oder »
A
«
wählen und mit »SELECT« bestätigen.
3Anzeige »›« ( ür Kapitel) mit »
s
« anwählen, Kapitel mit »
S
« oder
»
A
« oder »1 … 0« wählen und mit »SELECT« bestätigen.
– Die Wiedergabe beginnt mit dem gewählten Titel oder dem gewählten
Kapitel.
... mit dem Menü der DVD Video-CD
Das Menü der DVD/Video-CD kann Auswahlmöglichkeiten ür Titel, Abschnitte
oder Szenen enthalten.
1Inhalt der DVD/Video-CD mit »MENU« oder »TITLE« au ru en.
– Wenn die DVD/Video-CD ein Titelmenü enthält, erscheint es am Bild-
schirm.
2Wenn die Auswahlmöglichkeiten numeriert sind, entsprechenden Titel und
Abschnitt mit »1 … 0, +10« wählen.
3Sind die Auswahlmöglichkeiten nicht numeriert, Titel und Abschnitte mit
»
A
«, »
S
«, »
a
« oder »
s
« wählen und mit »SELECT« aktivieren.
Einen Abschnitt minutengenau anwählen
1
In o-Zeile mit »DISPLAY« einblenden.
2»DISPLAY« noch einmal drücken.
– Die Anzeige »ø-:--:-- « erscheint.
3Gewünschte Spielzeit mit »1 … 0« eingeben und mit »SELECT« bestätigen.
Beispiele: 30 Minuten, 15 Sekunden – Eingabe »3« »0« »1« »5«.
1 Stunde, 5 Minuten, 30 Sekunden – Eingabe »1«»0« »5« »3« »0«.
– Der DVD-Player sucht den Abschnitt und beginnt die Wiedergabe.
Ein Kapitel direkt anwähen
1
Nächstes Kapitel anwählen, dazu während der Wiedergabe »s6 NEXT«
drücken.
2Vorheriges Kapitel mit »5a PREV« wählen.
– Der DVD-Player sucht das Kapitel und beginnt die Wiedergabe.
Ç01 02 ›002 045
Ç01 02 ›019 045
Ç01 02 ø-:--:--
Ç01 02 ø1:05:30
Ç01 02 ›025 045
Ç01 02 ›024 045
DEUTSCH
15
WIEDERGABE EINER DVD VIDEO-CD
____________________________________
Zusatzfunktionen der Wiedergabe
Hinweise:
Bei den Funktionen „Bildsuchlau “, „Zeitlupe“, und „Standbild“ ist der Ton
stummgeschaltet.
Wenn das Symbol »-« erscheint, ist diese Funktion mit dieser DVD/Video-
CD nicht möglich.
Bildsuchlauf
Sie können zwischen sechs unterschiedlichen Geschwindigkeiten (rückwärts
oder vorwärts) wählen.
1Während der Wiedergabe gewünschte Wiedergabe-Geschwindigkeit mit
»3FR SR« oder » 4FF SF« wählen.
2Zurück zur Wiedergabe, dazu »PLAY PAUSE
8!
« drücken.
Zeitlupe
Sie können zwischen drei unterschiedlichen Geschwindigkeiten (rückwärts oder
vorwärts) wählen.
1Während der Wiedergabe »PLAY PAUSE
8!
« drücken.
2Gewünschte Zeitlupen-Geschwindigkeit mit » 3FR SR« oder
»4FF SF« wählen.
3Zurück zur Wiedergabe, dazu »PLAY PAUSE
8!
« drücken.
Standbilder schrittweise weiterschalten
1
Während der Wiedergabe » STEP
Ƙ
« wiederholt drücken.
– Das Bild wird schrittweise zum nächsten Standbild weitergeschaltet.
2Zurück zur Wiedergabe, dazu »PLAY PAUSE
8!
« drücken.
Einen Abschnitt oder einen Titel wiederholen (Repeat)
Bei diesen Funktionen wird der momentan lau ende Abschnitt oder der momen-
tan lau ende Titel wiederholt.
1Während der Wiedergabe »REPEAT« ein- oder zweimal drücken.
– Die gewählte Funktion wird kurz angezeigt:
»KAPITEL WIEDERHOLEN« – das aktuelle Kapitel der DVD wird
wiederholt.
»TITEL WIEDERHOLEN« – der aktuelle Titel der DVD wird wiederholt;
2Funktion beenden, dazu »REPEAT« ein drittes mal drücken.
– Anzeige »WIEDERHOLUNG AUS« – die Funktion wird beendet.
4
2X
3
4X
II PAUSE
I
ı
ZEITLUPE 1 2
ľ
I ZEITLUPE 1 4
ƘEINZELBILD
KAPITEL WIEDERHOLEN
TITEL WIEDERHOLEN
WIEDERHOLUNG AUS

GDV 130…Allgemeiner Teil / General Section
GRUNDIG Service 1 - 9
DEUTSCH
25
KINDERSICHERUNG
________________________________________________
Kindersicherung des DVD-Players aktivieren
DVDs können Spiel ilme anbieten, deren Inhalt oder auch Szenen nicht ür Kinder
geeignet sind. Diese DVDs enthalten In ormationen, die diesen Inhalt oder diese
Szenen markieren und sind mit Kennzahlen von 1 bis 8 versehen. Sie können eine
der Kennzahlen anwählen und damit alternative Szenen zur Wiedergabe autori-
sieren.
1DVD-Player mit »
STOP RETURN
7
« au Stopp schalten.
2Menü mit »SETUP « au ru en.
– Das »AUDIO« Menü wird eingeblendet.
3Menü »KS.« (Kindersicherung) mit »s« anwählen.
4Zeile »KINDERSICHER.« mit »S« anwählen und mit »s« aktivieren.
5Gewünschte Kennzahl (von 1 bis 8) mit »A« oder »S« anwählen und mit
»SELECT« bestätigen.
6Aktuelle Geheimnummer mit »1...0 « eingeben und mit »SELECT« bestäti-
gen.
– Die gewählte Kennzahl ist grün markiert.
7Einstellung mit »SETUP « beenden.
Hinweise:
Wird jetzt eine DVD in die Schublade gelegt, die mit der eingegebenen
Kennzahl versehen ist, müssen Sie die vierstellige Geheimnummer eingeben.
Zum Abschalten der Funktion die Punkte 1bis 5wiederholen und mit »A«
oder »S« die Anzeige »8 AB 18« wählen.
Falls Sie die Geheimnummer vergessen oder verlegt haben, dann lesen Sie
bitte das Kapitel „Störungen selbst beheben“ au Seite 32.
Geheimzahl ändern
1DVD-Player mit »
STOP RETURN
7
« au Stopp schalten.
2Menü mit »SETUP « au ru en.
– Das »AUDIO« Menü wird eingeblendet.
3Menü »KS« (Kindersicherung) mit »s« anwählen.
4Zeile »PASSWORT« mit »S« anwählen und mit »s« und »SELECT« akti-
vieren.
5Neue vierstellige Geheimnummer mit »1...0 « eingeben.
6Vierstellige Geheimnummer mit »1...0 « nocheinmal eingeben.
7Einstellung mit »SETUP « beenden.
KINDERSICHER. 1 KINDER
PASSWORT ÄNDERN
VERLASSEN
˜œæ Ł
II
SETUP
KS.
KINDERSICHER. >>
PASSWORT
VERLASSEN
\˜œæ Ł
II
SETUP
KS.
1 KINDER
2
3
4
5
6
7
✔
8 AB 18
JET IGES PASSWORT XXXX
KS.
KINDERSICHER.
PASSWORT>>
✔
ÄNDERN
VERLASSEN
\˜œæ Ł
II
SETUP
KS.
ALTES PASSWORT XXXX
NEUES PASSWORT
PASSWORTBESTÄTIGEN
KS.
26
EINSTELLUNGEN
_________________________________________________________
Einstellungen im Menü »AUDIO«
1Hauptmenü mit »SETUP « au ru en.
2Menü »AUDIO« mit »
a« oder »s« anwählen.
Hinweis:
Die weitere Bedienung entnehmen Sie bitte den olgenden Kapiteln, jeweils ab
Pkt. 1.
Tonarten für den Digitalausgang wählen
Abhängig vom angeschlossenen Decoder/Verstärker muß die Tonart gewählt
werden.
1Zeile »DIG. AUSGANG« mit »S« oder »A« anwählen und mit »s«
aktivieren.
2Format mit »S« oder »A« wählen und mit »SELECT« bestätigen.
Hinweis:
Bei der Einstellung »AUS« ist der digitale Tonausgang (Buchse »DIGITAL
AUDIO OUT COAXIAL«) abgeschaltet.
3Menü mit »SETUP « abschalten.
Dolby Surround oder Stereo wählen
Wenn ein Dolby Digital Decoder angeschlossen ist, Einstellung »Dolby PL«
wählen, ist eine Stereo-Anlage angeschlossen, Einstellung »STEREO« wählen.
1Zeile »DOWNMIX« mit »S« oder »A« anwählen und mit »s«
aktivieren.
2Einstellung mit »S« oder »A« wählen und mit »SELECT« bestätigen.
3Menü mit »SETUP « abschalten.
Tonarten für den Analogausgang wählen
1
Zeile »ANALOG AUSGANG« mit »S« oder »A« anwählen und mit »s«
aktivieren.
2Gewünschte Einstellung mit »S« oder »A« wählen und mit »SELECT«
bestätigen.
»STEREO« linker Kanal am linken Lautsprecher, rechter Kanal am
rechten Lautsprecher;
»MONO L« linker Kanal am linken und rechten Lautsprecher;
»MONO R« rechter Kanal am linken und rechten Lautsprecher;
»MONO MIX« linker und rechter Kanal an beiden Lautsprechern.
3Menü mit »SETUP « abschalten.
DIG. AUSGANG AUS
DOWNMIX Dolby PL
ANALOGAUSGANG STEREO
DYNAMIK 0
VERLASSEN
˜œæ Ł
II
SETUP
AUDIO
DIG. AUSGANG >>
DOWNMIX
ANALOGAUSGANG
DYNAMIK
VERLASSEN
\˜œæ Ł
II
SETUP
AUDIO
AUS
ORIGINAL
PCM
DIG. AUSGANG
DOWNMIX >>
ANALOGAUSGANG
DYNAMIK
VERLASSEN
\˜œæ Ł
II
SETUP
AUDIO
Dolby PL
STEREO
DIG. AUSGANG
DOWNMIX
ANALOGAUSGANG >>
DYNAMIK
VERLASSEN
\˜œæ Ł
II
SETUP
AUDIO
STEREO
MONO L
MONO R
MONO MIX

Allgemeiner Teil / General Section GDV 130…
1 - 10 GRUNDIG Service
DEUTSCH
27
EINSTELLUNGEN
________________________________________________________________________
Lautstärkebereich einstellen (Dynamik)
1
Zeile »DYNAMIK« mit »S« oder »A« anwählen und mit »s«
aktivieren.
2Gewünschten Wert mit »S« oder »A« einstellen.
3Menü mit »SETUP « abschalten.
Einstellungen im Menü »VIDEO«
1Hauptmenü mit »SETUP « au ru en.
2Menü »VIDEO« mit »a« oder »s« anwählen.
Hinweis:
Die weitere Bedienung entnehmen Sie bitte den olgenden Kapiteln, jeweils ab
Pkt. 1.
Sprache der Bildschirmmenüs des DVD-Players wählen
1Zeile »OSD« mit »
S« oder »A« anwählen und mit »s«
aktivieren.
2Gewünschte Sprache ür die Bildschirmmenüs mit »
S« oder »A« wählen
und mit »SELECT« bestätigen.
3Menü mit »SETUP « abschalten.
Format des Fernsehgerätes wählen
Haben Sie ein Fernsehgerät mit dem Bild ormat 16:9, dann wählen Sie die Ein-
stellung »16 : 9«.
Bei einem herkömmlichen Fernsehgerät (Bild ormat 4:3) können Sie wählen
»4:3 LB« ür eine Breitbild-Wiedergabe mit schwarzen Balken am oberen und
unteren Bildschirmrand des Fernsehgerätes oder »4:3 PS« ür eine Breitbild-
Wiedergabe vergrößert au volle Bildschirmhöhe, bei der der linke und rechte
Rand des Bildes beschnitten ist.
1Zeile »TV FORMAT« mit »
S« oder »A« anwählen und mit »s«
aktivieren.
2Benötigtes Bild ormat »4:3 PS« oder »4:3 LB« oder »16 : 9« mit »
S« oder
»A« wählen und mit »SELECT« bestätigen.
3Menü mit »SETUP « abschalten.
TV Sytem einstellen
Entsprechend der Ausstattung Ihres Fernsehgerätes muß die Farbnorm der Bild-
schirmmenüs des DVD-Players an das Fernsehgerät angepaßt werden.
Einstellung »PAL« ür Fernsehgeräte mit PAL-Norm, Einstellung »NTSC« ür
Fernsehgeräte mit NTSC-Norm, Einstellung »MULTI« ür Fernsehgeräte mit
Multi-Norm
1Zeile »TV NORM« mit »
S« oder »A« anwählen und mit »s«
aktivieren.
OSD DEUTSCH
TV FORMAT 4 : 3 PS
TV NORM PAL
SCART RGB
CLOSED CAPT. EIN
VERLASSEN
˜œæ Ł
II
SETUP
VIDEO
OSD >>
TV FORMAT
TV NORM
SCART
CLOSED CAPT.
VERLASSEN
\˜œæ Ł
II
SETUP
VIDEO
ENGLISCH
RUSSISCH
FRAN ÖSISCH
✔
DEUTSCH
SPANISCH
ITALIENISCH
PORTUGUESE
DUTCH
OSD
TV FORMAT>>
TV NORM
SCART
CLOSED CAPT.
VERLASSEN
\˜œæ Ł
II
SETUP
VIDEO
✔
4 : 3 PS
4 : 3 LB
16 : 9
OSD
TV FORMAT
TV NORM >>
SCART
CLOSED CAPT.
VERLASSEN
\˜œæ Ł
II
SETUP
VIDEO
✔
PAL
NTSC
MULTI
28
EINSTELLUNGEN
________________________________________________________________________
2Benötigte Farbnorm mit »
S« oder »A« wählen und mit »SELECT« bestäti-
gen.
3Menü mit »SETUP « abschalten.
Bildsignal (FBAS oder RGB) wählen
Wenn Sie Ihren DVD-Player über ein Euro-AV-Kabel an das Fernsehgerät
anschließen, können Sie zwischen der Einstellung »FBAS« oder »RGB« wählen.
1Zeile »SCART« mit »
S« oder »A« anwählen und mit »s«
aktivieren.
2Einstellung mit »
S« oder »A« wählen und mit »SELECT« bestätigen.
3Menü mit »SETUP « abschalten.
Zusatzinformationen (Untertitel) ein- ausschalten
Bei DVDs, die mit der TV-Norm NTSC bespielt wurden, können diese In orma-
tionen enthalten sein.
1Zeile »CLOSED CAPT.« mit »
S« oder »A« anwählen und mit »s«
aktivieren.
2Einstellung mit »
S« oder »A« ein- oder ausschalten und mit »SELECT«
bestätigen.
3Menü mit »SETUP « abschalten.
Einstellungen im Menü »DIV.« (Diverses)
1In „Stopp” das Hauptmenü mit »SETUP « au ru en.
2Menü »DIV.« mit »
a« oder »s« anwählen.
Hinweis:
Die weitere Bedienung entnehmen Sie bitte den olgenden Kapiteln, jeweils ab
Pkt. 1.
Anzeige für Blickwinkel ein- ausschalten
Bei DVDs, die Szenen oder Passagen von unterschiedlichen Blickwinkeln anbie-
ten, wird die Anzeige » †« eingeblendet. Diese Anzeige kann abgeschaltet
werden.
1Zeile »KAMERA INFO« mit »S« oder »A« anwählen und mit »s«
aktivieren.
2Anzeige mit »S« oder »A« ein- oder ausschalten und mit »SELECT«
bestätigen.
3Menü mit »SETUP « abschalten.
KAMERA INFO EIN
BILD.SCHONER AUS
GERÄTEDISPLAY HELL
AUDIOAN EIGE EIN
TASTENSPERRE AUS
OSD EINSTELLUNG
VERLASSEN
˜œæ Ł
II
SETUP
DIV.
OSD
TV FORMAT
TV NORM
SCART >>
CLOSED CAPT.
VERLASSEN
\˜œæ Ł
II
SETUP
VIDEO
✔
FBAS
RGB
OSD
TV FORMAT
TV NORM
SCART
CLOSED CAPT. >>
VERLASSEN
\˜œæ Ł
II
SETUP
VIDEO
✔
EIN
AUS
KAMERA INFO >>
BILD.SCHONER
GERÄTEDISPLAY
AUDIOAN EIGE
TASTENSPERRE
OSD EINSTELLUNG
VERLASSEN
\˜œæ Ł
II
SETUP
DIV.
✔
EIN
AUS

GDV 130…Allgemeiner Teil / General Section
GRUNDIG Service 1 - 11
DEUTSCH
29
EINSTELLUNGEN
________________________________________________________________________
Bildschirmschoner ein- ausschalten
Haben Sie ein Standbild (bei DVDs und Video-CDs) oder das Hauptmenü
(bei MP3 CDs) längere Zeit angewählt, kann das schädlich ür die Bildröhre
Ihres Fernsehgerätes sein. Wenn der Bildschoner aktiviert ist, wird er nach
ca. 5 Minuten eingeblendet.
1Zeile »BILD.SCHONER« mit »S« oder »A« anwählen und mit »s«
aktivieren.
2Funktion mit »S« oder »A« ein- oder ausschalten und mit »SELECT«
bestätigen.
3Menü mit »SETUP « abschalten.
Helligkeit der Anzeige des DVD-Players einstellen
1
Zeile »GERÄTE DISPLAY« mit »S« oder »A« anwählen und mit »s«
aktivieren.
2Gewünschte Einstellung mit »S« oder »A« wählen und mit »SELECT«
bestätigen.
3Menü mit »SETUP « abschalten.
Audioanzeige im Gerätedisplay ein- ausschalten
1
Zeile »AUDIOANZEIGE« mit »S« oder »A« anwählen und mit »s«
aktivieren.
2Anzeige mit »S« oder »A« ein- oder ausschalten und mit »SELECT«
bestätigen.
3Menü mit »SETUP « abschalten.
Tasten am DVD-Player sperren
Wenn die Tasten am DVD-Player gesperrt sind, ist die Bedienung nur mit der
Fernbedienung möglich.
1Zeile »TASTENSPERRE« mit »S« oder »A« anwählen und mit »s«
aktivieren.
2Tasten mit »S« oder »A« sperren (EIN) oder reigeben (AUS) und mit
»SELECT« bestätigen.
3Menü mit »SETUP « abschalten.
DVD-Player in den Auslieferungszustand schalten
1
Zeile »OSD EINSTELLUNGEN« mit »S« oder »A« anwählen und mit »s«
aktivieren.
2OSD-Einstellungen mit »SELECT« in den Auslie erungszustand schalten.
3Menü mit »SETUP « abschalten.
KAMERA INFO
BILD.SCHONER >>
GERÄTEDISPLAY
AUDIOAN EIGE
TASTENSPERRE
OSD EINSTELLUNG
VERLASSEN
\˜œæ Ł
II
SETUP
DIV.
✔
EIN
AUS
KAMERA INFO
BILD.SCHONER
GERÄTEDISPLAY>>
AUDIOAN EIGE
TASTENSPERRE
OSD EINSTELLUNG
VERLASSEN
\˜œæ Ł
II
SETUP
DIV.
✔
HELL
MITTEL
DUNKEL
KAMERA INFO
BILD.SCHONER
GERÄTEDISPLAY
AUDIOAN EIGE >>
TASTENSPERRE
OSD EINSTELLUNG
VERLASSEN
\˜œæ Ł
II
SETUP
DIV.
✔
EIN
AUS
KAMERA INFO
BILD.SCHONER
GERÄTEDISPLAY
AUDIOAN EIGE
TASTENSPERRE >>
OSD EINSTELLUNG
VERLASSEN
\˜œæ Ł
II
SETUP
DIV.
✔
EIN
AUS
KAMERA INFO
BILD.SCHONER
GERÄTEDISPLAY
AUDIOAN EIGE
TASTENSPERRE
OSD EINSTELLUNG >>
VERLASSEN
\˜œæ Ł
II
SETUP
DIV.
✔
AB FABRIK
32
INFORMATIONEN
_____________________________________________________________________
Störungen selbst beheben
Nicht jede Bild- und Tonstörung muß au einen De ekt Ihres DVD-Players zurück ühren.
Auch versehentlich herausgezogene Anschlußkabel, beschädigte DVDs/CDs, sowie
verbrauchte Batterien der Fernbedienung, ühren zu Funktionsstörungen.
Wenn die olgenden Maßnahmen zu keinem be riedigenden Ergebnis ühren, dann
wenden Sie sich bitte an den Fachhandel!
Störung Ursache Abhilfe
Der DVD-Player reagiert nicht au die Richten Sie die Fernbedienung direkt au den DVD-Player.
Fernbedienung Räumen Sie alle Hindernisse beiseite, die den Weg des
Signals der Fernbedienung stören könnten.
Überprü en oder ersetzen Sie die Batterien der Fernbedienung.
Kein Bild Überprü en Sie den Video-Anschluß.
Verzerrtes Bild Achten Sie darau , daß au der DVD/CD keine Fingerab-
drücke sind, beachten Sie die Reinigungshinweise au
dieser Seite.
DVD/CD läßt sich nicht abspielen Überprü en, ob der Au druck der DVD/CD nach oben zeigt.
Reinigen Sie die DVD/CD.
Überprü en Sie, ob die DVD/CD beschädigt ist, indem Sie
eine andere DVD/CD ausprobieren.
Kein Ton Überprü en Sie die Audio-Anschlüsse.
Testen Sie eine andere Wiedergabequelle.
Verzerrter Klang von der HiFi-Anlage Vergewissern Sie sich, daß die Audio-Anschlüsse nicht am
Phonoeingang des Verstärkers angeschlossen wurden.
Kindersicherung ist aktiv, die vierstellige Kindersicherung au heben, anstelle der „Geheimnummer“
Geheimnummer ist unbekannt. die Zi ern »8« »0« »9«»5« eingeben.
DVD CD reinigen
Wischen Sie die verschmutzte DVD/CD mit einem Reinigungstuch von der Mitte aus zum
Rand hin geradlinig sauber.
Verwenden Sie keine Lösungsmittel wie Benzin, Verdünnungsmittel, handelsübliche Reini-
gungsmittel oder Antistatik-Spray ür analoge Schallplatten.

Allgemeiner Teil / General Section GDV 130…
1 - 12 GRUNDIG Service
6
Audio OUT L R Audio output jacks (le t/right channel) or connecting to a
HiFi system.
Video OUT Video output jack or connecting a television with a video
jack.
DIGITAL AUDIO OUT Audio output socket (coaxial) or PCM/MPEG2/AC3/
COAXIAL DTS signal, or connecting to a digital multi-channel
audio/video ampli ier.
S-Video OUT Video output jack or connecting a television with an S-VHS
jack.
SCART Connector Video/audio output jack or connecting a tele-
To TV vision.
ÜPower cord.
Caution:
Do not connect any devices while the DVD player is switched on.
Never touch the inside o the sockets and plugs o the connecting cables. An
electrostatic discharge can damage the DVD player.
The back of the DVD player
OVERVIEW__________________________________________________________________________________
Audio
OUT
Video
OUT
coaxial
DIGITAL AUDIO OUT
S-Video
OUT
L
R
SCART Connector
To T V
ENGLISH
5
The front of the DVD player
OVERVIEW
___________________________________________________________________
ON 9Switches the DVD player on rom Stand-by mode and o
again (Stand-by).
Switching the DVD player o does not mean it is disconnected
rom the mains.
Compartment or DVDs/CDs.
Display.
•9Stand-by indicator.
OPEN CLOSE əOpens and closes the disc compartment.
ľľ During playback, switches the video search backwards at
di erent speeds.
Selects various menu unctions.
ŃSelects the next title or section during playback.
Selects various menu unctions.
ıı During playback, switches the video search orwards at
di erent speeds.
Selects various menu unctions.
ĽSelects the previous title or section during playback.
Selects various menu unctions.
PLAY SELECT Starts playback.
Con irms the selected unction in the menus.
7
Press once to interrupt tape movement.
Press twice to switch to ”STOP” mode.
MENU Calls up the DVD/Video CD title menu during playback.
Ƙ
Freeze- rame and rame-by- rame playback or DVDs and video
CDs.
Pause or MP3 and audio CDs.
DISPLAY Displays various in ormation on the television screen during
playback, such as the title or chapter number and playing
time.
B
A
DVD / VIDEO CD / CD PLAYER
ǵ
ON/
Ǽ
DISC
OPEN/CLOSE
Ǽ
MENU
DISPLAY
GDV 130
PLAY
SELECT
AB
Operating Hints This chapter contains excerpts from the user manual. For further particulars please refer to the appropriate user manual
the part number of which is indicated in the relevant spare parts list.

GDV 130…Allgemeiner Teil / General Section
GRUNDIG Service 1 - 13
12
DVD VIDEO CD PLAYBACK
_____________________________________________________
Inserting a DVD video CD
1
Press the »OPEN CLOSEə« button.
– The disc compartment opens. DVD player display: »OPEN«.
2Insert the DVD/video CD into the compartment, with the label acing
upwards.
3Press »OPEN CLOSEə«.
– DVD-player display: »CLOSE«, »LOAD«, then »DVD« or »VCD«, the
current chapter and the elapsed playing time o the DVD or Video-CD.
Playback starts automatically.
Note:
I the parental lock is activated and the DVD/video CD is blocked (see the
”PARENTAL LOCK” section on Page 25), you will have to enter the code
number.
I the »-« symbol appears on the television screen, then the selected
unction is not possible with this DVD/video CD.
Playing back a title
1A ter the disc compartment closes and the DVD is scanned, playback starts
automatically.
2To switch to playback-pause ( reeze- rame), press »PLAY PAUSE
8!
«.
3To resume playback, press »PLAY PAUSE
8!
«.
4To stop playback, press »
STOP RETURN
7
«.
Note:
Depending on the DVD/video CD you are using, you may have to select a
title or chapter rom the DVD’s/video CD’s table o contents.
Use the »
A
«, »
S
«, »
a
« or »
s
« buttons to select it and then press
»SELECT« to con irm.
I the selections are numbered, use the »1 … 0, +10« keys.
Calling up information
You can call up in ormation on the title, chapter and playing time or display on
the screen.
1Press »DISPLAY« to see the In o line.
2For more in ormation, keep pressing »DISPLAY«.
3Press »DISPLAY« to hide the In o line.
IDEO CD / CD PLAYER
DISC
OPEN/CLOSE
Ǽ
ı
PLAY
II PAUSE
PRESTOP
Ç01 02 ›002 045
ENGLISH
7
OVERVIEW
__________________________________________________________________________________
The remote control
OPEN CLOSE
əOpens and closes the disc compartment.
9Switches the DVD player on rom Stand-by mode (the red indicator
on the DVD player is lit) and o again (Stand-by).
ANGLE Selects various camera angles or certain scenes or passages on the
DVD during playback.
SUBTITLE For selecting and displaying subtitles on the DVD during playback.
AUDIO Switches between the original and the dubbed language during
DVD playback.
3D SOUND Selects 3D Sound during playback.
PREV 5a Selects the previous title or section during playback.
NEXT s6 Selects the next title or section during playback.
ZOOM Zooms in on scenes during playback.
STEP
Ƙ
Freeze- rame and rame-by- rame playback or DVDs and video
CDs.
Pause or MP3 and audio CDs.
FR SR 3Switches to backwards picture search at various speeds during
playback.
FF SF 4Switches to orwards picture search at various speeds during
playback.
DISPLAY Displays various in ormation on the television screen during
playback, such as the title or chapter number and playing time.
PLAY PAUSE
8!
Starts playback.
Freeze- rame or DVDs and Video CDs. Pause or Audio-CDs.
STOP RETURN
7
Press once to interrupt tape movement.
Press twice to switch to ”STOP” mode.
MARKER Marks scenes on a DVD and sections on an audio CD.
a sAS
Select various unctions in the menus.
SELECT Con irms selected unctions in the menus.
SETUP Calls up the DVD player menu.
TITLE Calls up the main menu o the DVD/Video CD ( rom STOP mode).
MENU PBC Calls up the DVD/Video CD title menu during playback.
A-B For marking sections or repeated playback.
1 … 0, +10 Numerical keys or various unctions.
REPEAT Repeats sections or titles.
PROGRAM For programming titles or chapters o video or audio CDs.
SHUFFLE For playing back titles/chapters on a video or audio CD in random
order.
DIGEST Shows the irst rame o each chapter.
CLEAR Deletes titles or chapters rom the video or music programme.
– VOLUME + For setting the volume.
Ǽ
OPEN/CLOSE
ANGLE SUBTITLE AUDIO 3D SOUND
ZOOM
STEP
PREV
NEXT
FR/SR
FF/SF
D
I
S
P
L
A
Y
P
L
A
Y
/
P
A
U
S
E
S
T
O
P
/
R
E
T
U
R
N
M
A
R
K
E
R
SETUP
TITLE MENU/PBC
A-B
SELECT
ǵ
123
456
789
0
REPEAT
PROGRAM
SHUFFLE
DIGEST
VOLUME
CLEAR
+10
Tele Pilot 84 D

Allgemeiner Teil / General Section GDV 130…
1 - 14 GRUNDIG Service
ENGLISH
15
DVD VIDEO CD PLAYBACK
_____________________________________________________
Additional playback functions
Note:
The sound is muted with the ” rame-search”, ”slow-motion” and ” reeze-
rame” unctions.
I the »-« symbol appears, then this unction is not possible with this
DVD/video CD.
Video search
You can choose rom among six di erent speeds ( orwards or backwards).
1During playback, select the desired playback speed with » 3FR SR« or
»4FF SF«.
2To resume playback, press »PLAY PAUSE
8!
«.
Slow motion
You can choose rom among three di erent speeds ( orwards or backwards).
1Press »PLAY PAUSE
8!
« during playback.
2Select the slow motion speed by pressing »3FR SR« or »4FF SF«.
3To resume playback, press »PLAY PAUSE
8!
«.
Frame-by-frame playback
1
Press » STEP
Ƙ
« repeatedly during playback.
– The picture is advanced step-by-step to the next reeze- rame.
2Press »PLAY PAUSE
8!
« to return to normal playback speed.
Repeating a chapter or a title
These unctions repeat the current chapter or title.
1During playback, press »REPEAT« once or twice.
– The selected unction is brie ly displayed:
»CHAPTER REPEAT« – the current chapter on the DVD is repeated.
»TITLE REPEAT« – the current title on the DVD is repeated.
2To quit the unction »REPEAT « a third time.
– Display »REPEAT OFF« – the unction is stopped.
4
FAST 2X
3
FAST 4X
II PAUSE
I
ı
SLOW 1 2
ľ
I SLOW 1 4
ƘSTEP
CHAPTER REPEAT
TITLE REPEAT
REPEAT OFF
ENGLISH
13
DVD VIDEO CD PLAYBACK
_____________________________________________________
Selecting titles or chapters …
I a DVD or video CD contains several titles and/or chapters, you can select
rom among them.
… using the Info line of the DVD player
1Press »DISPLAY« to see the In o line.
2Select the »Ç« (title) display by pressing »
a
«, press »
S
« or »
A
« to select
the title and then »SELECT« to con irm.
3Select the »›« (chapter) display by pressing »
s
«, press »
S
« or »
A
«or
»1 … 0« to select the chapter and then »SELECT« to con irm.
– Playback starts with the selected title or chapter.
… using the menu of the DVD video CD
The menu o the DVD/video CD may contain selection options or titles, sections
or scenes.
1Call up the contents o the DVD/video CD by pressing »MENU« or
»TITLE«.
– I the DVD/video CD has a title menu it will appear on the screen.
2I the selection options are numbered, select the desired title and section
using »1 … 0, +10«.
3I the options are not numbered, select titles and sections with »
A
«, »
S
«,
»
a
« or »
s
«, and activate with »SELECT«.
Selecting a section to the nearest minute
1
Press »DISPLAY« to see the In o line.
2Press »DISPLAY« again.
– »ø-:--:--« appears in the display.
3Enter the required playing time using the »1…0« buttons and press
»SELECT« to con irm.
Example: 30 minutes, 15 seconds – enter »3« »0« »1« »5«.
1 hour, 5 minutes, 30 seconds – enter »1«»0« »5« »3« »0«.
– The DVD player locates the section and starts playback.
Selecting a chapter directly
1
To select the next chapter, press »s6 NEXT« during playback.
2Press »5a PREV« to select the previous chapter.
– The DVD player locates the chapter and starts playback.
Ç01 02 ›002 045
Ç01 02 ›019 045
Ç01 02 ø-:--:--
Ç01 02 ø1:05:30
Ç01 02 ›025 045
Ç01 02 ›024 045

GDV 130…Allgemeiner Teil / General Section
GRUNDIG Service 1 - 15
26
CUSTOM SETTINGS
__________________________________________________
Custom settings in the »AUDIO« menu
1Press »SETUP « to call up the main menu.
2Select the »AUDIO« menu by pressing »
a« or »s«.
Note:
For urther operation, see the ollowing sections, each one starting rom
Step 1.
Selecting audio types for the digital output
The audio type must be selected according to the connected decoder/ampli ier.
1Select the »DIGITAL OUT« line with »S« or »A« and press »s« to
activate.
2Select the ormat using »S« or »A« and press »SELECT« to con irm.
Note:
With the »OFF« setting the digital audio output (»DIGITAL AUDIO OUT
COAXIAL« socket) is switched o .
3Quit the menu with the »SETUP « button.
Selecting Dolby Surround or Stereo
I a Dolby Digital decoder is connected, select »Dolby PL«. I a Stereo system is
connected, select »STEREO«.
1Select the »DOWNMIX« line with »S« or »A« and press »s« to activate.
2Select the setting using »S« or »A« and press »SELECT« to con irm.
3Quit the menu with the »SETUP « button.
Selecting audio types for the analogue output
1
Select the »DUAL MONO« line with »S« or »A« and press »s« to
activate.
2Select the desired setting using »S« or »A« and press »SELECT« to
con irm.
»STEREO« The le t channel on the le t loudspeaker, the right
channel on the right loudspeaker
»LEFT MONO« The le t channel on the le t and right loudspeakers
»RIGHT MONO« The right channel on the le t and right loudspeakers
»MIXED MONO« The le t and right channels on both loudspeakers
3Press »SETUP « to exit the menu.
DIGITAL OUT OFF
DOWNMIX Dolby PL
DUAL MONO STEREO
DYNAMIC RNG 0
EXIT SETUP
˜œæ Ł
II
SETUP
AUDIO
DIGITAL OUT >>
DOWNMIX
DUAL MONO
DYNAMIC RNG
EXIT SETUP
\˜œæ Ł
II
SETUP
AUDIO
OFF
ORIGINAL
PCM
DIGITAL OUT
DOWNMIX >>
DUAL MONO
DYNAMIC RNG
EXIT SETUP
\˜œæ Ł
II
SETUP
AUDIO
Dolby PL
STEREO
DIGITAL OUT
DOWNMIX
DUAL MONO >>
DYNAMIC RNG
EXIT SETUP
\˜œæ Ł
II
SETUP
AUDIO
STEREO
LEFT MONO
RIGHT MONO
MIXED MONO
ENGLISH
25
PARENTAL LOCK
_________________________________________________________
Activating the parental lock of the DVD player
Films on DVD may be wholly or partially unsuitable or children. Such DVDs
contain in ormation which identi ies these scenes, providing them with ratings rom
1 to 8. You can select one o the ratings and thereby authorise alternative scenes
or playback.
1Switch the DVD player to STOP by pressing »
STOP RETURN
7
«.
2Call up the menu by pressing »SETUP «.
– The »AUDIO« menu appears.
3Select the »LOCK« menu (parental lock) by pressing »s«.
4Select the »PARENTAL« line with »S« and press »s« to activate it.
5Select the desired rating (1 to 8) using »A« or »S«, and press »SELECT«
to con irm.
6Enter the current code number with »1…0 « and press »SELECT« to
con irm.
– The selected rating is highlighted in green.
7Conclude the setting by pressing »SETUP «.
Note:
I a DVD with the rating you selected is loaded into the player, and you have
to enter the our-digit code number.
To deactivate this unction, repeat steps 1to 5and press »A« or »S« to
select »8 ADULT«.
I you orget or lose the code number, read the section entitled ”Recti ying
minor problems” on Page 32.
Changing the code number
1Switch the DVD player to STOP by pressing »
STOP RETURN
7
«.
2Call up the menu by pressing »SETUP «.
– The »AUDIO« menu appears.
3Select the »LOCK« menu (parental lock) by pressing »s«.
4Select the »PASSWORD« line by pressing »S« and then use »s« and
»SELECT« to activate it.
5Enter the old code number with »1…0«.
6Enter the new our-digit code number with »1…0«.
Enter the our-digit code number again with »1…0«.
7Conclude the setting by pressing »SETUP «.
PARENTAL 1 KID
PASSWORD CHANGE
EXIT SETUP
˜œæ Ł
II
SETUP
LOCK
PARENTAL >>D
PASSWORD
EXIT SETUP
\˜œæ Ł
II
SETUP
LOCK
1 KID
2
3
4
5
6
7
✔
8 ADULT
CURRENT PASSWORD XXXX
LOCK
PARENTAL
PASSWORD >>
✔
CHANGE
EXIT SETUP
\˜œæ Ł
II
SETUP
LOCK
OLD PASSWORD XXXX
NEW PASSWORD
CONFIRM PASSWORD
LOCK

Allgemeiner Teil / General Section GDV 130…
1 - 16 GRUNDIG Service
28
CUSTOM SETTINGS
___________________________________________________________________
Selecting the video signal (FBAS or RGB)
I your DVD player is connected to the television using a Euro-AV (Scart) cable,
you can choose between the »FBAS« or »RGB« settings.
1Select the »SCART« line with »S« or »A« and press »s« to activate.
2Select the setting with »S« or »A« and press »SELECT« to con irm.
3Quit the menu with the »SETUP « button.
Switching additional information (subtitles) on and off
DVDs which have been recorded using the NTSC TV norm may contain this
in ormation.
1Select the »CAPTIONS« line with »S« or »A« and press »s« to activate.
2Activate or deactivate the setting with »S« or »A« and press »SELECT«
to con irm.
3Quit the menu with the »SETUP « button.
Settings in the »OTHER« menu (miscellaneous)
1In ”Stop” mode, call up the main menu with »SETUP «.
2Select the »OTHER« menu by pressing »a« or »s«.
Note:
For urther operation, see the ollowing sections, each one starting rom
Step 1.
Showing and hiding the camera angle display
DVDs which provide di erent camera angles or certain scenes or passages are
indicated by the »†« display. This display can be deactivated.
1Select the »ANGLE MARK« line with »S« or »A« and press »s« to
activate.
2Activate or deactivate the display with »S« or »A« and press »SELECT«
to con irm.
3Quit the menu with the »SETUP « button.
ANGLE MARK ON
SCREEN SAVER OFF
FLT DISPLAY BRIGHT
FLT AUDIO CH. ON
FRONT KEY UNLOCK
DEFAULTS
EXIT SETUP
˜œæ Ł
II
SETUP
OTHER
OSD
TV ASPECT
TV TYPE
SCART >>
CAPTIONS
EXIT SETUP
\˜œæ Ł
II
SETUP
VIDEO
✔
COMPOSITE
RGB
OSD
TV ASPECT
TV TYPE
SCART
CAPTIONS >>
EXIT SETUP
\˜œæ Ł
II
SETUP
VIDEO
✔
ON
OFF
ANGLE MARK >>
SCREEN SAVER
FLT DISPLAY
FLT AUDIO CH.
FRONT KEY
DEFAULTS
EXIT SETUP
\˜œæ Ł
II
SETUP
OTHER
✔
ON
OFF
ENGLISH
27
CUSTOM SETTINGS
___________________________________________________________________
Setting the (dynamic) volume range
1
Select the »DYNAMIC RNG« line with »S« or »A« and press »s« to
activate.
2Set the value by pressing »S« or »A«.
3Quit the menu with the »SETUP « button.
Custom settings in the »VIDEO« menu
1Press »SETUP « to call up the main menu.
2Select the »VIDEO« menu by pressing »a« or »s«.
Note:
For urther operation, see the ollowing sections, each one starting rom
Step 1.
Selecting the language of the DVD player’s screen menus
1Select the »OSD« line with »
S« or »A« and press »s« to activate.
2Select the desired language or the screen menus using »
S« or »A« and
press »SELECT« to con irm.
3Quit the menu with the »SETUP « button.
Selecting the television format
I your television has a 16:9 screen ormat, then select the »16 : 9 WIDE«
setting.
I you have a standard- ormat television (4:3 picture ormat) you can select »4:3
LB« or letterbox playback with black bars on the top and bottom edges o the
screen or »4:3 PS« or wide-screen playback using the ull height o the screen,
but with the le t and right edges o the picture cropped.
1Select the »TV ASPECT« line with »
S« or »A« and press »s« to activate.
2Select the required picture ormat, »4:3 PS« or »4:3 LB« or »16 : 9 WIDE«,
with »
S« or »A« and press »SELECT« to con irm.
3Quit the menu with the »SETUP « button.
Setting the TV system
The colour norm o the DVD player’s screen menus has to be adapted to the
ormat o the television.
Select »PAL« or televisions with PAL norm, »NTSC« televisions with NTSC norm,
or »MULTI« or televisions with Multi norm.
1Select the »TV TYPE« line with »
S« or »A« and press »s« to activate.
2Select the colour norm using »
S« or »A« and press »SELECT« to
con irm.
3Quit the menu with the »SETUP « button.
OSD ENGLISH
TV ASPECT 4 : 3 PS
TV TYPE PAL
SCART RGB
CAPTIONS ON
EXIT SETUP
˜œæ Ł
II
SETUP
VIDEO
OSD >>
TV ASPECT
TV TYPE
SCART
CAPTIONS
EXIT SETUP
\˜œæ Ł
II
SETUP
VIDEO
✔
ENGLISCH
RUSSIAN
FRENCH
GERMAN
SPANISH
ITALIAN
PORTUGUESE
DUTCH
OSD
TV ASPECT >>
TV TYPE
SCART WIDE
CAPTIONS
EXIT SETUP
\˜œæ Ł
II
SETUP
VIDEO
✔
4 : 3 PS
4 : 3 LB
16 : 9 WIDE
OSD
TV ASPECT
TVTYPE >>
SCART
CAPTIONS
EXIT SETUP
\˜œæ Ł
II
SETUP
VIDEO
✔
PAL
NTSC
MULTI

GDV 130…Allgemeiner Teil / General Section
GRUNDIG Service 1 - 17
32
INFORMATION
__________________________________________________________________________
Rectifying minor problems
Not every picture or sound problem is caused by a de ect in your DVD player. Impairment
can also be caused by leads having been accidentally pulled out, damaged DVDs/CDs
and worn-out batteries in the remote control.
I the ollowing measures do not bring about satis actory results, consult an authorised
dealer.
Problem
DVD player does not respond to remote
control
No picture
Distorted picture
DVD/CD cannot be played
No sound
Distorted sound rom Hi- i system
Parental lock is activated and you do not
know the our- igure code number.
Cleaning DVDs and CDs
Wipe the dirty DVD/CD with a cloth rom the centre outwards in a straight line.
Do not use any solvents such as benzene, thinners, conventional cleaner or anti-static
spray or vinyl records.
Cause Remedy
Point the remote control directly at the DVD player.
Remove all obstacles which may impair the path o the
remote control signal.
Check or replace the remote control batteries.
Check the video connection.
Make sure that there are no ingerprints on the DVD/CD,
ollow the cleaning instructions on this page.
Check i the label on the DVD/CD is acing upwards.
Clean the DVD/CD.
Check i the DVD/CD is damaged by testing it with another
DVD/CD.
Check the audio connections.
Try another playback source.
Ensure that the audio connections have not been connected
at the phono input on the ampli ier.
Cancel the parental lock by entering »8« »0« »9«»5«
instead o the code number.
ENGLISH
29
CUSTOM SETTINGS
___________________________________________________________________
Switching the screen saver on off
I you select a reeze rame (on DVDs and Video CDs) or the main menu (on
MP3 CDs) or a long time, this can damage the picture tube o your
television. I you activate the screen saver it appears a ter approximately ive
minutes.
1Select the »SCREEN SAVER« line with »S« or »A« and press »s« to
activate.
2Activate or deactivate the unction with »S« or »A« and press »SELECT«
to con irm.
3Quit the menu with the »SETUP « button.
Setting the brightness of the DVD player display
1
Select the »FLT DISPLAY« line with »S« or »A« and press »s« to activate.
2Select the setting using »S« or »A« and press »SELECT« to con irm.
3Quit the menu with the »SETUP « button.
Switching the device audio display on and off
1
Select the »FLT AUDIO CH.« line with »S« or »A« and press »s« to
activate.
2Activate or deactivate the display with »S« or »A« and press »SELECT«
to con irm.
3Quit the menu with the »SETUP « button.
Blocking the keys on the DVD player
I the keys on the DVD player are blocked, then it can only be operated using
the remote control.
1Select the »FRONT KEY« line with »S« or »A« and press »s« to activate.
2Press »S« or »A« to block (ON) or release (OFF) the keys and then press
»SELECT« to con irm.
3Quit the menu with the »SETUP « button.
Resetting the DVD player
1
Select the »DEFAULTS« line with »S« or »A« and press »s« to activate.
2Press »SELECT« to reset the OSD settings to the original state.
3Quit the menu with the »SETUP « button.
ANGLE MARK
SCREEN SAVER >>
FLT DISPLAY
FLT AUDIO CH.
FRONT KEY
DEFAULTS
EXIT SETUP
\˜œæ Ł
II
SETUP
OTHER
✔
ON
OFF
ANGLE MARK
SCREEN SAVER
FLT DISPLAY>>
FLT AUDIO CH.
FRONT KEY
DEFAULTS
EXIT SETUP
\˜œæ Ł
II
SETUP
OTHER
✔
BRIGHT
MEDIUM
DIM
ANGLE MARK
SCREEN SAVER
FLT DISPLAY
FLT AUDIO CH. >>
FRONT KEY
DEFAULTS
EXIT SETUP
\˜œæ Ł
II
SETUP
OTHER
✔
ON
OFF
ANGLE MARK
SCREEN SAVER
FLT DISPLAY
FLT AUDIO CH.
FRONT KEY >>
DEFAULTS
EXIT SETUP
\˜œæ Ł
II
SETUP
OTHER
✔
LOCK
UNLOCK
ANGLE MARK
SCREEN SAVER
FLT DISPLAY
FLT AUDIO CH.
FRONT KEY
DEFAULTS >>
EXIT SETUP
\˜œæ Ł
II
SETUP
OTHER
✔
RESET

2 - 1 GRUNDIG Service
Platinenabbildungen und Schaltpläne / Layout of PCBs and Circuit Diagrams GDV 130…
Platinenabbildungen und Schaltpläne / Layout of PCBs and Circuit Diagrams
DVD ATAPI Loader
Spindle
Motor
Focus
Coil
Track
Coil
Sled
Motor
Loading
Motor
BA6664FM
Spindle Motor Drive
BA5954FP
4Ch Motor Drive
80C52
System Controller
Flash
Memory
(1Mbit)
MT1366
(RF AMP.)
Laser Driver
Equalizer
Error Gen.
Disc Motor Unit
Laser
Pickup
MT1368
(Decoder/Servo)
ATAPI
Buffer Manager
Demodulator
Error Correction
PLl
Focus & Tracking
Feeding
Loading
DRAM
(4Mbit)
Spindle Motor Signal for CLV
Motor Signal
Actuator Signal
Disc
33.86MHz
5V
GND
GND
12V
I/F
Conn.

GRUNDIG Service 2 - 2
GDV 130…Platinenabbildungen und Schaltpläne / Layout of PCBs and Circuit Diagrams
Serial
Input
I/F
Mode
Control
I/F
8X Oversampling
Digital Filter with
Function
Controller
Crystal/OSC
XTI
SCK
XTO CLKO V
CC1
AGND1 V
DD
DGND
Enhanced
Multi-level
Delta-Sigma
Modulator
V
OUT
L
V
CC2
L
V
CC2
R
AGND2L
AGND2L
EXTL
Open Drain
DAC
Low-pass
Filter
Low-pass
Filter
BPZ-Cont.
V
OUT
R
EXTR
ZERO
DAC
MC/DM1
ML/IIS
LRCIN
DIN
BCKIN
CS/IWO
MD/DM0
MODE
MUTE
RST Power Supply
LRCIN
DIN
BCKIN
CLKO
XTI
XTO
DGND
V
DD
V
CC
2R
AGND2R
EXTR
NC
V
OUT
R
AGND1
ML/IIS
MC/DM1
MD/DM0
MUTE
MODE
CS/IWO
RST
ZERO
V
CC
2L
AGND2L
EXTL
NC
V
OUT
L
V
CC
1
1
2
3
4
5
6
7
8
9
10
11
12
13
14
28
27
26
25
24
23
22
21
20
19
18
17
16
15
PCM1716E
IC-Blockdiagramme / IC Block Diagrams
IC U301 (PCM1716E)
PIN NAME I/O DESCRIPTION
1
2
LRCIN
DIN
IN
IN
Left and Right Clock Input. This clock is equal to
the sampling rate-fS.(1)
Serial Audio Data Input (1)
3
4
5
6
BCKIN
CLKO IN
OUT
XTI
XTO IN
OUT
Bit Clock Input for Serial Audio Data. (1)
Buffered Output of Oscillator. Equivalent to System Clock.
Oscillator Input (External Clock Input)
Oscillator Output
7
8
9
10
DGND
VDD Ñ
Ñ
V
CC
2R
AGND2R Ñ
Ñ
11
12
13
14
EXTR
NC OUT
Ñ
V outR
AGND1 OUT
Ñ
Digital Ground
Digital Power +5V
Analog Power +5V
Analog Ground
Rch, Common Pin of Analog Output Amp
No Connection
Rch, Analog Voltage Output of Audio Signal
Analog Ground
15
16
17
18
V
CC
1
V
OUT
L
Ñ
OUT
NC
EXTL Ñ
OUT
19
20
21
22
AGND2L
V cc2L Ñ
Ñ
ZERO
RST OUT
IN
Analog Power +5V
Lch, Analog Voltage Output of Audio Signal
No Connection
Lch, Common Pin of Analog Output Amp
Analog Ground
Analog Power +5V
Zero Data Flag
Reset. When this pin is low, the DF and modulators are
held in reset. (2)
23
24
25
26
CS/IWO
MODE
IN
IN
MUTE
MD/DM0 IN
IN
27
28 NOTES: (1) Pins 1, 2, 3; Schmitt Trigger input. (2) Pins 22, 24, 25, 26, 27,
28; Schmitt Trigger input with pull-up resister. (3) Pin 23; Schmitt Trigger
input with pull-down resister.
MC/DM1
ML/IIS IN
IN
Chip Select/Input Format Selection. When this pin is low,
the Mode Control is effective. (3)
Mode Control Select. (H: Software, L: Hardware) (2)
Mute Control
Mode Control, DATA/De-emphasis Selection 1 (2)
Mode Control, BCK/De-emphasis Selection 2 (2)
Mode Control, WDCK/Input Format Selection (2)

2 - 3 GRUNDIG Service
Platinenabbildungen und Schaltpläne / Layout of PCBs and Circuit Diagrams GDV 130…
8
8
10-BIT
DAC
RSET1
COMP1
ADV7172/ADV7173
COLOR
DATA
P0
VREF
RSET2
COMP2
P7
DAC E
DAC F
DAC D
DAC A
DAC B
DAC C
BRIGHTNESS AND
CONTRAST CONTROL
+
ADD SYNC
+
INTERPOLATOR
10
LUMA
PROGRAMMABLE
FILTER
+
SHARPNESS
FILTER
SATURATION CONTROL
+
ADD BURST
+
INTERPOLATOR
10
PROGRAMMABLE
CHROMA
FILTER
10
8
8
8
REAL-TIME
CONTROL CIRCUIT
SCRESET/RTC
MODULATOR
+
HUE
CONTROL
10
10
10
10
10-BIT
DAC
10
10-BIT
DAC
10
M
U
L
T
I
P
L
E
X
E
R
Y
U
V
8
4:2:2 TO
4:4:4
INTER-
POLATOR
10 10
SIN/COS
DDS BLOCK
DAC
CONTROL
BLOCK
DAC
CONTROL
BLOCK
10-BIT
DAC
10
10
10
10
10-BIT
DAC
10
10-BIT
DAC
10
M
U
L
T
I
P
L
E
X
E
R
YUV TO
RBG
MATRIX
+
YUV
LEVEL
CONTROL
BLOCK
I2C MPU PORT
HSYNC
FIELD/
VSYNC
BLANK
TTX
TTXREQ
VAA
RESET
TELETEXT
INSERTION BLOCK
YCrCb
TO
YUV
MATRIX
CLOCK CSO_HSO VSO CLAMP SCLOCK SDATA ALSB
VIDEO TIMING
GENERATOR
GND
PAL NTSC
36
35
34
33
32
31
30
29
28
27
26
25
13 14 15 16 17 18 19 20 21 22 23 24
1
2
3
4
5
6
7
8
9
10
11
12
48 47 46 45 44 39 38 3743 42 41 40
PIN 1
IDENTIFIER
TOP VIEW
(Not to Scale)
ALSB
HSYNC
FIELD/VSYNC
BLANK
GND
VAA
P0
P1
P2
P3
P4
P5
P6
P7
CSO HSO
VAA
GND
VAA
SCLOCK
SDATA
RSET2
ADV7172/ADV7173
DAC F
COMP1
DAC A
VAA
DAC B
VAA
GND
VAA
DAC C
DAC D
VAA
GND
DAC E
CLOCK
GND
VAA
VSO
RESET
PAL NTSC
CLAMP
TTXREQ
SCRESET/RTC
RSET1
VREF
COMP2
GND
TTX
IC U401 (ADV 7172)
This manual suits for next models
3
Table of contents
Languages:
Other Grundig Media Player manuals

Grundig
Grundig GSTB3110DVD Installation guide

Grundig
Grundig Apollo 2000 User manual

Grundig
Grundig GSTB3110DVD Installation guide

Grundig
Grundig MPixx VP 6200/30GB User manual

Grundig
Grundig MPi SERIES VP6200/30GB User manual

Grundig
Grundig M 14 Instruction manual

Grundig
Grundig RCD 5050 User manual

Grundig
Grundig HiFi M 100-CD MKII User manual