manuals.online logo
Brands
  1. Home
  2. •
  3. Brands
  4. •
  5. Grundig
  6. •
  7. TV
  8. •
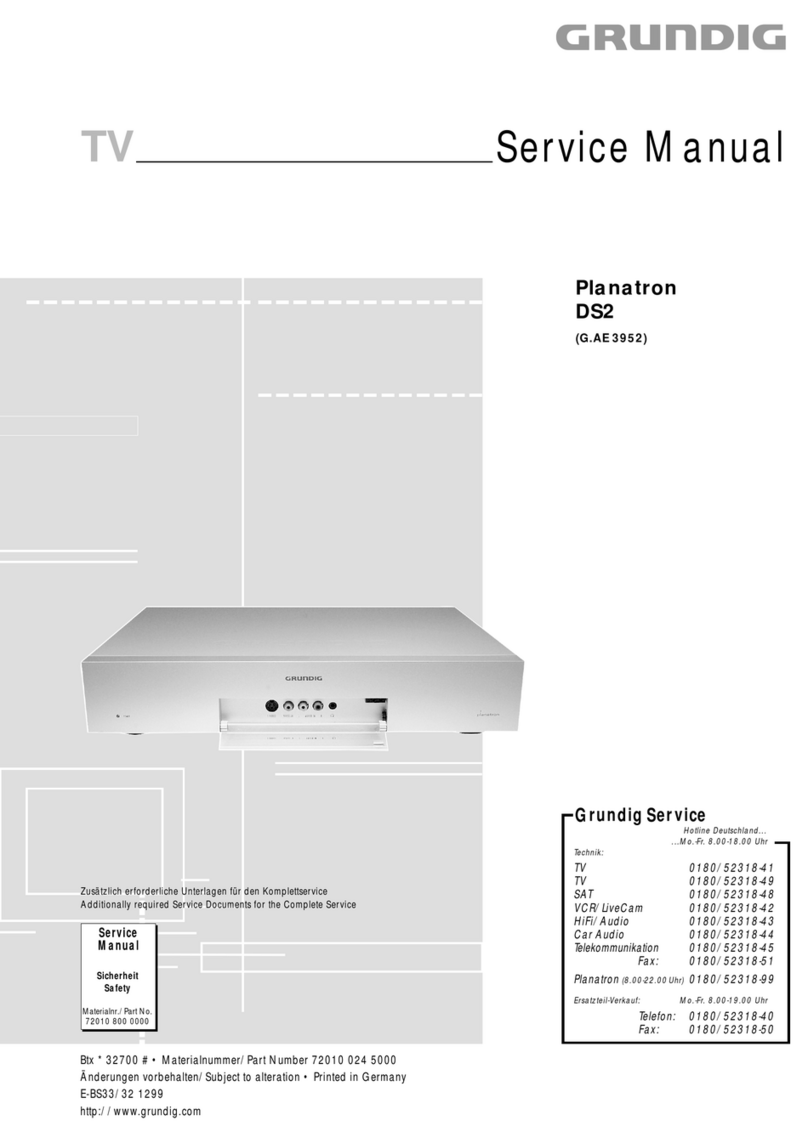
  9. Grundig Vision 2 22-2830 T DVD User manual

Grundig Vision 2 22-2830 T DVD User manual

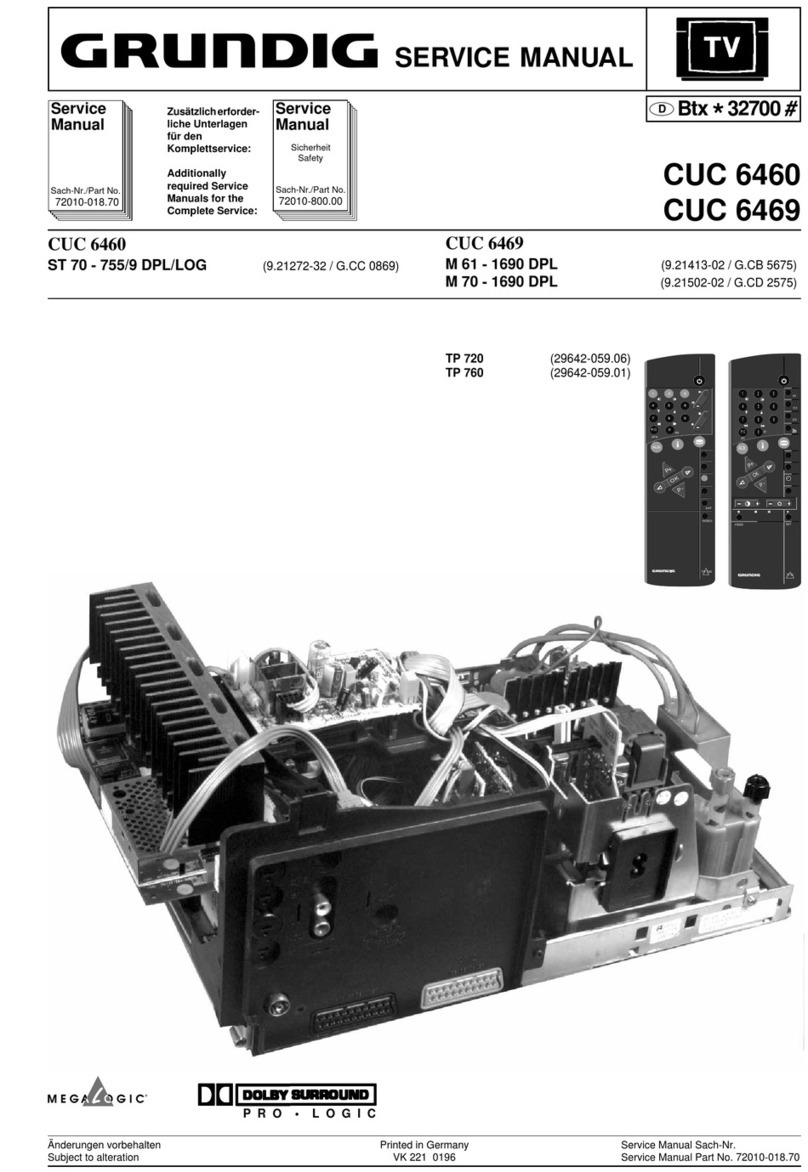
TV Service Manual
Zusätzlich erforderliche Unterlagen für den Komplettservice
Additionally required Service Documents for the Complete Service
Service
Manual
Materialnummer / Part Number 720100543000
Änderungen vorbehalten / Subject to alteration
TCC 0409 HH • Prepared in Germany
http://www.grundig.com
Chassis DH
Vision 2
22-2830 T DVD GBH3022
19-2830 T DVD GBH3019
Sicherheit
Safety
Materialnr./Part No.
720108000001
NUR FÜR INTERNEN GEBRAUCH
FOR INTERNAL USE ONLY
GRUNDIG Service Chassis DH
1 - 2
Table of Contents
Page
General Section .................................. 1-2…1-17
General Notes ...............................................................................1-2
Product and Display Variants ........................................................1-3
Disassembling Hints......................................................................1-4
Technical Data...............................................................................1-5
Operating Hints............................................................................1-11
Service and Special Functions ....................................................1-14
Layout of the PCBs
and Circuit Diagrams ......................... 2-1…2-28
Chassis Board XZT190R-6:
- Power Supply ..............................................................................2-1
- DVD/DMP-Interface.....................................................................2-2
- AV / HDMI / VGA.........................................................................2-3
- Tuner...........................................................................................2-4
- COFDM Demodulator..................................................................2-5
- IDTV MPEG Decoder & CPU......................................................2-6
- Common Interface.......................................................................2-8
- Amplifier ......................................................................................2-9
- Scaler ........................................................................................2-10
- PCB...........................................................................................2-11
Power Supply Board YLP193......................................................2-19
Inverter Board YLP192................................................................2-21
Keyboard YAS192.......................................................................2-22
DVD.............................................................................................2-23
Spare Parts Lists .................................. 3-1…3-3
Inhaltsverzeichnis
Seite
Allgemeiner Teil .................................. 1-2…1-17
Allgemeine Hinweise .....................................................................1-2
Geräte- und Display-Varianten......................................................1-3
Ausbauhinweise ............................................................................1-4
Technische Daten..........................................................................1-5
Bedienhinweise .............................................................................1-8
Service- und Sonderfunktionen ...................................................1-14
Platinenabbildungen
und Schaltpläne.................................. 2-1…2-28
Chassisplatte XZT190R-6:
- Netzteil ........................................................................................2-1
- DVD/DMP-Interface.....................................................................2-2
- AV / HDMI / VGA.........................................................................2-3
- Tuner...........................................................................................2-4
- COFDM Demodulator..................................................................2-5
- IDTV MPEG Decoder & CPU......................................................2-6
- Common Interface.......................................................................2-8
- Verstärker....................................................................................2-9
- Scaler ........................................................................................2-10
- Leiterplatte.................................................................................2-11
Netzteil-Platte YLP193 ................................................................2-19
Inverter-Platte YLP192 ................................................................2-21
Keyboard YAS192.......................................................................2-22
DVD.............................................................................................2-23
Ersatzteillisten ...................................... 3-1…3-3
Es gelten die Vorschriften und Sicherheitshinweise
gemäß dem Service Manual "Sicherheit", Material-
nummer720108000001,sowiezusätzlichdieeventu-
ell abweichenden, landesspezifischen Vorschriften!
The regulations and safety instructions shall be
valid as provided by the "Safety" Service Manu-
al, part number 720108000001, as well as the
respective national deviations.
General Section
General Notes
Before opening the cabinet disconnect the mains plug!
Attention: Observe the ESD safety regulations
Wiring
Before disconnecting any leads and especially the earth connecting
leads observe the way they are routed to the individual assemblies.
On completion of the repairs the leads must be laid out as originally
fitted at the factory to avoid later failures or disturbances.
Carrying out Measurements
Whenmakingmeasurementsonsemi-conductorswithanoscilloscope,
ensure that the test probe is set to 10:1 dividing factor. If the previous
measurement was made on AC input, please note that the coupling
capacitor in the oscilloscope will be charged. Discharge via the item
being checked can damage the components.
Measured Values and Oscillograms
The measured values given in the circuit diagrams and oscillograms
are approximates!
Exchange of Software or Chassis
After changing the memory or the chassis all device-specific parame-
ters must be checked and if necessary setuped (see part Service and
Special Functions, page 1-14).
Reset Parental Control
Following Master Passwords wil get access to change a lost pass-
word:
Digital TV: 2005
DVD: 1369
Allgemeiner Teil
Allgemeine Hinweise
Vor dem Öffnen des Gehäuses den Netzstecker ziehen!
Achtung: ESD-Vorschriften beachten
Leitungsverlegung
Bevor Sie die Leitungen und insbesondere die Masseleitungen lösen,
muss die Leitungsverlegung zu den einzelnen Baugruppen beachtet
werden.
Nach erfolgter Reparatur ist es notwendig, die Leitungsführung wieder
in den werkseitigen Zustand zu versetzen um evtl. spätere Ausfälle
oder Störungen zu vermeiden.
Durchführen von Messungen
BeiMessungenmitdem OszilloskopanHalbleiternsolltenSienurTast-
köpfe mit 10:1 - Teiler verwenden. Außerdem ist zu beachten, dass
nach vorheriger Messung mit AC-Kopplung der Koppelkondensator
des Oszilloskops aufgeladen sein kann. Durch die Entladung über
das Messobjekt können Bauteile beschädigt werden.
Messwerte und Oszillogramme
Bei den in den Schaltplänen und Oszillogrammen angegebenen
Messwerten handelt es sich um Näherungswerte!
Austausch von Speicher oder Chassisplatte
Bei Austausch der Speicher oder der Chassisplatte müssen alle ge-
rätespezifischen Parameter überprüft und gegebenenfalls eingestellt
werden (siehe Service- und Sonderfunktionen, Seite 1-14).
Reset Kindersicherung
MitfolgendenMaster-Kennwörtern bekommen Sie Zugriffzum Ändern
verlorener Kennwörter:
Digital TV: 2005
DVD: 1369
GRUNDIG Service Chassis DH
1 - 3
Geräte- und Display-Varianten
Display- und Product Code
Je nach Verfügbarkeit werden
Displays verschiedener Herstel-
lereingebaut.Diesführt zu unter-
schiedlichenChassis-Bestückun-
gen, sowie zu Änderungen in der
Software.BeiErsatzteilbestellun-
gen und Software-Updates ach-
ten Sie bitte auf das eingebaute
Display, sowie auf den "Product
Code". Angaben dazu finden
Sie auf der Geräterückseite.
Sollte in der Ersatzteilliste des
Service Manuals Ihr "Product
Code"oder IhreDisplay-Variante
nicht aufgeführt sein, können Sie
eine aktualisierte Version auf
dem GRUNDIG Service-Portal
"http://service.grundig.de" fin-
den.
ÜberprüfenSievorAustauschder
Hauptplatte, ob die Aufkleber der
Platinen identisch sind.
Product and Display Variants
Display- und Product Code
Dependingonavailabilitydisplays
of different manufacturer are built
in.This resultsin differentchassis
mountings as well as a different
software. On spare parts orders
as well as software updates take
careof the fitteddisplay as wellas
of the "Product Code". Therefore
you can find information on the
labels on the rear side. If your
"Product Code" or display vari-
ant is not mentioned in the spare
parts list of the service manual,
please look for a current version
at the GRUNDIG service portal
"http://service.grundig.de".
Before changing the main board
please check whether the labels
on the boards are identical.
GRUNDIG Service Chassis DH
1 - 4
Ausbauhinweise
Rückwand abnehmen
- 2 Schrauben Aim Gerätefuß (Fig. 1) herausschrauben und Fuß
entfernen.
- Schraube B(Fig. 2) herausschrauben.
- 2 Rastnasen C(Fig. 2) ausrasten.
- 8 Rastnasen D(Fig. 2, 3) ausrasten.
- Rückwand nach oben klappen und abnehmen.
Disassembling Hints
Removing the Rear Cabinet
- Undo 2 screws Afitted in the stand (Fig. 1) and remove the
stand.
- Undo screw B(Fig. 2).
- Disengage 2 latches C(Fig. 2).
- Disengage 8 latches D(Fig. 2, 3).
- Fold up and remove the rear panel.
Fig. 1
Fig. 2
A
BC
C
DD
DD
D
D
D
Fig. 3
DVD aus Laufwerk entfernen (Fig. 4)
- 2 Schrauben Eherausschrauben, Halter Fund Zahnrad Gent-
fernen. Zahnstange Hwird auf Grundstellung zurückgezogen.
- Hebel Iso in Mittelstellung halten, dass die DVD nicht blockiert
wird.
- DVD vorsichtig entfernen.
Removing a DVD from the DVD mechanism (Fig. 4)
- Undo 2 screws Eand remove holder Fand gear wheel G. Gear
rack Hwill be pulled backwards to its home position.
- Position lever Ito center position so that the DVD is no longer
blocked.
- Carefully remove the DVD.
F
E
G
I H
Fig. 4
Vision 2 19-2830 T DVD Vision 2 22-2830 T DVD
Order No.
Product Code
Destination
Approbations
IM-Languages
Remote control
EAN
Color
DISPLAY
Panel
Display-Manufacturer
Wide-sreen format
Response time
Brightness
Contrast ratio (Panel) approx.
Viewing angle vertical / horizontal (ca.)
Physical display resolution max. pixel
PICTURE
Motion Compensation
Motion Adaptive Deinterlacing
Natural view HD Reference
Full HD
Line Flicker Reduction
Digital Color Transition Improv. (DCTI)
Digital Combfilter
Digital Luminance Transition Improv. (DLTI)
Picture Noise Reduction
Preset picture modes
Aspect ratios (Format switching)
Blackline detection
PIP
Multifold Tuner scan (Mosaic Picture)
PAT: Split screen (PICTURE + TEXT)
PAP: Double Window (PICTURE + PICTURE)
P2AT: Double Window + TXT
POP: PICTURE on PICTURE
Picture freezing
Zoom with point function
Auto 16:9 selection via Scart
Sharpness control
Blue Background
CHASSIS
TV-Chassis
Progressive
Tuner
Scaler
Keyboard
ELECTRONIC
Stand by indicator
EPG (Electronic Programme Guide)
Easy Dialog
Megalogic
Manual & autom. labeling of prog.
Programmable off timer
Programmable on timer
Intelligent channel search (Zapping funct.)
Programme Edit
Intelligent Programme Switch
Auto switch off
Programme memory TV/AV (opt.)
Teletext/Fasttext/Toptext
Teletext options
Childlock
Menue languages OSD
OSD-style
Service mode
Hotel mode
TUNING
Autom. Tuning System with country selection
Frequency Based Auto Search
Automatic Micro-search
Automatic Programming
Manual fine tuning
Direct channel selection
Direct frequency selection
TV-Norm
NTSC-Playback via Scart (3.58/4.43)
Cable TV / Hyperband (S1-S41)
G.BH 30-19
Y3R, BLQ
G.BH 30-22
Y3S, GBN
All NSOs
CE,I
All NSOs
CE,I
D,GB,I,DK,N,S,FIN,E,P
RC 22
D,GB,I,DK,N,S,FIN,E,P
RC 22
40 13833-61683 2
glossy black/silver
40 13833-61684 9
glossy black/silver
19" / 49cm Active Matrix TFT-LC-Display 22" / 56cm Active Matrix TFT-LC-Display
BOE
[
AUO
[
ca. 5ms
ca. 300cd/m2
ca. 5ms
ca. 300cd/m2
800:1
160° / 160°
1.000:1
160° / 160°
WXGA 1440 x 900 WSXGA 1680 x 1050
\
2D DeInterlacer
\
2D DeInterlacer
\
\
\
\
\
[
\
[
[
(2D)
[
[
(2D)
[
[
[
[
[
Auto WSS, 4:3 / 14:9 / 16:9 / Letterbox / Subtitle
\
Auto WSS, 4:3 / 14:9 / 16:9 / Letterbox / Subtitle
\
\
\
\
\
\
\
\
\
\
\
\
\
\
\
\
\
[
[
[
[
[ [
DH
\
DH
\
PLL frequency synthesizer tuning
MSTAR Maria 5
PLL frequency synthesizer tuning
MSTAR Maria 5
4 Volume/Programm, ± keys, stand-by 4 Volume/Programm, ± keys, stand-by
blue LED
\
blue LED
\
\
\
\
\
[
sleep timer
[
sleep timer
\
\
\
\
[
\
[
\
\
100 / 5
\
100 / 5
[
/
[
/
\
8 pages
[
/
[
/
\
8 pages
\
23 Languages: D, GB, F,I,E,P,NL,GR,TR,DK,FIN,N,S,SI,PL,H,RUS,BG,RO,HR,CZ,SK,SER
\
OEM-style with Grundig look
[
OEM-style with Grundig look
[
Simple hotel mode possible via service adjustment Simple hotel mode possible via service adjustment
full automatic sorting
[
full automatic sorting
[
[
\
[
\
[
[
[
[
\
PAL/SECAM/BG/DK/I/L'/L
\
PAL/SECAM/BG/DK/I/L'/L
[
[
[
[
Chassis SH/SMGRUNDIG Service
1 - 5
Chassis SH/SMGRUNDIG Service
1 - 5
Chassis DHGRUNDIG Service
1 - 5
Technische Daten / Technical Data
Vision 2 19-2830 T DVD Vision 2 22-2830 T DVD
AUDIO
Mono/Stereo/Nicam
AV Stereo
Loudspeaker
SRS
Virtual Dolby
Magic Fidelity Sound System
Matched Sound Delay (Lip synchronous)
Subwoofer
Dynamic Bass
DSP (Digital Sound Processor)
Balance Adjustment
AVL (Audio Volume Level)
PIP listening via Headphone.jack
Equalizer
Space Sound Effect
Audio mode
Audio amplifier
USB
Supported files
File browser
Supported subtitles
Screen saver
DVD
Supported subtitles
Supported files
SVCD
CD-R/+R/-RW/+RW
DVD-R/+R/-RW/+RW
Dolby Digital
DVB reception
DVB-T/S/C
Fully compliant to
Autmatic/manual channel search
EPG (SI based)
- 7 Day Electronic Programme Guide
- now/next
- scheduled
- Exdended Event Info
- Short Event Info
TV/Radio programmes
OSD languages
Parental control
Teletext VBI insertion
VPS - VBI insertion
Programme table
Factory station list
DVB-T Front end
Tuner inputs (Hyperband)
Input frequency (MHz) / Loop through
Input level / Impedance
Modulation
FEC
Hierarchical modulation
Activ antenna support
Embedded Conditional Access
Common Interface
Smart Card Reader
Video Decoder
MPEG profiles
Data rate
Resolution
OSD colors
Picture formats
Audio Decoder
Profiles
AC 3 Decoding
AC 3 Output
Modes
Processor
CPU
RAM
Flash
Software
Service information processing
DVB subtitling
Over air download (OTA)
Navigator
API
Last station memory
Favourite mode
Timer / Sleep timer
Clock
Volume
Mute function
Swap function
[
/
\
/
\[
/
\
/
\
[
2 wide band at the front side
[
2 wide band at the front side
\
\
\
\
\
\
\
\
\
\
\
\
\
\
\
\
[
\
[
\
\
[
\
[
\
2x 2.5W (RMS)
\
2x 3W (RMS)
MP3, WMA, JPG, MPG, AVI, DivX (3, 4, 5, 6x), Xvid MP3, WMA, JPG, MPG, AVI, DivX (3, 4, 5, 6x), Xvid
[
Micro DVD (.sub, .txt), SUbRip (.srt), SAMi (.smi, .sami), Power DivX (.psb), Sub-Station-Alpha (.ssa), Advanced Sub-Station-Alpha (.ass), TMPlayer (.txt)
[
[ [
Micro DVD (.sub, .txt), SUbRip (.srt), SAMi (.smi, .sami), Sub-Station-Alpha (.ssa), Advanced Sub-Station-Alpha (.ass)
MP3, WMA, JPG, MPG, AVI, Xvid MP3, WMA, JPG, MPG, AVI, Xvid
[
[
[
[
[
[
[
[
retrofitting possible via Scart socket retrofitting possible via Scart socket
EN 300 744 & revided NorDig II spec (regarding DVB-T front end performance)
ATS type sorting & LCN type sorting ATS type sorting & LCN type sorting
[
[
[
[
[
If broadcasted
[
If broadcasted
If broadcasted
If broadcasted
If broadcasted
If broadcasted
899
21 Languages: D, GB, F ,I ,E, NL,TR, DK, FIN, N, S, SI, PL, H, RUS, RO, HR, CZ, SK, BG, SER
899
\
[
\
[
PDC based
full automatic sorting
PDC based
full automatic sorting
\
[
\
[
1
177 - 862 VHF & UHF /
\
1
177 - 862 VHF & UHF /
\
-84,1 dBm to -35 dBm (at 16 QAM 2/3) / 75 Ohm
COFDM 2/8 QPSK 16/64 QAM
-84,1 dBm to -35 dBm (at 16 QAM 2/3) / 75 Ohm
COFDM 2/8 QPSK 16/64 QAM
1/2, 2/3, 3/4, 5/6, 7/8
\
1/2, 2/3, 3/4, 5/6, 7/8
\
[
\
[
\
Depends on Terracom approval, implemented according to EN 50221 specification;
Tested modul: Viaccess 1.4 red Label (Sweden);
Other possible modules - not tested yet: Conax CAM 2.01, 3.03, 4.0 Eurocam - Viaccess V1.20, Professional made by Aston - Irdeto Ver 2.05 (CI), SE
4.60 Ver 2.06 (CI) - Aston Crypt V 1.03, made by Aston - Nageravision 1.2 SCM 2.30 - Crypto Works by Philips - Alpha Crypt - NDS Video guard CI
\ \
MP@ML MP@ML
Up to 15 Mbit/sec.
720 x 576
Up to 15 Mbit/sec.
720 x 576
Fitting to TV-OSD
4:3, 16:9, pan scan, letter box
Fitting to TV-OSD
4:3, 16:9, pan scan, letter box
MPEG 2 layer I & II MPEG 2 layer I & II
\
\
\
\
Mono, Dual Mono, Stereo, Joint Stereo Mono, Dual Mono, Stereo, Joint Stereo
32MB
32MB
32MB
32MB
2MB 2MB
Dynamic PMT
[
Dynamic PMT
[
DVB enhanced profile
via menu
DVB enhanced profile
via menu
\
from stand-by, as TV
\
from stand-by, as TV
4x free
\
4x free
\
\
\
\
\
[
[
[
[
Chassis SH/SMGRUNDIG Service
1 - 6
Chassis DHGRUNDIG Service
1 - 6
Vision 2 19-2830 T DVD Vision 2 22-2830 T DVD
POWER SUPPLY / CABINET
Power voltage
Range of regulation
Power switch
Integrated supply
Plug-in AC adaptor
Power consumption
Cabinet (WxHxD, cm) / Weight
REAR PANEL CONNECTIONS
Euro-AV Socket AV1
Euro-AV Socket AV2
Euro-AV Socket AV3
S-Video
Camera-AV
Wireless
YUV input / progressive
PC-input
PC-Audio in
DVI
HDMI
HD ready including HDCP
Common Interface
USB
Headphones
Digital Audio out coaxial (SPDIF)
Video out
Audio out
Antenna for terrestrial reception
DC-connector
Power supply plug
SUPPLIED ACCESSORIES
Remote control (incl. battery)
Power cord
Cables
Instruction manual
Circuit diagram
Wall fixture
Stand
230V, 50Hz; in accordance to IEC 65 230V, 50Hz; in accordance to IEC 65
140V - 265V
Tact switch
140V - 265V
Tact switch
[
\
[
\
45W, standby 1W in accordance to IEC 62087-2002
46.6 x 38.9 x 7.2cm (17.8cm with stand) / ca. 4.1kg
55W, standby 1W in accordance to IEC 62087-2002
51.8 x 42.0 x 6.7cm (16.0cm with stand) / ca. 4.7kg
Full wired Full wired
\
\
\
\
\
2x Audio, 1x Video
\
2x Audio, 1x Video
\
via VGA
\
via VGA
WXGA
[
WXGA
[
\
1x
\
1x
via HDMI
1 slot
via HDMI
1 slot
USB 2.0
\
USB 2.0
\
\
\
\
\
\
Coaxial-socket for TV-tuner-in, according to DIN 45325
\
Coaxial-socket for TV-tuner-in, according to DIN 45325
\
[
\
[
RC 22 incl. 2x Battery AAA size RC 22 incl. 2x Battery AAA size
[
\
[
\
[
[
[
[
Prepared for VESA standard adaptor 75 x 75
[
Prepared for VESA standard adaptor 75 x 75
[
, tilting function
Chassis SH/SMGRUNDIG Service
1 - 7
Chassis SH/SMGRUNDIG Service
1 - 7
Chassis SH/SMGRUNDIG Service
1 - 7
Chassis DHGRUNDIG Service
1 - 7
Chassis SH/SMGRUNDIG Service
1 - 8
Chassis DHGRUNDIG Service
1 - 8
Bedienhinweise Dieses Kapitel enthält Auszüge aus der Bedienungsanleitung. Weitergehende Informationen entnehmen Sie bitte der gerätespezifischen Bedienungsanleitung, die Sie unter
www.grundig.de, Menüpunkt Downloads/Bedienungsanleitungen herunterladen können.
Chassis SH/SMGRUNDIG Service
1 - 9
Chassis SH/SMGRUNDIG Service
1 - 9
Chassis DHGRUNDIG Service
1 - 9
Chassis SH/SMGRUNDIG Service
1 - 10
Chassis DHGRUNDIG Service
1 - 10
Hinweis – Kindersicherung:
Mit dem PIN-Code 2005 können Sie die Einstellungen ändern.
Chassis DHGRUNDIG Service
1 - 11
Operating Hints This chapter contains excerpts from the operating instructions.
For further particulars please refer to the appropriate user instructions which can be downloaded by www.grundig.com, submenu Downloads/Manuals.
Chassis SH/SMGRUNDIG Service
1 - 12
Chassis SH/SMGRUNDIG Service
1 - 12
Chassis DHGRUNDIG Service
1 - 12
Chassis SH/SMGRUNDIG Service
1 - 13
Chassis SH/SMGRUNDIG Service
1 - 13
Chassis DHGRUNDIG Service
1 - 13
Note –Parental control:
General PIN Code 2005 gives access to enter a new personal
code.
Service- und Sonderfunktionen
Tastenfunktionen
MENU
Aufrufen des Dialog Centers / Menüverlassen
33
33
44
44
,
1…9
Menü-Zeile (Menüpunkt) wählen
11
11
22
22
Aufrufen des Menüs, Wert ändern
MENU
Menüverlassen
EXIT
Beenden des Service Mode
Service-Mode aktivieren
–Taste "
MENU
" (INFO) drücken.
–Zahlenfolge "
8500
" eingeben.
Service-Mode beenden
–Taste "
EXIT
" drücken.
1. Grundeinstellwerte
Die Grundeinstellwerte im Service Mode sind in der Tabelle enthal-
ten.
Service and Special Functions
Functions of the buttons
MENU
Call up the Dialog Center / close down the Menu
33
33
44
44
,
1…9
Call up the dialogue line (point of menu)
11
11
22
22
Call up the Menus, Changing the settings
MENU
Close down the Menu
EXIT
Exit the Service Mode
Calling up the Service Mode
–Press button "
MENU
" (MAIN MENU).
–Enter the code number "
8500
".
Exit the Service Mode
–Press button "
EXIT
".
1. Basic Settings
The table shows all basic specific settings in the service mode.
Menüpunkt
Point of Menu
33
33
44
44
0…9
Einstellung
Adjustment
11
11
22
22
Vision 2 19-2830 T DVD Vision 2 22-2830 T DVD
Hinweis
Hint
1. OPTIONS I2. OPTIONS II3. VIDEO
Menü
Menu
33
33
44
44
0…9
1. STANDBY CUSTOMER
FACTORY
XX
2. PLUG N PLAY
3. ACT.ANTEN IN MENU
ON/OFF
YES/NO
4. TXT TYPE
DEFAULT
FASTEXT
OFF
YES
OFF
YES
XX
ATS Reset (ON)
Netz ein –> Automatischer Sendersuchlauf
Power on –> automatic
p
ro
g
ramme search
TOPTEXT
FASTEXT TOPTEXT
5. TXT TABLE
NO
AUTO
WEST
EAST
CYRILLIC
GREEK
XX
ARABIC
PERSIAN
6. PROTECTION
7. POWER UP
ON/OFF
LAST STATE
8. RECALL LAST AV
STANDBY
ON/OFF
9. MONITOR FEATURES
0. KEYPAD TYPE
YES/NO
1 KEY
ON
X
ON
X
ON ON
YES YES
4 KEY
7 KEY
1. LOGO
GRUNDIG
POLAROID
OBL
OEM
2. OSD LANGUAGE
GROUP A
GROUP B
XX
X
Nach Auswahl dieserEinstellungen ist der Zugang zum Service Menünur über die Codezahl 9301 möglich.
After selecting one of these settings, access to the service menu is only possible via code 9301.
X
XX
3. OSD SIZE
GROUP C
X1/X2
4. CURSER KEYS VOL-PROG FUNCTION
ONLY CURSER
5. GAME MODE
6. CLOCK DISPLAY
ON/OFF
ON/OFF
7. HOTEL HEADPHONE
8. HOTEL TV
ON/OFF
OFF
X2 X2
XX
OFF
OFF
OFF
OFF
OFF
X
OFF
X siehe Punkt 8 / see point 8
SIMPLE
LOCATEL
9. VOLUME LIMIT
0. HDMI DDC UPDATE
0…50
ON/OFF
1. BLUEBACK
2. WHITE BALANCE
ON/OFF
1. SOURCE TYPE
2. COLOUR TEMP.
3. R GAIN
Nach Anwahl von "LOCATEL" im Service Menu 6. "SOURCE" die Einstellungen "DIGITAL" und "DVD" prüfen.
Check the settin
g
s "DIGITAL" and "DVD" in service menu 6. "SOURCE" after selectin
g
"LOCATEL".
50
OFF
50
OFF
siehe Punkt 8 / see point 8
ON
siehe Punkt 3
see point 3
ON
4. G GAIN
5. B GAIN
3. ADC ADJUST
1. ADC SOURCE
2. AUTO CALIBRATION
3. R GAIN
4. G GAIN
5. B GAIN
6. R OFFSET
siehe Punkt 4
see point 4
7. G OFFSET
8. B OFFSET
DIMMING 0…255 Maximale Intensität der Hintergrundbeleuchtung einstellen / Set intensity of backlight to maximum
Chassis L5C-26"…32"GRUNDIG Service
1 - 14
Chassis DHGRUNDIG Service
1 - 14
Chassis DHGRUNDIG Service
1 - 15
Menüpunkt
Point of Menu
33
33
44
44
0…9
Einstellung
Adjustment
11
11
22
22
Vision 2 19-2830 T DVD Vision 2 22-2830 T DVD
Hinweis
Hint
4. AUDIO5. TUNING6. SOURCE7. PRESET
8.
NVM
EDIT
9. INFO0. USER DEFAULTS
Menü
Menu
33
33
44
44
0…9
1. BG
EU
NEW
AUS
2. DK
OFF
ON/OFF
XX
ON ON
3. I
4. L
ON/OFF
ON/OFF
5. AUDIO POWER
2W
2.5W
6. AUTO MUTE
3W
ON/OFF
1. ATS SORTING
2. AGC VHF
ON/OFF
0…31
ON
ON
ON
ON
X
ON
X
ON
ON
14
ON
14
Programmsortierung bei Programmsuchlauf
Programme sorting at autoprogramme operation
3. AGC UHF
4. AGC L PRIME
0…31
0…31
5. TUNER TYPE
1. ANALOG
Eingebauten Tuner wählen / Select used tuner
YES/NO
2. DIGITAL
EUROPE
UK
3. DVD
NO
YES/NO
14
14
14
14
YES YES
XX
YES YES
4. USB
5. SCART
YES/NO
YES/NO
6. SCART-SVHS
7. AV
YES/NO
YES/NO
8. HDMI
9. YPBPR
YES/NO
YES/NO
0. PC
1. USER
YES/NO
Achtung: Kunden- und Gerätespezifische Einstellwerte werden gelöscht und mit Grundwerten geladen.
Attention: Erases the customer and set specific values and loads the default values.
NO
YES
NO
YES
YES
YES
YES
YES
YES
YES
YES
YES
YES YES
2. PROGRAMME TABLE
3. PC MODES
4. WHITE BALANCE
5. ADC
6. SERVICE
7. ALL
NVM ADDR. HEX
NVM DATA HEX
siehe Punkt 9
see point 9
EEPROM
TUNER
Prüft über das Bus-System die Kommunikation mit den jeweiligen Komponenten.
Checks the communication to the components via the bus system.
IF
AUDIO
DTV
HDCP KEY
DEFAULT SETTINGS 1
1. VOLUME
2. BASS
16
15
16
15
Diese Grundeinstellwerte wirken sich nur aus wenn Sie
die Grundwerte USER laden.
The user default settings are only activ when you load
the presets USER.
(siehe / see 7. PRESET –> 1. USER).
3. TREBLE
4. BALANCE
5. SOUND MODE
6. RED
7. GREEN
8. BLUE
DEFAULT SETTINGS 2
9. ACTIVE ANTENNA
1. IF SOURCE IS
15
25
15
25
NORMAL
128
NORMAL
128
128
128
128
128
OFF
ANALOG
OFF
ANALOG
2. PICTURE MODE
3. COLOUR TEMP.
4. DNR
5. CCE
DEFAULT SETTINGS 3 siehe Punkt 2 / see point 2 (Default Settings 3)
RICH
NORMAL
RICH
NORMAL
LOW
ON
LOW
ON
DEFAULT SETTINGS 3
1. SOURCE TYPE
TUNER 50HZ
CVBS 50HZ
SVHS 50HZ
RGB 50HZ
DIGITAL
2. IF PICT. MODE IS
3. BRIGHTNESS
USER
130 128 118 118 118
4. CONTRAST
5. COLOUR
124
128
6. TINT
7. SHARPNESS
50
28
124
128
122
129
50
28
50
28
116
129
122
129
50
28
50
28
2. IF PICT. MODE IS NATURAL
3. BRIGHTNESS
4. CONTRAST
130
124
5. COLOUR
6. TINT
128
50
7. SHARPNESS 28
128
124
118
122
118
116
118
122
128
50
129
50
28 28
129
50
129
50
28 28
DVD
HDMI SD
114 110
YPBPR SD
PC
114 112
114
128
126
128
50
28
50
28
114
128
101
128
50
28
50
28
TUNER 60 HZ
CVBS 60HZ
130 128
SVHS 60HZ
RGB 60HZ
118 118
124
128
124
128
50
28
50
28
122
129
116
129
50
28
50
28
114
114
110
126
114
114
112
101
128
50
128
50
28 28
128
50
128
50
28 28
130
124
128
124
118
122
118
116
128
50
128
50
28 28
129
50
129
50
28 28
HDMI/DVI
HDMI HD
110 110
YPBPR HD
114
126
128
126
128
50
28
50
28
114
128
50
28
TUNER 50HZ
CVBS 50HZ
SOFT
132 130
SVHS 50HZ
RGB 50HZ
120 120
96
120
96
120
50
16
50
16
96
121
96
121
50
16
50
16
110
126
110
126
114
114
128
50
128
50
28 28
128
50
28
RICH
126
142
124
138
114
140
114
130
160
50
160
50
45 45
161
50
161
50
45 45
DIGITAL
DVD
120 123
HDMI SD
YPBPR SD
123 123
96
121
96
120
50
16
50
16
96
120
96
120
50
16
50
16
PC
TUNER 60 HZ
115 132
CVBS 60HZ
SVHS 60HZ
130 120
88
120
96
120
50
16
50
16
96
120
96
121
50
16
50
16
114
140
106
125
126
142
116
128
161
50
161
50
45 61
160
50
161
50
61 61
120
106
126
142
124
138
114
140
160
50
160
50
61 45
160
50
161
50
45 45
RGB 60HZ
HDMI/DVI
120 123
HDMI HD
YPBPR HD
123 123
96
121
96
120
50
16
50
16
96
120
96
120
50
16
50
16
114
130
126
142
126
142
116
128
161
50
160
50
45 61
160
50
161
50
61 61
2. Default Settings 3 2. Default Settings 3
Chassis DHGRUNDIG Service
1 - 16
3. Weißabgleich (WHITE BALANCE)
Für alle Eingangssignale sind die Farbtemperaturen NORMAL,
WARM und COOL getrennt einstellbar.
–Weiss-Testbild am gewünschten Eingang einspeisen und diese
Quelle mit den Tasten "
AV
"
33
33
44
44
anwählen.
–Taste "
MENU
" (INFO) drücken und Zahlenfolge "
8500
" eingeben.
–Grundwerte laden: Tasten
7
,
4
und
22
22
nacheinander drücken und
mit Taste "
BACK
"
beenden.
–Tasten
3
und
2
nacheinander drücken.
–Signalquelle "SOURCE TYPE" mit den Tasten
11
11
22
22
wählen.
–Taste
2
drücken und mit den Tasten
11
11
22
22
die gewünschte Farb-
temperatur wählen.
–Mit den Tasten
3
"R GAIN",
4
"G GAIN" und
5
"B GAIN" nachein-
ander anwählen und mit den Tasten
11
11
22
22
nach Testbild abglei-
chen.
4. Analog-Digital-Wandler (ADC ADJUST)
Für die Eingangssignale SCART-RGB, PC und YPBPR ist der Ana-
log-Digital-Wandler getrennt einstellbar.
–Grautreppen-Testbild am gewünschten Eingang einspeisen und
diese Quelle mit den Tasten "
AV
"
33
33
44
44
anwählen.
–Taste "
MENU
" (INFO) drücken und Zahlenfolge "
8500
" eingeben.
–Tasten
3
und
3
nacheinander drücken.
–Signalquelle "ADC SOURCE" mit den Tasten
11
11
22
22
wählen.
–Taste
2
drücken und mit der Taste
22
22
den automatischen Abgleich
starten.
–Gegebenenfalls das Grautreppen-Testbild unbunt nachgleichen.
Dazu mit den Tasten
3
…
8
die Menüzeilen "RGB GAIN" und "RGB
OFFSET" anwählen und jeweils mit den Tasten
11
11
22
22
abgleichen.
5. Austausch der Hauptplatte oder des IC201
Nach dem Austausch der Hauptplatte oder des IC201 sind die
Grundeinstellwerte im Service Mode entsprechend der Tabelle zu
prüfen.
6. Software-Versionsnummern
6.1 Geräte-Software
Die Software-Versionsnummer der Gerätesoftware wird unten im
Service-Menüangezeigt, z.B.:
SW VERSION : SDH22W-AU2-T64-S0 GRUNDIG
6.2 DVB-T-Software
–Taste "
AV
" drücken.
–"DIGITAL" mit den Tasten
33
33
44
44
anwählen und mit der Taste "
OK
"
bestätigen.
–Taste "
MENU
" (INFO) drücken.
–"SONDERFUNKTIONEN" mit den Tasten
33
33
44
44
anwählen und mit
der Taste "
OK
" bestätigen.
–"DIGITALE FUNKTIONEN" mit den Tasten
33
33
44
44
auswählen und
mit der Taste
22
22
aufrufen.
–Zahlenfolge "
9301
" eingeben. Anschließend werden alle geräte-
spezifischen Versionsnummern angezeigt.
–Zum Beenden der Anzeige die Taste "
EXIT
" drücken
7. Programmsuchlauf
–Taste "
AV
" drücken.
–"DIGITAL" oder "ANALOG" mit den Tasten
33
33
44
44
anwählen und mit
der Taste "
OK
" bestätigen.
–Taste "
MENU
" (INFO) drücken.
–"SUCHEN / ABSTIMMUNG" mit den Tasten
33
33
44
44
anwählen und
mit der Taste "
OK
" bestätigen.
–"PROGRAMMSUCHLAUF" (analog) / "AUTOMATISCHE SU-
CHE" (digital) mit den Tasten
33
33
44
44
anwählen und mit der Taste
"
OK
" bestätigen.
–Gewünschtes Land mit den Tasten
33
33
44
44
11
11
22
22
auswählen und mit
der Taste "
OK
" bestätigen.
Das automatische Sendersuchsystem stoppt bei jedem emp-
fangswürdigen Sender (AFC und Koinzidenz) und speichert auto-
matisch die entsprechenden Senderdaten mit dem jeweiligen
Standard. Danach wird der Suchlauf fortgesetzt.
–Zum Abbrechen des Suchlaufes die Taste "
MENU
" (analog) /
"
EXIT
" (digital) drücken.
3. White Balance
The colour temperatures NORMAL, WARM and COOL are adju-
stable for all input signals.
–Fit in a white test pattern at the desired input and select it with
buttons "
AV
"
33
33
44
44
.
–Press button "
MENU
" (MAIN MENU) and enter the code number
"
8500
".
–Load Presets: Press the buttons
7
,
4
and
22
22
step by step and con-
firm it with button "
BACK
".
–Press the buttons
3
and
2
step by step.
–Select SOURCE TYPE with buttons
11
11
22
22
.
–Press button
2
and adjust the white balance with buttons
11
11
22
22
.
–Select with buttons
3
"R GAIN",
4
"G GAIN" und
5
"B GAIN" step
by step and adjust with buttons
11
11
22
22
according to test pattern.
4. Analogue Digital Converter (ADC ADJUST)
The analogue digital converter is seperately adjustable for the input
signals SCART-RGB, PC and YPBPR.
–Fit in a grey scale test pattern at the desired input and select it
with buttons "
AV
"
33
33
44
44
.
–Press button "
MENU
" (MAIN MENU) and enter the code number
"
8500
".
–Press the buttons
3
and
3
step by step.
–Select "ADC SOURCE" with buttons
11
11
22
22
.
–Press button
2
and
22
22
to start the automatic adjustment.
–If necessary, readjust to an achromatic grey scale test pattern.
Select the menu lines "RGB GAIN" and "RGB OFFSET" with but-
tons
3
…
8
and adjust with buttons
11
11
22
22
.
5. Change of the Main Board or IC201
After changing the Main Board or IC201 all basic settings in the ser-
vice mode must be checked according to the table.
6. Software Version Numbers
6.1 TV Software
The software version number of the TV software is shown on the lo-
wer part of the service menu, e.g.:
SW VERSION : SDH22W-AU2-T64-S0 GRUNDIG
6.2 DVB-T Software
–Press button "
AV
".
–Select "DIGITAL" with the buttons
33
33
44
44
and confirm with button
"
OK
".
–Press button "
MENU
" (MAIN MENU).
–Select "FEATURES" with the buttons
33
33
44
44
and confirm with button
"
OK
".
–Select "DIGITAL FEATURES" with the buttons
33
33
44
44
and call up
with button
22
22
.
–Enter the code number "
9301
". All version numbers of the TV set
are shown on the screen.
–Pressing the button "
EXIT
" closes the software report.
7. Programme Search
–Press button "
AV
".
–Select "DIGITAL" or "ANALOG" with the buttons
33
33
44
44
and confirm
with button "
OK
".
–Press button "
MENU
" (MAIN MENU).
–Select "SETUP" with the buttons
33
33
44
44
and confirm with button
"
OK
".
–Select "AUTOPROGRAM" (analogue) / "AUTO SEARCH" (digital)
with the buttons
33
33
44
44
and confirm with button "
OK
".
–Select the required Country with the buttons
33
33
44
44
11
11
22
22
and confirm
with button "
OK
".
The auto programme system stops at every station of acceptable
reception quality (AFC and coincidence) and stores the station
data and the respective standard automatically. The system then
continues searching.
–Pressing the button "
MENU
" (analogue) / "
EXIT
" (digital) button
stops the programme search.
Chassis DHGRUNDIG Service
1 - 17
8. Hotel-Mode
Bei aktivierter Funktion ist die maximale Lautstärke begrenzt und
"PROGRAMM BELEGUNG" sowie "SUCHEN/ABSTIMMUNG" sind
im INFO MENU nicht mehr anwählbar.
Hotel-Mode aktivieren:
MENU
–> "
8500
" –>
2
"OPTION II" –>
8
"HOTEL TV" –>
22
22
"SIMPLE". Wird versehentlich die 3. Einstellmöglichkeit "LOCATEL"
angewählt, sind DVB-T und der DVD Player deaktiviert. Zum reakti-
vieren im Service Unter-Menü"SOURCE" die Einstellung "DIGITAL"
mit
22
22
auf "EUROPE" und "DVD" mit
22
22
auf "YES" stellen.
Hotel-Mode deaktivieren:
MENU
–> "
8500
" –>
2
"OPTION II" –>
8
"HOTEL TV" –>
11
11
"OFF".
Maximale Lautstärke:
MENU
–> "
8500
" –>
2
"OPTION II" –>
9
"VOLUME LIMIT" –>
11
11
22
22
Wert 0…50.
9. NVM EDIT
Diese Funktion ist ausschließlich für die Entwicklung und darf nur
nach besonderer Aufforderung verwendet werden. Bei falschen Ein-
gaben sind die Gerätefunktionen nicht mehr gewährleistet.
8. Hotel Mode
Maximum volume is limited and there is no access to "PROGRAM
TABLE" and "SETUP" of the main menu at activated hotel mode.
Activate Hotel Mode:
MENU
–> "
8500
" –>
2
"OPTION II" –>
8
"HOTEL TV" –>
22
22
"SIMPLE". If - accidentally - the third possible setting "LOCATEL" is
selected, DVB-T and the DVD player are deactivated. To reactivate
both in the service submenu "SOURCE" set "DIGITAL" to "EURO-
PE" and "DVD" to "YES" by button
22
22
.
Deactivate Hotel-Mode:
MENU
–> "
8500
" –>
2
"OPTION II" –>
8
"HOTEL TV" –>
11
11
"OFF".
Maximum volume:
MENU
–> "
8500
" –>
2
"OPTION II" –>
11
11
22
22
–>
9
"VOLUME LIMIT"
–>
11
11
22
22
Wert 0…50.
9. NVM EDIT
This function is only for development and is only allowed to use by
special demand. Any incorrect settings may cause a defectiv set.
GRUNDIG Service Chassis DH
2 - 1
1 2
L301 NC
32
T300
PMV65XP
C305
1uF
C301
NC
1 2
L300 60R/100Mhz
R304
10K
R312
NC
C300
100nF
R305
(22K)
VCC5V
VCC3.3V
VDDD
GND
GND
VCC3.3V
VDDDCTRL
VBLCTRL
BRIGHTNESS
VDDDCTRL-Hi: VDDD = ON
VDDDCTRL-Lo: VDDD = OFF
D300
STPS340U
C309
4.7uF/16V
C313
22uF/6.3V
VCC3.3V
GND
C310
22uF/6.3V
C318
1uF
+5V
+5V
C306
NC
VCC2.5V
Vcc2.5V
VCC3.3V
GND
R317
100R
R318
NC C311
100nF
C307
2.2uF/6.3V
ADJ
1
VOUT 2
VIN
3
TAB 4
IC300
NCP1117DTARK
VCC1.5V
GND
GND
VDD9V
STANDBY
R309
4.7K
GND
VCC5V R310
4.7K
1 2
L302 NC/15"
VDD12V
GND
R306
2.2K
1
122
3
344
5
566
7
788
9
910 10
S302
POWER
VDD12V
GND
KEY0
IR_INT
LED
KEYPAD&POWER
DIM
BL ON/OFF
R308
1K
VCC3.3V
R314
(4.7K)
VCC3.3V
GND
+5V
C323
22uF/6.3V
GND
VCC5V
C308
1uF
VCC1.2VVCC3.3V
R316
0R
VCC5V
R320 120R
R321 22R
Vcc1.5V
Vcc1.2V
R325
330R
GND
Vcc3.3V
C302
10uF
C304
1uF/16V
GNDGND
R327
2k GND
C317
1uF
GND
STANDBY: L-ST.BY, H-Power ON
VDD12V_A,VDD9V
R324
22k
GND
STANDBY
VDD12V
STANDBY: L-ST.BY, H-Power ON
1
32
T308
PMV65XP
VDD12V_A
C217
220uF/16V
GND
R332
NC
VDD12V
L304
120R/100Mhz
L305
NR3015T1RON
C319
NC
GND
VCC3.3V
L302
VCC5V2
L306
VDDD
5V PANEL 3.3V PANEL
350mA120mA(+350mA)
450mA
1A for >19"W
C314
22uF/6.3V
C312
100nF
ADJ
1
VOUT 2
VIN
3
TAB 4
IC303
NCP1117DTARK
GNDGND
1,5A for <19"W
C316
22N
C315
100nF
C320
NC
GND
GND
R334
7.5K
R322
10K%1 R319
15K%1
GND
R333
2.7K%1
C321
10nF
C322
NC
GND
GND
L303
10uH
BS
1
VIN
2
OUT
3
GND
4FB 5
COMP 6
EN 7
SS 8
GND
9
IC304
MP1593/CAT7106
GND
GND
C324
220uF/16V
GND
ADJ
1
VOUT 2
VIN
3
TAB 4
IC302
NCP1117DTARK
GND
R340
(33k)
R339
(220K)
VDD12V
C325
NC
GND
C617
22uF/6.3V
30V_PWM
GND
D306
GND GNDGND
21
3
D301
BAV99
GND
+33V
21
3
D302
BAV99
VDD12V
30V_PWM
C327
22nF
C326
22nF
C329
220nF/50V
C330
220nF/50V
C328
220nF/50V
R300
1k R301
100k
Only for IDTV
Only For Analog
1
3 2
T306
PMV56XN
VCC2.5V
Pd=0.4W
300mA
50mA
1
1
2
2
3
344
55
66
T303
PBLS4003D
VCC3.3V
R303
680R
VCC3.3V_D
R302
NC
+5V
1
32
T301
2N7002
1
32
T302
2N7002
1
3
2
T304
2N7002
1
3
2
T309
2N7002
1
1
2
2
3
344
55
66
T305
PBLS4003D
R311
680R
R307
NC
VCC3.3V
200mA
R313
NC
VCC5V
VCC3.3V_D
+33V
C303
NC
2
31
IC301
ZTL431AFFTA
VCC5V2
GND
C331
1uF/16V
GND
+0.6A for DMP
1
1
2
2
3
344
55
66
T307
PBLS4003D
VCC1.2V
+5V
50mA
VCC1.2V_D
VCC1.2V_D
R328
NC
R329
680R
1 2
L306 60R/100Mhz
VCC5V2
GND
L307
NR3015T1RON
C332
22uF/6.3V
C333
1uF
GND
C334
22uF/6.3V
GND
C335
10nF
C336
10nF
GND
GND
H300
H301
H302
MONTAGE HOLE
H303
GND
MONTAGE HOLE
MONTAGE HOLE
MONTAGE HOLE
1
1
MP1593
3A, 28V, 385KHz
STEP-DOWN CONVERTER
LOCKOUT
COMPARATOR
ERROR
AMPLIFIER
FREQUENCY
FOLDBACK
COMPARATOR
INTERNAL
REGULATORS
1.8V
SLOPE
COMP
CLK
CURRENT
COMPARATOR
CURRENT
SENSE
AMPLIFIER
SHUTDOWN
COMPARATOR
SS
8
COMP
6
IN 2
EN 7
GND
4
OSCILLATOR
40/385KHz
S
R
Q
SW
3
BS
M1
M2
1
5V
+
Q
0.7V
++
2.3V/
2.6V +
1.22V0.7V +
+
FB
5
--
--
--
--
--
--
1
Platinenabbildungen und Schaltpläne / Layout of PCBs and Circuit Diagrams
Chassis – Netzteil / Power Supply
GRUNDIG Service Chassis DH
2 - 2
Chassis – DVD/DMP-Interface
1B
1
1C
2
2B
3
2C
4
3B
5
3C
6
4B
7
4C
8GND 9
4A 10
3A 11
2A 12
1A 13
S14
OE_N 15
VCC 16
IC800
STMAV340
1
2
3
4
5
6
7
8
9
10
11
12
13
14
15
16
032953R
S800
CON16
DMP_Pb
DMP_Pr
DMP_AL_IN/OUT
DMP_AR_IN/OUT
IR_INT
VCC5V
DMP_SEL
DMP_SEL: L- DMP, H- IDTV
DMP_AL_IN/OUT
DMP_AR_IN/OUT
IR_INT
C801
1uF
GND
GND
R800
10k
RX
TX
NC/0R
R802
NC/0R
C800
1uF C802
1uF
GND GND
SW_R+
SW_B+
No DMP
R804
0R
R803
0R
RX_MST
TX_MST
DVD OFF
RX_DMP
TX_DMP
C803
100nF
R805 10K
R809 10K
DMP 600mA
Power for DMP/DVD
DMP_Y
R807
75
R806
75
R808
75
GND
D_G
D_R
D_B
SW_G+
X0
12
X1
13
Y1
1Y0
2
A
11
Z0
5
Z1
3
Z4
EN 6
B
10
C
9
X14
Y15
VDD 16
VEE 7
VSS 8
IC801
MC14053BDTR2
GND
GND
VCC3.3V
VCC3.3V
L803 60R/100Mhz
L802 60R/100Mhz
L801
60R/100Mhz VDD12V_A
UART_SW
DVD 15mA
R801
10K
UART_SW: L-DMP, H-IDTV
VCC3.3V
VCC3.3V
VCC5V2
VDD12V_A
C804
NC
GND
1
32
T800
PMV56XN
DMP_Y
DMP_Pb
DMP_Pr
L800
60R/100Mhz DVD900mA
DVD
L800L801
DMP 500mA
1
32
T801
PMV56XN
1
3
2
T802
2N7002
DMP
T800T801
NC
NC NC
No
Yes
Yes Yes
Yes
C805
NC
GND GND
DVD_5VDVD_5V L804
NC/60R/100Mhz
L805
60R/100Mhz
VCC5V
C431
100nF
C437
100nF
C441
100nF
R811 0R
R810 0R
36
37
38
39 40
‚
fl
‡
°
·
GRUNDIG Service Chassis DH
2 - 3
D_RXD
SC_CVBS1
D_HS
D_VS
D_SCL
D_G+
D_TXD
D_SDA
D_R+
D_B+
SC_G+
D_R+
D_B+
D_G+
R417 10K
R420
0R
R432 1.5K
C415 100pF
R444
4.7K
C433
22pF
R401
75R
C417
NC
R405
0R
NC1
1
NC2
2
NC3
3
GND
4SDA 5
SCL 6
VCLK 7
VCC 8
IC401
24C02
C407
NC
R435 0R
C412
NC
C400
100nF
C429
100nF
C434
100nF
R411 75R
1
6
2
7
3
8
4
9
5
11
12
13
14
15
10
16
17
S402
VGA
C432 100nF
C401
47p
R442
4.7K
R448
NC
R439
75R
R436 0R
R402
75R
R408
75R
C430
100nF
C411
100nF
C406
100nF
R423
75R
R400
0R
3
1
2
D401
BAV70
R438
60R/100MHz
R443
4.7K
R419 2.7K
C435
22pF
C416
100nF
R414
0R
R434 1.5K
R433
470R
R416
75R
GND
GND
GND
GND
GND
GND GND
VGA5V
GND
GND
GND
GND
GND
VGA5V VCC5V
VSYNCIN
VIDEO_SEL
RGB_SEL
SOG HSYNCIN
SC_LI
SCL_TXD
SC_RI
B_INP
R_INP
G_INM
G_INP
DSUB_RGB IN
SCART IN
SC_CVBS_OUT
SC_B+
SC_R+
R447
75R
C439 100nF
C436 100nF
R446
60R/100MHz
R441
60R/100MHz R445
75R
GND
GND
SC_LO
SC_RO
SDA_RXD
SC_RO
SC_LO
SC_CVBS_OUT
R413 100R
R412 100R
TX_Scart
RX_Scart
R440
NC
R437 NC
2
4
6
8
10
12
14
16
18
20
1
3
5
7
9
11
13
15
17
19
21
22
23
S400
SCART
GND
R431
75R
SC_CVBS_OUT
+5V
L400
0R C428
47p
C427
NC
GNDGND
C419
1uF
GND
R425
1R
CVBS_OUT
RX2+
1
GND2
2
RX2-
3
RX1+
4
GND1
5
RX1-
6
RX0+
7
GND0
8
RX0-
9
CLK+
10
GND_CLK
11
CLK-
12
CEC
13
N.C.
14
SCL
15
SDA
16
CEC_GND
17
5V
18
HP_DETECT
19
20
2122
23
S403
HDMI
GND
GND
GND
GND
GND
GND
GND
HDMI_RX2+
HDMI_RX2-
HDMI_RX1-
HDMI_RX0+
HDMI_RX1+
HDMI_RX0-
HDMI_CLK+
HDMI_CLK-
HDMI_SDA
HDMI_SCL
HDMI_5V
HDMI_DET
R406
4.7K
NC1
1
NC2
2
NC3
3
GND
4SDA 5
SCL 6
VCLK 7
VCC 8
IC400
24C02
C402
100nF
R403
4.7K
R415
NC
3
1
2
D404
BAV70
R404
4.7K
GND
GND
HDMI_5V
VCC5V
GND
HPDCTRL
R421
1K
R422
10K
VCC3.3V
GND
HDMI_WP
2
61
5
43
T607
BC847BPDW1T1
R643
56K
R645
39K
R644
470R
R647
470R
R646
470R
GND GND
C660
1uF
IN1
1
IN2
2
GND
3
IN3
4
IN4
5
OUT4
6
OUT3
7
GND 3
OUT2 9
OUT1 10
D405 Rclamp0524P
GND
GND
IN1
1
IN2
2
GND
3
IN3
4
IN4
5
OUT4
6
OUT3
7
GND 3
OUT2 9
OUT1 10
D406 Rclamp0524P
C404
100nF R457
470R
SC_C
R449 100R
R450100R
HDMI_SCL
HDMI_SDA
GND
D410
CDS3C16GTH
GND
D409
CDS3C16GTH
GND
D408
CDS3C16GTH
R451100R
R452100R
for only IDTV
C408 100nF
R_INM
C409 100nF
B_INM
1
32
T401
2N7002
1
32
T400
2N7002
SC_R
SC_G
SC_B
CVBS1_SC
HDMI_WP
GND
1
32
T402
2N7002
D_G+
D_R+
D_B+
No DMP
VGA
SW_G+
SW_R+
SW_B+
D_G
D_R
D_B
Chassis – AV / HDMI / VGA

This manual suits for next models

3

Other Grundig TV manuals

Grundig 32 GEH 6930 A Reference guide

Grundig

Grundig 32 GEH 6930 A Reference guide

Grundig CINEMO 32 User manual

Grundig

Grundig CINEMO 32 User manual

Grundig 32 VLE 6910 BP User manual

Grundig

Grundig 32 VLE 6910 BP User manual

Grundig CUC 1825 User manual

Grundig

Grundig CUC 1825 User manual

Grundig AMIRA 17 User manual

Grundig

Grundig AMIRA 17 User manual

Grundig 40 VLE 5520 BG User manual

Grundig

Grundig 40 VLE 5520 BG User manual

Grundig VISION 2 16-2830 T User manual

Grundig

Grundig VISION 2 16-2830 T User manual

Grundig ST 72-860 NIC/TOP User manual

Grundig

Grundig ST 72-860 NIC/TOP User manual

Grundig ST 63-700 FR/TOP User manual

Grundig

Grundig ST 63-700 FR/TOP User manual

Grundig 49GFB6624 User manual

Grundig

Grundig 49GFB6624 User manual

Grundig 65 VLX 6950 BP User manual

Grundig

Grundig 65 VLX 6950 BP User manual

Grundig CUC 7303 User manual

Grundig

Grundig CUC 7303 User manual

Grundig Toronto 32-7830 T User manual

Grundig

Grundig Toronto 32-7830 T User manual

Grundig Vision 4 26-4931 T User manual

Grundig

Grundig Vision 4 26-4931 T User manual

Grundig XEPHIA 42 PXW 110-6616 REF User manual

Grundig

Grundig XEPHIA 42 PXW 110-6616 REF User manual

Grundig 32 GFB 6825 User manual

Grundig

Grundig 32 GFB 6825 User manual

Grundig TORREON 32 User manual

Grundig

Grundig TORREON 32 User manual

Grundig 28 VLE 5500 BG User manual

Grundig

Grundig 28 VLE 5500 BG User manual

Grundig 65 GEU 7900C Reference guide

Grundig

Grundig 65 GEU 7900C Reference guide

Grundig 26 GLX 4000 User manual

Grundig

Grundig 26 GLX 4000 User manual

Grundig CUC 7303 FR User manual

Grundig

Grundig CUC 7303 FR User manual

Grundig 55 GOB 9089 Operating and maintenance manual

Grundig

Grundig 55 GOB 9089 Operating and maintenance manual

Grundig 22 VLE 5520 SG User manual

Grundig

Grundig 22 VLE 5520 SG User manual

Grundig Cinaro 26 User manual

Grundig

Grundig Cinaro 26 User manual

Popular TV manuals by other brands

LG LED LCD TV / LCD TV / PLASMA TV owner's manual

LG

LG LED LCD TV / LCD TV / PLASMA TV owner's manual

Aiwa TV-F2400u Service manual

Aiwa

Aiwa TV-F2400u Service manual

Samsung HLR6168WX Brochure & specs

Samsung

Samsung HLR6168WX Brochure & specs

JVC LT-52GZ79 Service manual

JVC

JVC LT-52GZ79 Service manual

Panasonic TX-W32R4F operating instructions

Panasonic

Panasonic TX-W32R4F operating instructions

Sharp LC-32AV22U Service manual

Sharp

Sharp LC-32AV22U Service manual

Listo 40FHD752 operating instructions

Listo

Listo 40FHD752 operating instructions

Samsung Bauhn Tizen ATV43UHDT-0123 user manual

Samsung

Samsung Bauhn Tizen ATV43UHDT-0123 user manual

Philips A02E Service manual

Philips

Philips A02E Service manual

I-View iVIEW-1303DTV user manual

I-View

I-View iVIEW-1303DTV user manual

Finlux FL4922 owner's manual

Finlux

Finlux FL4922 owner's manual

Philips 29PT6433 owner's manual

Philips

Philips 29PT6433 owner's manual

Panasonic TX-48CXW404 operating instructions

Panasonic

Panasonic TX-48CXW404 operating instructions

Toshiba 32L1753DB operating instructions

Toshiba

Toshiba 32L1753DB operating instructions

RCA 1535006A user guide

RCA

RCA 1535006A user guide

Toshiba CX35F60 owner's manual

Toshiba

Toshiba CX35F60 owner's manual

RCA 27F500T user guide

RCA

RCA 27F500T user guide

Toshiba 43L1753DB operating instructions

Toshiba

Toshiba 43L1753DB operating instructions

manuals.online logo
manuals.online logoBrands
  • About & Mission
  • Contact us
  • Privacy Policy
  • Terms and Conditions

Copyright 2025 Manuals.Online. All Rights Reserved.