Gryphon Diamond Slicer User manual
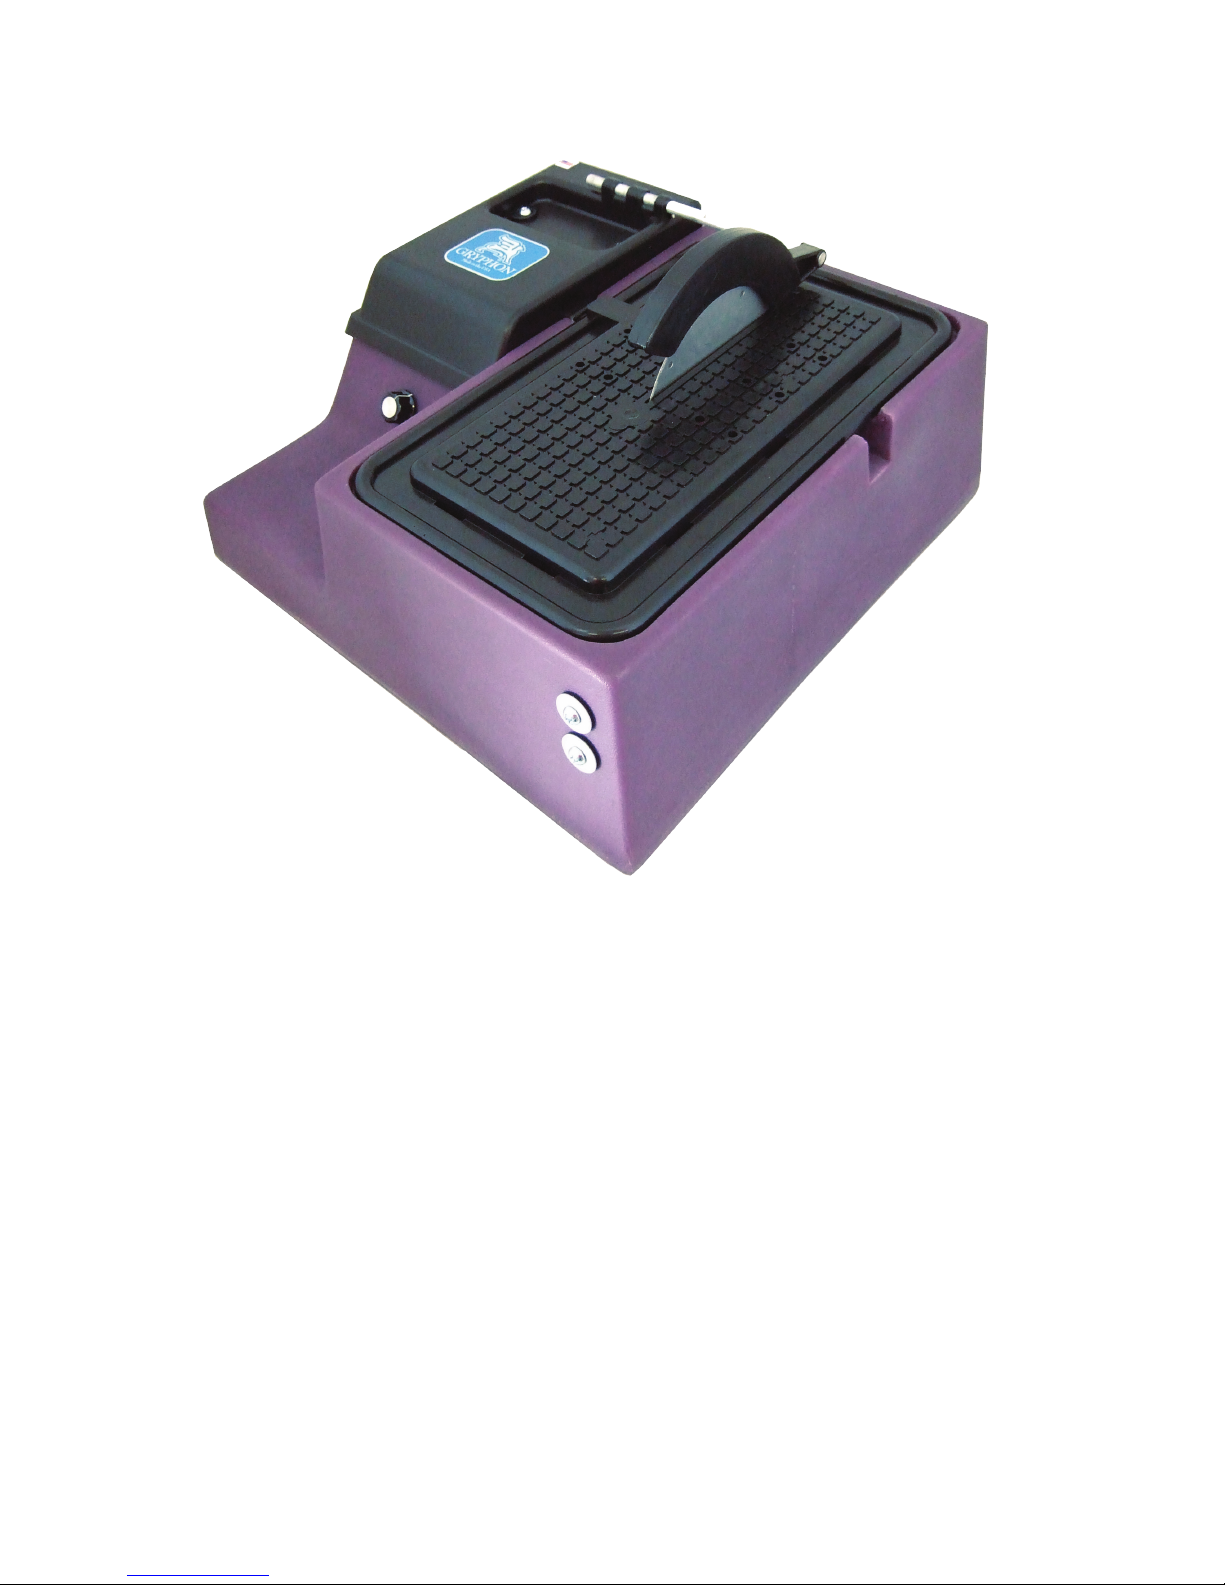
Gryphon Diamond Slicer
For Your Safety
NEVER operate your slicer without goggles or other protective eye equipment. Be sure that anyone who is
observing also has adequate eye protection as well.
NEVER wear loose clothing or jewelry as it can easily get caught in moving parts.
NEVER abuse your cord. Carrying a tool by the cord or yanking the cord to disconnect it from a receptacle
may cause your cord to break. Keep all cords away from heat, oil and sharp edges at all times.
NEVER forget to disconnect your cord and other tools before servicing, when not in use and when changing
your blade.
ALWAYS remove adjusting keys and wrenches. Check that your keys and wrenches are still in place before
starting up your slicer.
ALWAYS allow your slicer to cool. After running your slicer for 30 minutes, allow 30 minutes off to cool.
Your machine can overheat and melt the case if this is ignored!
ALWAYS stay vigilant and alert while slicing. Never operate your slicer if you are tired.

Specifications
•115VAC motor•
•Variable speed 800-3400 RPM•
•5/8” Arbor•
• Accepts a variety of 6” diameter blades•
In the Box with your Slicer
•Two Diamond Saw Blades – One Heavy Duty for especially thick material and one in Blade for bottles
and most glass cutting•
•Splash Guard•
•Adjustable Fence•
•ese Instructions•
•Hex Wrench•
Operating Instructions
1) Carefully unpack your slicer from the box and check all packaging material to make certain no
accessories or small parts are inadvertently discarded. Should the machine arrive in a damaged condition
immediately contact the delivering carrier or your dealer.
2) Attach the blade so you can start using your new slicer. To do so, remove the cutting table by lifting the
table away form the base and unscrew the bolt at the end of the shaft. Place the blade on the end of the
shaft and replace the bolt. e bolt needs be nger tight. If you are using a blade meant to spin on one
direction only, make sure the blade is oriented in the right direction. e blade will spin towards you as
you are using the slicer.
3) Your slicer is designed to be operated with oil or water. We recommend water, since it’s easier to clean.
NEVER operate your slicer dry. Fill the reservoir until water covers the bottom 1/8” of the blade. Replace
the cutting table and insert your black splash guard into the two slots at the front of the table. Your black
splash guard can be used in either direction.
4) Before turning on, spin the blade towards you to make sure it isn’t in contact with the table. If your blade is
touching the table, refer to the Blade Positioning section that you will nd later in this manual. Note that
very thin blades tend to wave side to side as you spin them. is is the nature of thin blades but can also be
caused by over tightening the bolt.
5) Put on your safety goggles (not included) then turn on the power switch. Pour additional water over the
blade until there is a fine mist and a small amount of splash around the blade. Do not over fill reservoir as
it will splash everywhere. Be vigilant to keep your slicer blade wet when cutting.
Cutting Tips
Place your material to be cut on the slicer table and line it up properly with the diamond blade. Slide your
material lightly into the blade until a groove forms then firmly push the material through the blade. Your
slicer is meant to only cut in a straight line. Do not attempt to cut curves with it. Your diamond blade works

best when the material is pushed firmly against it. NEVER force a diamond blade, let the blade do the work.
Cutting speed depends on the type of blade you are using and the max RPM. Do not exceed the max RPM
of your specific blade. We recommend that you start with a lower speed and increase it until you reach an
effective cutting speed.
Your material that needs to be cut should normally not exceed 2/3 the size of the visible cutting area of the
blade. Some larger objects, such as bottles, can be cut by rotating the object against the blade. Exercise care
when cutting these larger objects as the blade can pull the object from your hand. e diamond saw blade
cuts hard material easier than soft material because soft material sometimes will clog up the microscopic
diamond particles.
As you near the end of your cut, reduce pressure on the material. By doing so, you will avoid a sudden “break-
through” and give your material a cleaner cut.
Preventative Maintenance
When your work is completed, turn off the switch and always unplug your slicer. Drain water from reservoir
and dry both your machine and blade with paper towels or cloth. Briefly turn on the slicer to spin dry
your blade thoroughly. Dry your slicer and blade after each use to prevent rusting. e slicer arbor and
the shaft it ts on are made from dierent material. Over time, they can galvanize together, making it
impossible to remove the arbor. Every 2 months or so, remove the arbor using the hexagonal wrench, turning
counterclockwise. Place a few drops of oil or grease on the shaft, rubbing to coat the shaft lightly. Replace
the arbor using the hexagonal wrench to tighten.
NEVER get oil or water down the shaft. If this happens, water can get into the motor and will cause the
motor to burn out.
NEVER pour used water down the drain as it can harden like cement and clog your drain.
Blade Positioning
Follow these steps to adjust the position of the metal shaft so you can prevent your blade from contacting the
table:
1) Remove the cutting table and loosen the two set screws using the hex wrench supplied with your slicer, so
that the shaft can slide side to side.
2) Replace the cutting table and position your blade so it’s not in contact with the cutting table. Your blade
should spin freely.
3) Rotate the blade so you can see a setscrew that will be exposed between the cutting table and the motor
cover. Tighten that screw with the hexagonal wrench then remove the cutting table to tighten the other
screw.
4) Replace the cutting table and rotate the blade again to make sure there is adequate clearance.
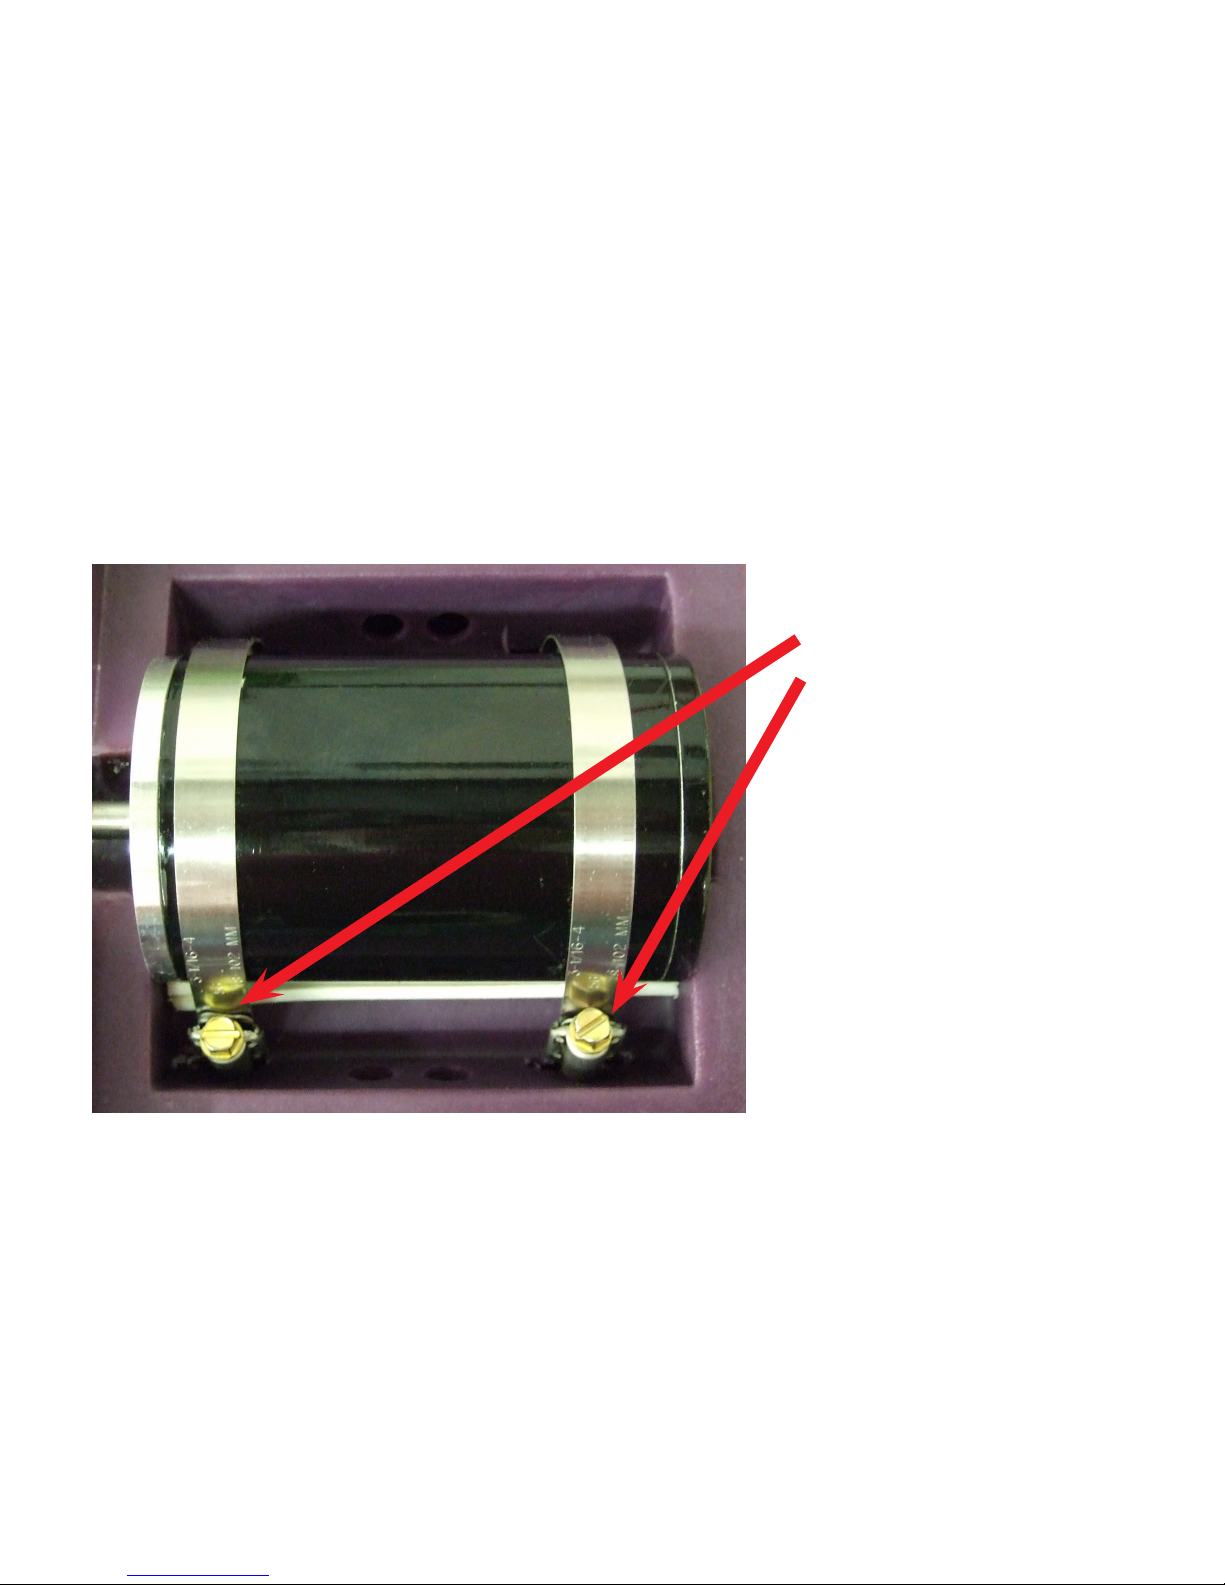
Adjust these
clamps to get the
blade parallel to
the slot in the
cutting table
Warranty
Your new Gryphon Diamond Slicer is warranted for one year from date of purchase. All mechanical parts
with the exception of the normal wear parts such as blades are guaranteed against failure for one year. If
such a failure occurs for any reason other than abuse or misuse during this period, it will be repaired (or at
our option replaced) free of charge FOB our factory. Retain your sales receipt for proof of purchase. Should
repairs ever be required, return the slicer to Gryphon Corporation.
© 2012 Gryphon Corporation • 12417 Foothill Blvd. • Sylmar • California • 91342 • (818) 890-7770 • www.gryphoncorp.com
Axial Adjustments
Follow these two easy steps if you notice your blade is not parallel to the slot in the table (Process may
require trial and error). Refer to the photograph below.
1) Remove the motor cover by unscrewing the cover screws and tighten or loosen the hex nuts
2) Adjust one clamp at a time using a 5/16” hexagonal nut driver to either tighten or loosen until the blade
re-aligns itself parallel to the table. Once the blade is parallel to the table, make sure the motor is securely
fit and there is no movement of the motor.
Table of contents
Popular Kitchen Appliance manuals by other brands

Tayama
Tayama TYG-35AF instruction manual

AEG
AEG 43172V-MN user manual

REBER
REBER Professional 40 Use and maintenance

North American
North American BB12482G / TR-F-04-B-NCT-1 Assembly and operating instructions

Presto
Presto fountain popper instruction manual

Westmark
Westmark 1035 2260 operating instructions


