GSSI SIR 3000 User manual


Copyright© 2003-2015 Geophysical Survey Systems, Inc.
All rights reserved
including the right of reproduction
in whole or in part in any form
Published by Geophysical Survey Systems, Inc.
40 Simon Street
Nashua, New Hampshire 03060-3075 USA
Printed in the United States
SIR, RADAN and UtilityScan are registered trademarks of Geophysical Survey Systems, Inc.

Geophysical Survey Systems, Inc. hereinafter referred to as GSSI, warrants that for a period of
24 months from the delivery date to the original purchaser this product will be free from defects
in materials and workmanship. EXCEPT FOR THE FOREGOING LIMITED WARRANTY,
GSSI DISCLAIMS ALL WARRANTIES, EXPRESS OR IMPLIED, INCLUDING ANY
WARRANTY OF MERCHANTABILITY OR FITNESS FOR A PARTICULAR PURPOSE.
GSSI's obligation is limited to repairing or replacing parts or equipment which are returned to
GSSI, transportation and insurance pre-paid, without alteration or further damage, and which in
GSSI's judgment, were defective or became defective during normal use.
GSSI ASSUMES NO LIABILITY FOR ANY DIRECT, INDIRECT, SPECIAL, INCIDENTAL
OR CONSEQUENTIAL DAMAGES OR INJURIES CAUSED BY PROPER OR IMPROPER
OPERATION OF ITS EQUIPMENT, WHETHER OR NOT DEFECTIVE.
Before returning any equipment to GSSI, a Return Material Authorization (RMA) number must
be obtained. Please call the GSSI Customer Service Manager who will assign an RMA number.
Be sure to have the serial number of the unit available
This device complies with Part 15 of the FCC Rules. Operation is subject to the following two
conditions: (1) this device may not cause harmful interference, and (2) this device must accept
any interference received, including interference that may cause undesired operation.
Warning: Changes or modifications to this unit not expressly approved by the party responsible
for compliance could void the user’s authority to operate the equipment.
Note: This equipment has been tested and found to comply with the limits for a Class B digital
device, pursuant to Part 15 of the FCC Rules. These limits are designed to provide reasonable
protection against harmful interference when the equipment is operated in a commercial
environment or residential installation. This equipment generates, uses, and can radiate radio
frequency energy and, if not installed and used in accordance with the introduction manual, may
cause harmful interference to radio communications. However, there is not guarantee that
interference will not occur in a particular installation.
Shielded cables must be used with this unit to ensure compliance with the Class B FCC
limits.
This Class B digital apparatus complies with Canadian ICES-003.
Cet appareil numerique de la classe B est conforme a la norme NMB-003 du Canada.
Operation is subject to the following two conditions: (1) this device may not cause interference, and (2)
this device must accept any interference, including interference that may cause undesired operation of the
device.


This manual is designed for both the novice and experienced user of ground penetrating radar. It is
intended as both a reference and a teaching tool and it is recommended that you read the entire manual,
regardless of your level of GPR experience. For information about GPR theory, please see the list of
general geophysics references that can be found in Appendix F.
If you experience operation problems with your system, GSSI Tech Support can be reached Monday-
Friday, 9 am - 5 pm EST, at 1-800-524-3011, or at (603) 893-1109 (International).
Thank you for purchasing a GSSI TerraSIRch SIR®System-3000 (hereafter referred to as SIR 3000). A
packing list is included with your shipment that identifies all of the items that are in your order. You
should check your shipment against the packing list upon receipt of your shipment. If you find an item is
missing or was damaged during the shipment, please call or fax your sales representative immediately so
that we can correct the problem.
Your SIR 3000 system contains the following items:
1- Digital Control Unit (DC-3000) with preloaded operating system.
1 - Transit Case
2 - Batteries
1 - Charger
1 - AC Adaptor
1- Sunshade
1- Operation Manual
Your choice of antenna, cables, and post-processing software is available for an additional purchase.
The SIR 3000 is a lightweight, portable, single-channel ground penetrating radar system that is ideal for a
wide variety of applications. The various components of the SIR 3000 are described below.
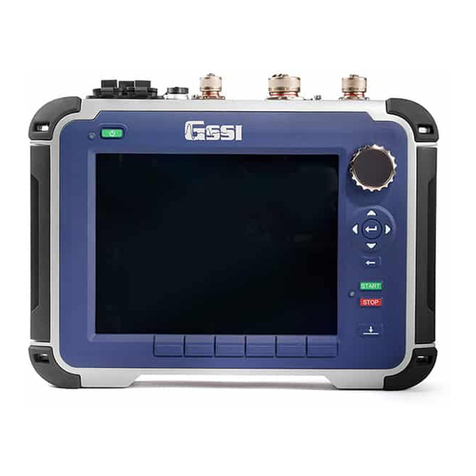
The major external features of the control unit are the keypad, color SVGA video screen, connector panel,
battery slot, and indicator lights. The video screen allows you to view data in real time or in playback
mode. It is readable in bright sunlight, although an optional sunshade for the unit is available. Prolonged
exposure to direct sunlight will cause the screen to heat up and may affect screen visibility.
Do not use Windex or other ammonia-based glass cleaner to clean the display screen as this may
damage the coating. Use only a clean, slightly damp cloth to gently clean the screen. Due to the screen’s
special coating for direct sun viewing, it is very susceptible to scratches. Take extreme care not to use any
abrasive materials or any solvents to clean the screen. The only recommended cleaning tool is a camera
quality lens cloth. Screen replacement due to scratching is not covered under the system’s warranty.

The battery slot in the front of the unit accepts the 10.8 V Lithium-Ion rechargeable battery provided.
Survey time with a fully charged battery is approximately 3 hours. Batteries are recharged with the
optional battery charger or by simply leaving the battery in the unit and connecting the unit to a standard
AC source and leaving the system in standby mode. Time to recharge a battery is approximately
4-5 hours. Be sure to keep the battery slot cover on the unit while in use to ensure that no dust or dirt
enters the unit’s interior.
On the back edge of the unit, the SIR 3000 has six connectors and one slot for the memory card. The five
top-row connectors are, from left to right: AC Power, Serial I/O (RS232), Ethernet, USB-B, and USB-A.
Data can be stored on Compact Flash cards, USB key drives (Compact Flash format), or
IBM Microdrives for transfer to PC for processing. These cards are widely available and are the same
type used in other digital devices such as cameras, MP3 players, and camcorders. The amount of system
card memory is totally dependent on your choice of memory card size.
Since radar profiles can sometimes be several megabytes in size, GSSI recommends that you
purchase a high capacity card.
If there is no memory card inserted when the system is first turned on, the system will save the
data profile to its internal system memory and data will have to be transferred with the USB
connection or by later inserting a memory card. The internal memory capacity is approximately 1
gigabyte. Please see Chapter 4: Data Transfer and File Maintenance for additional information on
transfer.
The large, protruding 19-pin connector at the back of the system is for the antenna
control cable. You will notice that antenna connection on the SIR 3000 has five notches cut from the
metal. These mate with the five raised nubs on the control cable to ensure that the pins line up properly.
Screw the cable connector collar onto the SIR 3000 to make proper contact. The cable should
only be hand-tightened. Do not use a wrench to tighten the connection as over-tightening will
result in damage. The cable connector collar should be screwed down far enough to cover the red
line on the SIR 3000 connector.
The only proper time to attach or detach an antenna is with system power off. Be sure to unplug
any external power and to remove the battery before attaching or detaching antennas. Putting the
SIR 3000 in Sleep Mode is not sufficient.
:Use of a Model 3207 pair (100 MHz) or a Model 3200 Multiple Low Frequency antenna
without a TR fiber optic link will cause damage to the SIR 3000’s transmit circuitry. Always be sure to
use a Model 570 Fiber Optic Transmit Link with the Model 3207 pair and use the fiber optic transmit
cable for the 3200 MLF.

Plug in the supplied universal AC power adaptor to run the system from 110-240 V, 47-63 Hz
power.
This is a standard serial connection that can be used to establish communication
between the SIR 3000 and a GPS. Please see Chapter 7: Using a GPS with your SIR 3000 for additional
information. This port is also used to connect the serial lead from the StructureScan Optical barcode
reader cart to the SIR 3000.
Functionality for this port is not currently available.
These ports are for connection to a variety of USB peripherals, including a keyboard
and memory device.

The keypad on the front of the unit has fifteen (15) buttons and two indicator lights.
This button turns the SIR 3000 on and off. To start up the system, insert a battery or connect AC
power and push the power button.
This grouping of five buttons is located right below the power button. The Enter key
is the one in the center. These buttons allow you to navigate through the menu tree.
Highlighting a menu item by pushing Up or Down on the menu tree and then pushing the Right
arrow will open any menus that are under that menu choice. Left arrow will collapse those menu
items to refresh the menu tree.
Pushing the Enter key on some menu items will cause a pop-up menu to appear so you can toggle
between two or more parameter choices.
For example: To setup data collection mode, pushing Enter when COLLECT > RADAR > MODE is
highlighted will bring up a pop-up menu which will allow you to choose from Time (continuous data
collect), Distance (survey wheel), or Point measurement. Highlight your choice and push Enter to see
your choice applied, and then Right arrow to accept and cause the pop-up menu to disappear.
This button is located below the Enter/Arrow Pad. Pushing this button while collecting data
will cause the system to set a User mark in the data.
User marks are helpful for noting distance traveled if you are not using a survey wheel and for
noting the location of obstacles such as columns, trees, pits, etc.
User marks will appear as long, dashed, vertical white lines through the data window.
This button is located below the Insert Mark button. Pushing the Run/Stop button in
COLLECT > RUN stops data collection and brings up a set of crosshairs. Clicking this button again
closes a data collection file and causes the system to ask if you want to save that file. Clicking this button
during Setup in modes other than TerraSIRch or Quick 3D will cause the system to re-initialize the gain
and position servos. This will reset the gains to the area under the antenna and could minimize clipping.
This button is located under the Start/Stop button. Pushing the Help button will bring up a menu of
help topics. The onscreen help is only accessible from the TerraSIRch splash screen. Use the Mark
button to highlight links and Enter to jump to a help topic. Pushing the Run/Stop button on the right hand
side of the unit will take you back to the previously viewed screen.
These six (6) buttons are located below the video screen. Pushing one of these from the
initial start screen will cause the SIR 3000 to operate in the desired software module.

Do not use Windex or other ammonia-based glass cleaner to clean the display
screen as this may damage the glare reduction coating. Use only a clean, slightly damp cloth to gently
clean the screen. Due to the screen’s special coating for direct sun viewing, it is very susceptible to
scratches. Take extreme care not to use any abrasive materials or any solvents to clean the screen. The
only recommended cleaning tool is a camera quality lens cloth. Screen replacement due to scratching
is not covered under the system’s warranty
Antennas are not hot-swappable. You
must turn off the SIR 3000 before connecting or disconnecting an antenna. Failure to remove power
may cause damage to the SIR 3000.
The SIR 3000 is weather resistant, but not weather proof. Try to avoid getting
the system wet. If you believe that water has gotten inside of the system, disconnect power, open the
battery compartment and input connector compartment on the back and allow the system to
thoroughly dry.
Use of a Model 3207 pair (100 MHz) or a Model 3200
Multiple Low Frequency antenna without a TR fiber optic link will cause damage to the SIR 3000’s
transmit circuitry. Always be sure to use a Model 570 Fiber Optic Transmit Link with the Model
3207 pair and use the fiber optic transmit cable for the 3200 MLF.


In Chapter 2, you will find instructions for connecting all of the hardware inputs and an introduction to
the different menus and functions that are available to you in TerraSIRch mode. TerraSIRch mode allows
you total control over all collection parameters and is the most versatile data collection method, usable for
all GPR applications. If desired, these 2-D profiles can later be transferred to a PC for processing in
GSSI’s RADAN™ post-processing software.
Hardware setup for the SIR 3000 is very simple. We will assume the 400 MHz (Model 5103) antenna for
this example, but the hardware connections are the same for other GSSI antennas, and the cable
connections are clearly marked. Follow the steps below.
Attach the survey handle between the two vertical mounting plates on the top of the antenna with the
two removable pins, adjust the angle for comfort, and connect the marker cable to the antenna at the
MARK port.

Connect the female end of the antenna control cable to your antenna. Then connect the male end to
the antenna connection on the back of the SIR 3000. Connect the two protective caps together. Attach
the survey wheel to the brackets at the back of the antenna (as shown below) and connect the cable to
the SURVEY port on the top of the antenna. Be sure that the triangular plate protecting the survey
wheel encoder faces down.
Connect power source (battery or AC) to the SIR 3000 and push the power button to turn on the
system.
If you purchased your SIR 3000 with a cart as in the UtilityScan System, or purchased the cart system
separately, please see Appendix C: Mounting your SIR 3000 on a Cart. The cart also incorporates a
survey wheel that is used in place of the survey wheel pictured earlier. If you have a StructureScan™
Standard or StructureScan™Optical system, please consult the hardware setup instructions in the small,
laminated QuickStart Guides that came with the system.

After the SIR 3000 boots up, you will see the introductory screen. There will be 6 icons positioned over
the Function Keys. The first one is TerraSIRch.
Pushing the Mark button switches your desired units between English and Metric.
TerraSIRch mode gives you complete control over all data collection parameters. Quick Start guides are
available for StructureScan and UtilityScan. The StructureScan Quick Start guide also covers the
ConcreteScan functionality. Push the TerraSIRch button. After a moment, you will see a screen divided
into three windows and there will be a bar running across the bottom with commands above each of the 6
Function Keys.
After entering one of the six data collection modes, you can return to this screen by either clicking the
Power button twice or by removing the battery and AC power and reinserting it to re-boot.
For information on other modes, please see Chapter 6.
On the far right of the screen you will see a window that shows a single radar scan in
an oscilloscope-style (O-scope) depiction. This will show successive single scans as you move your
antenna across an area while in Setup mode.
Time (depth) increases down the screen.
At the bottom of the window you will see a color bar. This shows you the distribution of colors
across the range of reflection amplitudes (size of the peaks of the scan to the left and the right of
center). The exact color and distribution depends on your choice of color table and color
transform.
The main data display window in the center shows a radar profile in linescan
format. In this depiction, successive single scans are assigned color values and stacked next to each other
in sequence to form a continuous image.
The vertical scale on the left of this data display window shows time, depth, or sample number.
New scans will be placed at the right side of the window and data will scroll from right to left.

The bar across the bottom of the screen is the Command bar and allows you
different toggles and functions depending on whichever system mode you are in at the time. You can
activate these commands by pushing the function key right below the wording. These commands are each
explained in more detail later on when the different system modes are discussed.
To the left of the main data display window is the parameter selection tree
window. This window is where you will navigate through the various commands, set system parameters,
and enter file name information. The tree is similar to the basic folder and file browser seen in many
Windows-based applications. Upon setup, you will see three choices that indicate the three modes of the
SIR 3000, COLLECT, PLAYBACK, and OUTPUT, as well as the SYSTEM menu used to change
system parameters.
The SIR 3000 has four main system menus, Collect, Playback, Output, and System. We will first look
briefly at the System menu.
If you are using your SIR 3000 for the first time or if you need to change
some system parameters, you should enter this menu first. Highlighting
SYSTEM and pushing the Right arrow will bring out seven additional
menu choices:
UNITS (page 11)
SETUP (page 11)
PATH (page 11)
BACKLIGHT (page 11)
DATE/TIME (page 12)
BATTERY (page 12)
LANGUAGE (page 12)
VERSION (page 12)

You can select appropriate units for DEPTH and DISTANCE, as well as the appropriate scale. For
example, if you are using a very high frequency antenna to scan 18 inches into concrete, you may choose
to display depth in inches and distance in feet. Under VSCALE, you can choose to display in depth, time,
or height. Time is measured in units of nanoseconds (ns). When set to time, the vertical scale displays two
way travel time (TWTT). If you set to depth, then the SIR 3000 will perform a time to depth conversion
based on the dielectric value that you have set in COLLECT > SCAN. It will then display the vertical
scale in depth. Height will invert the screen so that time-zero is at the bottom. This can be a useful display
if you are scanning upside-down.
This allows you to either save the current list of data collection parameters (hereafter called a setup),
recall saved setup, or a factory loaded one.
Factory setups cannot be overwritten, but the system has 16 slots where single user setups can be
saved.
After choosing your antenna under the COLLECT mode, you will have to find the correct setup
for that antenna and recall it.
These are named SETUP01 to SETUP16. SETUP00 is a default setup that contains the
parameters the system was collecting the last time that it was used.
Think of this as the location in which your files are stored on the SIR 3000. There are two basic types of
paths: Common and User-defined.
Each file in the Common path will be named with the word FILE and then a number. For
example, the first data file will be FILE001, then FILE002, and so on.
The user-defined path allows you to change the root name (instead of FILE) and the location of
your data. This is useful if you are surveying multiple areas or if you prefer to name your files
during collection with a site name instead of doing it later after download.
To create a user-defined path, select NEW from the Path menu. This will bring up a window with
six letters and an Up/Down arrow. Enter the new name by scrolling through the letters with the
Up/Down arrow. You can advance to the next ‘digit’ by using the Enter button. Once you are
finished, click the Right arrow.
To delete a Path you must first delete all of the data files. Then select TRANSFER > DELETE
again, the Remove Files window will pop-up, and you will see an option to REMOVE PATH.
Click Enter to put a check in that box and then Right Arrow to accept. The path will be removed
and the system will default to the Common path.
This controls screen brightness. The scale runs from 1 to 4 with 4 being the brightest. The darker the
screen is, the longer the battery will last because powering the screen is a large draw on the power supply.

Use this selection to set the system’s internal clock to the current date and local time. The SIR 3000 will
attach this information to each radar profile you collect. This information is saved and will not be lost
each time you turn the system off or remove the battery.
This selection allows you to check the remaining charge on the battery. The value here is rough
estimation of the remaining time until the battery is too low to power the SIR 3000. If you have external
power connected, the window will say External Power Supply.
This allows you to change the display language of the SIR 3000 to a number of pre-loaded language
packs. If your native language is not available, check the GSSI website periodically to see if the language
patch is available for download.
This allows you to check the current version of the TerraSIRch operating software. You should check the
GSSI website for updates to the Graphical User Interface (GUI) software. The GUI is listed at the bottom
of the Version pop-up window. Note which GUI version you have, then go to the GSSI Technical Support
website at , and click on the SIR 3000 Updates tab. You should also
download the instructions for the download. You will need a USB cable to link your SIR 3000 to your
PC, and you will also need a password and username for the secure section of GSSI’s website. You may
register for a password on the Technical Support section of the website.

The COLLECT menu is similar to the Collect Setup mode on the older GSSI SIR 2 and SIR 2000. If you
are familiar with those systems, you will notice a lot of similarities here. Under COLLECT, there are five
main sub-menus that can each be accessed by pushing the Down arrow to highlight the sub-menu, then
the Right arrow to see additional menus inside the sub-menu. These are:
SCAN (page 14)
GAIN (page 16)
POSITION (page 17)
FILTERS (page 17)

This sub-menu has four main choices: Antenna, T_RATE, MODE, and GPS.
Under this menu, you will be able to enter the center frequency of the particular
antenna you are using. This will allow the SIR 3000 to perform the auto-surface operation.
The T_RATE is the antenna transmit rate in KHz. This rate is capped at 100 KHz. A higher
transmit rate equals faster data collection ability. Some older antennas however, are not capable of
transmitting at high speeds and setting them at a high transmit rate may cause error. Please consult your
antenna documentation or call GSSI Tech Support if you have any question about transmit rate. All GSSI
5100 and 52000 series antennas (2.6 GHz, 2.0 GHz Palm, 1.6 GHz, 1.5 GHz, 1.0 GHz, 400 MHz, 270
MHz, 200 MHz) can be driven at 100 KHz. If you are using another GSSI antenna, consult Appendix E
for the proper transmit rate.
If your SIR 3000 beeps repeatedly with an older/high power antenna, you may have your T_RATE
set too high. This beeping is a high-voltage overload warning. A prolonged overload could damage your
system. Lower your T_RATE until the beeping stops.
The MODE selection allows you to collect data as point, distance, or time based. Point data
collection is commonly selected only for very deep applications or very difficult terrain. The system will
record one scan every time the external marker or Run/Stop button is pressed. The antenna is then moved
to the next location and the next scan is taken. In time based data collection, the system is recording a
certain amount of scans per second. The data density over an area depends on the speed that the antenna is
moved over the ground. The rate (scans/second) is set in the SCAN submenu. Distance-based collection is
performed with a survey wheel. The system records a certain number of scans per unit of distance. This is
the most accurate data collection method and it is strongly recommended that you collect data in this
mode if possible. Distance-based data is required for 3D files
This selection allows you to toggle the GPS capability on and off. Connect the GPS to the serial
port, and toggle this either to G30L if you are using the GPS receiver obtained from GSSI, or to
CUSTOM if you are using another GPS receiver.
If you are using the Acumen SDR Data Bridge/Logger purchased from GSSI, attach the serial lead from
the GPS to the Data port and attach the lead from the SIR 3000 to the Config port, and then select SDR
from the list under RADAR > GPS.
Consult Chapter 7 of this manual for additional instructions and setting up the GPS and working with it.
GSSI publishes information about GPS integration as Technical Notes that are available on the GSSI
Technical Support website at .
Scan contains six additional menus: SAMPLES, FORMAT, RANGE, DIEL, RATE, and SCN/UNIT.
Each scan curve is made up of a set number of individual data points, called Samples. The
more samples you collect, the smoother the scan curve and the better your vertical resolution will be.
You can choose from a preset list of 256, 512, 1024, 2048, 4096, or 8192 samples per scan. FIR
filters should not be used with 4096 or 8192 samples per scan.
Note that as sample number increases, maximum scan rate drops and file size increases.
GSSI recommends sampling at 512 or 1024 samples per scan for most applications. More
samples will be required for deep geologic or polar ice thickness applications.
Table of contents
Other GSSI Radar manuals
Popular Radar manuals by other brands

Endress+Hauser
Endress+Hauser Levelflex FMP53 FOUNDATION Fieldbus Brief operating instructions

Decatur Electronics
Decatur Electronics SI-3C user manual

Endress
Endress HART Levelflex FMP53 Brief operating instructions

HIK VISION
HIK VISION DS-TDSB00-EKT user manual

Furuno
Furuno WR-2100 Operator's manual

Kustom Signals
Kustom Signals EAGLE II Operator's manual