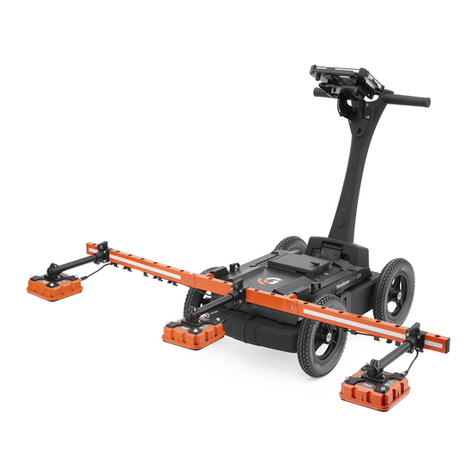
GSSI UtilityScan User manual

UtilityScan®
Quick Start Guide
MN71-292 Rev C

Copyright© 2017-2018 Geophysical Survey Systems, Inc.
All rights reserved
including the right of reproduction
in whole or in part in any form
Published by Geophysical Survey Systems, Inc.
40 Simon Street
Nashua, NH 03060-3075 USA
Printed in the United States
SIR, RADAN, UtilityScan and PaveScan are registered trademarks of Geophysical Survey Systems, Inc.

UtilityScan®Quick Start Guide
A Fast Check List for Field Operation
Introduction ........................................................................................................................................................................................................1
Section 1: Getting Started..............................................................................................................................................................................5
First Time Setup.................................................................................................................................................... 11
Section 2: Using ScanEZ Application.......................................................................................................................................................12
Collecting Data and Marking Targets with Scan EZ ............................................................................... 13
Section 3: Using the ScanMax Application 16
Collecting Data and Marking Targets with ScanMax ............................................................................. 20
Calibrating for Depth with ScanMax ............................................................................................................ 25
Other Functions in ScanMax: Understanding Gain, Focus, and Save Image ................................ 27
Using LineTrac.......................................................................................................................................................31
Using GPS................................................................................................................................................................ 33
Section 4: Playing Back Data.......................................................................................................................................................................35
Section 5: Data Transfer to a PC.................................................................................................................................................................37
Section 6: Updating the UtilityScan Software......................................................................................................................................40
Appendix A: Tablet Specific Cable and Accessory Set......................................................................................................................41
Appendix B: Optional Accessories............................................................................................................................................................42
Appendix C: Handle Configurations........................................................................................................................................................43
Appendix D: Examples of Common Targets.........................................................................................................................................44


Limited Warranty, Limitations of Liability and Restrictions
Geophysical Survey Systems, Inc. hereinafter referred to as GSSI, warrants that for a period of 24 months from the delivery date to the
original purchaser this product will be free from defects in materials and workmanship. EXCEPT FOR THE FOREGOING LIMITED
WARRANTY, GSSI DISCLAIMS ALL WARRANTIES, EXPRESS OR IMPLIED, INCLUDING ANY WARRANTY OF
MERCHANTABILITY OR FITNESS FOR A PARTICULAR PURPOSE. GSSI's obligation is limited to repairing or replacing parts
or equipment which are returned to GSSI, transportation and insurance pre-paid, without alteration or further damage, and which in
GSSI's judgment, were defective or became defective during normal use.
GSSI ASSUMES NO LIABILITY FOR ANY DIRECT, INDIRECT, SPECIAL, INCIDENTAL OR CONSEQUENTIAL
DAMAGES OR INJURIES CAUSED BY PROPER OR IMPROPER OPERATION OF ITS EQUIPMENT, WHETHER OR NOT
DEFECTIVE.
Before returning any equipment to GSSI, a Return Material Authorization (RMA) number must be obtained. Please call the GSSI
Customer Service Manager who will assign an RMA number. Be sure to have the serial number of the unit available.
Regulatory Information
Please see our website, www.geophysical.com/regulatoryinformation.htm, for current information and FCC Registration Form,
including:
FCC Notice for U.S. Customer
Canadian Requirements for RSS-220
Declaration of CE Conformance


UtilityScan Quick Start Guide Page 1
Introduction
Thank you for purchasing the UtilityScan by GSSI. GSSI is re-imagining the standard in underground utility locating by
pairing cutting-edge sensors with an advanced Android-based user interface to create a high performance product at an
affordable cost. The UtilityScan is designed with today’s busy subsurface professional in mind. It’s a tool that packs a ton
of simple-to-learn functionality into a ruggedly reliable package.
What Comes in the Box
•UtilityScan system, pre-assembled
•Your choice of control tablet (Consumer or
Ruggedized)
•Two (2) rechargeable lithium ion UtilityScan batteries
with charger
•Ethernet cable (2 meters long)
•AC power adaptor and set of international
plugs for the tablet
•USB drive for data transfer
•Tablet-specific cable and accessory set
(see Appendix A)
•Quick Start Guide (this document)

UtilityScan Quick Start Guide Page 2
About this Quick Start Guide
This document is provided to get you up and running with your new UtilityScan right out of the box. It details field setup
and use of the UtilityScan’s applications: Scan EZ and Scan Max. You can download an electronic copy of this guide
from GSSI’s Support site: www.support.geophysical.com.
GSSI also recommends that you take advantage of one of the training opportunities provided for the UtilityScan. GSSI
offers classroom-based training help by our professional training team. Please visit www.geophysical.com or contact
training@geophysical.com for more details.

UtilityScan Quick Start Guide Page 3
UtilityScan®
1
Ergonomic adjustable handle and tablet mount
2350 MHz HyperStacking antenna
3Survey wheel connector for cart config.
4GPS mount attachment point
5Ethernet connector
6Battery slot
7Power button
8Marking grooves
1
2
8
6
7
8
3
4
5

UtilityScan Quick Start Guide Page 4
UtilityScan Transport Configurations

UtilityScan Quick Start Guide Page 5
Section 1: Getting Started
This section assumes that you are using WiFi to connect to the UtilityScan.
1GSSI recommends fully charging the batteries and the tablet prior to use.
2Unfold the UtilityScan cart and place the tablet into the mount.
3Slide a fully charged battery into the battery slot at the top of the UtilityScan until the battery release lever at the
front of the battery opening locks into place. The groove along the top side of the battery should face up.
To eject the battery, push down on the battery release lever.
4Push the Power button on the top of the UtilityScan housing. A blue ring will illuminate around the button.
The UtilityScan is booting up and is ready to connect to the tablet when the blue ring begins to flash.
5Turn on the tablet and tap the UtilityScan icon. You will briefly see the UtilityScan splash screen as the UtilityScan
app boots up and then the connection screen will appear.
Note: The blue ring around the power button also indicates the WiFi connection status. A flashing blue ring indicates
that the UtilityScan WiFi is broadcasting and ready to connect. A solid blue ring indicates that the system is actively
collecting data.

UtilityScan Quick Start Guide Page 6
Connecting to the UtilityScan with WiFi
1Make sure that the UtilityScan is turned On and
tap the UtilityScan app icon. After a short splash
screen, you will see the image at the right. This
image shows five UtilityScans are broadcasting
nearby. You will likely see only one entry.
2The center of the screen will show one entry for
each UtilityScan the app detects. Individual
systems are identified by their serial numbers
which will show after the zeros.
3Tap the box next to the correct UtilityScan entry
and then tap Connect. The connection will
establish after a few seconds and UtilityScan Main Menu screen will appear.
Note: The UtilityScan app will remember the last UtilityScan antenna to which it connected. The next time you open
the app, it will auto connect if it detects the last UtilityScan antenna. The connection screen will flash and the go to the
Main Menu screen. If you have multiple UtilityScan antennas, be sure to turn them on and connect one at a time. Once
connected, the UtilityScan antenna will not connect to another tablet until disconnected from the its current tablet.

UtilityScan Quick Start Guide Page 7
Connecting to the UtilityScan via Ethernet
1Make sure that both the tablet and the UtilityScan antenna are powered Off.
2Unscrew the protective cap covering the antenna Ethernet connector and connect the Ethernet cable to the antenna.
Connect the other end of the Ethernet cable to the tablet. Note that you may need to use the included adapter cable
depending on your tablet.
3Power on the antenna first and wait for the blue light around the antenna power button to flash before turning on the
tablet.
4Power on the tablet and note the Ethernet symbol <…> in the top-right corner of the Android desktop. If you do not
see it wait for it to appear before going on to the next step.
5Tap the UtilityScan app icon. The system is now communicating over Ethernet and the WiFi radio on the UtilityScan
antenna will automatically turn off after 15-20 minutes.
Note that the WiFi radio on your tablet will remain on. If you are in an environment where WiFi is not permitted, you can
turn it off by following these steps:
1From the Android tablet desktop, tap Settings:
2Tap Wi-Fi from the Wireless & Networks section
at the top.
3Tap the slider toggle on the top right to turn WiFi off. Remember to turn it on again to use WiFi in the future.

UtilityScan Quick Start Guide Page 8
Connecting/Disconnecting to Another WiFi Network and Navigating WiFi in Android
There may be times when you want to connect your tablet to another network to download updates. Bear in mind
however, that you should treat this tablet as part of the GPR data collection instrument and avoid loading unnecessary
apps such as games, etc.
To connect to a wireless network:
1Turn your UtilityScan antenna Off.
2From the Android tablet desktop, tap Settings.
3Tap Wi-Fi from the Wireless & Networks section at the top. You will see a list of available networks.
Tap the one to which you want to connect.
4Input the network password.

UtilityScan Quick Start Guide Page 9
Note:You will need to manually disconnect from any non-UtilityScan connections before connecting to the antenna.
You will need to do this even if the network you had connected to is off or out
of range. Follow these steps to do so:
1From the Android tablet desktop, tap Settings.
2Tap Wi-Fi from the Wireless & Networks section at the top. You will see a
list of available networks. Tap the one to which you want to disconnect.
A box with the network information will pop up.
3Tap Forget. You can now connect to the UtilityScan antenna normally.

UtilityScan Quick Start Guide Page 10
The Main Menu Screen
App Selection
Carousel
Menu Carousel Softkeys
Battery, Status, and Storage Indicators
Sidebar Buttons
Exit the UtilityScan program and
return to the tablet desktop

UtilityScan Quick Start Guide Page 11
First Time Setup
1Set Language: Make sure that the UtilityScan is in the ScanMax App. Tap on the Secondary Menu
softkey in the Menu Carousel to display the secondary menu. Tap Select Language and choose your
desired language.
2Set Units: Tap Units from the Menu Carousel to toggle between English (Imperial) and
Metric units.
3Calibrate Antenna: This option will run an auto-calibration routine on the antenna signal position. Assuming a
correct dielectric value, this will ensure your depths are more accurate.
4Calibrate Survey Wheel:While there is minimal manufacturing variation in the survey wheel encoders, it is still
a good idea to occasionally calibrate the survey wheel to ensure distance accuracy.
5Save Prompt: Tap this to toggle the Save File courtesy check on and off. Setting this to Off will cause the
UtilityScan to automatically save each file.
The choices you have made here will carry over to the ScanEZ Collection Apps.
The status indicator shows (from left to right): 1) Antenna battery power. 2) Tablet storage.
3) Antenna connectivity (white = positive, gray = negative). 4) LineTrac module (white = on,
gray = off, crossed = damaged. 5) GPS indicator.
Secondary Menu Softkey

UtilityScan Quick Start Guide Page 12
Section 2: Using ScanEZ
Application
Before collecting any data, you may want to configure
your UtilityScan. Tap ScanEZ from the App Carousel.
1Choose Inspection Depth: Tap Depth to toggle
through the pre-set depth settings. GSSI
recommends setting the inspection depth a little
deeper than required.
2Set Soil Type: GPR energy travels at different
speeds though different materials. Setting this close
to the material type through which you are scanning
will provide more accurate depth readings. These
names refer to the majority of material, not just the surface cover. See Appendix A in this guide for details.
3Choose Color Table: This will set the data display color. GSSI recommends that new users choose
Color Table 1.
4Once you have configured the UtilityScan, tap Collect to begin collecting data.
Note:The UtilityScan will detect the direction of first movement as “Forward.” This means that if you pull the
cart backwards as the first movement after tapping collect, the UtilityScan will collect data going backwards.
This will not change the direction which the data file scrolls on the screen.

UtilityScan Quick Start Guide Page 13
Collecting Data and Marking Targets with Scan EZ
The image at the right shows
the tablet screen while the
UtilityScan is actively
collecting data. Data will be
added to the left edge of the
screen as you push the cart.
The left edge ruler indicates
a depth estimate based on the
current dielectric value. The
current project number and
file name are shown at the
top-left corner of the top bar.
The top bar also indicates
depth, linear position,
dielectric, and current app.
Targets such as pipes will
appear as hyperbolas when
crossed at a 90-degree angle.
Rebar embedded in concrete
Hyperbolas from targets

UtilityScan Quick Start Guide Page 14
The image at the right shows the buttons
active on the bottom Menu Carousel
when the UtilityScan is backing up to
mark a target.
Once you have identified a target which
you want to mark, simply back up the
UtilityScan in a straight line. You will
see the yellow vertical backup cursor
appear on the screen. Move the
UtilityScan until the cursor bisects the
hyperbola. Draw a mark on the ground
lining up with the marking grooves on
the side of UtilityScan cart.
The image at the right shows the Gain
function. Gain will help to brighten the
screen contrast and may make it easier
to see targets. Tap Gain to bring up the
control sidebar. Gain Level will affect
the whole vertical scale while Shallow and Deep will focus on those portions of the image.
Tap Save Image to save a screen shot of the current view.
You must save the data file and transfer it to your PC in order to access the saved image.
Backup Cursor
Table of contents
Other GSSI Radar manuals
Popular Radar manuals by other brands

Hesai
Hesai PandarQT user manual

Endress+Hauser
Endress+Hauser Micropilot FMR53 Brief operating instructions

Endress+Hauser
Endress+Hauser Levelflex FMP55 operating instructions

Hesai
Hesai Pandar40P user manual

Decatur Electronics
Decatur Electronics Genesis VP Directional user manual

Endress
Endress HART Levelflex FMP53 Brief operating instructions

Endress+Hauser
Endress+Hauser micropilot S FMR 532 operating instructions

IDS GeoRadar
IDS GeoRadar RockSpot user guide

nanoradar
nanoradar NRA24 user manual

HART
HART micropilot M FMR 230 operating instructions

Raymarine
Raymarine SL70 PLUS Quick reference card

Endress+Hauser
Endress+Hauser Levelflex M FMP43 Brief operating instructions