GTCO CalComp QUIKRULER User manual

QuikRuler
Contents
IntroducingQuikRuler 1
SettingUp 2
Components 2
Connecting the Components 3
Digitizer Connections 3
Interface Module Connections 3
Display Module Connections 4
Optional PC Connections and
Program Installation 4
Starting QuikRuler 5
Making Selections 6
Stylus 6
16-Button Cursor 6
4-Button Cursor 6
ConfiguringQuikRuler 7
Locating the Menu 7
Relocating the Menu at Start-up 8
Relocating the Menu While Working
with QuikRuler 9
If You Lose the Menu Location 9
Using the Configure Block 10
Setting Fractional Digits 11
Setting Tone Options 12
Selecting Your Language 13
Choosing the Decimal Point Character 15
Setting the Last Output Character 15
Setting Scale and Units 16
Identifying the Unit of Measure 16
Setting the Scale Manually 17
Setting the Scale Automatically 19
Setting the Counting Scale 21
Contents
53-00039 C.p65 10/4/00, 11:54 AM1

GTCO
GTCO Document Number 53-00039, Revision C
GTCO Corporation, 1994. Under copyright laws,
this manual may not be copied in whole or in part,
without the written consent of GTCO Corporation.
PRECISIONinside is a trademark of Timberline
Software Corporation. Roll-Up and QuikRuler
are trademarks of GTCO Corporation. All other
marks are the marks of their respective
Companies.
GTCO Corporation, 7125 Riverwood Drive,
Columbia, MD 21046, USA
Phone (410) 381-6688 • Fax (410) 290-9065
Contents
Measurements 23
Measuring the Size of an Area 23
Area Shortcut 24
Adding or Subtracting Areas 25
Measuring the Length of a Perimeter 26
Counting Elements of Your Drawing 26
Measuring a Straight Segment 27
Measuring a Continuous Length 28
Adding or Subtracting Segments
and Lengths 29
Using QuikRuler as a Calculator 30
Editing Data on the Display 31
Correcting Mistakes When Accumulating
Measurements 31
Clearing the Total 31
Correcting Numeric Entries 32
Sending Data to Your PC 33
Messages 35
Radio and Television Interference 37
Appendix 39
Transducer Button Functions 39
Limited Warranty for QuikRuler 40
53-00039 C.p65 10/4/00, 11:54 AM2

QuikRuler
Introducing QUIKRULER
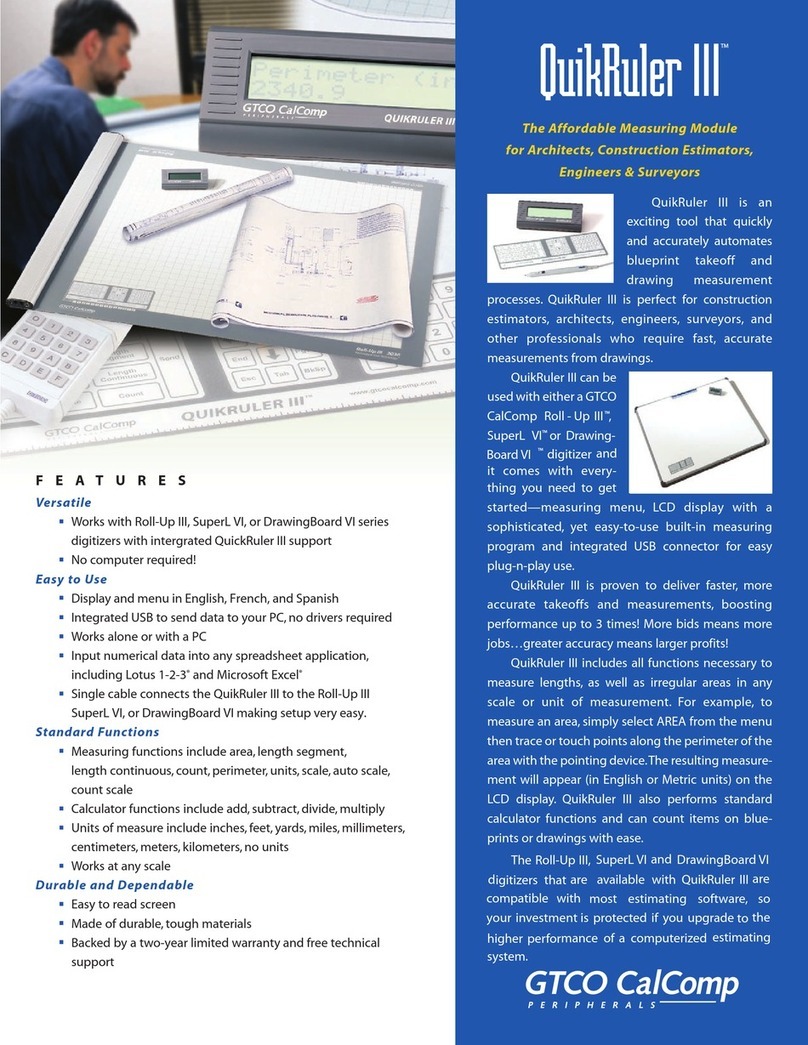
Congratulations for purchasing the GTCO
QuikRuler. QuikRuler is a portable measuring
system that is perfect for estimators, builders,
contractors, surveyors, scientists, planners,
designers, appraisers, and anyone else who
needs to take measurements from blueprints,
maps, diagrams, and other drawings.
With QuikRuler, you can quickly measure areas,
perimeters, and lengths, using any scale and
unit of measure. You can perform more complex
measurements by adding or subtracting areas
and lengths. The built-in measurement functions,
combined with QuikRuler's calculator, make
QuikRuler an indispensable tool. And with the
optional PC interface, you can send results
directly from the QuikRuler display to your PC,
for use in a spreadsheet or estimating package.
Best of all, you don't need any special
experience or training to use QuikRuler. Simply
select an option from the QuikRuler menu, touch
the stylus or cursor to the drawing, and read the
result on the QuikRuler display.
1
Introduction
53-00039 C.p65 10/4/00, 11:54 AM3

GTCO
Setting Up
Components
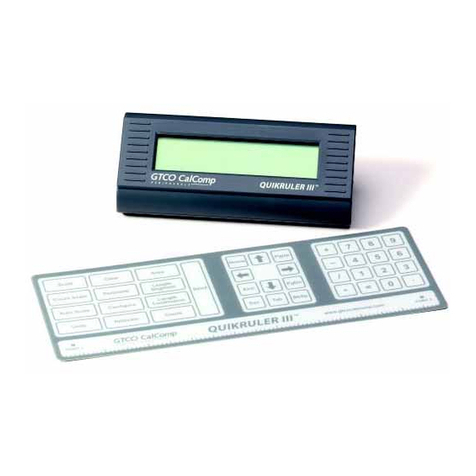
QuikRuler combines a digitizer, stylus or cursor,
and portable display into a single system that is
easy to move and set up as needed.
QuikRulerMenu
GTCORoll-UpDigitizerTablet
2
As an option, use your
computer to take input from
QuikRuler
Stylus
(A 4-button or 16-button
cursorcanalso beused)
InterfaceModule
DisplayModule
SettingUp
53-00039 C.p65 10/4/00, 11:54 AM4

QuikRuler
Connecting the Components
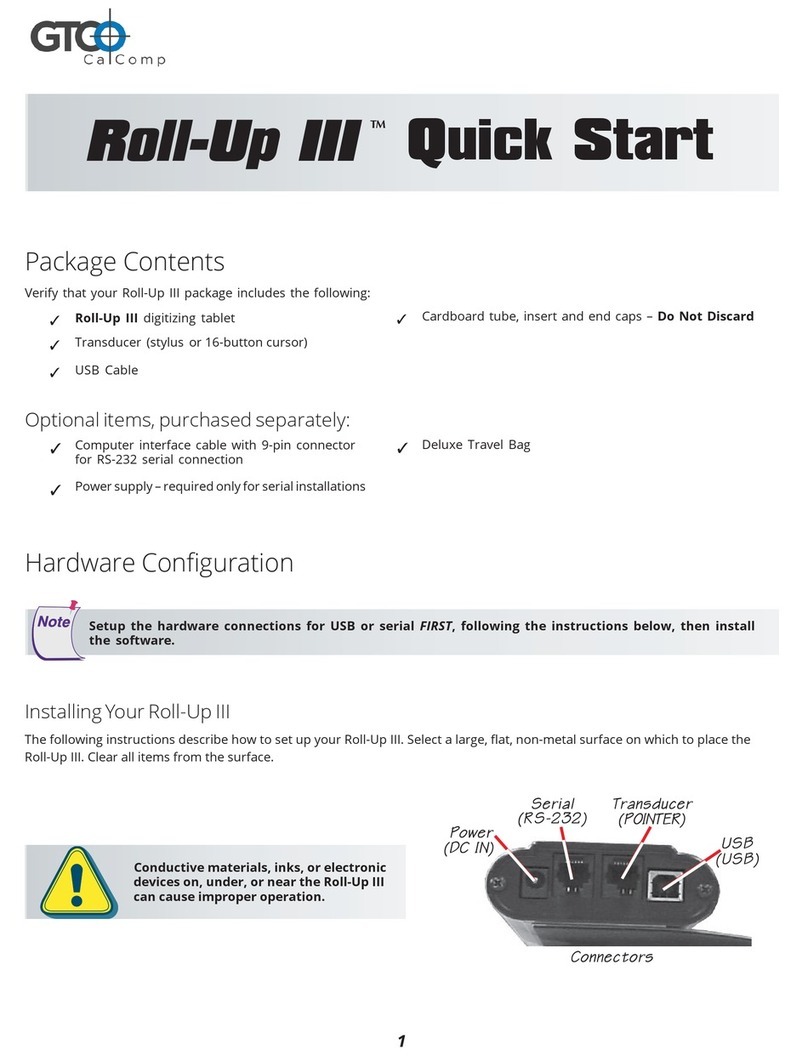
•Connect the stylus (or optional cursor) to the
digitizer.
•Connect the QuikRuler interface module to the
digitizer.
•Connect the QuikRuler display module to the
interface module.
•Connect the power cable to the interface
module.
DigitizerConnections
Interface Module Connections
3
Connecttodisplaymodule
Connecttopowersupply Connect to digitizer
Connectto
stylus/cursor
Connectto
interfacemodule
DONOTconnect
digitizerpower
supply if using a
Roll-UpDigitizer.
Powerissupplied
from the QuikRuler.
SettingUp
53-00039 C.p65 10/4/00, 11:54 AM5

GTCO
4
DisplayModuleConnections
OptionalPCConnections
andProgramInstallation
If you want to use QuikRuler with a PC, you must
attach the interface module to an available PC
serial port and install the QuikRuler interface
program.
•Insert the QuikRuler disk into drive A (or B).
•Type a:install (or b:install) at the DOS prompt
and press ENTER.
•Follow the instructions on your screen.
Connect to the serial port on
the back of your PC
Connectto
interfacemodule
SettingUp
53-00039 C.p65 10/4/00, 11:54 AM6

QuikRuler 5
Starting QuikRuler
QuikRuler starts up when you connect the power
supply. If the start-up was successful, you
should hear four short beeps from the digitizer
and, after the sign-on messages, line 1 of the
display should read Select from Menu. Line 2
of the display will show the current X-axis and Y-
axis position of the stylus and a number
indicating the status of the stylus switches. If the
stylus is over the menu, the numbers will be
replaced by minus signs (- -----,-----) or, if the
stylus is not in the tablet's measuring area, the
numbers will be replaced by asterisks
(* *****,*****).
Press the tip of the stylus on a menu function
button to begin using QuikRuler.
SettingUp
53-00039 C.p65 10/4/00, 11:54 AM7

GTCO
MakingSelections
You can use either a stylus or a cursor to trace
and measure drawings. You can also use either
device to make selections from the QuikRuler
menu. This manual assumes you have a stylus.
Stylus
16-Button Cursor
4-Button Cursor
Crosshairsfortracing
orselecting
Crosshairsfortracing
orselecting
Press any button on the bottom
three rows to activate a menu function
without pointing to the menu.
(see"TransducerButtonFunctions")
Press the white, green or blue button on
the cursor to activate a menu function
without pointing to the menu.
(see"TransducerButtonFunctions")
6
Press any button on the top
row to make a selection.
(sameasstylustipswitch)
Press the yellow button
on the cursor to make a selection.
(sameasstylustipswitch)
SettingUp
Tomakeaselection
with the stylus,
press the tip down. Press the side button to
use the Count function.
For more information, see
"CountingElementsof
Your Drawing" later in this
manual.
53-00039 C.p65 10/4/00, 11:54 AM8

QuikRuler
Configuring QuikRuler
Locating the Menu
Use the QuikRuler menu to select functions you
want to use.
When QuikRuler is shipped to you, it is
programmed to expect the menu to be in the
lower left corner of the digitizer surface.
7
When you first start QuikRuler,
it expects the menu to be in the
digitizer's lower left corner.
Configuring
53-00039 C.p65 10/4/00, 11:54 AM9

GTCO
Relocating the Menu at Start-Up
When you start QuikRuler, it shows the following
message for five seconds.
Press Switch to
Relocate Menu...
If you want the menu to be in a different location,
you can relocate it when you start QuikRuler:
•Put the menu where you want it to be and tape
it down. The entire menu must be within the
digitizer's measuring area.
•Power up the QuikRuler.
•Press the stylus tip anywhere when the
Relocate Menu message is displayed.
•QuikRuler prompts you to Select Left Pnt
•Press the stylus on the left point of the menu.
•QuikRuler prompts you to Select Right Pnt
•Press the stylus on the right point of the menu.
8
Left point Right point
Configuring
53-00039 C.p65 10/4/00, 11:54 AM10

QuikRuler 9
Relocating the Menu while
Working with QuikRuler
You can change the location of the menu at any
time while working with QuikRuler:
•Select
•Put the menu where you want it to be and tape
it down.
•QuikRuler prompts you to Select Left Pnt
•Press the stylus on the left menu point.
•QuikRuler prompts you to Select Right Pnt
•Press the stylus on the right menu point.
See the previous page for an illustration of the
left and right menu points.
If You Lose the Menu Location
Sometimes you might move the menu without
first telling QuikRuler that you want to relocate it.
Don't panic! Instead:
•Tape the menu down where you want it to be.
•Disconnect the power supply.
•Reconnect the power supply and listen for four
beeps.
•When QuikRuler displays
Press Switch to
Relocate Menu...
press the stylus tip anywhere to enter the
relocate mode.
•Follow the prompts that QuikRuler shows you
to select the left and right points. See the
previous sections for details.
Configuring
53-00039 C.p65 10/4/00, 11:54 AM11

GTCO
10
Using the Configure Block
QuikRuler provides a number of user preference
settings.
•Select
•QuikRuler displays a preference option and its
current setting.
•Select repeatedly or use
and until you see the option you
want to change:
Digits Rt of '.'
Select Tones
Select Language
Decimal Pnt Char
Last Character
•Use and to change the current
setting of the displayed option. See the
following sections for details on each option.
Configuring
53-00039 C.p65 10/4/00, 11:54 AM12

QuikRuler 11
SettingFractionalDigits
QuikRuler displays 0 to 8 digits to the right of the
decimal point.
•Select
•Select repeatedly or use
and until Digits Rt of '.' is
displayed on line 1.
•The current number of digits setting is
displayed on line 2 beneath the flashing
cursor.
•Change the current setting by selecting a
number from to on the QuikRuler
menu.
•Select or select another option or
function.
Configuring
53-00039 C.p65 10/4/00, 11:54 AM13

GTCO
12
SettingToneOptions
QuikRuler can provide an audible tone when
you make a selection from the menu, when you
press the stylus on the digitizer tablet, or both.
You can also turn off the tones entirely.
•Select
•Select repeatedly or use
and until Select Tones is
displayed on line 1.
•The currently selected tone option is displayed
on line 2.
•Use or repeatedly until you see the
tone setting that you want to use:
Menu + Tablet
MenuOnly
TabletOnly
Disabled
•Select or select another option or
function.
Configuring
53-00039 C.p65 10/4/00, 11:54 AM14

QuikRuler 13
SelectingyourLanguage
QuikRuler supports a variety of languages.
•Select
•Select repeatedly or use
and until Select Language is
displayed on line 1.
•The currently selected language is displayed
on line 2.
•Use or repeatedly until you see the
language you want to use.
•Select or select another option or
function.
Configuring
53-00039 C.p65 10/4/00, 11:54 AM15

GTCO
14
Choosing the Decimal Point Character
QuikRuler can display either a "." or a "," as the
decimal point when numeric values are
displayed.
•Select
•Select repeatedly or use
and until Decimal Pnt Char is
displayed on line 1.
•The currently selected character is followed by
the flashing cursor on line 2.
•Use or to move the cursor to the
character that you want to use.
•Select or select another option or
function.
Configuring
53-00039 C.p65 10/4/00, 11:54 AM16

QuikRuler
Setting the Last Output Character
When is selected, line 2 of the display is
sent to the computer if a numeric value is
displayed. The line 2 value is terminated by the
character selected in this option.
•Select
•Select repeatedly or use
and until Last Character is
displayed on line 1.
•The currently selected last character is
displayed on line 2.
•Use or repeatedly until you see the
last character that you want to use:
Enter
Tab
Down Arrow <↓>
Right Arrow <→>
•Select or select another option or
function.
15
Configuring
53-00039 C.p65 10/4/00, 11:54 AM17

GTCO
16
Setting Scale and Units
Use the and functions to
tell QuikRuler the scale of the drawing you are
measuring and the units in which you want
measurements to be displayed.
Identifying the Unit of Measure
Use the function to identify the units in
which you want measurements to be displayed.
(See the next sections for details about setting
the scale of measurements.)
For example, suppose you are working with a
map where 1 centimeter on the map represents
3 kilometers. You would first use to
tell QuikRuler that you want to measure your
drawing in centimeters and display the result in
kilometers. You would then use to set
a 1:3 scale.
Note: You can also select at any time
to convert the current measurement, shown on
the second line of the display, to a different unit
of measure.
Scale/Units
53-00039 C.p65 10/4/00, 11:54 AM18

QuikRuler 17
To set the units:
•Select
•QuikRuler displays:
Measured (cm)
Displayed (km)
where, from the previsous example,
centimeters are the units you want to measure
from your drawing and kilometers are the units
you want to display. The flashing cursor
follows the unit that may be changed.
•Select repeatedly or use
and until you see the units you
want to use:
mm in
cm ft
myd
km mi
•Select or select another function.
Setting the Scale Manually
If you know the scale of the drawing you are
working with, you can enter the measurement
scale manually:
•Use to select the unit of measure for
the first part of the scale. For example, if 1
centimeter equals 3 kilometers, select cm as
Scale/Units
53-00039 C.p65 10/4/00, 11:55 AM19

GTCO
18
the unit of measure and km as the displayed
unit. For more information, see "Setting Units"
earlier.
•Select
•QuikRuler displays Scale cm:km on line 1,
where cm is the current unit of measure and
km is the current displayed unit as selected in
the function.
•QuikRuler displays the current scale setting on
line 2. For example, if the current scale is 1cm
= 3km, QuikRuler displays 1:3 on line 2 with
the flashing cursor positioned over the 3.
•Change the scale by selecting a number on
the QuikRuler menu. For example, select
if the desired scale is 1cm = 5km.
•If the drawing scale is larger than 1:1, use a
decimal value. For example, if the scale is 5:1,
divide both sides of the ratio by 5 and select
so that the scale reads 1:.2
•If the drawing scale is given as 1/8 in=1 ft, for
example, multiply both sides of the equation
by 8 so that 1 in = 8 ft and select so that
the QuikRuler scale reads 1:8.
•Select or select another function.
Scale/Units
53-00039 C.p65 10/4/00, 11:55 AM20
Table of contents
Other GTCO CalComp Measuring Instrument manuals
GTCO CalComp
GTCO CalComp Super L VI Series User manual

GTCO CalComp
GTCO CalComp Roll-Up III User manual

GTCO CalComp
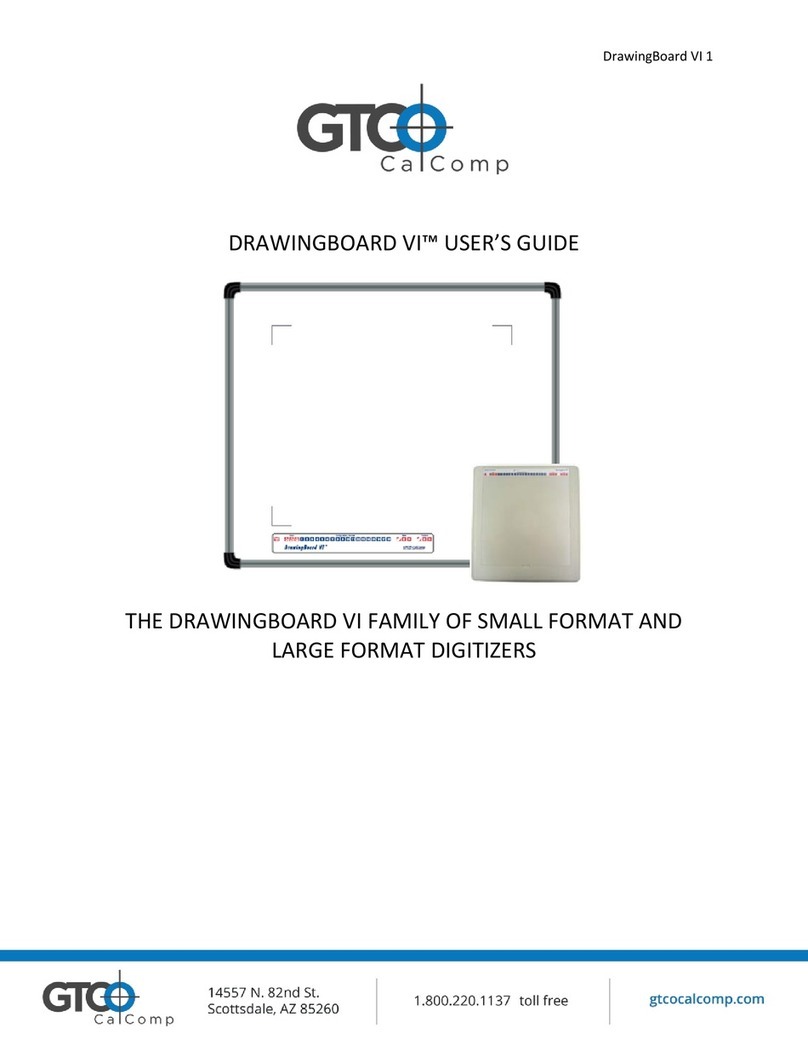
GTCO CalComp DrawingBoard VI User manual
GTCO CalComp
GTCO CalComp Roll-Up III User manual

GTCO CalComp
GTCO CalComp QuikRuler III User manual
GTCO CalComp
GTCO CalComp Roll-Up III User manual

GTCO CalComp
GTCO CalComp QuikRuler III User manual

GTCO CalComp
GTCO CalComp DrawingBoard VI User manual