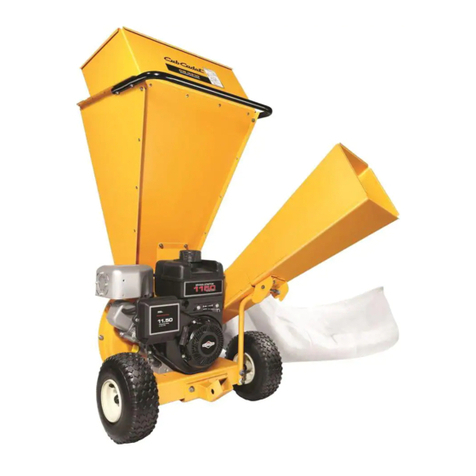
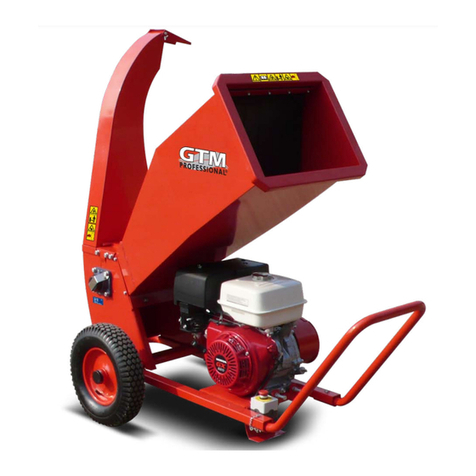
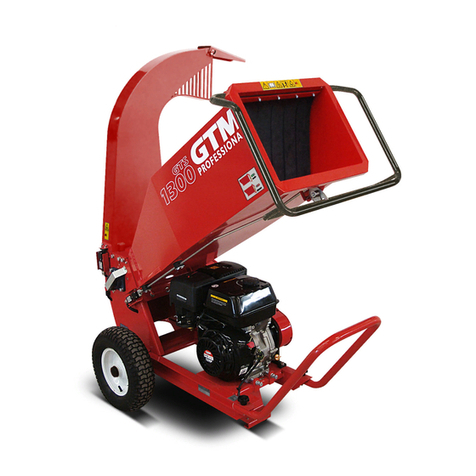
GTM Professional GTS1300C User manual

User manual GTS1300C
Compo wood chipper low & high output
English
Original instructions
D09-CC13S20-11

Preface
© Technische Handelmaatschappij J. De Wild B.V.
This document or parts thereof may not be reproduced, copied, distributed, stored in a retrieval
system, or transmitted in any form or by any means, electronically nor otherwise, without the prior
written permission of Technische Handelmaatschappij J. De Wild B.V.
Specifications and illustrations are subject to change without prior notice. Technische
Handelmaatschappij J. De Wild B.V. will not accept liability for any alteration or typing error. Details
and values given in this manual are average values and have been compiled with care. They are
not binding, however, and Technische Handelmaatschappij J. De Wild B.V. disclaims any liability
for damage or detriments suffered as a result of reliance on the information given herein or the use
of products, processes or equipment to which this document refers.
Introduction
2D09-CC13S20-11

Contents
1 Introduction............................................................................................... 6
1.1 About this document..................................................................................................................... 6
1.1.1 Purpose of this document................................................................................................. 6
1.1.2 Language.......................................................................................................................... 6
1.1.3 Illustrations........................................................................................................................6
1.1.4 Symbols used in this document........................................................................................ 6
1.2 About the machine and model types in this document................................................................. 7
1.3 How to use this document............................................................................................................ 7
1.4 Contact information.......................................................................................................................7
1.5 Warranty conditions...................................................................................................................... 7
2 Safety........................................................................................................9
2.1 Approved user.............................................................................................................................. 9
2.2 Liability..........................................................................................................................................9
2.3 Personal protective equipment..................................................................................................... 9
2.4 Safety signs on the machine.......................................................................................................10
2.5 Safety instructions...................................................................................................................... 13
2.5.1 General safety instructions............................................................................................. 13
2.5.2 Safety instructions for use...............................................................................................13
2.5.3 Safety instructions for maintenance, transport and storage............................................14
2.6 Disposal...................................................................................................................................... 14
3 Description.............................................................................................. 15
3.1 Intended use............................................................................................................................... 15
3.2 Identification of the machine....................................................................................................... 15
3.3 Overviews................................................................................................................................... 16
3.3.1 Overview of the main components..................................................................................16
3.3.2 Overview of the engine controls......................................................................................17
4 Installation...............................................................................................18
4.1 Install the input............................................................................................................................18
4.2 Install the low output................................................................................................................... 19
4.2.1 Remove the cover plate of the low output.......................................................................19
4.2.2 Install the low output....................................................................................................... 19
4.3 Install the high output..................................................................................................................20
4.3.1 Remove the cover plate of the high output..................................................................... 20
4.3.2 Install the high output......................................................................................................21
4.4 Install the handle.........................................................................................................................22
Contents
D09-CC13S20-11 3

5 Instructions for use..................................................................................23
5.1 Prepare for use........................................................................................................................... 23
5.2 Fill the fuel tank...........................................................................................................................23
5.3 Change the output...................................................................................................................... 24
Change to the high output..................................................................................................... 24
Change to the low output.......................................................................................................24
5.4 Start the machine........................................................................................................................24
5.5 Use the machine.........................................................................................................................25
5.6 Stop the machine........................................................................................................................25
5.7 Transport the machine................................................................................................................25
5.8 Use the panic bar in case of an emergency............................................................................... 26
5.9 Release the panic bar.................................................................................................................26
6 Preventive maintenance......................................................................... 27
6.1 Preventive maintenance schedule..............................................................................................27
6.2 Do a functional test of the panic bar........................................................................................... 27
6.3 Do a detection test of the output.................................................................................................27
6.4 Do a detection test of the input................................................................................................... 28
6.5 Clean the machine......................................................................................................................29
6.6 Do a check of the tension of the belts.........................................................................................29
6.7 Replace the air filter....................................................................................................................30
6.8 Fill the engine with oil................................................................................................................. 31
6.9 Lubricate the bearing housing.................................................................................................... 31
6.10 Replace the belts........................................................................................................................ 32
6.10.1 Remove the cover...........................................................................................................32
6.10.2 Remove the belts............................................................................................................32
6.10.3 Install the belts................................................................................................................33
6.10.4 Adjust the tension........................................................................................................... 33
6.10.5 Do a check for correct operation.....................................................................................34
6.11 Align the pulleys..........................................................................................................................34
7 Corrective maintenance.......................................................................... 36
7.1 Do maintenance on the blades................................................................................................... 36
7.1.1 Lock the rotor.................................................................................................................. 36
7.1.2 Remove the blades......................................................................................................... 36
7.1.3 Turn the blades............................................................................................................... 37
7.1.4 Sharpen the blades.........................................................................................................37
7.1.5 Install the blades............................................................................................................. 38
7.1.6 Adjust the gap................................................................................................................. 38
7.1.7 Finish.............................................................................................................................. 39
7.2 Do maintenance on the engine...................................................................................................39
7.3 Remove a blockage.................................................................................................................... 39
Contents
4D09-CC13S20-11


7.3.1 Do a visual check............................................................................................................39
7.3.2 Remove the output..........................................................................................................39
7.3.3 Remove the input............................................................................................................41
7.3.4 Remove the blockage..................................................................................................... 41
7.3.5 Use the rotor deblocking tool.......................................................................................... 42
7.3.6 Finish.............................................................................................................................. 42
7.4 Replace a safety sign................................................................................................................. 42
8 Troubleshooting...................................................................................... 43
8.1 General troubleshooting procedure............................................................................................ 43
8.2 Troubleshooting table................................................................................................................. 43
9 Technical specifications.......................................................................... 44
9.1 General specifications................................................................................................................ 44
9.2 Material specifications................................................................................................................ 45
9.3 Engine specifications.................................................................................................................. 45
9.4 Working area.............................................................................................................................. 47
9.5 Danger area................................................................................................................................48
9.6 Wiring diagram............................................................................................................................49
Contents
D09-CC13S20-11 5

1 Introduction
1.1 About this document
1.1.1 Purpose of this document
This document contains the information and instructions for an approved user to safely do
these tasks:
• Use the machine.
• Do user maintenance on the machine.
• Do user troubleshooting on the machine.
For the requirements of the approved user, refer to section
2.1
.
1.1.2 Language
The original language of the document is English. All other available language versions
are translations of the original instructions.
1.1.3 Illustrations
The illustrations in this document show a typical setup with relevant details for
instructional use only. Minor differences between the illustrations and the machine are
possible but do not have an effect on the comprehensibility of this document.
1.1.4 Symbols used in this document
Icon Signal word Description
Warning Injury or death is possible if
you do not obey the instruc-
tions.
Caution Damage to equipment is
possible if you do not obey
the instructions.
Note Gives additional information.
N/A Information about the condi-
tion of the machine before
you start the procedure.
N/A Information about spare
parts that are necessary for
a procedure.
Introduction
6D09-CC13S20-11

Icon Signal word Description
N/A Information about support
equipment that is necessary
for a procedure.
N/A Information about supplies
(consumables) that are nec-
essary for a procedure.
1.2 About the machine and model types in this document
This document is applicable for the wood chipper GTS1300C.
Note:
• For identification of the model type, refer to section
3.2
.
• In this document, the wood chipper GTS1300C is referred to as the
machine.
1.3 How to use this document
1. Read this document completely. Make sure that you know and understand all the
instructions.
2. Obey the safety instructions to prevent injury and/or damage to the machine.
3. Do the procedures completely and in the given sequence.
4. Keep this document in a safe area for future use. This document is part of the
machine.
1.4 Contact information
Company name Technische Handelmaatschappij J. De Wild B.V.
Address De Meeten 54
4706 NH Roosendaal
The Netherlands
Email [email protected]
1.5 Warranty conditions
Note:
For the warranty conditions of the engine, refer to the OEM documentation of
the engine.
The purchase invoice and the serial number of the machine is the warranty certificate.
Speak to your dealer for the after sales service.
The warranty includes:
• Factory and component faults.
• Replacement of faulty parts and the involved work.
Introduction
D09-CC13S20-11 7

The warranty excludes:
• Parts that are subject to wear.
• Transport costs for part replacement.
The warranty will be void when you do not obey these rules:
• The machine must be operated by approved users.
• Use the machine only as described in this document.
• Obey the safety, user and maintenance instructions in this document.
• Use original spare parts.
• Do not make unapproved changes to the machine.
• Only your dealer is allowed to repair the machine.
Introduction
8D09-CC13S20-11

2 Safety
2.1 Approved user
A user must:
• Be 18 years or older to operate the machine.
• Never be under the influence of drugs or alcohol when operating the machine.
• Be familiar with and obey the safety instructions.
• Be able to stop the machine immediately.
• Be aware of the rules and regulations for the environment and for noise levels.
• Wear personal protective equipment. Refer to section
2.3
.
All users are responsible for:
• Damage caused to a third party.
• The safety of all persons within a radius of 12 m.
2.2 Liability
Technische Handelmaatschappij J. De Wild B.V. is not liable if you do not obey these
instructions:
• Obey the safety instructions. Refer to section
2.5
.
• Use the machine only as described in section
3.1
.
• Use original spare parts.
• Do not make unapproved changes to the machine.
• Only operate and do maintenance on the machine as described in this document.
2.3 Personal protective equipment
When you use the machine, always wear appropriate personal protective equipment:
• Ear protection
• Eye protection
• Cut resistant gloves
Warning:
You must stop the work every hour for a minimum of 15 minutes to prevent
noise-induced hearing loss.
Safety
D09-CC13S20-11 9

2.4 Safety signs on the machine
120
Safety
10 D09-CC13S20-11

Sign Description
Cutting hazard
Rotating parts hazard
120
Noise level
Read the manual
Wear ear protection (mandatory PPE)
Wear eye protection (mandatory PPE)
Wear cut resistant gloves (mandatory PPE)
V-belts running direction
Hot surface hazard
Safety
12 D09-CC13S20-11

Sign Description
Use of the panic bar, left-hand side
Use of the panic bar, right-hand side
2.5 Safety instructions
2.5.1 General safety instructions
• Do not leave the working machine unattended.
• Keep away from the discharge zone.
• Do not wear loose clothing.
• Make sure that the machine is level.
• Keep away from moving parts inside the input and output.
• Replace warning signs if they are damaged or illegible.
• Keep the contact key away from children and from not approved users.
2.5.2 Safety instructions for use
• Wear appropriate personal protective equipment. Refer to section
2.3
.
• Do not use the machine if any part of the machine is damaged or defective.
• Make sure that all machine components are installed.
• Never use the machine without the input or output. Refer to section
3.3.1
.
• Do not climb into the input.
• Make sure that the panic bar is always unobstructed when the machine is used.
• Make sure that you can immediately operate the panic bar when the machine is used.
• Do not use the machine if the blades are dull. This can cause damage to the
machine.
• Do not tilt the machine when the engine is running.
• Use the machine in a well-ventilated area. Do not use the machine indoor.
• Do not use the machine on a paved or gravel surface.
• Make sure that the fumes from the exhaust are blown away from the user.
• Only chip material that is described in this document. Refer to section
9.2
.
• Keep a stable position during operation with your feet firmly on the soil.
• When you chip material, your position must be level with the machine.
• Prevent a buildup of chipped material in the discharge zone.
• Make sure that the input, rotor and output are free of wood chips, leaves and grass
before use.
Safety
D09-CC13S20-11 13

• Make sure that the tire pressure of the machine is correct. Refer to section
9.1
.
• Immediately stop the machine if the blades hit an unwanted object, if the machine
makes an unusual sound or if the machine moves irregularly.
2.5.3 Safety instructions for maintenance, transport and storage
• Never use the engine or output to strap the machine down during transport or
storage.
• Always lock the rotor during maintenance, transport and storage. Refer to section
7.1.1
• Always remove the spark plug cap from the engine.
• Only use original spare parts.
• Replace bent or damaged blades. Never repair them.
2.6 Disposal
• Do not dispose of the machine into domestic waste.
• Obey the local regulations and the waste sorting instructions of the machine.
Safety
14 D09-CC13S20-11

3 Description
3.1 Intended use
The machine is a wood chipper designed to compose and to chip wood and roots. For an
overview of the specifications of the material, refer to section
9.2
.
3.2 Identification of the machine
NAME
Technische Handelsmaatschappij
J. de Wild B.V.
www.gtmprofessional.com
De meeten 54
4706 NH Roosendaal
THE NETHERLANDS
MODEL
SERIALNO.
YEAR
WEIGHT
POWER
DE WILD
A
B
C
D
E
F
AName
BModel
CSerial number
DYear of production
EWeight
FPower
Description
D09-CC13S20-11 15

3.3 Overviews
3.3.1 Overview of the main components
J
M
L
J
I
H
G
B
A
C
E
D
F
K
Pos. Item Description
A Deflector The deflector makes sure that the chipped
material is put in the correct place.
B High output The output is used to guide the chipped ma-
terial.
C Input The input is used to guide the entering mate-
rial to the shredderbox.
D Panic bar The panic bar is used to stop the machine in
case of an emergency.
E Engine The engine drives the rotor.
F Handle The handle and the wheels allow the user to
move the machine.
G Wheel
H Bumper The bumper makes sure that the machine
does not tilt over.
Description
16 D09-CC13S20-11

Pos. Item Description
I Shredderbox The shredderbox keeps the rotor in the cor-
rect position.
J Safety lock switch The safety lock switch detects if the input
and output are installed correctly. The ma-
chine does not start if the parts are not instal-
led correctly.
K Low output The output is used to guide the chipped ma-
terial.
L Rotor The rotor holds the blades.
M Blade The blades chip the material.
Note:
The machine can be used with a low or high output.
3.3.2 Overview of the engine controls
Note:
For an overview of the controls, refer to the OEM documentation of the
specific engine of your machine.
Description
D09-CC13S20-11 17

4 Installation
Note:
Use bumper support to make sure that the machine stays balanced during
installation.
4.1 Install the input
Warning:
Two persons are required to install the input. The input is heavy.
Preliminary requirements
• Wrench size 13
Procedure
1. Lift the input (A).
2. Move the hinges (B) into the holes
(C).
3. Tilt the input.
4. Make sure that the locking key (D)
correctly fits in the safety lock switch
(E).
5. Install the bolts (G) and the washers
(F).
A
B
C
E D F G
Installation
18 D09-CC13S20-11

4.2 Install the low output
Caution:
Never install the low and high output at the same time.
4.2.1 Remove the cover plate of the low output
Preliminary requirements
• Wrench size 13
Procedure
1. Remove the bolts (A).
2. Remove the cover plate (B).
4.2.2 Install the low output
Preliminary requirements
1. The input is installed.
2. The high output is removed.
• Wrench size 13
Note:
Make sure that the cover plate of the high output is installed. Refer to section
5.3
.
A
B
Installation
D09-CC13S20-11 19

Procedure
1. Lift the output (A).
2. Position the output (A) in the
openings of the shredderbox.
3. Tilt the output.
4. Make sure that the locking key (B)
correctly fits in the safety lock switch
(C).
5. Install the bolts (D).
4.3 Install the high output
Caution:
Never install the low and high output at the same time.
4.3.1 Remove the cover plate of the high output
Preliminary requirements
• Wrench size 13
Procedure
1. Remove the bolts (A) and washers
(B).
2. Tilt the cover plate (C).
3. Remove the hinges (D) from the holes
(E).
4. Remove the cover plate.
2
23
DC
B
A
3
2
DEC
A B
Installation
20 D09-CC13S20-11
Table of contents
Other GTM Professional Chipper manuals