Guideline Geo MALA GroundExplorer HDR Series User manual

MALÅ GroundExplorer HDR Series
User Manual
__________________________________________________________________________________

2
Our Thanks...
Thank you for choosing Guideline Geo and MALÅ as your Ground Penetrating Radar solution
provider. The very core of our corporate philosophy is to provide our users with the very best
products, support and services. Our development team is committed to providing you with the
most technologically advanced and easy-to-use GPR products with the capability to meet your
needs for efficiency and productivity now, and into the future.
Whether this is your first MALÅ product, or an addition to the MALÅ collection, we believe that a
small investment of your time, to familiarize yourself with the product by reading this manual, will
be rewarded with a significant increase in productivity and satisfaction.
At Guideline Geo, we welcome comments concerning the use and experience with our products,
as well as the contents and usefulness of this manual.
Guideline Geo team

3
Guideline Geo | MALÅ
Under the copyright laws, this manual may not be copied, in whole or in part, without the written
consent of Guideline Geo. Your rights to the software are governed by the accompanying software
license agreement. The MALÅ logo is a trademark of Guideline Geo registered in Sweden and
other countries.
The product described in this document is subject to continuous developments and
improvements. All particulars of the product and its use contained in this document are given by
Guideline Geo in good faith. However, all warranties implied or expressed, including but not
limited to implied warranties or merchantability, or fitness for purpose, are excluded. This
document is intended only to assist the reader in the use of the product and every effort has
been made to ensure that the information in this manual is accurate. Guideline Geo shall not be
liable for any loss or damage arising from the use of any information in this document, or any
error or omission in such information, or any incorrect use of the product.
Guideline Geo, the MALÅ logo, are trademarks of Guideline Geo, registered in Sweden and other
countries. Other company and product names mentioned herein are trademarks of their
respective companies. Mention of third-party products is for informational purposes only and
constitutes neither an endorsement nor a recommendation. Guideline Geo assumes no
responsibility with regard to the performance or use of these products.
Guideline Geo AB
Head-office
Löfströms Allé 6A
172 66 Sundbyberg
www. guidelinegeo.com
Release Date:
Version:

4
Table of Contents
Our Thanks... ..........................................................................................................................2
Table of Contents.....................................................................................................................4
Preface ...................................................................................................................................6
About this Manual ................................................................................................................6
Additional Resources............................................................................................................6
Feedback.............................................................................................................................6
Safety and Compliance User Notices ........................................................................................7
Get Ready. Set up. Go..............................................................................................................8
MALÅ GroundExplorer (GX) HDR Features ............................................................................8
Advantages compared to conventional GPR technology..........................................................8
Accessories and Optional Extras ...............................................................................................9
MALÅ GX HDR Rough Terrain Cart (RTC)..............................................................................9
MALÅ Controller Holder and Towing Options .........................................................................9
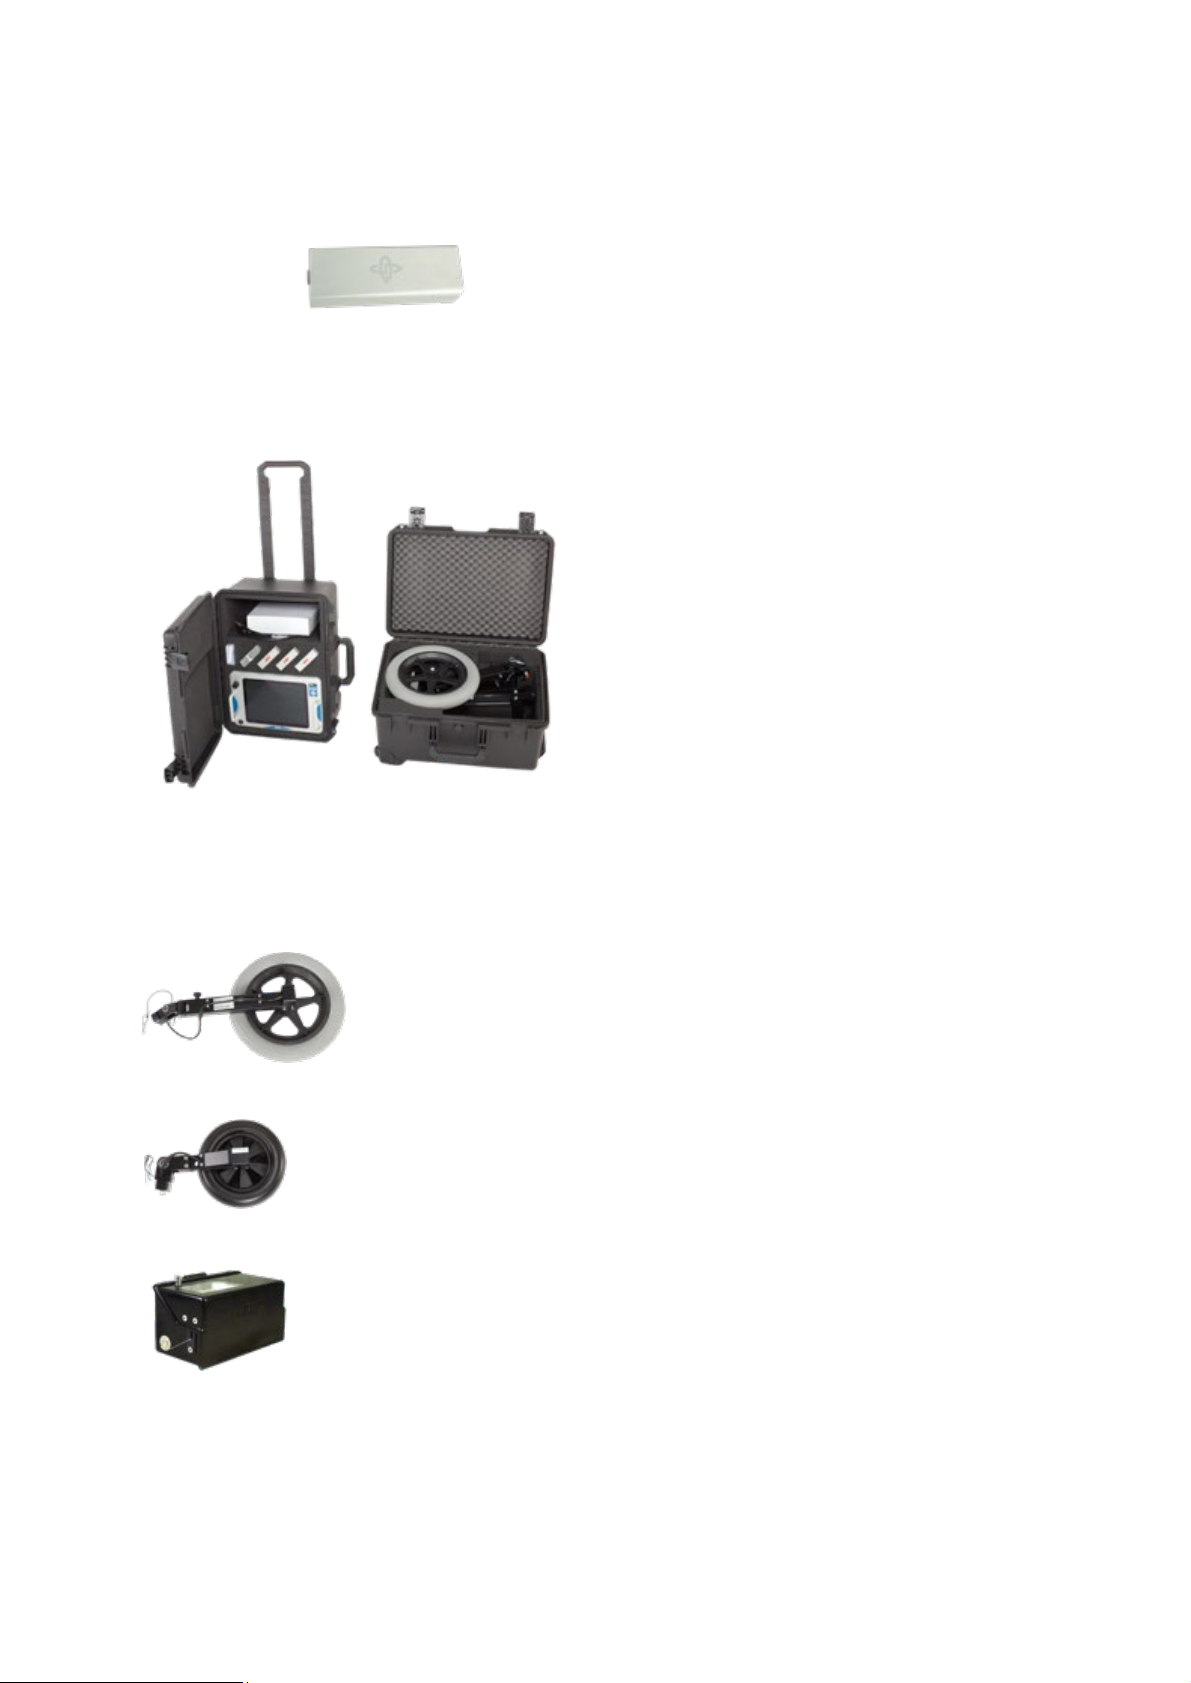
Additional Battery and charger............................................................................................10
Shipping Cases ..................................................................................................................10
Measuring Wheels and Devices...........................................................................................10
Others ...............................................................................................................................10
Unpack. Inspect. Register......................................................................................................11
Repacking and Shipping.....................................................................................................12
Registering MALÅ GX HDR .................................................................................................12
System Assembly and Set Up.................................................................................................13
Connecting it all up ............................................................................................................14
Connect data cable to the GX controller ...........................................................................14
Connect the data cable to the antenna.............................................................................14
Mount the battery to the antenna.....................................................................................14
Connect the encoder wheel to the antenna. .....................................................................15
Power up........................................................................................................................15
Power down....................................................................................................................15
Antenna LED Indicators......................................................................................................16
Antenna Battery Maintenance and Charging........................................................................16
Powering the GX antenna/controller from the optional battery bag or other external battery
source............................................................................................................................18
Charging the GX Controller..................................................................................................18
User Interface........................................................................................................................19
Start Menu.........................................................................................................................20

5
Navigating the Menus and Options......................................................................................20
Main 2D Project Menu........................................................................................................21
Zoom Function...................................................................................................................22
Main Menu Icons ...............................................................................................................22
Measurement Parameters Menu.........................................................................................24
Acquisition Parameters Menu .............................................................................................26
Wheels Edit and Calibration Menu.......................................................................................27
Wheels Edit Options ...........................................................................................................28
Display Parameters Menu...................................................................................................29
Operating Instructions............................................................................................................30
2D Project..........................................................................................................................31
3D Grid Project ..................................................................................................................33
Creating a 3D Project......................................................................................................33
ObjectMapper Project.........................................................................................................39
Creating an Object Mapper Project................................................................................39
Object Mapper Measurements with Baseline.................................................................41
Object Mapper measurements with GPS..........................................................................43
Continuing an Object Mapper measurements Project .......................................................44
Positioning Menu............................................................................................................44
File Manager ..................................................................................................................45
MALÅ GeoDrone 80 Project ................................................................................................46
System Menu.....................................................................................................................47
GPS options and settings....................................................................................................49
WiFi options and settings....................................................................................................51
WiFi Connection .............................................................................................................51
Wire WiFi Channel Selection............................................................................................52
Restoring Missing Traces ................................................................................................53
WiFi Initiation via Wire.....................................................................................................54
Troubleshooting .....................................................................................................................55
System Malfunctions ..........................................................................................................55
Service and Repairs ...........................................................................................................56
Technical Support...............................................................................................................56
Technical Specification ...........................................................................................................57

6
Preface
About this Manual
This manual is written for the end user of the product and explains how to set up and configure
the product, as well as providing detailed instruction on its use. Basic theory for Ground
Penetration Radar is outlined to help the operator understand the underlying technology.
References for thorough discussions of this topic and applications for the technology are also
presented.
Known issues and limitations, precautions, best practices and tips are also presented so that the
most efficient and productive use can be achieved.
Additional Resources
GPR Training www.guidelinegeo.com/1105-2
GPR Applications www.guidelinegeo.com/technical-support
GPR Case Studies www.guidelinegeo.com/solutions/case-stories
Feedback
Feedback regarding the contents of this manual or the product may be sent using any of the
following channels.
Phone (Sweden) +46 953 34550
Phone (USA) +1 843 852 5021
Phone (China) +86 108 225 0728
Phone (Malaysia) +60 (0) 3 6250 7351
Phone (Australia) +61 438 278 902
Web www.guidelinegeo.com

7
Safety and Compliance User Notices
This GPR-device is certified according to FCC, subpart 15, IC RSS-220 and ETSI EN 302 066-
1&2.
According to the regulations stated in ETSI EN 302 066-1 (European
Telecommunication Standards Institute):
The control unit should not be left ON when leaving the system unattended. It should always be
turned OFF when not in use.
The antennas should point towards the ground, walls etc. during measurement and not towards
the air.
The antennas should be kept in close proximity to the media under investigation.
Canadian and US regulations state that whenever GPR antennas are in use
the following notes apply:
This Ground Penetrating Radar device shall be operated only when in contact with or within 1 m
of the ground.
Only law enforcement agencies, scientific research institutes, commercial mining companies,
construction companies and emergency rescue or firefighting organizations shall use this Ground
Penetrating Radar Device.
This device complies with Industry Canada license-exempt RSS standards. Operation is subject
to the following two conditions: (1) This device may not cause interference and (2) this device
must accept any interference, including interference that may cause undesired operation of the
device.
French translations:
Cet instrument de Géoradar se devra d’être opéré seulement en contact à même le sol ou en
deça d’un mètre du sol.
Cet instrument de Géoradar se devra d’être utilisé seulement par les agences chargées de
l’application de la loi, les instituts de recherches scientifiques, les compagnies minières à buts
lucratifs, les compagnies de construction et les organisations responsables pour le sauvetage et
la lutte contre les incendies.
Cet instrument répond aux exigences de la licence avec Industrie Canada- exempt des standards
RSS. L ‘opération est sujette aux deux conditions suivantes : (1) Cetinstrument ne peut pas
causer une interférence et (2) cet instrument se doit d’accepter quelque interférence que ce soit,
incluant une interférence qui pourrait causer une opération non-souhaitable de l’instrument.

8
Get Ready. Set up. Go
This section walks through the steps for getting ready, setting up and basic operation of your new
MALÅ GX HDR. Information is also available on what to do in case the equipment may have been
damaged during shipment.
Note: If a defect in the equipment is discovered, make sure to contact MALÅ Geoscience prior to
use and follow the instructions for Repacking and Shipping in this section.
MALÅ GroundExplorer (GX) HDR Features
The HDR-series (High Dynamic Range) is the latest addition to Guideline Geo´s versatile MALÅ
product range. It is a completely new design, based on patented cutting edge technology. These
new antennas are not just an upgrade of earlier designs; they represent a leap in GPR
technology, not seen in the past 15 years.
Advantages compared to conventional GPR technology
•Real-time sampling technology – HDR enabled
•Significantly faster data acquisition rates
•Greater signal-to-noise ratio
•Increased bandwidth
•Unprecedented dynamic range and resolution
•32 bit data output
•Greater depth penetration
•Better detection capabilities

9
Accessories and Optional Extras
MALÅ GX HDR Rough Terrain Cart (RTC)
MALÅ Rough Terrain cart is a robust carrier for Guideline Geo Shielded Antennas designed to
handle rough GPR surveying. The cart is suitable for Guideline Geos shielded antennas 160, 450
and 750 MHz. Visit our website for more information.
MALÅ Controller Holder and Towing Options
Controller holder, rough terrain skid plate, tow attachment and tow handle.

10
Additional Battery and charger
Additional Li-ion Battery Pack 12 V (5 Hour) for the MALÅ GX HDR.
Shipping Cases
Robust shipping cases for the MALÅ GX Controller and accessories.
Measuring Wheels and Devices
GX Measuring Wheel
GX Spring-loaded Wheel
String Encoder
Others
To the GX system there is also a GPS bracket and extension pole for easy attachment of a GPS
antenna on the GPR antenna.

11
Unpack. Inspect. Register
Great care should be taken when unpacking the equipment. Be sure to verify the contents shown
on the packing list and inspect the equipment and accessories for any loose parts or other
damage.
Note: The packing list that is included with the shipment should be read careful and any
discrepancy should be reported to our sales department at www.guidelinegeo.com
Remove the protective shipping cover on the antenna.
Using the supplied Torx screwdriver,
remove the 4 Torx screws.
Remove and store the black plastic cover
for future use, if shipping is required at a
later date.
Note: All packing material should be kept in the event that any damage occurred during
shipping.
File any claim for shipping damage with the carrier immediately after discovery of the damage
and before the equipment is put into use. Any claims for missing equipment or parts should be
filed with Guideline Geo within fourteen (14) business days from the receipt of the equipment.

12
Repacking and Shipping
The Guideline Geo packing kit is specially designed for shipping MALÅ GX HDR. The packing kit
should be used whenever shipping is necessary. If original packing materials are unavailable,
pack the instrument in a box that is large enough to allow at least 80mm of shock absorbing
material to be placed all around the instrument. This includes top, bottom and all sides.
Warning: Never use shredded fibres, paper or wood wool, as these materials tend to pack down
and permit the instrument to move inside its packing box.
Please read our shipping instructions before returning instruments to Guideline Geo. These
instructions can be found on our website at: www.guidelinegeo.com/Support/Service-Repairs.
Registering MALÅ GX HDR
By registering your equipment, you ensure that you receive up-to-date documentation, software
upgrades and product information, which all helps to optimize the utilization of the equipment
and realize the maximum return on your investment.
To register your equipment, simply visit – www.guidelinegeo.com/Support/Product-Registration
on our website and submit the registration form.
Note: Two serial numbers are attached to the equipment, (1) on the underside of the monitor
and (2) on top of the antenna under the battery pack.

13
System Assembly and Set Up
MALÅ GX HDR is an integrated system, consisting of a GX controller and HDR antenna, linked
through a single data/power cable.
The MALÅ GX Controller is mounted on the handle of the Rough Terrain Cart or the Controller
Holder and connects to the HDR antenna through a single data/power combination cable, and
displays the data as the instrument is moved. Use the two supplied knobs or Velcro to mount the
controller.
Rough Terrain Cart (RTC) The cart is suitable for shielded antennas; 160, 450 and 750 MHz.

14
Connecting it all up
Connect data cable to the GX controller
Note: Look for the countersink in the power cable and place it towards the mark on the
connection. Push lightly. If you have it in the correct orientation it will go into its position
smoothly. To disconnect, pull out holding the metal part of the connector.
Connect the data cable to the antenna
Mount the battery to the antenna

15
Connect the encoder wheel to the antenna.
Always remember to attach the sprint as well for a firm connection of the wheel.
Note: The precision of the encoder wheel depends on several factors, such as; the condition of
measurement surface, the pressure applied on the wheel and possible wear.
Warning: When using MALÅ GX HDR with a cart or measuring wheel, the wheel calibration must
be changed to the appropriate wheel; enter the Settings Menu on the GX Controller and change
the Acquisition Parameters to the correct wheel.
Power up
Start the MALÅ GX HDR by pressing the power button on both the HDR antenna and the HDR
Controller.
Power down
To turn the antenna and monitor off, first select Shut down from the Start Menu, confirm the
action by selecting YES. When the Controller screen is black, push the power button on the
monitor and release quickly.
Note: The antenna will automatically turn off when the monitor is powered down.
Note: If a power cable is accidentally pulled out, the MALÅ GX HDR components will start
automatically when reconnected.

16
Antenna LED Indicators
Three LED-indicators are mounted beneath
the antenna product label.
DATA: Continuous flashing light indicates the unit is working properly and ready for data
collection. Irregular flashing on this LED means erroneous antenna configuration or possible
software version issue. The LED switches to continuous illumination when the unit enters data
collection.
GPS: Flashing light mean that the GPS option is installed and that the internal computers are
successfully communicating with the GPS-unit. This LED switches to continuous light whenever
there’s 4 or more satellites available.
INFO: This LED indicates a serious system error, whenever active. Please contact your local
Guideline Geo representative.
Antenna Battery Maintenance and Charging
A 12V/8.7Ah Li-ion battery pack is shipped
with the MALÅ GX HDR Antenna and is the
recommended power source for the antenna.
Under normal operating and handling
conditions, this battery is capable of up to 5
hours of continuous operation.
MALÅ GX HDR antenna will automatically turn itself off when the battery voltage drops below
10V. A meter showing the remaining battery capacity is displayed on the Controller.
Tip: If storing the battery for long periods of time, discharge the battery to approximately 50%, this
will maximise the life of the battery. Use the battery level indicator on the Controller to estimate
50%, wait until the indicator enters the yellow section, power down and remove the battery. This
also applies to the internal battery in the Controller.

17
Warning: Power sources other than the recommended 12V/8.7Ah Li-ion battery are not compatible
with the power meter and the status of the battery will not be indicated accurately.
To remove and charge the antenna
battery, pull the battery release pin on the
rear of the battery module and gently
remove the battery pack by lifting upward
and in a backward direction.
When re-mounting the battery, gently
attach the d-sub connector on front of the
battery with the d-sub on the mounting
tower. Then pull the battery release pin
and press down on the battery until the
release pin slots into place.
With the use of the correct adaptor,
connect the supplied battery charger to
the battery pack.
The LED light on the charger indicates the
following:
Red=Charged<80%
Yellow=Charged80-100%
Green = Maintenance charging
Tip: Though recharging up to 80% of the full capacity is typically very fast, it is recommended to
keep the battery charging until it is fully charged to help extend the battery life.
Note: The battery charger can be left on after the battery has been fully charged where it will then
automatically enter a maintenance-charging mode
Charging time for the 8.7Ah batteries is approximately 3-5 hours (80%-100%).
The temperature when charging should be within Zero to +45oC / 32 to 110oF. Do not
charge the
batteries in direct sunlight or when surrounding temperature is below freezing point.

18
Powering the GX antenna/controller from the optional battery bag or other external battery
source
With the use of the optional antenna battery
adaptor, the GX antenna can be powered from
the optional battery bag.
Note: The battery bag can also power the GX
Controller.
There are also cables available for use
together with external 12 V batteries.
Charging the GX Controller
Connect the supplied power supply to
the socket on the right hand side of the
GX Controller data/power connectors.
The battery indicator on the GX
Controller will show the charging cycle.
The red lightning bolt indicates the GX Controller is charging
The green lightning bolt indicates the GX Controller is fully charged
Note: The bars on the top row indicates the battery level in the Controller, the bottom row
indicates the battery level in the antenna battery.
Tip: The GX Controller can be charged without the need for the Controller to be switched on. The
charge cycle will take 3 - 4 hours to complete if fully discharged.

19
User Interface
The following sections contain a detailed description of the user interface and give tips and
warnings designed to help the user achieve the highest possible level of productivity and safety
while operating the MALÅ GX HDR.
Start Menu 20
Navigating the Menus and Options (Navigator) 20
Main Menu 21
Zoom Function 22
Main Menu Icons 22
Measurement Parameter Menu 24
Acquisition Parameters Menu 26
Wheels Edit and Calibration Menu 27
Wheels Edit Options 28
Display Parameters Menu 29

20
Start Menu
The MALÅ GX Controller uses dedicated software designed specifically for the display and
collection of GPR data.
Note: The Controller utilizes a sunlight readable LCD display for maximum visibility in daylight.
The Start Menu has the different project
options, the Positioning information, File
manager and the System Menu button
The icon indicates the connection
status to the antenna.
Navigating the Menus and Options
The GX Controller is operated with a dual function Navigator for
selecting options and functions. Menu items are selected by
rotating the Navigator clockwise or anti-clockwise. The selected
item is then executed by pushing the button.
The Navigator control fitted to MALÅ GX Controller works in a
similar way to a computer mouse allowing the user to navigate
menus and update data. Rotating the knob either allows sequential
scrolling through menu options, to make a menu selection, or
changes selected parameter values. Pressing the knob either
executes the currently selected menu option or sets the value of the
selected parameter.
Note: The controller Start Menu appears about 20 seconds after turning on the controller and
HDR antenna.
Table of contents
Other Guideline Geo Radar manuals
Popular Radar manuals by other brands

Endress+Hauser
Endress+Hauser Micropilot S FMR540 Safety instructions

Endress+Hauser
Endress+Hauser Micropilot FMR63B technical information

Wavetronix
Wavetronix SMARTSENSOR 105 installation guide

JRC
JRC Radar 3000 instruction manual

Emerson
Emerson Rosemount 3300 Series quick start guide

Preco
Preco PreView Side Defender SDR8503 operating manual