Vroom Retract Vac
4
New Construction Rough-in
The tubing should be roughed-in so it comes down through the ceiling
directly above the intended valve location. Extend the tubing approximately
6-inches below where the finished garage ceiling will be, do not glue, then
finish the connection when the valve is installed after drywall. The low
voltage wire should be left long enough to finish the valve, approximately
8-feet. The rest of the tubing run from the ceiling to the valve will be surface
mounted when finished.
Retro-fit Installation / New Construction Finish
NOTE: Locate the Vroom Retract Vac valve at approximately the same height
as a light switch if hose retracts up. If the hose retracts down, mount it at
approximately the height of an electrical outlet.
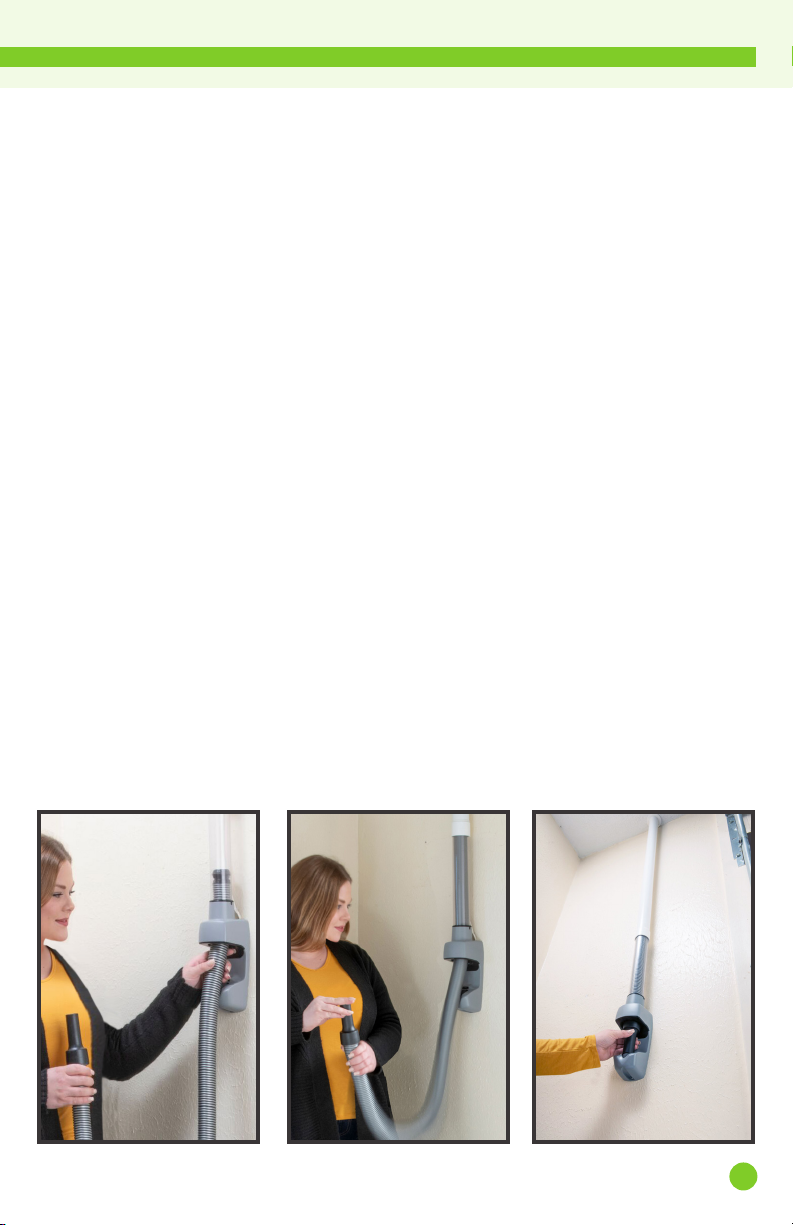
1. Using a level held against top of tube seal, mark the mounting holes for
the valve at desired location.
2. If installing on drywall, sink included self-drilling anchors at marked
locations. Temporarily mount valve using one screw into drywall anchor
or directly into stud to hold during tubing installation.
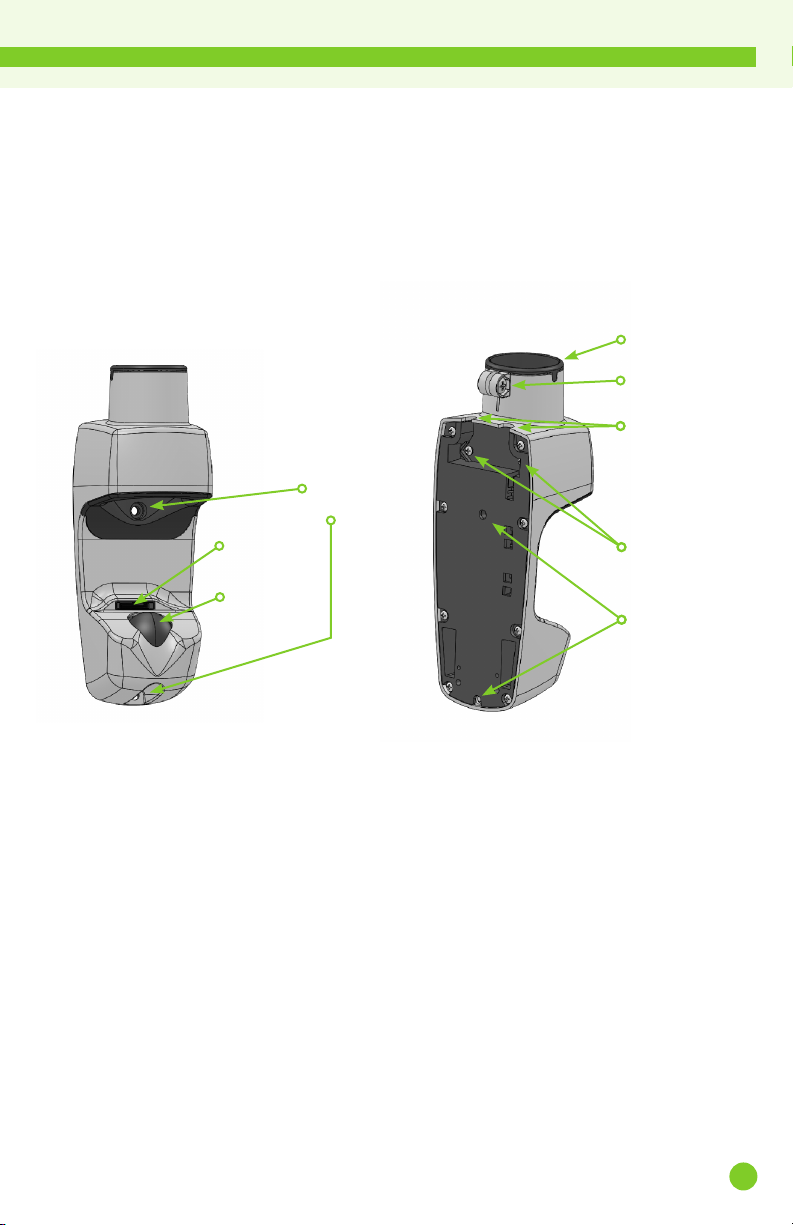
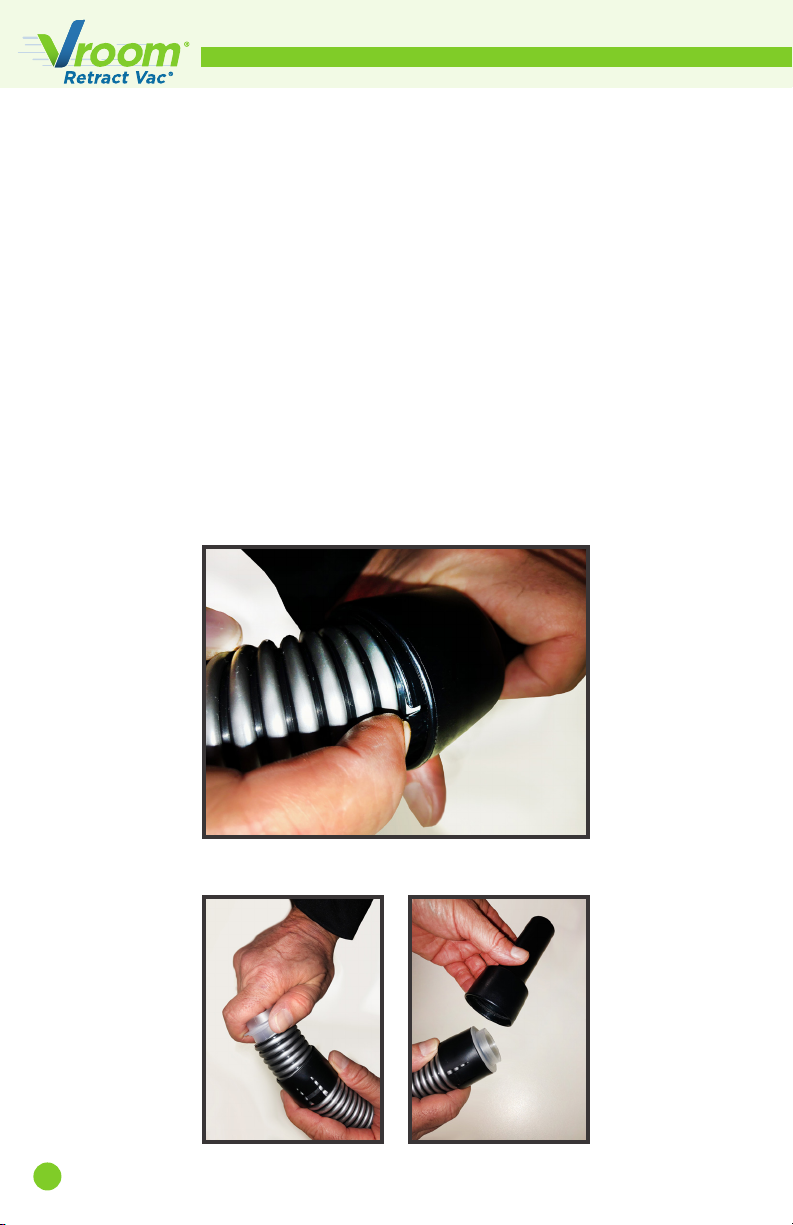
3. Insert the 6-inch long piece of clear tubing into the top of the valve. The
tubing should be completely inserted 1-1/2-inches into the valve tube
seal. [FIG. 2]
4. Slightly tighten the tube clamp onto the clear tubing. NOTE: The tube
clamp features a reversible nut and bolt which allows the bolt to be
accessed from either side. [FIG. 3]
5. Complete the installation of the hose storage area using long radius
elbows and a tubing cutter. Make sure to deburr the ends of the tubing.
6. Install the recommended reducer coupling at the end of the hose
storage area, prior to the first standard fitting (at least 5-foot longer
than the hose).
7. Remove the screw temporarily holding the valve in place, and gently
rotate the valve to access the low voltage wires and screws. Attach the
wires from the valve to the trunk line wire and secure to the valve using
the ring terminals or strip the end of the wires and use the supplied
wire nuts. [FIG. 4]
8. Rotate the valve back forward facing and permanently mount the valve
to the wall using the two screws provided. Tighten tube clamp to create
vacuum seal.