Hagen EXO TERRA PT2459 User manual

Operating Instructions
Mode d’emploi
Manual de Instrucciones
Thermostat
600W Dimming &
Pulse Proportional
Thermostat with
Day/Night function
PT2459

2
INDEX
ENGLISH 3
FRANÇAIS 12
ESPAÑOL 22
Thermostat 600W
PT2459

Thank you for purchasing the Exo Terra®600W Dimming & Pulse
Proportional Thermostat with Day/Night function. Please read this
operation manual carefully before use and operate according to
the instructions provided for maximum safety and performance. We
recommend that you keep this manual handy for future reference.
• Dimming & Pulse Proportional function
controls terrarium temperatures
very accurately
• Daytime and nighttime temperature can be
set separately
• From 10°C up to 60°C (50°F – 140°F)
• Easy-to-read blue LCD screen shows actual
and set temperature
• Red LED and heating symbol will indicate
when heating device is ON
• Push button/dial system to avoid accidental
setting or tampering
• Waterproof remote temperature probe with
built-in light sensor
• Ideal for use with Heat Mats, Heat Cables,
Ceramic Heaters and Heat Bulbs
• Extra long 6.2 foot / 190cm power-cord
• Controls heating devices up to 600W
Can be used with the following Exo Terra®heating sources:
Heat Mat
Heat Cable
Ceramic Heater
Infrared Basking Spot
Daytime Heat Lamp
Reptiles are ectotherm, and use heat from an external source to
thermoregulate their optimal body temperature. Most reptiles use
direct radiant heat from the sun in combination with conductive heat
from sun-heated surfaces such as branches, rocks or other heat
accumulating structures. Providing such an appropriate, species
related, temperature gradient in the terrarium is an important factor
in successful reptile keeping. With the Exo Terra®600W Dimming
& Pulse Proportional Thermostat with Day/Night function you can
create a well-controlled heating system that allows you to maintain
the required temperature conditions similar to those found in a
desert or tropical environment. The Thermostat will also help to
THERMOSTAT
Operating
Instructions
ENGLISHFRANÇAISESPAÑOL

4
prevent overheating and undercooling during hot summer days or
cold winter nights. Both the daytime and nighttime temperatures can
be set separately to guarantee safe daytime-nighttime temperature
fluctuations for your reptiles. The Dimming & Pulse Proportional
function keeps the temperature at the desired setpoint with a much
higher accuracy than conventional thermostats and virtually eliminates
temperature swings in the terrarium. The easy-to-read blue LCD
screen shows actual and set temperature, and will automatically
increase brightness of the LCD in day mode and use dim light when
in night mode. A Red LED and a heating symbol will indicate when the
heating device is switched ON. Once the set temperature is reached,
the LED will switch to Blue and the heating symbol will no longer
show. The temperature probe with built-in light sensor switches
automatically between daytime and nighttime temperature setting,
based on the light intensity. Simply connect your Heat Mat, Heat Cable,
Ceramic Heater or Heat Bulb to the Exo Terra®Day/Night Thermostat,
set the preferred daytime and nighttime temperatures and place the
heat sensor in the desired spot. The push button/dial system of the
thermostat will prevent accidental changes of the set temperature if
the device is being handled. The Thermostat comes with a 6.2 foot
/ 190cm power-cord with grounded plug & receptacle for increased
safety and to allow the use of a power outlet strip. The waterproof
remote sensor can be safely used in highly moist terrariums and
aquatic environments.
The Exo Terra®Thermostat should be set according to the needs of
the animals. Thoroughly research the preferred optimum temperature
range (POTR) for your specific reptile, so you can create the correct
temperature gradients inside the terrarium to allow your reptiles to
thermoregulate.
Red LED and heating symbol will indicate when heating device is
powered.
Blue LED will indicate when set temperature has been reached.
READ INSTRUCTIONS THOROUGHLY PRIOR TO INSTALLATION AND
OPERATION.
INSTRUCTIONS PERTAINING TO A RISK OF FIRE, ELECTRIC SHOCK,
OR INJURY TO PERSONS
IMPORTANT SAFETY
INSTRUCTIONS
WARNING:
To guard against injury,
basic precautions should be observed
when handling the appliance, including
the following:
1. READ AND FOLLOW ALL
SAFETY INSTRUCTIONS
and all
important notices on the appliance

before using. Failure to do so
may result in in personal injury or
damage to the unit.
2. DANGER –
For each of the
following situations, do not attempt
repairs yourself; return the product
to an authorized service facility for
service if it is still under warranty
or discard the appliance. Do not
operate the appliance if it has a
damaged electrical cord or if it is
malfunctioning or if it is dropped or
damaged in any manner.
A. For INDOOR HOUSEHOLD USE ONLY,
NOT for commercial use.
B. Carefully examine the appliance
after installation. It should not be
plugged in if there is water on parts
not intended to be wet.
C. Do not operate any appliance if it
has a damaged cord or plug, or if it
is malfunctioning or if it is dropped
or damaged in any manner. The
power cord of this appliance is a
Z type attachment and cannot be
replaced; if the cord is damaged,
the appliance should be discarded.
Never cut the cord.
ENGLISHFRANÇAISESPAÑOL

6
D. To avoid the possibility of the
appliance plug or electrical socket
getting wet, position the unit to one
side of a wall mounted socket to
prevent water from dripping onto
the socket or plug. A “drip-loop”
should be arranged. The “driploop”
is that part of the cord below the
level of the socket, or the connector
if an extension cord is used, to
prevent water from traveling along
the cord and coming into contact
with the socket. If the plug or socket
does get wet, DO NOT unplug the
cord. Disconnect the fuse or circuit
breaker that supplies power to
the appliance. Then unplug and
examine for the presence of water
in the socket.
3. Read and observe all the important
notices on the appliance.
4. This appliance can be used by
children aged from 8 years and
above and persons with reduced
physical, sensory or mental
capabilities or lack of experience
and knowledge if they have been

given supervision or instruction
concerning use of the appliance
in a safe way and understand the
hazards involved. Children shall not
play with the appliance. Cleaning
and user maintenance shall
not be made by children
without supervision.
5. To avoid injury, do not contact
hot surfaces.
6. Always unplug an appliance from
an outlet when not in use, before
putting on or taking off parts, and
before cleaning. Never yank cord to
pull the plug from the outlet. Grasp
the plug and pull to disconnect.
7. Do not use the appliance for other
than intended use. The use of
attachments not recommended or
sold by the appliance manufacturer
may cause an unsafe condition.
8. Do not install or store the appliance
where it will be exposed to weather
or to temperatures below freezing.
Do not expose the unit to
direct sunlight.
9. If an extension cord is necessary,
ENGLISHFRANÇAISESPAÑOL

8
ensure the connection is watertight
and dust proof. A cord with a proper
rating should be used. A cord rated
for less amperes or watts than the
appliance rating may overheat. Care
should be taken to arrange the cord
so that it will not be tripped over or
pulled. The connection should
be carried out by a qualified
electrical installer.
10.Ensure that the appliance is placed on
a flat, even surface.
SAVE THESE INSTRUCTIONS FOR
FUTURE REFERENCE
Only close adherence of these
installation, electrical and maintenance
guidelines will ensure the safe and
efficient use of this appliance.
EXO TERRA®600W DIMMING & PULSE PROPORTIONAL THERMOSTAT
INSTALLATION INSTRUCTIONS
INSTALLATION in Exo Terra®Natural Terrariums
Follow this installation procedure to install the Exo Terra®Thermostat
on any size of Exo Terra®Natural Terrarium:
1. Unlock the top screen cover and lift it off the terrarium.
2. Slide one of the inlet holes (located on the back of the screen top
on either side) to the open position, so the wiring will fit through.
3. Feed the wire with sensor through the first available inlet hole on
the preferred side on the back of the screen cover.
4. Position the sensor inside your terrarium, in the location where you
want to reach the temperature set on the Blue LCD Screen. This
can be on top of the substrate if you are using a Heat Mat or Heat
Cable, but this can also be on a branch, cave or pile of stones if
you are using a Ceramic Heater or Heat Bulb to heat up a certain
basking area.
5. Place the top screen cover back on the terrarium and lock it
into position.

ENGLISHFRANÇAISESPAÑOL
6. Close the remaining inlets by sliding the slider against the tubing
or wires to prevent escape from feeding insects and
smaller animals
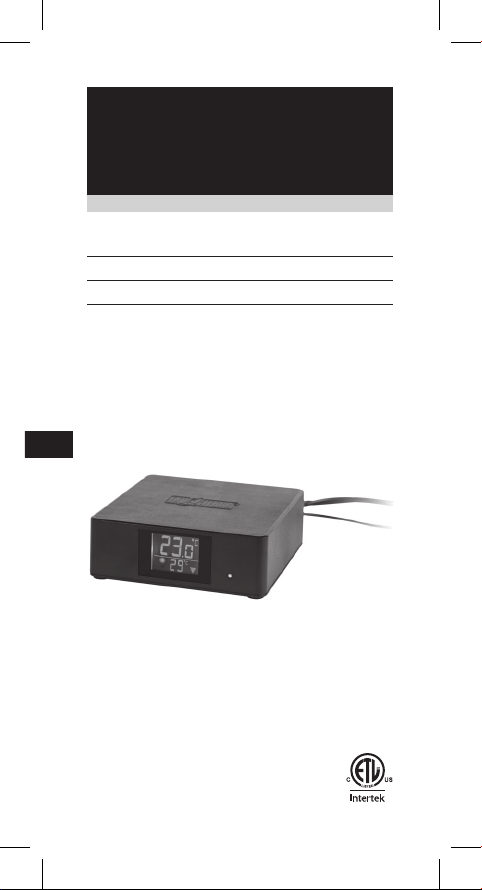
7. Place the Exo Terra®Thermostat on a solid, level surface.
8. Connect your heating device (Heat Mat, Heat Cable, Ceramic
Heater, Heat Bulbs, etc.) to the receptacle of the thermostat.
Controls heating devices up to 600W.
INSTALLATION in other Terrarium Models
1. Refer to your terrarium’s instruction manual for instructions on
how to install equipment, wiring and sensor cables inside the
terrarium.
2. Position the sensor inside your terrarium, in the location where
you want to reach the temperature set on the Blue LCD Screen.
This can be on top of the substrate if you are using a Heat Mat
or Heat Cable, but this can also be on a branch, cave or pile of
stones if you are using a Ceramic Heater or Heat Bulb to heat up
a certain basking area.
3. Place the Exo Terra®Thermostat on a solid, level surface.
4. Connect your heating device (Heat Mat, Heat Cable, Ceramic
Heater, Heat Bulbs, etc.) to the receptacle of the thermostat.
Controls heating devices up to 600W.
WARNING: Do not overload the Exo Terra®Thermostat by
connecting heat devices with outputs greater than 600W.
Damage from overloading is considered misuse and is exempt
from the guarantee.
OPERATING INSTRUCTIONS
The Exo Terra®Thermostat should be set according to the needs
of the animals. Thoroughly research the preferred optimum
temperature range (POTR) for your specific reptile, so you can
create the correct temperature gradients inside the terrarium to
allow your reptiles to thermoregulate.
Always use a thermometer to monitor the inside temperatures
of your terrarium. Adjust the Exo Terra®thermostat according to
the required temperature range for your pet’s environment.
Choose between DIMMING or PULSE PROPORTIONAL mode
The Exo Terra®600W Thermostat with Day/Night function can be
switched from Dimming function to Pulse Proportional function
if desired. The Dimming or Pulse Proportional mode will provide
the most accurate temperature control and virtually eliminates
temperature swings.
• The standard setting of the Exo Terra®600W Thermostat with
Day/Night function is the Dimming mode, but in case you prefer
to use the Pulse Proportional mode, press and hold the pinhole
(C/F) on the back of the thermostat with a pen or similar tool
for 3 seconds and the mode will change from Dimming to Pulse
Proportional. In Dimming mode, the “°C” or “°F” symbol on the
Blue LCD screen will show constantly, when in Pulse Proportional
mode the “°C” or “°F” symbol on the Blue LCD screen will flash
every 2 seconds. To switch back to Dimming mode press and
hold the pinhole (C/F) on the back of the thermostat with a pen
or similar tool for 3 seconds once again and the setting will
reverse to Dimming mode.

10
Set Temperature
The Exo Terra®600W Thermostat day- and night temperature can
be set and controlled individually. The upper part of the LCD-screen
shows the actual temperature measured at the heat sensor.The
temperature shown in the lower part indicates the temperature
setting at the current part of the day (symbol: day/sun or night/
moon).
1. To switch between Celsius (°C) and Fahrenheit (°F), press the
pinhole (C/F) on the back of the thermostat with a pen or similar
tool.
2. To set the preferred daytime or nighttime temperature: press
and hold the respective “sun” (day) or “moon” (night) symbol
at the back of the thermostat for more then 5 seconds until
the selected sun or moon symbol on the LCD-screen starts to
flash. Turn the knob at the back of the thermostat to increase or
decrease the temperature to the preferred setting. Than press
the selected “sun” or “moon button once more to finalize the
setting; the symbol will no longer flash and the temperature is
set.
3. To check the current Day or Night temperature setting: click the
button under the “sun” symbol on the back of the thermostat
and the set daytime temperature will show on the LCD-screen,
or click the button under the “moon” symbol to show the set
nighttime temperature on the LCD-screen.
a. If the set temperature is higher than the current temperature
measured at the heat sensor, a red LED will light up, to indicate
that the Thermostat is powering the connected heating device.
In the lower right corner of the LCD-screen a heating symbol will
be flashing until the set temperature has been reached at the
location of the sensor.
b. If the set temperature is lower than the current temperature
measured at the heat sensor, or if the set temperature has been
reached, a blue LED will light up and the heating symbol will no
longer show.
1. Red LED lights up and heating symbol is blinking: heating device
is powered
2. Blue LED lights up and heating symbol disappears: heating
device is no longer powered, set temperature has been reached
Troubleshooting
1. If there is no LED indicator and the Blue LCD screen is not
illuminated on the unit: check if the device is connected to a
power source.
GUARANTEE
This unit is guaranteed for defects in material or workmanship for
a period of 1 year from date of purchase. The guarantee is valid
with proof of purchase only. The guarantee is limited to repair or
replacement of the unit only and does not cover consequential loss
or damage of or to animate or inanimate objects. This guarantee
is valid only under normal operating conditions for which the unit
is intended. It excludes any damage caused by unreasonable
use, improper installation, negligence, tampering, or abuse of the
unit. The warranty does not cover commercial use. For guarantee
service or spare parts contact your local pet dealer or write to the
representative in your country. This guarantee does not affect your
statutory rights.

ENGLISHFRANÇAISESPAÑOL
SERVICE
If you have any problems or questions about the operation of
this product, please let us try to help you before you return the
product to your dealer. Most problems can be handled promptly
with a phone call. When you call (e-mail or write), please have all
relevant information such as model number and/or part numbers
available, as well as the nature of the problem. Please ensure that all
maintenance instructions have been adhered to before returning the
product to your retailer.
Customer Service and Authorized Warranty Repair Service:
Canada:
Rolf C. Hagen Inc.
20500 Trans Canada Hwy
Baie d’Urfé QC, H9X 0A2
Toll Free Number 1-800-55HAGEN (1-800-554-2436)
Between 9:00 am and 4:30 pm (Eastern Standard Time)
http://faq.hagencrm.com/?en
U.S.A.:
Rolf C. Hagen (U.S.A.) Corp.
305 Forbes Blvd, Mansfield, MA. 02048
Toll Free Number 1-800-724-2436
Between 9:00 am and 5:00 pm (Eastern Standard Time)
For general information on our whole product range, explore our
websites at: www.exo-terra.com or www.hagen.com.
Distributed by:
Canada: Rolf C. Hagen Inc., Montreal, QC H9X 0A2
U.S.A.: Rolf C. Hagen (U.S.A.) Corp., Mansfield MA. 02048

12
Nous vous remercions d’avoir acheté le Thermostat à variateur et à
pulsion proportionnelle avec fonction diurne et nocturne. Veuillez lire
attentivement le mode d’emploi avant d’utiliser l’appareil et suivre
les instructions fournies pour obtenir le meilleur rendement possible,
et ce, de la façon la plus sûre qui soit. Nous vous recommandons
de garder ce mode d’emploi à portée de la main pour consultation
ultérieure.
• Variateur et pulsion proportionnelle qui
contrôle la température du terrarium avec
une grande précision
• Réglage indépendant des températures diurne
et nocturne
• Températures de 10 à 60 °C (de 50 à 140 °F)
• Écran bleu à cristaux liquides facile à
lire affichant la température réglée et la
température réelle
• Voyant à DEL rouge et symbole de chauffage
indiquant que l’appareil de chauffage est en
marche
• Boutons et cadrans conçus pour éviter les
réglages et les changements accidentels
• Capteur à distance étanche avec capteur de
luminosité intégré
• Utilisation idéale avec les pellicules, les
ampoules et les câbles chauffants, ainsi
qu’avec les émetteurs de chaleur en
céramique
• Cordon d’alimentation très long de 190 cm
(6,2 pi)
• Contrôle d’appareils de chauffage jusqu’à
600 W
Le thermostat peut être utilisé avec les appareils de chauffage
Exo TerraMD suivants:
Pellicule chauffante
Câble chauffant
Émetteur de chaleur en céramique
Ampoule infrarouge pour lézarder
Ampoule infrarouge à lumière du jour
THERMOSTAT
Mode d’emploi

ENGLISHFRANÇAISESPAÑOL
Puisqu’ils sont ectothermes, les reptiles régulent la température
optimale de leur corps grâce à la chaleur provenant d’une source
externe. Pour la plupart des reptiles, cette source constitue la chaleur
rayonnante directe du soleil en combinaison avec la chaleur conduite
par les surfaces chauffées par le soleil, telles que les branches, les
pierres ou toute autre structure qui emmagasine la chaleur. L’un
des facteurs importants pour garder un reptile est le maintien d’un
gradient de température adéquat dans le terrarium selon l’espèce
de reptile gardée. Le Thermostat Exo TerraMD à variateur et à pulsion
proportionnelle avec fonction diurne et nocturne, 600 W permet de
créer un système de chauffage contrôlé afin d’offrir les conditions
stables idéales aux reptiles, comme celles d’un environnement
désertique ou tropical. Le thermostat contribue aussi à prévenir la
surchauffe pendant les chaudes journées d’été ou le froid extrême
pendant les froides soirées d’hiver. Les températures diurne et
nocturne peuvent être réglées séparément afin d’assurer des
fluctuations de température sûres pour vos reptiles. Le variateur
et à pulsion proportionnelle maintient la température à la valeur
désirée de façon beaucoup plus précise que les thermostats
habituels, en plus d’empêcher virtuellement les variations de
température dans le terrarium. L’écran bleu à cristaux liquides facile
à lire affiche la température réglée et la température réelle. Durant
les périodes d’éclairage diurne, l’écran est très brillant alors que
durant les périodes d’éclairage nocturne, la luminosité de l’écran
est atténuée. Un voyant à DEL rouge et un symbole de chauffage
s’allument lorsque l’appareil de chauffage est en marche. Une fois
la température désirée atteinte, le voyant à DEL devient bleu et le
symbole de chauffage disparaît. Le capteur de température avec le
capteur de luminosité intégré permet de passer de la température
diurne à la température nocturne automatiquement selon l’intensité
lumineuse. Il suffit de brancher le Thermostat Exo TerraMD avec
fonction diurne et nocturne, 600 W à la pellicule, à l’ampoule ou au
câble chauffant, ou à l’émetteur de chaleur en céramique, de régler
les températures diurne et nocturne souhaitées, puis de placer le
capteur de chaleur à l’endroit désiré. Le système de boutons et
de cadrans prévient les changements accidentels de température
lorsque l’appareil est manipulé. De plus, le cordon d’alimentation de
190 cm (3,2 pi) est muni d’une fiche et d’une prise mises à la terre
pour augmenter la sûreté de l’appareil et pour permettre l’utilisation
d’une barre multiprise. Finalement, puisque le capteur à distance est
étanche, il peut être utilisé sans danger dans les terrariums et les
environnements aquatiques à haut taux d’humidité.
Le Thermostat Exo TerraMD avec fonction diurne et nocturne, 600
W doit être réglé en fonction des besoins des animaux gardés. Il
importe donc de faire des recherches précises sur les espèces
gardées afin de connaître leur plage de températures optimales
préférentielles (PTOP), et ainsi d’offrir les gradients de température
adéquats à la thermorégulation de ces espèces dans le terrarium.
Le voyant à DEL rouge et le symbole de chauffage indiquent quand
l’appareil de chauffage est en marche. Le voyant à DEL bleu s’allume
quand la température souhaitée est atteinte.
BIEN LIRE LE MODE D’EMPLOI AVANT D’INSTALLER ET DE FAIRE
FONCTIONNER L’APPAREIL.
INSTRUCTIONS SE RAPPORTANT À UN RISQUE D’INCENDIE, DE
DÉCHARGE ÉLECTRIQUE OU DE BLESSURES AUX PERSONNES

14
MESURES DE SÉCURITÉ
IMPORTANTES
AVERTISSEMENT :
Pour éviter
toute blessure, il faut observer des
précautions élémentaires de sécurité
lorsque l’appareil est manipulé,
notamment celles qui suivent.
1. LIRE ET RESPECTER TOUTES
LES CONSIGNES DE SÉCURITÉ
et tous les avis importants sur
l’appareil avant de l’utiliser. Le
non-respect de ces précautions
risque d’entraîner des blessures aux
personnes ou des dommages
à l’appareil.
2. DANGER –
Dans chacune des
situations suivantes, ne pas essayer
de réparer l’appareil soi-même;
le retourner plutôt à un service de
réparations autorisé s’il est encore
sous garantie ou le jeter. Ne pas
faire fonctionner un appareil dont la
fiche ou le cordon est endommagé,
qui ne fonctionne pas correctement
ou qui est tombé ou a été
endommagé de quelque manière
que ce soit.

A. POUR USAGE DOMESTIQUE ET À
L’INTÉRIEUR SEULEMENT, ET NON
pour usage commercial.
B. Examiner attentivement l’appareil
après l’installation. Ne pas le
brancher si de l’eau se trouve sur
des pièces qui ne doivent pas
être mouillées.
C. Ne pas faire fonctionner un appareil
dont la fiche ou le cordon est
endommagé, qui ne fonctionne
pas correctement ou qui est tombé
ou a été endommagé de quelque
manière que ce soit. Le cordon
d’alimentation de cet appareil est
de type Z et ne peut être remplacé;
si le cordon est endommagé, il faut
jeter l’appareil. Ne jamais couper
le cordon.
D. Afin d’éviter que la fiche de
l’appareil ou la prise de courant
entre en contact avec de l’eau,
installer l’appareil à côté d’une prise
de courant murale pour empêcher
l’eau de s’égoutter sur la prise ou
la fiche. Il faut former une « boucle
d’égouttement » avec le cordon
ENGLISHFRANÇAISESPAÑOL

16
d’alimentation qui relie l’appareil à
la prise. La « boucle d’égouttement
» est la partie du cordon qui se
trouve sous la prise de courant,
ou le raccord si une rallonge est
utilisée, afin d’empêcher l’eau de
glisser le long du cordon et d’entrer
en contact avec la prise de courant.
Si la fiche ou la prise de courant
entre en contact avec de l’eau, NE
PAS débrancher l’appareil. Mettre
d’abord hors circuit le fusible ou le
disjoncteur qui fournit l’électricité
à l’appareil. Débrancher ensuite
l’appareil et vérifier qu’il n’y a pas
d’eau dans la prise.
3. Lire et suivre tous les avis importants
apparaissant sur ce produit.
4. Cet appareil peut être utilisé par
des enfants de 8 ans et plus
ainsi que par des personnes aux
capacités physiques, sensorielles ou
mentales réduites, ou qui manquent
d’expérience et de connaissances, si
elles sont toutes sous surveillance.
De plus, des directives doivent leur
être fournies quant à l’emploi sûr de

l’appareil et aux dangers possibles.
Les enfants ne doivent pas jouer
avec l’appareil. S’ils en effectuent le
nettoyage et l’entretien, ils doivent
être surveillés.
5. Pour éviter toute blessure, ne
toucher aucune pièce chaude.
6. Toujours débrancher l’appareil
lorsqu’il n’est pas utilisé, avant
d’ajouter ou de retirer des pièces,
et avant d’en effectuer le nettoyage.
Ne jamais tirer sur le cordon
d’alimentation pour débrancher
l’appareil. Prendre plutôt la fiche
entre les doigts, puis tirer.
7. Ne pas se servir de l’appareil pour
un autre usage que celui pour lequel
il a été conçu. L’emploi de fixations
ni recommandées ni vendues par
le fabricant de l’appareil peut être
source de situations dangereuses.
8. Ne pas installer ni ranger l’appareil
où il sera exposé aux intempéries
ou à des températures sous le point
de congélation. Ne pas exposer
l’appareil à la lumière directe
du soleil.
ENGLISHFRANÇAISESPAÑOL

18
9. Si une rallonge électrique est
nécessaire, vérifier qu’elle est
étanche à l’eau et à la poussière,
et qu’elle est d’un calibre suffisant.
Un cordon d’alimentation de
moins d’ampères ou de watts que
l’appareil peut surchauffer. Il faut
placer le cordon d’alimentation de
façon à éviter qu’on tire la rallonge
ou qu’on trébuche sur celle-ci. Le
raccordement doit être effectué par
un électricien qualifié.
10.S’assurer que l’appareil est placé
sur une surface plane.
CONSERVER CES INSTRUCTIONS
POUR CONSULTATION
ULTÉRIEURE
Seul le respect ces directives
d’installation, d’électricité et d’entretien
assurera l’emploi sûr et efficace de
cet appareil.
INSTRUCTIONS D’INSTALLATION DU THERMOSTAT À VARIATEUR
ET À PULSION PROPORTIONNELLE AVEC FONCTION DIURNE ET
NOCTURNE EXO TERRAMD
INSTALLATION dans les terrariums naturels Exo TerraMD
Suivre les étapes d’installation du Thermostat Exo TerraMD pour les
aquariums naturels Exo TerraMD de n’importe quel format.
1. Déverrouiller le couvercle grillagé et le soulever du terrarium.
2. Dégager l’une des ouvertures (situées à l’arrière du couvercle
grillagé de chaque côté) afin d’y passer le fil de l’appareil.
3. Passer le fil doté du capteur dans la première ouverture du côté
désiré à l’arrière du Terrarium.
4. Placer le capteur à l’endroit désiré à l’intérieur du terrarium,

ENGLISHFRANÇAISESPAÑOL
c’est-à-dire là où vous voulez atteindre la température réglée
sur l’écran bleu à cristaux liquides. Le capteur peut être placé
au-dessus du substrat si vous utilisez une pellicule ou un câble
chauffant. Le capteur peut également être placé sur une branche,
une cachette ou un amas de pierres si vous utilisez un émetteur
de chaleur en céramique ou une ampoule chauffante dans le but
de chauffer un endroit où lézarder en particulier.
5. Replacer le couvercle grillagé et le verrouiller en place.
6. Bloquer les ouvertures en glissant le curseur sur les fils pour
empêcher les insectes servant au nourrissage ou les très petits
animaux de s’enfuir.
7. Installer le Thermostat Exo TerraMD sur une surface solide
et plane.
8. Brancher l’appareil de chauffage (pellicule, ampoule ou câble
chauffant, ou émetteur de chaleur en céramique, etc.) à la prise
du thermostat. Le thermostat permet de contrôler des appareils
de chauffage jusqu’à 600 W.
INSTALLATION dans les autres modèles de terrariums
1. Consulter le mode d’emploi du terrarium pour les étapes
d’installation de l’équipement, des fils et des câbles capteurs à
l’intérieur du terrarium.
2. Placer le capteur à l’endroit désiré à l’intérieur du terrarium,
c’est-à-dire là où vous voulez atteindre la température réglée
sur l’écran bleu à cristaux liquides. Le capteur peut être placé
au-dessus du substrat si vous utilisez une pellicule ou un câble
chauffant. Le capteur peut également être placé sur une branche,
une cachette ou un amas de pierres si vous utilisez un émetteur
de chaleur en céramique ou une ampoule chauffante dans le but
de chauffer un endroit où lézarder en particulier.
3. Installer le Thermostat Exo TerraMD sur une surface solide
et plane.
4. Brancher l’appareil de chauffage (pellicule, ampoule ou câble
chauffant, ou émetteur de chaleur en céramique, etc.) à la prise
du thermostat. Le thermostat permet de contrôler des appareils
de chauffage jusqu’à 600 W.
AVERTISSEMENT : Pour éviter une surcharge, ne pas brancher le
thermostat Exo TerraMD à des appareils de chauffage de plus de
600W. Les dommages causés par une surcharge sont considérés
comme étant le résultat d’une mauvaise utilisation de l’appareil
et ne sont donc pas couverts par la garantie.
INSTRUCTIONS D’UTILISATION
Le Thermostat Exo TerraMD 600W doit être réglé en fonction
des besoins des reptiles gardés. Il importe donc de faire des
recherches précises sur les espèces gardées afin de connaître
leur plage de températures optimales préférentielles (PTOP),
et ainsi d’offrir les gradients de température adéquats à la
thermorégulation de ces espèces dans le terrarium.
Toujours utiliser un thermomètre pour surveiller la température
à l’intérieur du terrarium. Régler le thermostat Exo TerraMD selon
la température requise dans l’environnement du reptile.
Modes VARIABLE et PULSION PROPORTIONELLE
Le Thermostat Exo TerraMD avec fonction diurne et nocturne,
600 W permet de passer du mode variable au mode à pulsion
proportionnelle. Le mode variateur et pulsion proportionnelle permet
de contrôler la température avec une grande précision et élimine
pratiquement toute fluctuation de température.

20
• Le mode variable est le réglage standard du Thermostat Exo
TerraMD avec fonction diurne et nocturne, 600 W. Par contre, pour
mettre l’appareil en mode à pulsion proportionnelle, enfoncer
et maintenir le minuscule trou (C/F) au dos du thermostat avec
un stylo ou un accessoire similaire pendant trois (3) secondes,
jusqu’à ce que le mode change de variable à mode pulsion
proportionnelle. En mode variable, les symboles « °C » ou « °F »
sur l’écran bleu à cristaux liquides sont affichés en continu alors
qu’en mode pulsion proportionnelle, les symboles clignotent
toutes les deux (2) secondes. Pour revenir au mode variable,
enfoncer et maintenir de nouveau le minuscule trou (C/F) au dos
du thermostat avec un stylo ou un accessoire similaire pendant
trois (3) secondes.
Réglage de la température
Le Thermostat Exo TerraMD avec fonction diurne et nocturne, 600 W
permet de régler et de contrôler les températures de jour et de nuit
individuellement. La partie supérieure de l’écran à cristaux liquides
affiche la température réelle enregistrée par le capteur de chaleur.
La partie inférieure, quant à elle, affiche la température réglée au
moment précis de la journée (soleil=jour/lune=nuit).
1. Pour passer de l’affichage en degré Celsius (°C) à l’affichage en
degré Fahrenheit (°F), enfoncer le minuscule trou (C/F) au dos du
thermostat avec un stylo ou un accessoire similaire.
2. Pour régler les températures de jour et de nuit souhaitées,
enfoncer et maintenir pendant plus de cinq (5) secondes le bouton
sous le symbole approprié (le soleil pour le jour et la lune pour
la nuit) au dos du thermostat jusqu’à ce que le symbole du soleil
ou de la lune se mette à clignoter sur l’écran à cristaux liquides.
Tourner le cadran au dos du thermostat pour augmenter ou
abaisser la température au réglage souhaité. Ensuite, appuyer
sur le bouton « soleil » ou « lune » de nouveau pour terminer
le réglage. Le symbole cessera de clignoter sur l’écran et la
température sera réglée.
3. Pour vérifier les réglages actuels des températures diurnes et
nocturnes, cliquer sur le bouton du symbole du soleil (pour la
température diurne) ou de la lune (pour la température nocturne)
au dos du thermostat, et la température s’affichera sur l’écran à
cristaux liquides.
a. Si la température réglée est plus élevée que la température réelle
enregistrée par le capteur de chaleur, un voyant à DEL rouge
s’allume pour indiquer que le thermostat alimente l’appareil
de chauffage. Dans le coin inférieur droit de l’écran à cristaux
liquides, un symbole de chauffage clignotera jusqu’à ce que la
température souhaitée soit atteinte là où le capteur a été placé
dans le terrarium.
b. Si la température réglée est inférieure à la température réelle
enregistrée par le capteur de chaleur, ou si la température désirée
a été atteinte, un voyant à DEL bleu s’allume et le symbole de
chauffage disparaît.
1. Voyant à DEL rouge allumé et symbole de chauffage qui
clignote : le thermostat alimente l’appareil de chauffage.
2. Voyant à DEL bleu allumé et aucun symbole de chauffage
affiché : le thermostat n’alimente plus l’appareil de chauffage
puisque la température désirée a été atteinte.
Table of contents
Languages:
Other Hagen Thermostat manuals
Popular Thermostat manuals by other brands

smart home
smart home TempLinc INSTEON 2441ZTH owner's manual

Pro 1 IAQ
Pro 1 IAQ T725 installation manual

BOSSCO
BOSSCO BPS242RF Programming and operating instructions

Pro 1 IAQ
Pro 1 IAQ T855 installation manual

Pro 1 IAQ
Pro 1 IAQ True Comfort T715 installation manual

Pro 1 IAQ
Pro 1 IAQ T925 Installation manaul