Technical characteristics
Power around 15 W (75 W luminous energy)
Colour of the light 4000 Kelvin
Luminous ux 1 100 lumen
Power supply 230 V AC 50/60 Hz
Compulsory protection 10 A gG/gl fuse or
16A circuit-breaker curve C or curve B
Insulation class II
Recommended cable U1000R02V3G1.5
Connection without screws (Sanvis) terminals
1,5 … 2,5 mm2
Protection class IP55
Operating temperature -25 … +50°C
Storage temperature -30 … +70°C
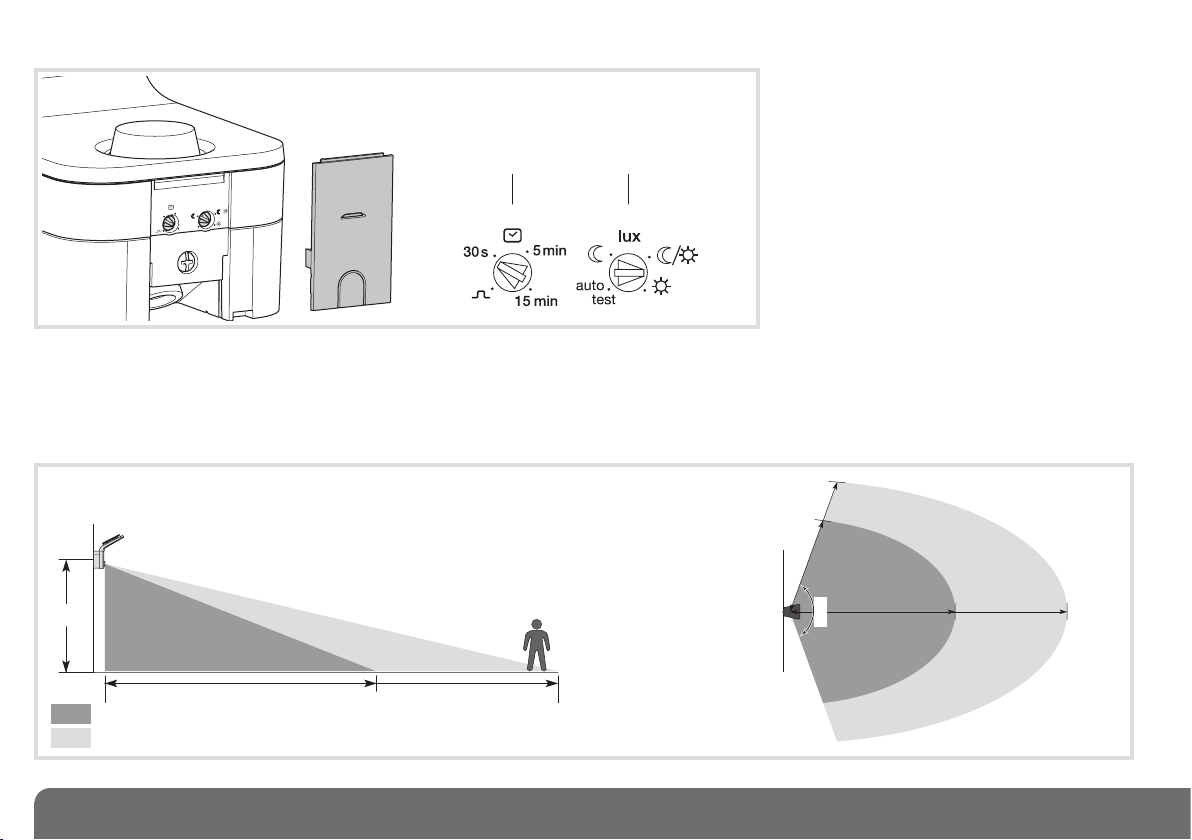
Detection angle 140°
Forward detection distance 6 m (by default)
12 m maximum (with remote control)
Twilight threshold setting 5 … 1000 lux
Operating duration setting 5 s … 15 min
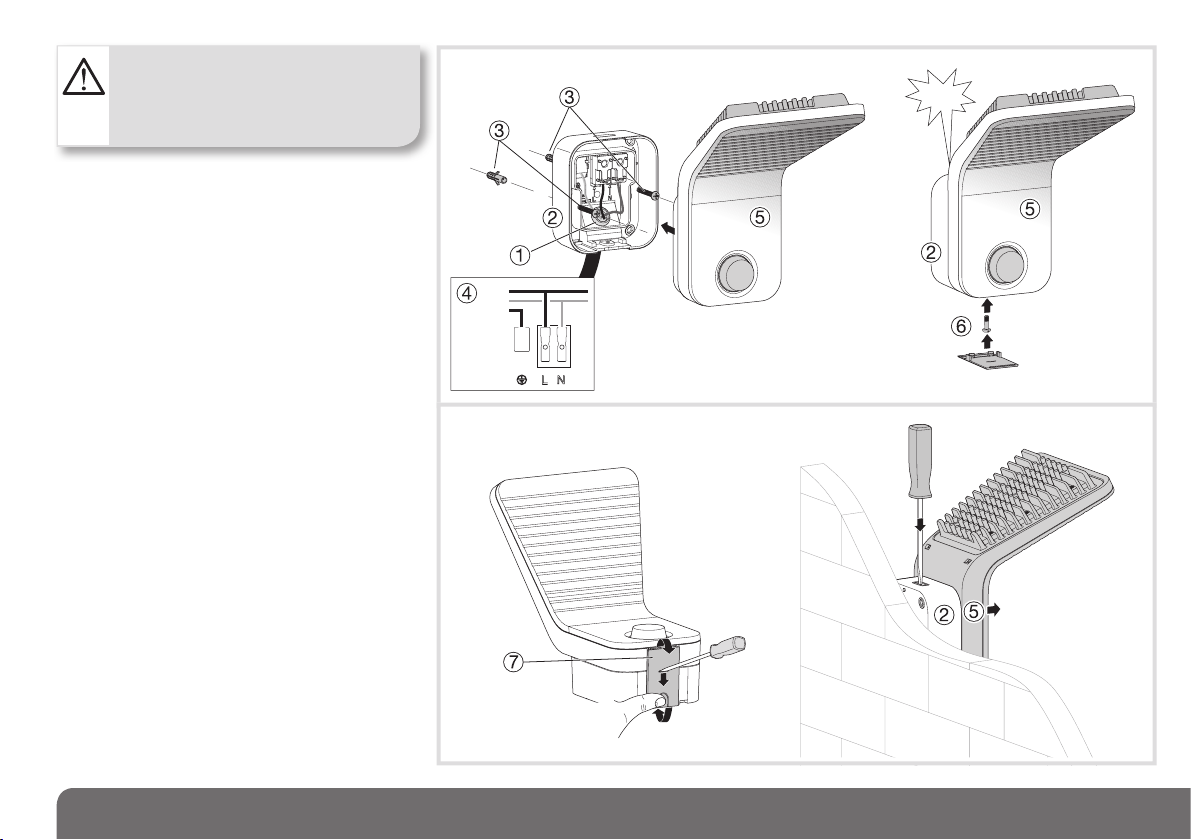
Accessories Mounting screws and wall plugs
Standards EN60598-2-5 (07/1999)
EN60669-2-1 (08/2004)
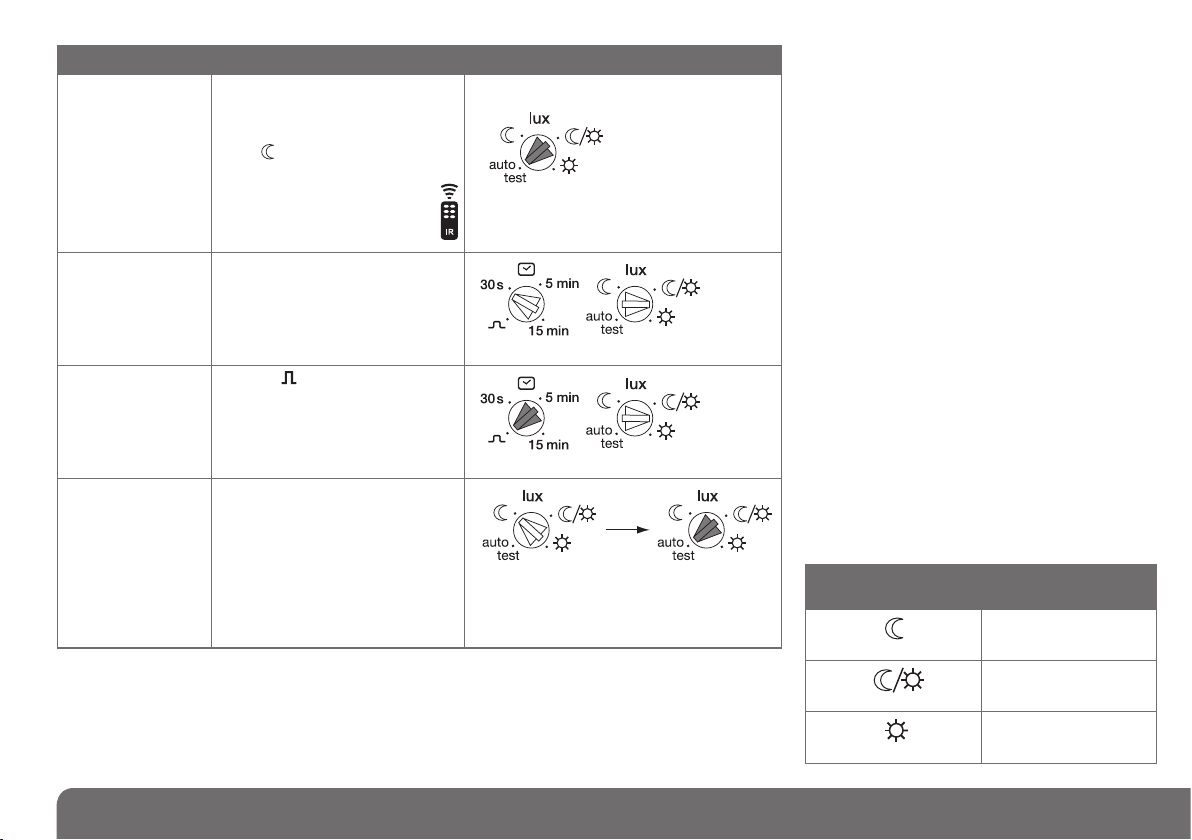
What to do if...
The lamp does not switch on
• In day/night mode, the twilight setting is set to
night only mode.
- Readjust.
• Incorrect adjustment of the detection zone.
- Readjust.
The lamp does not switch off
• Continuous movement in the detection zone.
- Inspect the detection zone, you may need to
readjust the zone.
The lamp continually switches on and off
• Animals are moving in the detection zone.
- Adjust the sensitivity.
Usable in all Europe å and in Switzerland
Hereby, Hager Controls, declares that this LED lamp
is in compliance with the essential requirements and
other relevant provisions of the low voltage directives
2014/35/EC and CEM 2014/30/EC.
The CE declaration can be consulted on the site:
www.hagergroup.net
z