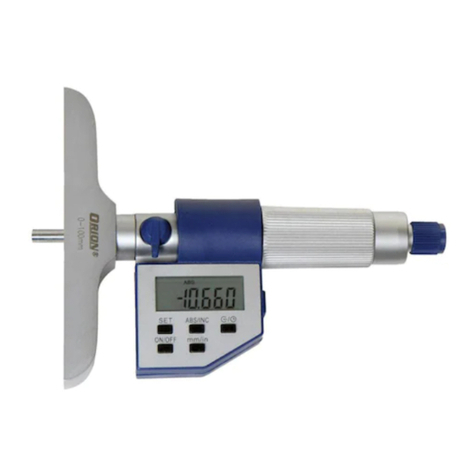
4. Functions:
4.1 Zero setting at any position.
4.2 mm/inch system interchange at any position.
4.3 Switch-over between relative and absolute measurement.
5. Operation with the Electronic Depth Calliper:
5.1 Readiness for operation:
5.1.1 Clean the surface of the protective sticker with dry and clean cloth (or
soaked with cleaning oil).
5.1.2 Loosen the locking screw, move the slider to check if the LCD and all the
buttons work properly.
5.2 Measurement:
5.2.1 As soon as you move the slider the Electronic Depth Calliper will be switched
on automatically.
5.2.2 Press mm/inch button to select the desired unit system.
5.2.3 Move the slider to a flat surface gently, e.g. on surface granite plate, then
press ZERO button to set zero and then you can start measuring.
5.2.4 Operation of ABS button:
As soon as the Electronic Depth Calliper will be switched on it is in the
absolute measurement mode. After pressing the ABS button it will change to
the relative measurement mode. The display does show “ABS” and “0.00”.
Now you can preset a positive correction value. In this case please keep
pressing the ABS button for more than 2 sec. The display will show SET and
the first digit is flashing.After pressing the ABS button again shortly it will
change to the next digit also flashing. Now press the ZERO button in order
to preset the desired correction value. If you keep pressing the ZERO
button the electronic will count up the digits, if desired until the last digit.
As soon as the desired preset of correction value is finished repress the ABS
button again more than 2 sec. Now you can work with the value of the preset.
After pressing the ZERO button the Electronic Depth Calliper will return back
to the absolute measurement mode and will keep the original zero point.
6. Battery Replacement:
Abnormal display (digits flashing or even no display) shows a flat battery. To
replace the battery, just push the battery cover to the right end of the Depth
Calliper and replace the battery with a new one. Please note that the positive
side (+) of the battery must face out. If the new battery would not work
satisfactorily please do not hesitate to contact the supplier.
7. Brief on Maintenance:
Troubles Possible Causes Solutions
Flashing digits Low voltage Replace the battery
No Display 1.Low voltage
2.Poor contact 1.Replace the battery
2.Adjust and clean the battery housing
Fixed digits Trouble in circuit Remove the battery and put it back after
one minute
Notice: We reserve the right to modify or change the design of our products, especially because
of improvements and further development.


