Haier HIL 2801RBSJ User manual

Please read this booklet carefully before fixing and using and
save it for future reference.
HIL 2801RBSJ


Installation
1. Take out all the packing. If there is a safe film over the oven, tear it off before Use.
Check carefully for damage. If any, immediately notify dealer or send to the
manufacturer s service center.
2. Microwave ovens must be placed under dry and non-corrosiveness environments,
kept away from heat and humidity, such as gas burner or water tank.
3. to ensure sufficient ventilation, the distance of the back of microwave to the wall
should be at least 10 cm, the side to the wall should be at least 5 cm, the free
distance above the top surface at least 20 cm.
4. the position of the oven shall be such that it is far from the TV, Radio or antenna
as picture disturbance
Or noise may occur.
5. the appliance must be positioned so that the plug is accessible, and must ensure a
good grounding in case leakage, ground loop can be formed to avoid electric
shock.
6. The microwave oven must be operated with the decorative door closed.
7. The microwave oven shall not be placed in a cabinet
8. The back of the oven must be placed against a wall
9. As there is manufacturing residue or oil remained on the oven cavity or heat
element, it usually would smell the odor, even a slight smoke, It is normal case and
would not occur after several times use, keep the door or window open to ensure
good ventilation. So it is strongly recommended to set the oven to grill mode and
operate dry several times.
Operating dry should only be conducted in the grill mode, it should NOT be
conducted at combination mode
Important safety instruction
1. Read all instructions before using and keep it for future reference.
2. Before using, the user must check clearly whether the containers can be used for
microwave ovens Intensely forbid putting any non-microwave food containers
into the microwave oven, in order to avoid lead to ignition and other anomalies
which easily damage microwave oven itself.
3. Make sure the voltage in your living area corresponding to the one shown on the
rating label of the appliance. And the wall socket is properly grounded. As a result
of strong current please uses the dedicated sockets and not shared with other
normal sockets to avoid overloading and causing fire.
4. the microwave oven for home heating and cooking food and design, please do not
use for industrial and commercial
5. Do not cover the ventilation openings to avoid damage to the oven because of the
over-temperature.
6. To reduce the risk of fire in the oven cavity:
a. Do not heat food in sealed and do not overcook the food.
b. Remove wire twist-ties from paper or plastic bags before placing bags in the
oven.
1

c. Keep an eye on the oven when heating food with paper or plastic bags, and
cooking time should not be too long to avoid the possibility of catching fire.
d. Do not heat oil or fat for deep drying as the temperature of oil can not be
controlled .
e. After use wipe the waveguide cover with a damp cloth, followed by dry cloth to
remove any food splashes and grease. Built-up grease may overheat and
begin to cause smoke or catch fire
f. If materials inside the oven should smoke or ignite, keep oven door closed,
turn oven off and disconnect the power supply.
g. Close supervision is necessary when using disposable containers made from
plastic, paper or other combustible material.
h. When cooking the food with less moisture content or not heat-resistant
container, please use low power to avoid burning.
7. To reduce the risk of explosion and sudden boiling:
a. Do not place sealed containers in the oven. Baby bottles fitted with a screw
cap or teat are considered to be sealed containers.
b. When boiling liquid in the oven, use the wide-mouthed container and stand
about 20 seconds at the end of cooking to avoid delayed eruptive boiling of
liquids.
c . Potatoes, sausage and chestnut should be peeled or pierced before cooking.
Eggs in their shell, whole hard-boiled eggs should not be heated in
microwave ovens since they may explode, even after microwave heating has
ended.
d. The cooked liquid should not be removed out immediately. Several moments
should be waited before removing In order to avoid possible hazards caused
by delayed eruptive boiling of liquids. Eggs in their shell, whole hard-boiled
eggs should not be heated in microwave ovens since they may explode, even
after microwave heating has ended.
e. The contents of feeding bottles and baby food jars are to be stirred or shaken
and the temperature is to be checked before consumption, in order to avoid
burns.
8. Never operate the oven further if the door or door seals are damaged. Return the
appliance to the nearest authorized service center for repair and maintenance.
Never try to adjust or repair the oven yourself.
9. If the supply cord is damaged it must be replaced by the manufacturer or its
service agent or a qualified technician in order to avoid a shock hazard.
10. After cooking, the container is very hot. Using gloves to take out the food and
avoid steam burns by directing steam away from the face and hands.
11. Slowly lift the furthest edge of dishes cover and microwave plastic wrap and
carefully open popcorn and oven cooking bags away from the face.
12. To prevent the turntable from breaking:
a. Let the turntable cool down before cleaning.
b. Do not place hot foods or utensils on the cold turntable.
c. Do not place frozen foods or utensils on the hot turntable.
d. Make sure the utensils do not touch the interior walls during cooking.
13. Do not store food or any other things inside the oven.
14. Do not operate the oven without any liquid or food inside the oven. This would do
damage the oven.
15. This appliance is not intended for used by persons (including children) with
reduced physical, sensory or mental capabilities, or lack of experience and
knowledge, unless they have been given supervision or instruction concerning
use of the appliances by a person responsible for their safety.
16. Power rated voltage range ± 10% fluctuation, microwave oven can work in proper.
However, the output power will affect the working time. Therefore, according to
2

the actual situation, you can adjust the cooking time.
17. Warning Microwave Radiation.
18. Any accessories not recommended by the manufacturer may cause injuries to
appliances or persons.
19. After using, unplug the power cord, make sure not to put the power cord directly
above the cover, or close to the fire and submerged in water.
20. Do not try to cook any food with the oven door opening, never put anything into
the safety lock.
21. Microwave oven has microwave source and high pressure, and there is no
structure for user to adjust. Never remove the out cover.
22. Do not use outdoors.
23. This appliance is not intended to be operated by means of an external timer or
separate remote-control system.
24. The oven should be cleaned regularly and any food deposits removed.
25. Do not use harsh abrasive cleaners or sharp metal scrapers to clean the oven
door glass since they can scratch the surface, which may result in shattering of
the glass.
26. Failure to maintain the oven in a clean condition could lead to deterioration of the
surface that could adversely affect the life of the appliance and possibly result in
a hazardous situation
27. During use the appliance becomes hot. Care should be taken to avoid touching
heating elements inside the oven.
28. WARNING: Accessible parts may become hot during use. Young children should
be kept away.
29. Do not operate the microwave oven without the rotating ring and glass turntable.
30. Do not beat the control panel, or it will be broken.
31. Children should be supervised to ensure that they do not play with the appliance.
32. The lamp inside the product is used for lighting of the product. This lamp is not
suitable for household room illumination.
33. When the appliance is operated in the combination mode, children should only
use the oven under adult supervision due to the temperatures generated.
34. Device Group 2 Class B
This device is a Group 2 because it intentionally produced the radio
frequency energy to treat the material and is intended to be used in a local home
or a facility connected directly to the distribution of electricity at low voltage
supplying domestic premises (Class B)
Technical parameters
+,/5%6-1400 900 1000 1300 2450 28230V
Model
Microwave
power
consumption Volume
input
power
output
power
Voltage/
Frequency
~/50Hz
Grill
power
Convection
Convection Convection
power
Grill combi 1 Grill combi 2 combi 1 combi 2
1330 998 1337 1297
3

a. Do not remove the Waveguide cover during cleaning
b. Make sure the Waveguide cover installation right and no damage during cooking
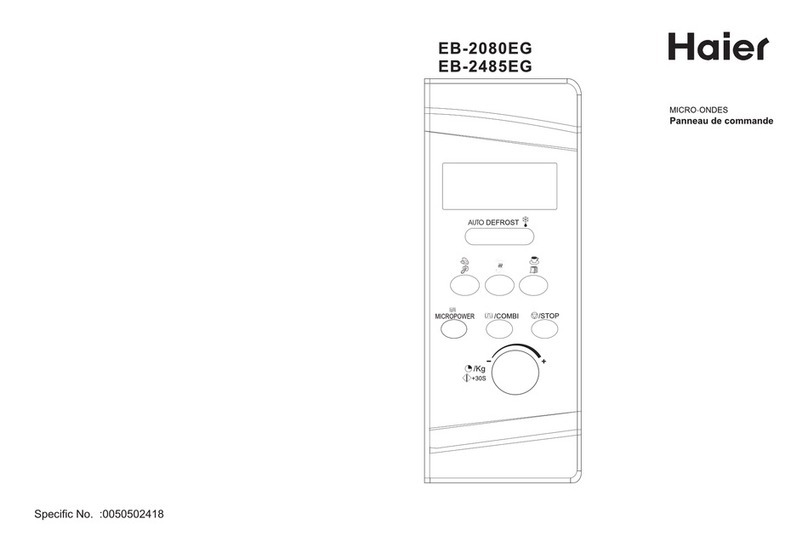
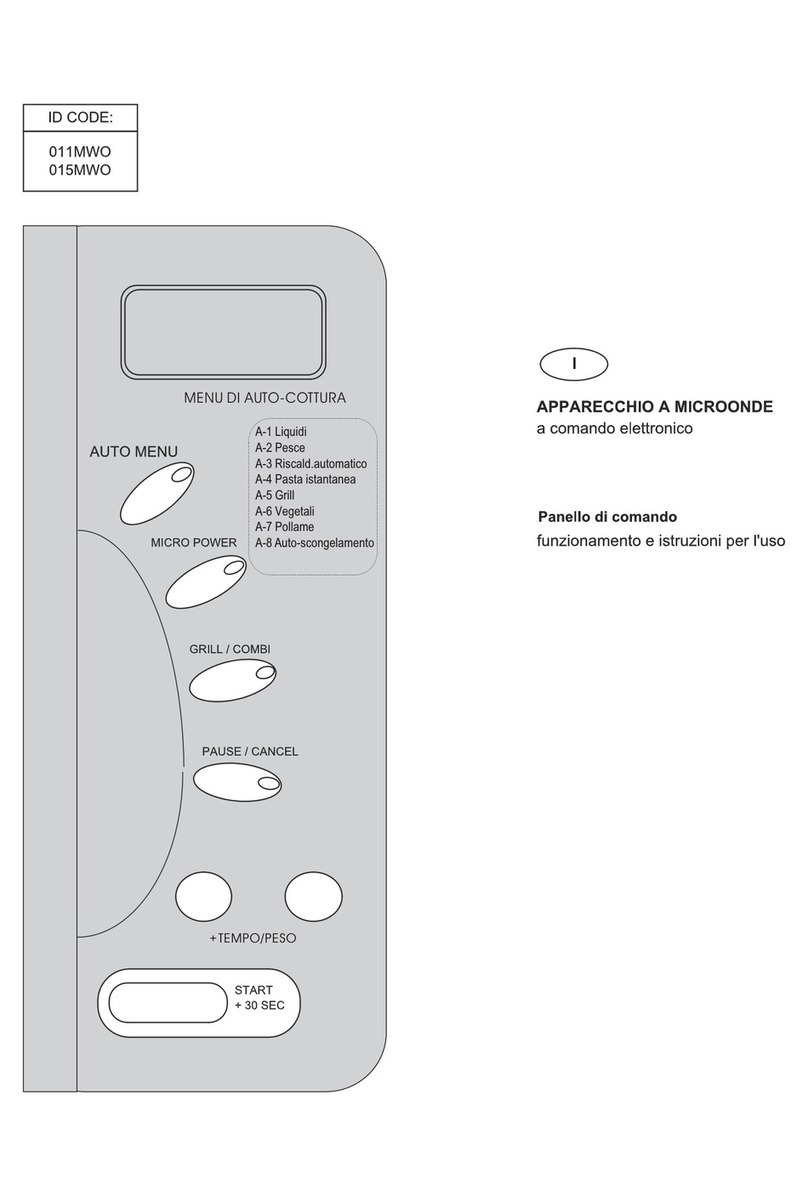
2. Control panel
Set microwave
power level
Set clock/Defrost/keep
warm/Deodorizer
Select Grill/Grill combination/Convection
oven combination cooking
Select cooking time or
weight during cooking
select Auto Cooking menu
Stop cooking or clear settings
Start
Function and Operation method
The LCD flashes 3 times when plugged in power supply. Then it flashes :
prompting you to input the cooking menu and time.press start button in this time,
the oven start express cook with high power one minutes.
Defrost
Preset/Clock
Deodorizer
Keep warm
Stop/clear Instant/start
RotisserieGrill/combi
Conv/combi
Micro power
Auto cook Time weight
Temp
the oven start express cook with high power one minutes.
Household use only
PRODUCT INTRODUCTION
Appearance and structure diagram
4

5

Medium power
60% microwave power. Applicable for steaming food
Medium
Low power
40% microwave power. Applicable for defrosting food
Low power
20% microwave power. Applicable for keeping warm
a. The max time which can be set is 60 minutes
b. Never use the grill rack during microwave cooking.
c. Never operate the oven empty.
d. If you turn the food during operation, press the Instant/Start button once and
the preset cooking procedure will continue.
e. If you intend to remove the food before the preset time, you must press
Stop/Clear button once to clear the preset procedure to avoid unintended
operation of next time use.
Example: To cook at P80 for 10 minutes.
Depress
Display
1
After power-up, the colon flashes
2
Select the desired microwave power by depressing Micro
Power button consecutively
’ ! ( #
3
Set cooking time by turning Auto Cook/ Time Weight
Temp knob.
$! "! ! #
4
Press Instant/Start button to start and LCD will count down
to show running time.
You may change the cooking time during cooking. And it is recommended
turning the food halfway, after you turn the food. Press Instant/Start button once
to continue.
6

Pr-H
7

5
Set the cooking time by turning Auto Cook/ Time Weight
Temp knob
%! "! ! #
6
Press Instant/Start button start cooking
7
When cooking program is ended, the integrated cooling fan
will automatically start running for 30 seconds while the
lamp is illuminated. This is intended to prolong the lifetime
of electronic part.
4.2 Grill/combination
G
Grill, the heat element will be energized during operation time. Which is
applicable for rolling thin meats or pork, sausage, chicken wing as good
brown color can be obtained
G1
Combination of Grill and microwave cooking. 30% of time microwave output
and 70% of time light
wave
G2
Combination of Grill and microwave cooking. 55% of time microwave output
and 45% of time light
wave
In the mode of convection/combo/grill, all of the oven parts, as well as the rack
and cooking containers, may become very hot. Use caution when removing any
item from the oven. Use heavy potholders or oven mitts to PREVENT BURNS.
Example: To grill food with G2 cook menu for 10 minutes
Depress
Display
1.After power-up, the colon flashes
2. Press Grill Combo/ Conv Comb button to select desired grill
menu
* +%#
3. Set cooking time by turning Auto Cook/ Time Weight Temp
knob
$! "! ! #
8

show d.1 d.2 d.3
9

A-01,A-02 A-17
Press Defrost button
Press Defrost button to set the food kind
10

A-01 Name of the Receipe Mode weight Time No
1 Auto Cook 100%MW 50 gm 1.30min 1
100%MW 100 gm 2.00min 2
100%MW 150 gm 2.30 min 3
100%MW 200 gm 3.00min 4
100%MW 250 gm 3.30 min 5
2 Tea/Coffee 100%MW 1 Cup 3.30 Min 6
100%MW 2 Cup 4.30 Min 7
100%MW 3 Cup 5.30 Min 8
3 Boiled Potato 100%MW 250 gm 18.oo Min 9
4 PopCorn 100%MW 1 3.30 Min 10
A-02 SOUP
1 Tomato Soup 100%MW 1 8.00 Min 11
2 Palak Soup 100%MW 1 8.ooMin 12
3 Sweet Corn Soup 100%MW 1 15.00 Min 13
A-03 SNACKS only sandwich
1 Open Grill Sandwich Grill 1
1
0min+8mi
n
14
2 Upma 100%MW 2 8.00 Min 15
3 Pizza Con 230C 3 15 Min 16
4 Idli/Dhokla 100% MW 4 5.00 Min 17
A-04 INTERNATIONAL RECIPES
1 Thai Red Curry 100% mw 1 28Min 18
2 Thai Green Curry 100%mw 1 28Min 19
3 Thai Cauliflower Curry 100%mw 250 g 16min 20
500g 18min
4 Thai Fish Curry 100% mw 250 g 8min 21
500g 9min
5 Mexican Rice 100% mw 150 g 18min 22
6 Mexican Hot Chocolate 100% mw 1 8min 23
7 Mexican Spicy Corn 100% mw 1 5min 24
8 Nachas Grill 1 8min 25
A-05 SOUTH/ NORTH INDIAN RECIPES
1 Avial 100%mw 1 18min 26
2 Veg Coconut Curry 100%mw 250g 17min 27
500 g 19min
Auto Cook Menu List for HIL2801RBSJ
Preheat+Cook
11

3 Pumpkin Samber 100%mw 1 37min 28
4 Lemon Rice 100%mw 1 4mim 29
5 Tomato Rasam 100%mw 1 11min 30
6 Imli ki Chutney 1oo%mw 1 8min 31
7 Sweet Rice 1oo%mw 150gm 25min 32
8 Rawa Masala Idli 80%mw 1 5min 33
9 Dry Gobi 100Mw 250 g 16min 34
500g 18min
10 Dry Cabbage 100Mw 1 6.30 min 35
11 Tomato Rice 100% 1 19.00 min 36
12 FISH PIECES G -2 250gm 6.00Min 37
G -2 500 gm 6.30min
A-06 GUJARATHI DISHES
1 Makai Ni Khichdi 100%mw 1 14min 38
2 Gujarathi Kadi 100%mw 1 10min 39
3 Ama ki Chutney 100%mw 1 7min 40
4 Sev Tomato Curry 100%mw 1 8min 41
5 Ama ka Panna 100%mw 1 10min 42
6Ounidhyu 100%mw 1 20min 43
7Kela Methi nu Shaak 100%mw 1 6min 44
8Masala Bhendi 100%mw 250 gm 6.30Min 45
100%mw 500 gm 7.30 min
A-07 RAJATHANI DISHES
1Gatta Kadhi 100%mw 1 14min 46
2Gattt ka Pulav 100%mw 1 18min 47
3Bengen Masala 100%mw 250g 14min 48
500g 16min
4Chicken Masala 100%mw 250 g 17min 49
500g 19min
5Pyaz ki Subzi 100%mw 1 14min 50
A-08 PUNJABI DISHES
1Koya Mutar 100%mw 1 16min 51
2Keema Mutar 100%mw 1 17min 52
3Methi Mutar Malai 100%mw 1 15min 53
4Veg Makhanwala 100%mw 250g 17min 54
500g 19min
5Paneer Makhani 100%mw 1 10min 55
6Navratna Kurma 100%mw 1 18min 56
7Paneer Masala 100%mw 1 10min 57
8 PANEER MUTTER MASALA 100%mw 250 gm 17.30 Min 58
100%mw 500 gm 21.00 Min
9Aloo Gobi 100%mw 1 8.00 Min 59
10 CHICKEN LEGS G -2 250 gm 18.00Min 60
G -2 500 gm 20.00 Min
12

A-09 BENGALI DISHES
1Mustard Chicken com-2 250 g 17min 61
500g 19min
2Prawn Malai Curry 100%mw 250g 9min 62
500g 11min
3Bhapa Mach 100%mw 250 g 8min 63
500g 10min
4Chholar Dal 100%mw 1 28min 64
5Pudina Fish 80%mw 1 7min 65
6Shukta 100%mw 1 18min 66
7Tomato Chutney 100%mw 1 10min 67
A-10 MAHARASHTRIAN DISHES
1Coconut Rice 100%mw 1 18min 68
2Masala Rice 100%mw 1 18min 69
3Stuffed Capsicum 100%mw 250g 6min 70
500g 8min
4Rice Kheer 100%mw 1 12min 71
5seviyachi Kheer 100%mw 1 10min 72
6Veg Kalvan 100%mw 1 16min 73
7Veg Kolhapuri 100%mw 250 gm 18.00 Min 74
100%mw 500 gm 21.00 Min
A-11 TANDOORI/BAKE CORNER 200c con cooking time
1 Veg cutlet 200c preheat 10min 1 12min 75
2 Aloo ki tikki 200c preheat 10min 1 12min 76
3 Reshmi paneer tikka 200c preheat 10min 1 14min 77
4 hara bhara kabab 200c preheat 10min 1 12min 78
5 Chicken hawalian pizza 200c preheat 10 min 1 12min 79
6 Cheez chilli toast 200c preheat 10 min 1 10min 80
7 Tandoori Chicken G -2 1 20.00 Min 81
8 TANDOORI FISH G -2 1 6.00 Min 82
9Tandoori Aloo 100%mw 1 8.00 Min 83
A-12 STEAM COOK/ FOOD
1 Patra 80%mw 1 5min 84
2 Methi muthia 80%mw 1 3min 85
3 Coriander Vadi (Muthia) 80%mw 1 3min 86
4 Palak Idli 80%mw 1 5min 87
5 Steam Manchurian 80%mw 1 5min 88
A-13 STOCK/SAUCE CORNER
1 Veg Stock 100%mw 1 18min 89
2 Chicken Stock 100%mw 1 2omin 90
3 Fish Stock 100%mw 1 10min 91
4 Mutton Stock 100%mw 1 22min 92
5 White Sauce 100%mw 1 4min 93
6 Pizza Sauce 100%mw 1 6min 94
7 Tomato Sauce 100%mw 1 7min 95
13

8 Shezwan Sauce 100%mw 1 6min 96
A-14 BASIC CORNER /MAIN MENU
1 Green Pulav 100%mw 1 18min 97
2 Makai Shorba 100%mw 1 16min 98
3 Phool gobi mutter subzi 100%mw 1 18min 99
4 Butta simla mirch subzi 100%mw 1 18min 100
5 Khubh ki subzi 100%mw 1 7 min 101
6 Khubh ki biryani 100%mw 1 18min 102
7 Sabz biryani 100%mw 1 18min 103
8 Acharya khichdi 100%mw 1 25min 104
A-15 Oil free food
1 subzi kadhi 100%mw 1 9min 105
2 palak rice 100%mw 1 18min 106
3 Mix veggi curry 100%mw 1 19min 107
4 palak dal 100%mw 1 12min 108
5 Shahi paneer mutter 100%mw 1 16min 109
6 Tinda masala 100%mw 1 14min 110
A-16 SWEETS
1 Dudhi Halwa 100%mw 1 18.00 Min 111
2 Gajar Halwa 100%mw 1 12.00 Min 112
3 Apple Jam 100%mw 1 18.00 Min 113
4 Kesar Kheer 100%mw 1 28.00 Min 114
5 Baundi 100%mw 1 18.00 Min 115
6 Fruit Custard 100%mw 1 6.30 Min 116
A-17 HEALTH FOOD FOR KIDS
1 Sabudana Kheer 100%mw 1 8.30min 117
2 Suji Ka Halwa 100%mw 1 8.00 Min 118
3 Sponge Wheat Cake 100%mw 1 5.00 Min 119
4 Fruit Kheer 100%mw 1 10.00 Min 120
5 Moong Dal Ki Khichadi 100%mw 1 27.30. Min 121
6 Apple Stew 100%mw 1 5.00 Min 122
A-18 Lemon Clean
1 Lemon Clean 100%mw 1 5.00 Min 123
14

8. Automatic starting (delayed function)
If you do not want the menu be started immediately, you can preset the cooking
menu and time and the preset menu will be automatically started at your set time.
The setting will consist of 2 steps:
1. Setting the current clock;
2. Setting the cooking menu and time.
5.Turn Auto Cook/ Time Weight Temp knob to set desired
weight
6.Start cooking by pressing Instant/Start button
7.If necessary to preheat ,when preheat over,3 beep sound will be
heard, LCD display open to prompt you put in food
15

Example: Now it is 12:30 clock, if you hope that the microwave
oven will automatically start cooking with 100P microwave power
for 9 minutes and 30 seconds at 14:20
Depress
Display
1
After power-up, the colon flashes
#
1.1
press Preset/Clock button three seconds
! ! "! ! #
1.2
Set hours by turn Auto Cook/ Time Weight
Temp knob
$%"! ! #
1.3
Depress Preset/Clock button again to confirm
hours
$%"! ! #
1.4
Set minutes by turning Auto Cook/ Time Weight
Temp knob
$%"&! #
1.5
Depress Preset/Clock button once or waiting
for 5 seconds, and the numbers will go steady.
$%"&! #
2
Set the cooking menu and time
#
2.1
Select cooking power by pressing Micro Power
button
$! ! ( #
2.2
Turn Auto Cook/ Time Weight Temp knob to set
cooking time
3"&! #
2.3
Press and hold Clock button for 3 seconds to
return to current clock.
3
Set the time you expect to start. Repeat the
steps of 1.2, 1.3, 1.4
4
Depress Clock button to confirm the delayed
menu. Now the program has been activated.
And the menu will be started at 14:20.
5
You may check the preset starting time by
depressing Clock button.
16

9. Multi-sequence cooking
To obtain best cooking result, some recipes call for different cook mode and time.
You may program your personalized menu as follow:
Example: You want cook food with 100P microwave for 3 minutes
then grill food for 9 minutes. This is 2 sequence setting.
Depress
Display
1
100P microwave for 3min
1.1
Press Micro Power button to select power level.
$! ! ( #
1.2
Turn Auto Cook/ Time Weight Temp knob to set
cooking time.
&"! ! #
2
Grill for 9min
#
2.1
Press Grill. Combo/ Conv. Combo button to
select desired grill menu
* #
2.2
Turn Auto Cook/ Time Weight Temp knob to set
cooking time.
3"! ! #
3
Start cooking by pressing Instant/Start button
a. When microwave power cooking is finished, microwave oven will begin grilling
operation automatically.
b. Max 4 sequences can be set per time, repeat the steps
10. Rotisserie
Press this button LCD Display will cycle to show Ar.!Ar.1!Ar.2
17

Pr-H
18
Table of contents
Other Haier Microwave Oven manuals

Haier
Haier HR-6751M User manual

Haier
Haier MO-2280M User manual

Haier
Haier MWQ6046RW User manual

Haier
Haier UA-0770M User manual

Haier
Haier HMV1630DBBB User manual

Haier
Haier MWQ767T User manual

Haier
Haier Bauer HR-6752D User manual

Haier
Haier Thermocool MD-2280M User manual

Haier
Haier HDN-2380EG User manual

Haier
Haier HR-6703D User manual

Haier
Haier AEB-3190ET User manual

Haier
Haier HR-6752T User manual

Haier
Haier MD-2485EG User manual

Haier
Haier EB-2080EGV User manual

Haier
Haier EB-3190EGS User manual

Haier
Haier MWM0701 User manual

Haier
Haier MWG7047TW / B User manual

Haier
Haier HGN-2070MG User manual

Haier
Haier AED-3190ET User manual

Haier
Haier EB-40100E User manual