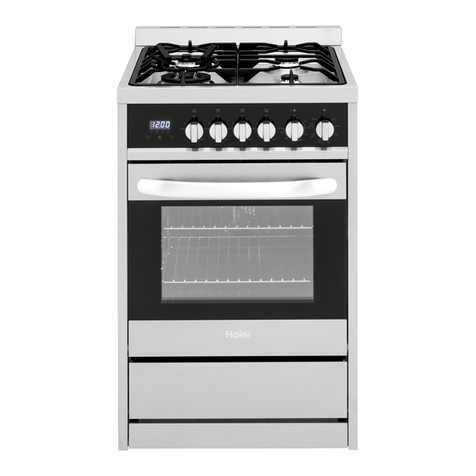
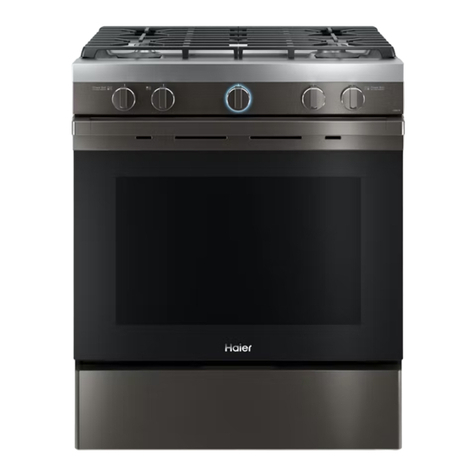
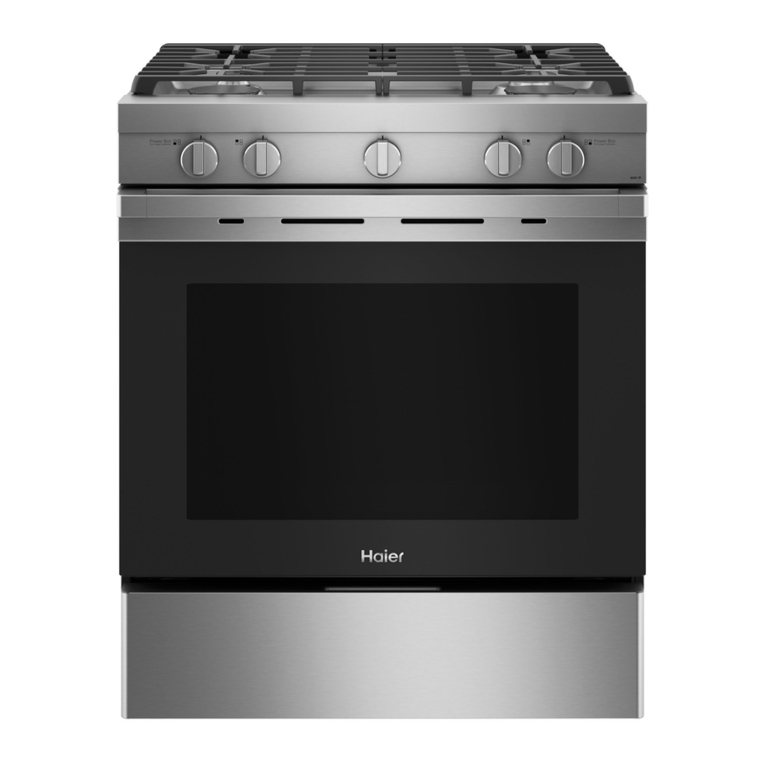
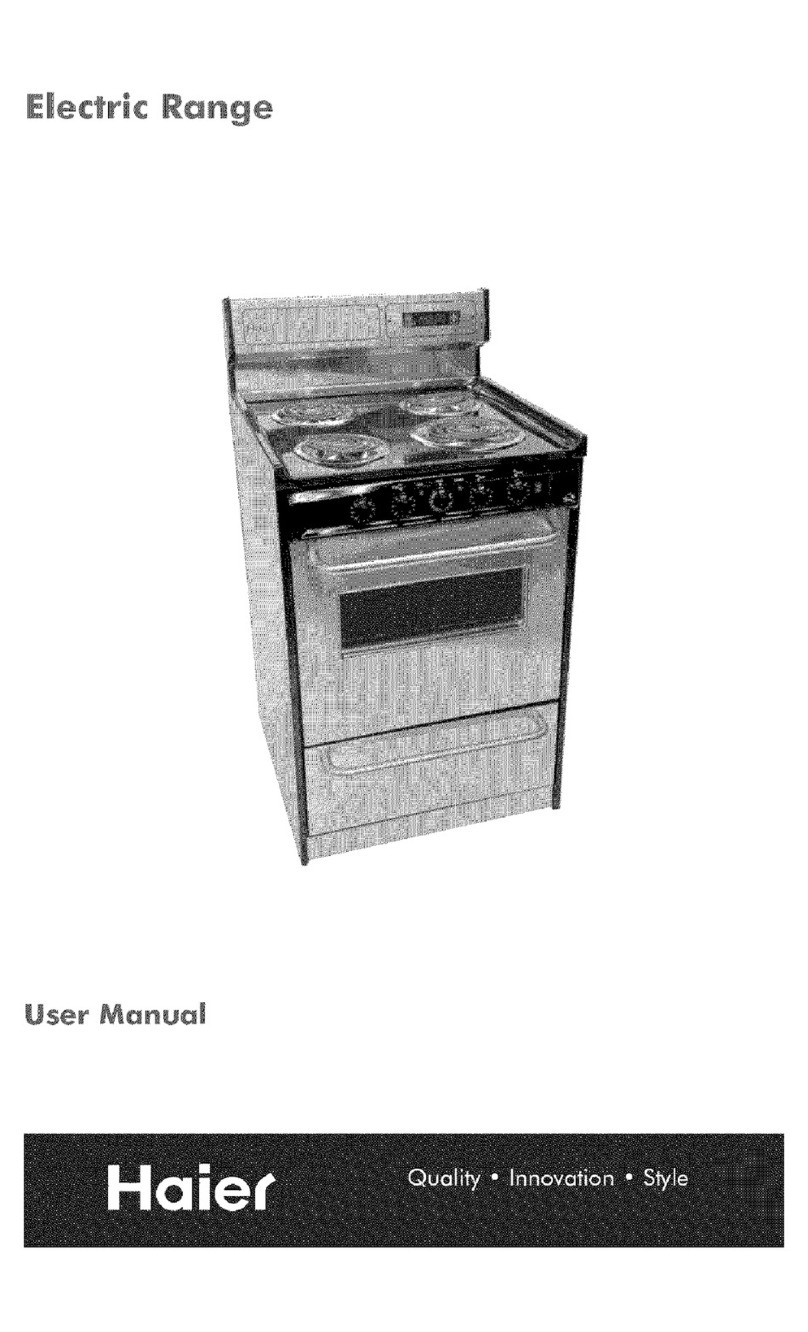
Haier QGSS740 User manual

ESPAÑOL
Paraconsultarunaversionenespañol
deestemanualdeinstrucciones,
visitenuestrositiodeinternet
Haierappliances.com.
UserManual
QGSS740
GasRanges
49-2000675 Rev. 0 03-20 GEA


49-2000675 Rev.0 3
ENGLISH
RECORDKEEPING
ThankyouforpurchasingthisHaierproduct.Thisusermanual
willhelpyougetthebestperformancefromyournewrange.
Forfuturereference,recordthemodelandserialnumber
locatedonthefrontbehindtherangestoragedrawer,andthe
dateofpurchase.
Stapleyourproofofpurchasetothismanualtoaidin
obtainingwarrantyserviceifneeded.
____________________________________________________
Modelnumber
____________________________________________________
Serialnumber
____________________________________________________
Dateofpurchase
TABLEOFCONTENTS
HAIER WEBSITE
Haveaquestionorneedassistancewith your appliance? Try theHaierWebsite24hoursaday,anydayofthe year! You
canalsoshopformoregreatHaier products and take advantageofallouron-linesupportservicesdesignedforyour
convenience.IntheUS:Haierappliances.com
SAFETYINFORMATION ............................................................................................4
USINGTHE RANGE ................................................................................................8
ConnectingYourWifiEnabledOven.....................................................................................8
RemoteEnableEquipment .............................................................................................8
InCaseOfaPowerFailure ..............................................................................................9
SurfaceBurners........................................................................................................9
OvenControls ........................................................................................................10
APPOnlyProductSettings............................................................................................10
SabbathMode ........................................................................................................11
CookwareGuidelines..................................................................................................12
CookingModes .......................................................................................................12
OvenProbe...........................................................................................................13
OvenRacks...........................................................................................................14
OvenAirVents........................................................................................................14
AluminumFoilandOvenLiners ........................................................................................14
CookingGuide........................................................................................................15
CAREAND CLEANING ............................................................................................16
Oven.................................................................................................................16
Cooktop..............................................................................................................16
DoorandDrawer......................................................................................................18
OvenLight............................................................................................................19
OvenDoor............................................................................................................19
TROUBLESHOOTINGTIPS ........................................................................................20
LIMITEDWARRANTY ............................................................................................ 22
ACCESSORIES .................................................................................................. 23

449-2000675 Rev.0
ENGLISH
READ AND SAVE THESE INSTRUCTIONS
IMPORTANT SAFETY INFORMATION
READ ALL INSTRUCTIONS BEFORE USING THE APPLIANCE
WARNING If the information in this manual is not followed exactly, a fire or explosion may
result, causing property damage, personal injury or death.
- Do not store or use gasoline or other flammable vapors and liquids in the vicinity of this or any
other appliance.
- WHAT TO DO IF YOU SMELL GAS
• Do not try to light any appliance.
• Do not touch any electrical switch; do not use any phone in your building.
• Immediately call your gas supplier from a neighbor’s phone. Follow the gas supplier’s
instructions.
• If you cannot reach your gas supplier, call the fire department.
- Installationand servicemustbeperformed by a qualified installer, service agencyorthegassupplier.
WARNING Readallsafetyinstructionsbeforeusingthe product. Failure to followtheseinstructionsmayresultinfire,
electricalshock,seriousinjuryordeath.
SAFETYINFORMATION
ANTI-TIP DEVICE Toreducetheriskoftippingthe range,
therangemustbesecuredbya properly
installedanti-tipbracket.Seeinstallation
instructionsshippedwiththebracketfor
completedetailsbeforeattemptingto
install.
For Free-Standing and Slide-In Ranges
Tocheckifthebracketisinstalled and
engagedproperly,lookunderneaththe
rangetoseethattherearleveling leg is engaged inthebracket.Onsome
models,thestoragedrawerorkickpanel can be removed foreasyinspection.
Ifvisualinspectionisnotpossible,slide the range forward, confirmtheanti-
tipbracketissecurelyattachedtothe floor or wall, andslidetherangeback
sotherearlevelinglegisunder the anti-tip bracket.
Iftherangeispulledfromthe wall for any reason,alwaysrepeatthis
proceduretoverifytherangeisproperly secured by the anti-tipbracket.
Nevercompletelyremovethelevelinglegsor the range will notbesecuredto
theanti-tipdeviceproperly.
Anti-Tip
Bracket
LevelingLeg
Free-StandingandSlide-InRanges
• Achild oradult cantip therangeand bekilled.
¬ Òñö÷äïï÷ëèäñ÷ì¡÷ìóåõäæîè÷÷ò÷ëèúäïïòõĥòòõ
• Engagethe rangetotheanti-tip bracketbyslidingthe
rangebacksuch thatthe footisengaged.
• Re-engagetheanti-tipbracketiftherangeis moved.
• Failuretodosocanresultindeathorseriousburns
tochildrenor adults.
Tip-OverHazard
WARNING

49-2000675 Rev.0 5
ENGLISH
READ AND SAVE THESE INSTRUCTIONS
IMPORTANT SAFETY INFORMATION
READ ALL INSTRUCTIONS BEFORE USING THE APPLIANCE
SAFETYINFORMATION
WARNING GENERAL SAFETY INSTRUCTIONS
WARNING
NEVER use this appliance as a
space heater to heat or warm the room. Doing
so may result in carbon monoxide poisoning and
overheating of the oven.
• Usethisapplianceforitsintendedpurpose as described
inthisowner’smanual.
• Haveyourrangeinstalledandproperlygrounded by
aqualifiedinstallerinaccordancewiththe provided
installationinstructions.
• Anyadjustmentandserviceshouldbeperformed only
byaqualifiedgasrangeinstalleror service technician.
Donotattempttorepairorreplace any part of your
rangeunlessitisspecificallyrecommendedin this
manual.
• Yourrangeisshippedfromthefactory set for use with
naturalgas.Itcanbeconvertedfor use with propane
gas.Ifrequired,theseadjustmentsmustbe made by a
qualifiedtechnicianinaccordancewiththeinstallation
instructionsandlocalcodes.Theagencyperforming
thisworkassumesresponsibilityfortheconversion.
• Havetheinstallershowyouthelocation of the range
gasshut-offvalveandhowtoturn it off if necessary.
• Plugyourrangeintoa120-voltgrounded outlet only.
Donotremovetheroundgroundingprong from the
plug.Ifindoubtaboutthegrounding of the home
electricalsystem,itisyourresponsibilityand obligation
tohaveanungroundedoutletreplacedwith a properly
grounded,threeprongoutletinaccordancewith the
NationalElectricalCode.Donotusean extension cord
withthisappliance.
• Beforeperforminganyservice,unplugtherange
ordisconnectthepowersupplyatthe household
distributionpanelbyremovingthefuseor switching off
thecircuitbreaker.
• Besureallpackingmaterialsareremoved from the
rangebeforeoperatingtopreventignitionof these
materials.
• Avoidscratchingorimpactingglassdoors,cooktops, or
controlpanels.Doingsomayleadto glass breakage. Do
notcookonaproductwithbroken glass. Shock, fire, or
cutsmayoccur.
• Donotleavechildrenaloneorunattended in an
areawhereanapplianceisinuse. They should never
beallowedtoclimb,sitorstand on any part ofthe
appliance.
• CAUTION
Donot storeitemsofinterestto
childrenincabinets aboveanoven-children climbingon
theovento reachitemscouldbeseriously injured.
• Neverblockthevents(airopenings)of the range. They
providetheairinletsandoutletsthat are necessary for
therangetooperateproperlywithcorrect combustion.
Airopeningsarelocatedattherear of the cooktop, at
thetopandbottomoftheoven door, and at thebottom
oftherangeunderthewarmingdrawer, lower oven
drawerorkickpanel.
• Useonlydrypotholders—moistordamp pot holders
onhotsurfacesmayresultinburns from steam. Do not
letpotholderstouchsurfaceburners,burner grate, or
ovenheatingelement.Donotusea towel or other bulky
clothinplaceofpotholders.
• Donottouchtheheatingelementsor the interior
surfaceoftheoven.Thesesurfacesmay be hot
enoughtoburneventhoughtheyare dark in color.
Duringandafteruse,donottouch, or let clothing or
otherflammablematerialscontactanyinteriorarea of
theoven;allowsufficienttimeforcooling first. Other
surfacesoftheappliancemaybecomehot enough
tocauseburns.Potentiallyhotsurfacesinclude the
burners,grates,ovenventopening,surfacesnear the
opening,andcrevicesaroundtheovendoor.
• Donotheatunopenedfoodcontainers.Pressure could
buildupandthecontainercouldburst, causing an injury.
• Cookfoodthoroughlytohelpprotectagainst
foodborneillness.Minimumsafefoodtemperature
recommendationscanbefoundat IsItDoneYet.gov and
fsis.usda.gov.Useafoodthermometertotake food
temperaturesandcheckseverallocations.
•
Donotallow anyonetoclimb,standor hangontheoven
door,draweror cooktop.Theycoulddamagethe rangeor
tipitover causingsevereinjuryordeath.

649-2000675 Rev.0
ENGLISH
WARNING KEEP FLAMMABLE MATERIALS AWAY FROM THE RANGE
Failure to do so may result in fire or personal injury.
• Donotstoreoruseflammablematerials in an oven or
nearthecooktop,includingpaper,plastic,pot holders,
linens,wallcoverings,curtains,drapesandgasoline or
otherflammablevaporsandliquids.
• Neverwearloose-fittingorhanginggarmentswhile
usingtheappliance.Thesegarmentsmayignite if they
contacthotsurfacescausingsevereburns.
• Donotletcookinggreaseorother flammable materials
accumulateinorneartherange.Grease in the oven or
onthecooktopmayignite.
WARNING IN THE EVENT OF A FIRE, TAKE THE FOLLOWING
STEPS TO PREVENT INJURY AND FIRE SPREADING
• Donotusewaterongreasefires. Never pick up a
flamingpan.Turnthecontrolsoff.Smother a flaming
panonasurfaceunitbycovering the pan completely
withawell-fittinglid,cookiesheetor flat tray. Use
amulti-purposedrychemicalorfoam-typefire
extinguisher.
• Ifthereisafireinthe oven during baking, smotherthe
firebyclosingtheovendoorand turning the oven offor
byusingamulti-purposedrychemicalor foam-type fire
extinguisher.
• Ifthereisafireinthe oven during self-clean, turnthe
ovenoffandwaitforthefire to go out. Donotforce
thedooropen.Introductionoffreshair at self-clean
temperaturesmayleadtoaburstof flame from the
oven.Failuretofollowthisinstructionmay result in
severeburns.
WARNING COOKTOP SAFETY INSTRUCTIONS
• Neverleavethesurfaceburnersunattended.Foods,
especiallyoilyfoods,mayigniteresultingin fire that
couldspreadtosurroundingcabinets.
• Neverleaveoilunattendedwhilefrying.If allowed to
heatbeyonditssmokingpoint,oilmay ignite resulting
infirethatmayspreadtosurrounding cabinets. Use a
deepfatthermometerwheneverpossibletomonitor oil
temperature.
• Toavoidoilspilloverandfire,use the minimum amount
ofoilwhenusingashallowpan-frying and avoid cooking
frozenfoodswithexcessiveamountsofice.
• Useproperpansizeandavoidpans that are unstable or
easilytipped.Selectcookwarethatismatched to the
sizeoftheburner.Burnerflamesshould be adjusted so
thattheydonotextendbeyondthe bottom of the pan.
Excessiveflamemaybehazardous.
• AlwaysusetheLITEpositionwhenigniting the top
burnersandmakesuretheburnershave ignited.
• Whenusingglass/ceramiccookware,makesureit is
suitableforcooktopservice;othersmaybreak because
ofsuddenchangeintemperature.
• Tominimizethepossibilityofburns,ignition of
flammablematerialsandspillage,thehandleof a
containershouldbeturnedtowardthecenter of the
rangewithoutextendingovernearbyburners.
• Donotuseawokwitha round metal support ring.The
ringmaytrapheatandblockair to the burner resulting
inacarbonmonoxidehazard.
• Donotattempttoliftthecooktop. Doing so may
damagethegastubingtothesurface burners resulting
inagasleakandriskof fire.
• Donotusealuminumfoiltocover the grates or line
anypartofthecooktop.Doingso may result in carbon
monoxidepoisoning,overheatingofthecooktop
surfaces,orapotentialfirehazard.
SAFETYINFORMATION
IMPORTANT SAFETY INFORMATION
READ ALL INSTRUCTIONS BEFORE USING THE APPLIANCE
READ AND SAVE THESE INSTRUCTIONS

49-2000675 Rev.0 7
ENGLISH
WARNING OVEN SAFETY INSTRUCTIONS
WARNING NEVER cover any slots, holes, or
passages in the oven bottom or cover an entire rack
with materials such as aluminum foil or oven liners.
Doing so blocks air flow through the oven and may
cause carbon monoxide poisoning. Never place foil
or oven liners on the oven bottom. They can trap
heat causing risk of smoke or fire.
• Standawayfromtherangewhenopening the oven
door.Hotairorsteamwhichescapes can cause burns
tohands,faceand/oreyes.
• Neverplacecookingutensils,pizzaorbaking stones,
oranytypeoffoilorliner on the oven floor.These
itemscantrapheatormelt,resulting in damage to the
productandriskofshock,smokeor fire.
• Placeovenracksindesiredlocationwhile oven is cool.
Ifrackmustbemovedwhileoven is hot, be carefulto
avoidtouchinghotsurfaces.
• Donotleaveitemssuchaspaper, cooking utensils, or
foodintheovenwhennotin use. Items stored inan
ovencanignite.
• Donotleaveitemsonthecooktop near the oven vent.
Itemsmayoverheatresultinginarisk of fire or burns.
• Neverbroilwithdooropen.Open-doorbroiling is not
permittedduetooverheatingofcontrolknobs.
READ AND SAVE THESE INSTRUCTIONS
IMPORTANT SAFETY INFORMATION
READ ALL INSTRUCTIONS BEFORE USING THE APPLIANCE
SAFETYINFORMATION
How to Remove Protective Shipping Film and Packaging Tape
Carefullygraspacorneroftheprotective shipping film with
yourfingersandslowlypeelitfrom the appliance surface. Do
notuseanysharpitemsto remove the film.Removeallofthe
filmbeforeusingtheapplianceforthe first time.
Toassureno damageisdonetothe finishoftheproduct,the
safestwayto removetheadhesivefrompackaging tapeonnew
appliancesisan applicationofahouseholdliquid dishwashing
detergent.Applywith asoftclothandallow tosoak.
NOTE:The adhesive must beremovedfromallparts.It
cannotberemovedifitisbaked on.

849-2000675 Rev.0
ENGLISH
USINGTHERANGE
CONNECTING YOUR WIFI ENABLED
OVEN
Yourovenisdesignedtoprovide you with two-way
communicationbetweenyourapplianceandsmart device.
ByusingtheSmartHQmobileapp, you will be able tocontrol
essentialovenoperationssuchastemperature settings and
cookingmodesusingyoursmartphoneor tablet.*
What you will need
Yourovenusesyourexistinghome WiFi network to
communicatebetweentheapplianceandyour smart device.
Inordertosetupyouroven, you will need to gathersome
information:
1. Eachovenhas aconnectedapplianceinformationlabel
thatincludesan ApplianceNetworkNameandPassword.
Thesearethe twoimportantdetailsthatyou willneed
toconnectto theappliance.Thisinformationis found
onalabel typicallylocatedinsidethedoor oftheovenor
drawerorin theWiFiSettingsmenuon theunitdisplay.
2. Haveyoursmart phoneortabletreadywith theabilityto
accesstheinternet anddownloadapps.
3. Youwillneed toknowthepasswordof yourhomeWiFi
router.Havethis passwordreadywhileyouare settingup
youroven.
Connect your oven
1. Onyoursmart phoneortabletvisit
GEAppliances.com/connecttolearn moreabout
connectedappliancefeatures andtodownloadthe
SmartHQmobileapp.
2. Followtheapp onscreeninstructionstoconnectyour
oven.
3. Oncetheprocess iscomplete,theconnectionblue light
willstayon andtheappwillconfirm youareconnected.
4. Iftheconnection lightdoesnotturnon, followthe
instructionsonthe apptoreconnect.Ifissues continue
pleasecallat 800.220.6899andaskforassistance
regardingovenwireless connectivity.
Toconnectadditional smartdevices,repeatsteps1 and2.
Notethatanychangesormodifications to the remote enable
deviceinstalledonthisoventhat are not expressly approved
bythemanufacturercouldvoidthe user’s authority to
operatetheequipment.
* Compatible Apple or Android devices and home WiFi network required.
REMOTE ENABLE EQUIPMENT
Thisdevicecomplies withpart15ofthe FCCRules.Operation
issubjectto thefollowingtwoconditions:(1) Thisdevicemay
notcauseharmful interference,and(2)thisdevice mustaccept
anyinterferencereceived, includinginterferencethatmay
causeundesiredoperation.
Thewirelesscommunicationequipmentinstalledonthis
rangehasbeentestedandfoundto comply with the limits
foraClassBdigitaldevice,pursuant to part 15 oftheFCC
Rules.Theselimitsaredesignedto:
(a) providereasonableprotectionagainstharmful
interferenceinaresidentialinstallation.Thisequipment
generates,uses,andcanradiateradiofrequency energy and,
ifnotinstalledandusedinaccordance with the instructions,
maycauseharmfulinterferencetoradiocommunications.
However,thereisnoguaranteethatinterference will not
occurinaparticularinstallation.Ifthis equipment does cause
harmfulinterferencetoradioortelevisionreception, which
canbedeterminedbyturningtheequipment off and on, the
userisencouragedtotrytocorrect the interference by one
ormoreofthefollowingmeasures:
•Reorientorrelocatethereceivingantenna.
•Increasetheseparationbetweentheequipment and
receiver.
•Connecttheequipmentintoanoutlet on a circuit different
fromthattowhichthereceiveris connected.
•Consultthedealeroranexperienced radio/TV technician
forhelp.
(b)acceptany interferencereceived,includinginterference
thatmaycause undesiredoperationofthedevice.
Notethatanychangesormodificationsto the wireless
communicationdeviceinstalledonthisoventhat are not
expresslyapprovedbythemanufacturercouldvoid the
user’sauthoritytooperatetheequipment.
FCC: ZKJ-WCATA001 Network: GE_XXXXXX_XXXX
Password: XXXXXXXX
PT. NO. 229C6272G001-0
IC: 10229A-WCATA001
MAC ID: XX - XX - XX - XX - XX - XX
Connected Appliance Information
Sample Label

49-2000675 Rev.0 9
ENGLISH
IN CASE OF A POWER FAILURE
Intheeventofapowerfailure, the oven is inoperableandno
attemptshouldbemadetooperateit. However, the surface
burnersmaybelitwithamatch. Using extreme caution,
holdalitmatchneartheports beneath the surface burner
cap,thenslowlyturntheknobto the LITE position. Oncelit,
surfaceburnerswillcontinuetooperatenormally.
SURFACE BURNERS
Lighting a Surface Burner
WARNING Burners should be operated only when
covered by cookware. Burner flames not covered by
cookware present a risk of fire or clothing ignition. Never
let flames extend beyond the sides of the cookware.
Failure to comply may result in serious injury.
Makesureallburnersareintheir correct locations and fully
assembledbeforeattemptingtooperateanyburner.
Selectaburnerandfinditscontrol knob. Push the knobin
andturnittotheLITEposition.
Youwillhearaclickingnoise—thesound of the electric spark
ignitingtheburner.Whenoneburneris turned to LITE, all
burnerswillspark.Sparkingwillcontinueas long as the knob
remainsatLITE.Oncegasisignited, turn the knob toadjust
theflamesize.
Selecting a Flame Size
Watchtheflame,nottheknob,as you adjust heat. When
rapidheatingisdesired,theflamesize should match the
sizeofthecookwareyouareusing. Flames larger than the
bottomofthecookwarewillnotheat faster and may be
hazardous.
Using the Surface Burners
NOTES:
• Donotoperatetheburnerforan extended period of time
withoutcookwareonthegrate.Thefinish on the grate
maydiscolororchipwithoutcookwareto absorb the heat.
• Donotattempttodisassembleanyburner while another
burnerison.Damagetotheproduct may occur.
• Besuretheburnersandgratesare cool before you place
yourhand,apotholderorcleaning materials on them.
Yourrangetophassealedgasburnersthat offer
convenience,cleanabilityandflexibilityforawide range of
cookingapplications.
Thesmallestburneristhesimmerburner. A simmer burner
turneddowntoLOprovidesprecisecooking performance
forfoodssuchasdelicatesaucesthat require low heat fora
longcookingtime.
Surface Burner
Theroundburnerisforgeneralcooking purposes. Size
cookwareappropriatelytotheflames.
USINGTHERANGE
Theseflamesare too large for thepot
Pushthecontrol knob in and turnittothe LITE position.

10 49-2000675 Rev.0
ENGLISH
SURFACE BURNERS (Cont.)
Top-of-Range Cookware
Aluminum: Medium-weightcookwareisrecommended
becauseitheatsquickly andevenly.Mostfoodsbrown evenly
inanaluminumskillet.Usesaucepanswith tight-fitting lids
whencookingwithminimumamountsofwater.
StainlessSteel:Thismetal alone haspoorheatingproperties
andisusuallycombinedwithcopper,aluminum or other
metalsforimprovedheatdistribution.Combinationmetal
skilletsusuallyworksatisfactorilyiftheyare used with
mediumheatorasthemanufacturerrecommends.
Cast-Iron:Ifheated slowly,mostskilletswillgive satisfactory
results.
Enamelware: Undersomeconditions,theenamelofsome
cookwaremaymelt.Followthecookwaremanufacturer’s
recommendationsforcookingmethods.
Glass:Thereare twotypesofglasscookware—those for
ovenuseonly andthosefortop-of-rangecooking (saucepans,
coffeeandteapots). Glassconductsheatveryslowly.
Heatproof Glass Ceramic: Canbeusedforeithersurfaceor
ovencooking.Itconductsheatveryslowly and cools very
slowly.Checkthecookwaremanufacturer’sdirectionsto be
sureitcanbeusedongas ranges.
Stove Top Grills
Donotuseanafter-marketstovetop grill on your gas
surfaceburners.Astovetopgrillwill cause incomplete
combustionresultingincarbonmonoxidelevelsabove
allowablestandards.Thiscouldbehazardousto your health.
UsingaWok
Useonlyaflat-bottomedwokwitha diameter of 14 inchesor
less.Makesurethewokbottomsits flat on the grate.
Donotuseawoksupportring. Placing the ring overthe
burnerorgratemaycausetheburner to work improperly,
resultingincarbonmonoxidelevelsaboveallowable
standards.Thiscouldbehazardoustoyour health.
OVEN CONTROLS
Oven Mode Selector Knob
TurntheOvenModeSelectorknobto the mode you want.
Yourovenhasthefollowingcookingmodes: Warm, Bake and
Broil.SeeCookingModessectionandSteam Clean for more
information.Theilluminatedoven knobflashesorangeduring
preheatandturnssolidorangewhenthe oven is preheated.
Theoventemperaturecalibrationiscontrolledthrough the
SmartHQapp.Toadjusttheoventemperature, download
theappfromtheappstoreto access this feature.
APP ONLY PRODUCT SETTINGS
TheSmartHQMobileAppallowsaccessto additional
functions.
WiFiConnectandRemoteEnable
Yourovenisdesignedtoprovideyouwithtwo-way
communicationbetweenyourapplianceandsmartdevice.By
usingtheWiFiConnectfeatures,youwillturntheOvenMode
SelectorKnobtoAPP. ItisnecessarytoturnonWiFibefore
usingRemoteEnableonyouroven.
Remote starting your oven
Tobeabletostarttheoven remotely once connected to
WiFi,turntheOvenModeSelectorKnob to APP. The oven
cannowberemotelystartedwitha connected device. The
OvenModeSelectorKnob mustbelitsolid blue to start the
ovenremotely.Thebluelightisnot required to change the
oventemperaturewhileitisrunningor to turn the ovenoff
fromtheapp.Afterusingtheoven, remember to verify that
theOvenModeSelectorKnobislit soild blue if youwishto
starttheovenremotelyinthefuture.
IntheSmartHQappselectyourappliance and touch the
menuicon.FromhereselectProductSettings to choose
fromthemanyadditionalfeaturesavailablethrough your
SmartHQapp.
USINGTHERANGE
Donotuse stove top grills
Useaflat-bottomed wok
OvenModeSelector Knob
IlluminatedColor
Blue
White
Red
Orange
Yellow
Green
NoLight
OvenMode
APP
SteamClean
Fault
Bake/Broil
Warm
Sabbath
Off

49-2000675 Rev.0 11
ENGLISH
USINGTHERANGE
APP ONLY PRODUCT SETTINGS (Cont.)
Oven Probe
NOTE:Onlyaccessiblethroughtraditionalandconvection
cookingmodes.
Monitorsinternalfoodtemperatureandturnstheovenoff
whenthefoodreachestheprogrammedtemperature.Insert
theprobe,pressthedesiredcookingmode,andprogram
theprobetemperature.SeetheCookingModesSectionfor
moreinformation.TheprobecanonlybeusedwithBake,
ConvectionBake,andConvectionRoast.
AutoConv(AutoConversion)
WhenusingConvectionBakeandConvectionRoastcooking,
AutoRecipeConversionwillautomaticallyconverttheregular
bakingtemperaturesenteredtoconvectionbakecooking
temperatureswhenturnedon.Notethatthisoptiondoes
notconvertconvectionbakecookingtimes,itonlyconverts
temperatures.ThisfeaturemaybeturnedOnorOff.Select
ProductSettingintheSmartHQapp.
12-Hourshutoff
Thisfeatureshutstheovendownafter12hoursof
continuousoperation.Itmaybeenabledordisabled.Select
ProductSettingintheSmartHQapptoturnthisfeatureon
oroff.
ToneVolumeandTimerEndTone
Youcanadjustthevolumeandtypeofalertyourappliance
uses.
SelectProductSettingintheSmartHQapp
formaking
volumeadjustmentsorforchangingbetweencontinuousand
singlealerttones.Acontinuoussettingwillcontinuetosound
atoneuntilabuttononthecontrolispressed.Theoventone
volumecanbeadjusted.Thecontrolwillsoundtheoventone
atthenewvolumeleveleachtimethesoundlevelischanged.
F/C(FahrenheitorCelsius)
TheovencontrolissettouseFahrenheittemperatures
(F),butyoucanchangeittouseCelsiustemperatures(C).
SelectProductSettingintheSmartHQappandF/C toalter
betweentemperaturescalesdisplayed.
AdjusttheOventemperature
Thisfeatureallowstheovenbakingandconvectionbaking
temperaturetobeadjustedupto35ºFhotterordownto35ºF
cooler.Usethisfeatureifyoubelieveyouroventemperature
istoohotortoocoldandwishtochangeit.Thisadjustment
affectsBakeandConvectionBakemodes. SelectProduct
SettingintheSmartHQapp.
AutoOvenLight
Whenthisfeatureisenabled,theovenlightwillturnonfor
everyovencycle.SelectProductSettingintheSmartHQapp
toturnthisfeatureonoroff.
BakeSetting
ThisfeatureallowsyoutosetdefaultBakesettingsto
TraditionalBakeorConvectionBakeMultiintheSmartHQ
app. SeeCookingModessectionformoredetails.
BroilSetting
ThisfeatureallowsyoutosetdefaultsettingstoBroilHighor
BroilLowintheSmartHQapp. SeeCookingModessection
formoredetails.
SABBATHMODE
CertainmodelscomplywiththeStar-KJewish Sabbath
requirementsforuseduringtheSabbathand holidays. For
thelatestlistofmodels,seestar-k.org.
Start Baking
TostartbakinguseyourSmartHQmobile app. (See
ConnectingyourWIFIEnabledOventodownload the app).
EnableSabbathmodeintheappand the oven knob backlight
willturnsolidgreen. Thisoperationshouldtake place before
theSabbathorHolidaybegin. Sabbathmodecan only be
enabledintheapp.
Adjusting the Temperature
Toadjusttheoventemperaturewhilein compliance with
Sabbathrequirements,theusermustobservethe oven
Sabbathmodesolidgreenbacklight. Toadjustthe oven
temperature,theusermustturntheoven knob to the
desiredbaketemperature.
SabbathBakecanonlybeinitiatedafter the Sabbath mode is
enabledthroughtheappandbyturning the oven knob onthe
unittothedesiredbaketemperature.
Exiting Sabbath Mode
Sabbathmodecanbedisabledeitherby the app or pushing
theovenknobinfor3seconds.
Oven Light Operation
TheovenlightisOFFforduration of Sabbath. Opening and
closingofthedoorwillnotturn the oven light toON.
Sabbath Mode Power Outage Note
Ifapoweroutageoccursduringa Sabbath bake, the unitwill
returntoSabbathmodewhenpoweris restored but the user
willneedtoturntheknobto off and then backtothedesired
temperature. Theunitwillstartwhilecomplyingto the Star
Krequirements.

12 49-2000675 Rev.0
ENGLISH
USINGTHERANGE
COOKWARE GUIDELINES
Thematerial,finish,andsizeofcookware affect baking
performance.
Dark,coatedand dullpansabsorbheatmore readilythanlight,
shinypans.Pans thatabsorbheatmorereadily canresultin
abrowner,crisper andthickercrust.Ifusing darkandcoated
cookwarecheckfood earlierthantheminimumcook time.If
undesirableresultsare obtainedwiththistypeof cookware
considerreducingoven temperatureby25ºFnext time.
• Shinypanscanproducemoreevenly cooked baked goods
suchascakesandcookies.
• Glassandceramicpansheatslowly but retain heat well.
Thesetypesofpansworkwell for dishes such as piesand
custards.
• Airinsulatedpansheatslowlyandcan reduce bottom
browning.
• Keepcookwarecleantopromoteevenheating.
• Stonewareheatsslowlyandretainsheatwell. It is
recommendedtopreheatthistypeofcookware if
possible.Additionalcooktimemayberequired.
COOKING MODES
Yournewovenhasavarietyof cooking modes to helpyou
getthebestresults.Thesemodesare described below.
RefertotheCookingGuidesectionfor recommendations
forspecificfoods.Remember,yournewoven may perform
differentlythantheovenitisreplacing.
SelectBake,Warm,orBroil fromtheOven Mode Selector
KnoborsettheknobtoAPP and choose from any ofthe
CookingModesavailablethroughtheSmartHQapp. From
theSmartHQappyoucaneasilyset the cooking mode Oven
TemperatureandtheCookTimer.
Bake
Thebakemodeisforbakingand roasting. When preparing
bakedgoodssuchascakes,cookiesand pastries, always
preheattheovenfirst.Tousethis mode turn the OvenMode
Selector knobtothedesiredtemperature.
ConvectionBakeMultiRack(SmartHQapponly)
TheConvectionBakemodeisintendedfor baking on
multipleracksatthesametime.This mode uses air
movementfromtheconvectionfantoenhance cooking
evenness.YourovenisequippedwithAuto Recipe
Conversion,soitisnotnecessaryto adjust the temperature
whenusingthismode.Alwayspreheatwhen using this mode.
Bakingtimesmaybeslightlylongerfor multiple racks than
whatwouldbeexpectedforasingle rack.
Convection Roast (SmartHQ app only)
TheConvectionRoastmodeisintendedfor roasting whole
cutsofmeatonasinglerack. This mode uses airmovement
fromteconvectionfantoimprovebrowning and reduce
cookingtime.Checkfoodearlierthanthe recipe suggested
timewhenusingthismode,oruse the probe (see theProbe
sectionformoreinformation).Itisnot necessary to preheat
whenusingthismode.
Warm
Warmmodeisdesignedtokeephot foods hot. Cover foods
thatneedtoremainmoistanddo not cover foods that
shouldbecrisp.Preheatingisnotrequired. Do not use Warm
toheatcoldfood.Itisrecommended that food not bekept
warmformorethan2hours.To use this mode turntheOven
ModeSelectorknobtoWarm.
Broil
Alwaysbroilwiththeoven door and drawer closed. Monitor
foodcloselywhilebroiling.Use caution when broiling on
theupperrackpositionsas placing food closer to the broil
burnerincreasessmoking,splattering,and the possibility of
fatsigniting.Itisnot necessary to preheat when using the
Broilmode.Tousethis mode, turn the Oven Mode Selector
knobtoBroil.
Broil Hi (SmartHQ app only)
TheBroilHighmodeusesintenseheat from the upper
elementorburnertosearfoods.Use Broil High for thinner
cutsofmeatand/orwhenyouwould like to have aseared
surfaceandrareinterior.Tousethis mode follow the
InstructionsintheSmartHQapp.
Broil Lo (SmartHQ app only)
TheBroilLowmodeuseslessintenseheatfromtheupper
elementorburnertocookfoodthoroughlywhilealso
browningthesurface.UseBroilLowforthickercutsofmeat
and/orfoodsthatyouwouldlikecookedallthewaythrough.
TousethismodefollowtheInstructionsintheSmartHQapp.
Frozen Snacks (SmartHQ app only)
TheFrozenSnacksmodesaredesignedto cook frozen
foodssuchaspotatonuggets,Frenchfries, and similar
frozensnacksandappetizers.Mostfoodswill cook within
packagerecommendedtime.Adjustcookingtimeaccording
toindividualpreferences.Usethismodewhen cooking
frozensnacksonasinglerack. Thismode does not require
preheatingtheoven.Foodshouldbeplaced in the oven
beforeorimmediatelyuponstartingthismode. To use this
modefollowtheInstructionsintheSmartHQ app.
Frozen Pizza (SmartHQ app only)
TheFrozenPizzamodesaredesignedto cook frozen pizzas.
Mostpizzaswillcookwithinpackagerecommended times.
Adjustcookingtimeaccordingtoindividualpreferences. Use
thismodewhencookingfrozenpizzaon a single rack. This
modedoesnotrequirepreheatingtheoven. Food should
beplacedintheovenbeforeor immediately upon starting
thismode.Tousethismodefollow the Instructions in the
SmartHQapp.
Baked Goods (SmartHQ app only)
TheBakedGoodsmodeisdesignedfor cooking cakes,
breads,cookies,andsimilarfoodsona single rack. This
modeisdesignedtoprovidelightertop browning and better
volume.Somefoodsmayrequireslightlylonger cook times
relativetowhencookedinthetraditional bake mode. To use
thismodefollowtheInstructionsinthe SmartHQ app.

49-2000675 Rev.0 13
ENGLISH
USINGTHERANGE
OVENPROBE(SmartHQapponly)
Internalfoodtemperatureisfrequentlyusedas an indicator
ofdoneness,especiallyforroastsandpoultry. The Probe
modemonitorstheinternalfoodtemperatureand turns the
ovenoffwhentheinternalfoodtemperature reaches the
programmedtemperature.
Alwayscheckthetemperatureatmultiplelocations in the
foodwithafoodthermometeraftercooking to ensure that
allportionsofthefoodhavereached the minimum safe
internaltemperatureforthatfood.
Proper Probe Placement
Afterpreparingthemeatandplacingit on the cooking pan
followtheseinstructionsforproperprobeplacement.
• Inserttheprobeintothefood,so that the tip oftheprobe
willrestinthecenterofthe thickest part of thefood.
Forbestperformancetheprobeshouldbe fully inserted
intothefood.Iftheprobeis not located properly, itmay
notaccuratelymeasurethetemperatureofthe coolest
portionofthefood.Somefoods,particularly small items,
arenotwellsuitedforcookingwith the probe due totheir
shapeorsize.
• Theprobeshouldnottouchbone,fat or gristle.
• Forwholepoultryinserttheprobeinto the thickest part
ofthebreast.
• Forbonelessroasts,inserttheprobeinto the center of
theroast.
• Forbone-inhamorlamb,insertthe probe into the center
ofthelowestlargemuscleorjoint.
• Forcasserolesordishessuchasmeatloaf, insert the
probeintothecenterofthedish.
• Forfish,inserttheprobefromjust above the gill intothe
meatiestarea,paralleltothebackbone.
Probe Usage
Thetemperatureprobecanonlybeused with Bake,
ConvectionBake,andConvectionRoastthroughthe
SmartHQapp.
To use the probe with preheating:
1. Selectthedesiredcookmode(Bake,Convection Bake,
orConvection Roast)throughtheapp,andselect the
desiredcookingtemperature.
2. Inserttheprobeintothefood(see Proper Probe
Placement).
3. Oncetheovenispreheated,placethe food in the oven
andconnecttheprobetotheprobe outlet, making sure
itisfullyinserted.Usecaution,the oven walls and probe
outletarehot.
4. Whentheprobeisconnected,theapp will prompt you
toenterthedesiredfoodtemperature.The maximum
internalfoodtemperaturethatyoucanset is 200° F.
To use the probe without preheating:
1. Inserttheprobeintothefood(see Proper Probe
Placement).
2. Placethefoodintheovenand connect the probe intothe
probeoutletintheoven.
3. Throughtheapp,selectthedesiredcook mode (Bake,
Convection Bake,orConvection Roast), cooking
temperature,anddesiredfoodtemperature.
Probe Care Guidelines
• Useofprobesotherthantheone provided with this
productmayresultindamagetothe probe outlet.
• Usethehandlesoftheprobeand plug when inserting and
removingthemfromthemeatandoutlet
• Toavoiddamagingyourprobe,donot use tongs to pull
onthecablewhenremovingit.
• Toavoidbreakingtheprobe,makesure food is
completelydefrostedbeforeinsertingtheprobe.
• Topreventpossibleburns,donotunplug the probe from
theoutletuntiltheovenhascooled.
• Neverleavetheprobeinsidetheoven during a self or
steamcleancycle.
• Donotstoretheprobeinthe oven.
WARNING Consuming undercooked food can result in foodborne illness. Use probe according to the following
instructions to ensure all portions of the food reach minimum safe cooking temperatures. Recommendations for
minimum safe food temperatures can be found at
foodsafety.gov or IsItDoneYet.gov.

14 49-2000675 Rev.0
ENGLISH
USINGTHERANGE
OVEN RACKS
Rack Positions
Recommendedrackpositionsforvarioustypesof foods are
providedintheCookingGuide.Adjustingthe rack position is
onewaytoimpactcookingresults.For example, if you would
preferdarkertopsoncakes,muffinsor cookies, try moving
foodonerackpositionhigher.Ifyou find foods are toobrown
ontop,trymovingthemdownnext time.
Whenbakingwithmultiplepansandon multiple racks, ensure
thereissufficientspacebetweenpansto allow air to flow.
Thismayimprovecookingevenness.
Removing and Replacing Flat Racks
Whenplacingandremovingcookware,pullthe rack out to
thebump(stopposition)ontherack support.
Toremovearack,pullittoward you until it reachesthestop
position,tiltupthefrontofthe rack and pull itout.
Toreplacearack,
placethecurvedend
oftherackontothe
racksupports.Tiltup
thefrontoftherack
andpushtherackin
untilitstops.Thenlay
therackflatandpush
itinuntilitisallthe
wayintotheoven.
Racksmaybecome
difficulttoslide.
Toimprovesliding
conditions,useasoft
clothorpapertowel
torubvegetableoil
ontheleftandright
edgesoftheracks
and/orracksupports.
NOTE: Remove
unusedrackswhen
usingtheovenfor
fasterpreheat,
improvedefficiency,
andoptimalcooking
performance.
OVEN AIR VENTS
Neverblockthevents(airopenings)of the range. They
providetheairinletandoutletthat are necessary for the
rangetokeepcoolandoperateproperly with correct
combustion.
Airopeningsare locatedattherearof thecooktop,atthetop
andbottomof theovendoor,andat thebottomoftherange.
ALUMINUM FOIL AND OVEN LINERS
CAUTION Donot useanytypeoffoilorovenlinerto
coverthe ovenbottom.Theseitemscantrapheatormelt,
resultingin damagetotheproductandriskofshock,smoke
orfire. Damagefromimproperuseoftheseitemsisnot
coveredby theproductwarranty.
Foilmaybeusedtocatchspills by placing a sheetonalower
rack,severalinchesbelowthefood.Do not use more foil
thannecessaryandneverentirelycoveran oven rack with
aluminumfoil.Keepfoilatleast1-1/2” from oven walls to
preventpoorheatcirculation.
Removingracks
Replacingracks
Rackstop
position
Rack positions
Vents

49-2000675 Rev.0 15
ENGLISH
USINGTHERANGE
COOKING GUIDE
NOTE: Somemodesmayonlybeavailablein the SmartHQ app.
FOOD TYPE RECOMMENDED
MODE(S) RECOMMENDED
RACK POSITION(S) ADDITIONAL SUGGESTIONS
Baked Goods
Layer cakes, sheet cakes, bundt
cakes, muffins, quick breads on a
Single Rack
Bake
Baked Goods 3 Use shiny cookware.
Layer cakes* on Multiple Racks Bake
Convection Bake 3 and 5 Use shiny cookware. Ensure adequate airflow (see illustration below).
Chiffon cakes (angel food) Bake
Baked Goods 1 Use shiny cookware.
Cookies, biscuits, scones on a
Single Rack Bake
Baked Goods 4 Use shiny cookware.
Cookies, biscuits, scones on
Multiple Racks Convection Bake 3 and 5 Use shiny cookware. Ensure adequate airflow.
Yeast Breads Bake
Baked Goods 3 or 4
Beef & Pork
Hamburgers Broil High 6 Use a broil pan; move food down for more doneness/less searing.
Watch food closely when broiling. For best performance center food
below the broil heater.
Steaks & Chops Broil High 6 or 5 Use a broil pan; move food down for more doneness/less searing.
Watch food closely when broiling. For best performance center food
below the broil heater.
Roasts Bake
Convection Roast 2 or 3 Use a low sided pan such as a broil pan. Preheating is not necessary.
Poultry
Whole chicken Bake
Convection Roast 2 or 3 Use a low sided pan such as a broil pan. Preheating is not necessary.
Bone-in chicken breasts, legs,
thighs Broil Low
Bake 3 If breaded or coated in sauce avoid Broil High modes. Broil skin side
down first. Watch food closely when broiling. For best performance
when broiling, center food below the broil heater.
Boneless chicken breasts Broil Low
Bake 3 Move food down for more doneness/less searing and up for greater
searing/browning when broiling. For best performance when broiling,
center food below the broil element or burner.
Whole turkey Bake
Convection Roast 1 Use a low sided pan such as a broil pan. Preheating is not necessary.
Turkey Breast Bake
Convection Roast 3 Use a low sided pan such as a broil pan. Preheating is not necessary.
Fish Broil Low 6 (1/2 inch thick or less)
5 (>1/2 inch) Watch food closely when broiling. For best performance center food
below the broil heater.
Casseroles Bake 3 or 4
Frozen Convenience Foods
Pizza on a Single Rack Frozen Pizza Single 4 Place food in oven prior to starting mode.
Pizza on Multiple Racks Convection Bake 3 and 5 Stagger pizzas left to right, do not place directly over each other.
Potato products, chicken nuggets,
appetizers on a Single Rack Frozen Snacks Single 4 Place food in oven prior to starting mode. Use dark cookware for more
browning/crisping; use shiny cookware for less browning.
Potato products, chicken nuggets,
appetizers on Multiple Racks Convection Bake 3 and 5 Use dark cookware for more browning/crisping; use shiny cookware
for less browning.
*When baking four cake layers at a time use racks
3 and 5. Place the pans as shown so that one pan is not directly above
another.
Cook food thoroughly to help protect against food borne illness. Minimum
safe food temperature recommendations for food safety can be found at
www.IsItDoneYet.gov. Make sure to use a food thermometer to take
food temperatures.
NOTE: Remove unused racks when using the oven for faster preheat,
improved efficiency and optimal cooking performance.
Rear Placement
Front Placement
Rack positions

16 49-2000675 Rev.0
ENGLISH
CAREANDCLEANING
OVEN
Besureallcontrolsareoffand all surfaces are coolbefore
cleaninganypartoftheoven.
Oven Interior
Theinteriorofyournewovencan be cleaned manually orby
usingtheSteamCleanfeature.
Spillageofmarinades, fruitjuices,tomatosaucesand basting
liquidscontainingacids maycausediscolorationandshould be
wipedupas soonashotsurfacescool, thencleanandrinse.
Manual Cleaning
Donotuseovencleaners,strongliquid cleansers, steel wool,
orscouringpadsontheinteriorof the oven. For soilsonthe
ovenbottomandotherenameledsurfaces,use a gentle
abrasivecontainingoxalicacid,suchasBar Keepers Friend®,
withanon-scratchsponge.Takecarenot to apply any
abrasivecleanersorspongestothedoor glass, as it will
scratchthereflectivecoating.Theoveninterior and door
glassmaybecleanedusingasoft cloth with a mildsoapand
water,orvinegarandwatersolution.After cleaning, rinse
withcleanwateranddrywitha soft cloth.
Steam Clean
TheSteamCleanfeatureisforcleaning light soil from your
oven.
TousetheSteamCleanfeature:
1. Startwiththeovenatroomtemperature.
2. Wipeexcessgreaseandsoilsfromthe oven.
3. Pour1cupofwaterontothe bottom of the oven.
4. Closethedoor.
5. TurntheOvenModeselectorknobto Steam Clean.
Donotopenthedoorduringthe Steam Cleaning cycle. At
theendoftheSteamCleancycle, soak up the remaining
water,andwipethemoisture-softenedsoilfrom the oven
wallsanddoor.
Oven Exterior
Donotuseovencleaners,abrasivecleansers, strong liquid
cleansers,steelwool,plasticscouringpadsor cleaning
powdersontheinteriororexteriorof the oven. Clean with
amildsoapandwaterora 50/50 solution of vinegarand
water.Rinsewithcleanwateranddry with a soft cloth.
Whencleaningsurfaces,makesurethatthey are at room
temperatureandnotindirectsunlight.
Spillageofmarinades, fruitjuices,tomatosaucesand basting
liquidscontainingacids maycausediscolorationandshould be
wipedupas soonashotsurfacescool, thencleanandrinse.
Oven Racks
Allovenracksmaybecleanedby hand with an abrasive
cleanerorsteelwool.
Aftercleaningtheracks,useasoft cloth or paper towel
torubasmallamountofvegetable oil on the leftandright
edgesoftherack.Thiswillensure the racks are easytoslide
inandoutoftheoven.
COOKTOP
Control Panel and Knobs
Wipethecontrolpanelaftereachuse of the oven witha
dampcloth.Forcleaning,usemildsoap and water or a50/50
solutionofvinegarandwater.Rinsewith clean water. Polish
drywithasoftcloth.
Donotuseabrasivecleansers,strongliquid cleansers, plastic
scouringpadsorovencleanersonthe control panel—they
willdamagethefinish.
Stainless Steel Surfaces (on some models)
Donotuseasteelwoolpad; it will scratch thesurface.
Tocleanthestainlesssteelsurface,use warm sudsy water or
astainlesssteelcleanerorpolish.Always wipe the surface in
thedirectionofthegrain.Followthe cleaner instructions for
cleaningthestainlesssteelsurface.
CleanerswithoxalicacidsuchasBar Keepers Friend Soft
Cleanser™willremovesurfacerust,tarnishand small
blemishes.Useonlyaliquidcleanserfree of grit and rubin
thedirectionofthebrushlineswith a damp, soft sponge.
Toinquireabout purchasingcleaningproductsincluding
stainlesssteelappliance cleanerorpolish,seethe Accessories
andConsumerSupport sectionsattheendof thismanual.
Foreasiercleaning, thecontrolknobsmaybe removedby
pullingthemdirectly outwardsoncetheknobsare intheOFF
position.Donot pullknobsupordown orhangobjectson
them.Thiscan damagethegasvalveshaft. Whenremoving
thetri-ring(on somemodels)andthedual-oval (onsome
models)burnerknobs, remembertheirlocation.Whileall
otherknobsare interchangeable,theseknobsmustbe placed
inthesame locationaftercleaning.Seethe SurfaceBurner
sectionfora detailedviewoftheseknobs. Theknobscanbe
washedbyhand withsoapandwateror inadishwasher.

49-2000675 Rev.0 17
ENGLISH
CAREANDCLEANING
COOKTOP (Cont)
Control Panel and Knobs (Cont)
Toreplaceknobsaftercleaning,alignthe hole on the knob
backsidewiththegasvalveshaftand push inward until the
knobissecurelyfastened.Allknobsare interchangeable.
Cooktop Surface
Donotuseovencleaners,abrasivecleansers, strong liquid
cleansers,steelwool,plasticscouringpads,or cleaning
powdersonthecooktopsurface.Cleanwith a mild soap
andwaterora50/50solutionof vinegar and water. Rinse
withcleanwateranddrywitha soft cloth. When cleaning
surfaces,makesurethattheyareat room temperature and
notindirectsunlight.
Spillageofmarinades, fruitjuices,tomatosaucesand basting
liquidscontainingacids maycausediscolorationandshould be
wipedupas soonashotsurfacescool, thencleanandrinse.
Ifyourmodelhasastainlesssteel cooktop surface, refer to
theStainlessSteelSurfacecleaninginstructionsfeatured in
theControlPanelandKnobssection.
RemovalofSurfaceBurners forCleaning
TurnallcontrolsOFF.Allowcooktopto cool before removing
gratesandburnerparts.Whenremovingthe burner caps and
heads,remembertheirsizeandlocation.Replace them in the
samelocationaftercleaning.
Cleaning the Surface Burners
Cleaning the Burner Caps
Washburnercapsinhot,soapywater and rinse with clean
water.Youmayscourwithaplastic scouring pad to remove
burned-onfoodparticles.Theroundburnercaps may also be
cleanedinyourdishwasher.
Cleaning the Burner Heads
Washtheburner headsroutinely,especiallyafterbad spillovers
whichcouldclog theburneropenings.Liftburners offwhen
cool.Washwith hot,soapywater.Rinsewith cleanwater.For
morestubbornstains, useabrushwithplastic bristles.
NOTE: Donotusesteelwoolorscouring pads to clean the
burnerpartsasthesemayclogthe openings. Never wash
burnerheadsinyourdishwasherasdishwasher. Doing so
maycausethemtodiscolor.
Theportsintheburnerheadsmustbekeptcleanatalltimes
foraneven,unhamperedflame.
Cloggedordirtyburnerportsorelectrodeswillnotallowthe
burnertooperateproperly.
Replacing Surface Burners
Beforereplacingtheburnercaps,headsand oval head/cap
assembly,shakeoutexcesswaterandallow them to dry
thoroughly.
Replaceburnerheadsinthecorrectlocations according to
size.Ensureeachcapisproperlyseated on the burner head,
aspicturedbelow.
CAUTION Do not operate the cooktop without all
burner parts and grates in place.
Anyspillonoraroundanelectrodemustbecarefullycleaned.
Avoidhittingtheelectrodewithanythinghardoritcouldbe
damaged.
Surfaceburnerknob
RoundBurner
RoundBurnerCap
(Removable)
Electrode
Round
Burner
Head
Burnercapis
properlyseated.
Burnercapis
רÝóõòóèõïü
seated.
Burnercapis
רÝóõòóèõïü
seated.
Theelectrodeofthesparkigniteris exposed when
theburnerheadisremoved.Whenone burner is
turnedtoLITE,alltheburnersspark. Do not attempt
todisassembleorcleanaroundanyburner while
anotherburnerison.
Electrode

18 49-2000675 Rev.0
ENGLISH
CAREANDCLEANING
COOKTOP (Cont)
Burner Grates
Gratesshouldbewashedinhot,soapy water and rinsed with
cleanwater.Tosoftenburned-onfood,place grates in a
solutioncontaining¼-cupofhouseholdammoniafor several
hours.Afterward,scrubgrateswithaplastic scouring pad
soakedinhot,soapywater.Rinsewell and dry.
DOOR AND DRAWER
Cleaning the Oven Door
Cleaning the Door Interior
Donotallowexcesswater to run into any holes or slotsin
thedoor.
Wipedishsoapoveranybaked-onspatters on the glass. Use
asinglesidedsafetyrazorbladeto clean it off. Thenwipe
overtheglasswithasoapycloth to remove any residueand
dryoff.
Theareaoutsidethegasketcanbe cleaned with a soap-filled
plasticscouringpad.Donotrubor clean the door gasket-it
hasanextremelylowresistancetoabrasion.
Ifyounoticethegasketbecomingworn, frayed or damaged
inanywayorifithas become displaced on thedoor,you
shouldhaveitreplaced.
Cleaning the Door Exterior
Ifastainonthedoorvent trim is persistent, useamild
abrasivecleanerandasponge-scrubberforbest results.
Donotusethismethodonany other surface.
Stainless Steel Surfaces (on some models)
Donotuseasteelwoolpad; it will scratch thesurface.
Tocleanthestainlesssteelsurface,use warm sudsy water or
astainlesssteelcleanerorpolish.Always wipe the surface in
thedirectionofthegrain.Followthe cleaner instructions for
cleaningthestainlesssteelsurface.
Toinquireabout purchasingcleaningproductsincluding
stainlesssteelappliance cleanerorpolish,seethe Accessories
andConsumerSupport sectionsattheendof thismanual.
Removable Storage Drawer
Thestoragedrawerisagoodplace to store cookware and
bakeware.Donotstoreplasticsorflammable material in the
drawer.
Thestoragedrawermayberemovedfor cleaning under
therange.Cleanthestoragedrawerwith a damp cloth or
sponge.Neveruseharshabrasivesorscouring pads.
Yourstoragedrawermayhaveplasticslides (shown to
theright)ormetalrails.Followthe respective removal and
replacementinstructionsforyourmodel’sconfiguration.
Removing the Storage Drawer:
1. Pulldrawerstraightoutuntilitstops.
2. Continuetopullthedraweruntilit is detached from
theoven.
Replacing the Storage Drawer:
1. Resttheleftdrawerrailaroundthe inner left rail guide
andslideitinslightly.
2. Placetherightdrawerrailaroundthe inner right rail
guideandslideitinslightly.
3. Slidethedrawerallthewayin.

49-2000675 Rev.0 19
ENGLISH
CAREANDCLEANING
OVEN LIGHT
WARNING SHOCK OR BURN HAZARD: Before
replacingovenlightbulb,disconnecttheelectrical power to
therangeatthemainfuseor circuit breaker panel. Failureto
dosomayresultinelectricshock or burn.
CAUTION BURN HAZARD: Theglasscoverandbulb
shouldberemovedwhencool.Touchinghot glass with bare
handsoradampclothcancause burns.
Oven Light Replacement
NOTE: Theglasscovershouldberemovedonly when cold.
Wearinglatexglovesmayofferabetter grip.
Beforereplacingthebulb,disconnectelectricalpower to the
ovenatthemainfuseorcircuit breaker panel. Let thebulb
coolcompletelybeforeremovingit.Foryour safety do not
touchahotbulbwithadamp cloth. If you dothebulbmay
break.
To remove:
Turntheglasscovercounterclockwise1/4turn until the tabs
oftheglasscoverclearthegrooves of the socket andpull
thecoveroff.Removethebulb.
To replace:
Putinanew40-wattappliancebulb. Place the tabs ofthe
glasscoverintothegroovesofthe socket. Turn the glass
coverclockwise1/4turn.
NOTE:
• A40-wattappliancebulbissmallerthan a standard
40-watthouseholdbulb.
• Reconnectelectricalpowerto the oven oncethenewbulb
isinstalled.
• Forimprovedlightinginsidetheoven,clean the glass
coverfrequentlyusingawetcloth.This should be done
whentheoveniscompletelycool.
OVEN DOOR
Thedoorisveryheavy.Becareful when removing and lifting
thedoor.Donotliftdoorby the handle.
To Remove the Door:
1. Fullyopenthedoor.
2. Pullthehingelocksupandaway from the range frameto
theunlockedposition.
3. Firmlygraspbothsidesofthedoor near the top.
4. Closedooruntilthetopofthe door is approximately 6”
fromtherangeframe.
5. Liftdoorupandawayfromthe range until both hinge
armsareclearoftheslotsin the range frame.
To Replace the Door:
1. Firmlygraspbothsidesofthedoor near the top.
2. Withthedooratthesameangle as the removal position,
restthenotchontheundersideof the left hinge armon
thebottomedgeofthelefthinge slot. The notch inthe
hingearmmustbefullyseatedinto the bottom of the
slot.Repeatfortherightside.
3. Fullyopenthedoor.Ifthedoor will not fully open,the
notchesinthebottomsofthehinge arms have not
seatedcorrectlyinthebottomedgeof the slot. Lift the
doorofftherangeandrepeatprevious step.
4. Pushthehingelockstowardtherange cavity and down
tothelockedposition.
5. Closetheovendoor.
Pushhingelocks down to lockRestnotchon bottom edge
ofhingeslot
Notch
Bottom
edgeof
slot
Hingearm
RemovalpositionPullhingelocks up to unlock
Bulb
Socket
Tab
31\2”
Max
length
Glasscover

20 49-2000675 Rev.0
ENGLISH
Problem Possible Cause What To Do
My new oven doesn't
cook like my old one.
Is something wrong
with the temperature
settings?
Yournew ovenhasadifferentcooking system
fromyour oldovenandthereforemay cook
differentlythan youroldoven.
Forthe firstfewuses,followyour recipetimes
andtemperatures carefullyanduserackpositions
recommendedin theCookingGuide.Ifyou stillthink
yournew ovenistoohotor toocold, youcanadjust the
temperatureyourself tomeetyourspecificcooking
preference.See theOvenControlssection.
Food does not bake
properly Ovencontrols improperlyset. SeetheCookingModes section.
Rackposition isincorrectorrackis notlevel. See theCookingModes sectionand CookingGuide.
Incorrectcookware orcookwareofimpropersize
beingused. See theCookwaresection.
Oventemperature needsadjustment. SeetheOvenControls section.
Food does not broil
properly Ovencontrols improperlyset. Makesureyouselect theappropriate broilmode.
Improperrack positionbeingused. SeeCookingGuide forrack locationsuggestions.
Cookwarenot suitedforbroiling. Useapan specificallydesigned forbroiling.
Aluminumfoil onthebroilpanhas notbeen fitted
properlyor slittodraingrease.
Ifusingaluminum foilonbroil pan,wraptightly andaddslits
conformingtothose inthepan toallowgrease todrain.
Oven temperature
too hot or too cold Oventemperature needsadjustment. SeetheOvenControls section.
Oven appears not to
work Afuse inyourhomemaybe blownor thecircuit
breakertripped. Replace thefuseorresetthe circuitbreaker.
Ovencontrols improperlyset. SeetheUsingthe Ovensection.
Ovenis inSabbathMode. Verify,thatthe ovenis notinSabbath Mode.See the
SabbathMode section.
“Crackling” or
“popping” sound Thisis thesoundofthemetal heatingand cooling
duringboth thecookingandcleaningfunctions. This isnormal.
Why is my range
making a "clicking"
noise when using my
oven?
Yourrange hasbeendesignedtomaintain atighter
controlover youroven'stemperature.Youmay
hearyour oven'sheatingelements"click"on and
offmore frequentlythaninolderovens toachieve
betterresults duringbaking,broiling,andself-
cleancycles.
Thisis normal.
Sometimes the
oven takes longer to
preheat to the same
temperature
Cookware,food, and/ornumberofracksin oven. Cookware,food, andracksin theoven willcause
differencesin preheattimes.Removeexcessitems to
reducepreheat time.
Oven lightdoes not
work Lightbulbislooseordefective. Tightenorreplacebulb.SeetheOvenLightsectionfor
instructionsonhowtoreplacethebulb.
Savetimeandmoney!Reviewthecharts on the following pagesfirstandyoumaynotneedtocallforservice.
TROUBLESHOOTINGTIPS
Other manuals for QGSS740
1
Table of contents
Other Haier Range manuals

Haier
Haier QCAS70 User manual

Haier
Haier HCR2250AES User manual

Haier
Haier HCR2250ADS User manual

Haier
Haier GE CGS986EEL Installation guide

Haier
Haier HGRP301AAWW User manual

Haier
Haier QSS740 User manual

Haier
Haier QAS740 User manual

Haier
Haier HCR2250ADS User manual

Haier
Haier HGRA202QABS User manual

Haier
Haier HCR2250AES User manual
Popular Range manuals by other brands

Frigidaire
Frigidaire FFGS3025PWA installation instructions

GE
GE EGR3000 Owner's Manual & Installation Instructions

Frigidaire
Frigidaire PLEF489GCA Guide installation instructions

Viking
Viking F20508 installation guide

Samsung
Samsung NX58M3310S Series user manual

GE
GE Profile PB910SPSS Dimensions and installation information