16 17
PARENTAL GUIDANCE
TV-MA:Mature audience only - this type of rated programs may contain graphic
violence, explicit sexual content and profane language.
FV: This type of rated programs contain Fantasy and cartoon violence.
Violence: This type of rated programs contain violence.
S: This type of rated programs contain sex.
L: This type of rated programs contain offensive language.
D: This type of rated programs contain dialogue with sexual content.
U.S.Movie Rating Chart
NR: This means movie is not rated yet. It is pending government rating approval.
G: General Audience- this type of movie rating means all ages admitted to see the movie.
PG: Parental Guidance Suggested- this type of movie rating means some material may
not be suitable for children.
PG-13: Parents Strongly Cautioned- this type of movie
rating means some material
may not be appropriate for children under 13.
R: Restricted- this type of movie rating means children under 17 of age requires to be
with parent or guardian.
NC-17: This type of movie rating means no one 17 and under admitted.
X: This type of movie rating means adults only.
Parental Guidance technology:
To understand clearly about TV programs rating codes, read the following list.
U.S. TV Program Ratings
NR: Not Rated- this means that programs are not rated or rating does not apply.
TV-Y: For all children- this type of rated programs are designed for a very young
audience, including children from ages 2-6.
TV-Y7: Directed for older children -this type of rated programs may include
comedic violence or mild physical, or may frighten children under the age of 7.
TV-G: General Audience- this type of rated programs contains little or no violence,
no strong language, and little or no sexual dialogue and situation.
TV-PG: Parental Guidance Suggested- this type of rated
programs may contain
limited violence, some suggestive sexual dialogue and situation, and rare language.
TV-14: Parents strongly cautioned- this type of rated programs may contain sexual
content, strong language and more intense violence .
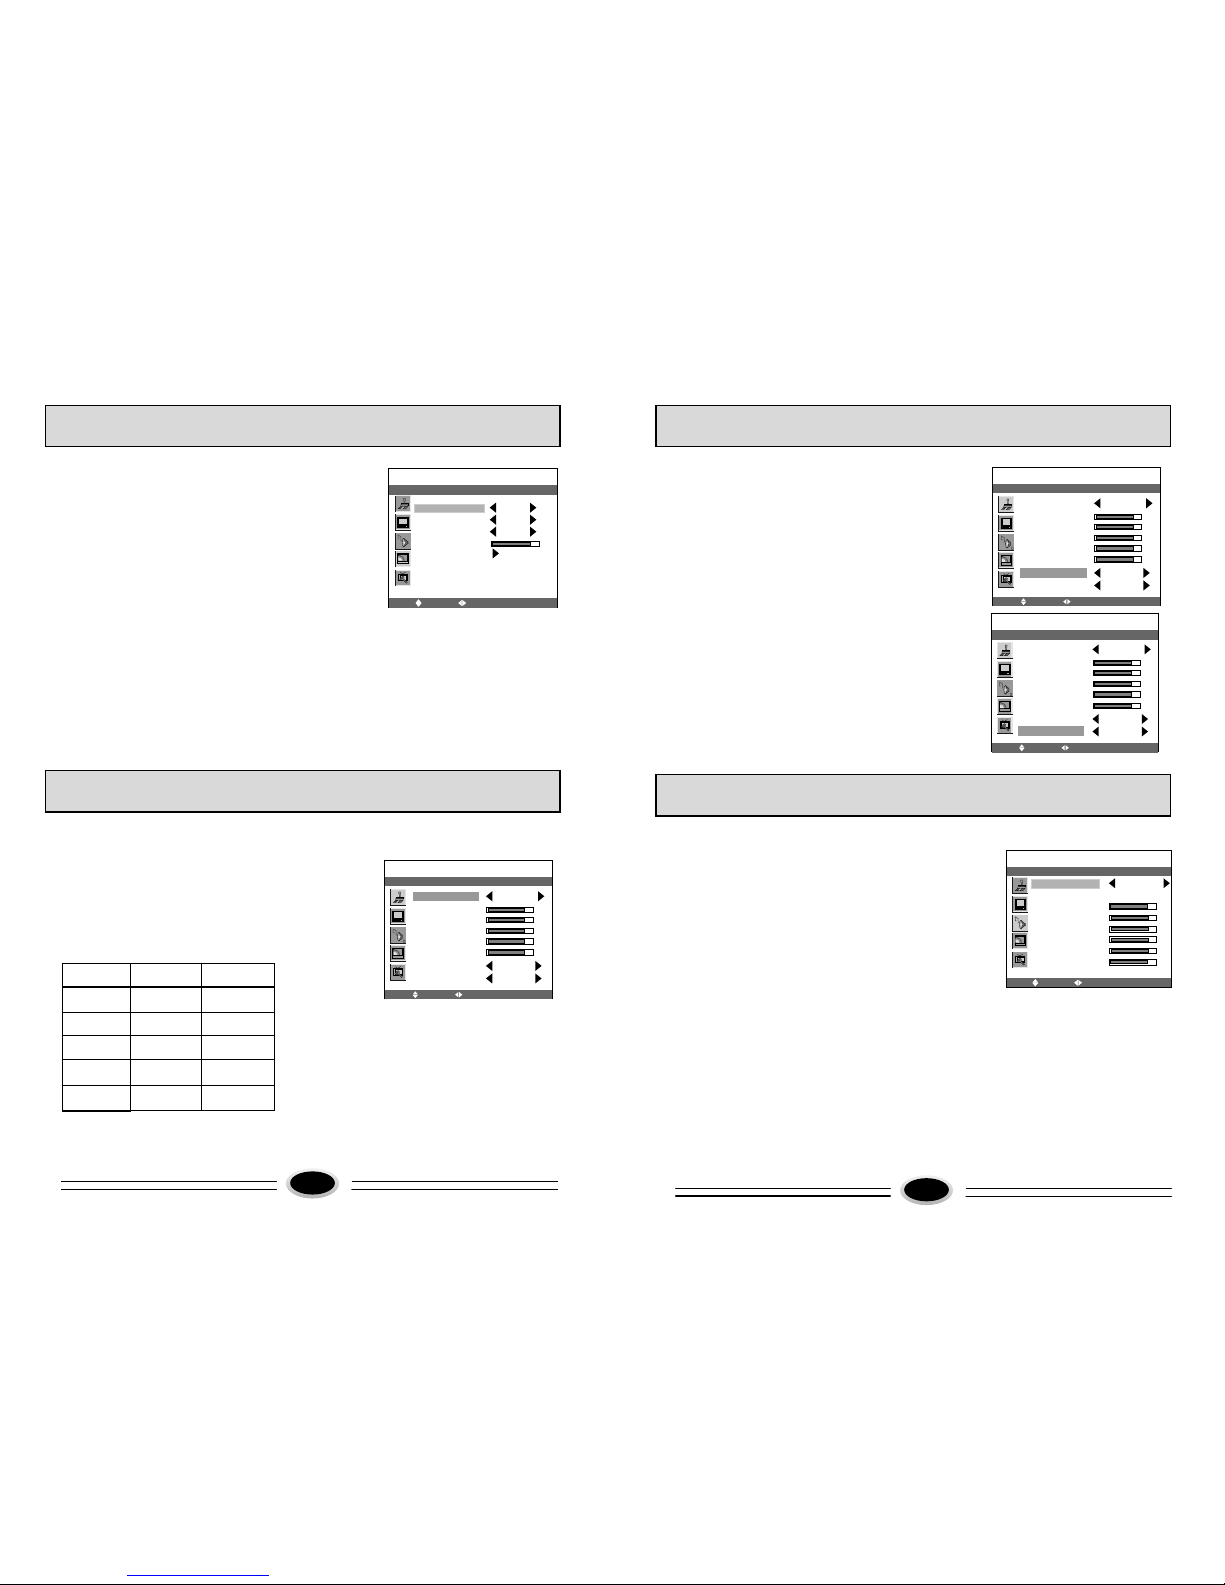
PARENTAL CONTROL
CHANGE PASSWORD
1. Press CH+/- button to select CHANGE item.
2. Press VOL+/- button to enter INPUT PASSWORD.
3. Input any four digits that you can easily remember.
4. Input the new password again. Then the screen will
display CHANGE SUCCESS.
Note: Once you set the new password for the particular
channel, that channel will be blocked. This way you are
the only one who can access that channel.
PARENTAL GUIDANCE (P.G.) ON/OFF set
1.Press CH+/- button to select P.G. item.
2.Press VOL+/- button to select P.G. ON or OFF.
When BLOCKED is selected, the P.G. function
is activated. When you watch the TV RATING or
MOVIE RATING, the screen is blue and display the
rating that received; when UNBLOCK is selected,
the P.G. function will not be activated. At this
time the rating that set in TV RATING or MOVIE
RATING is not available.
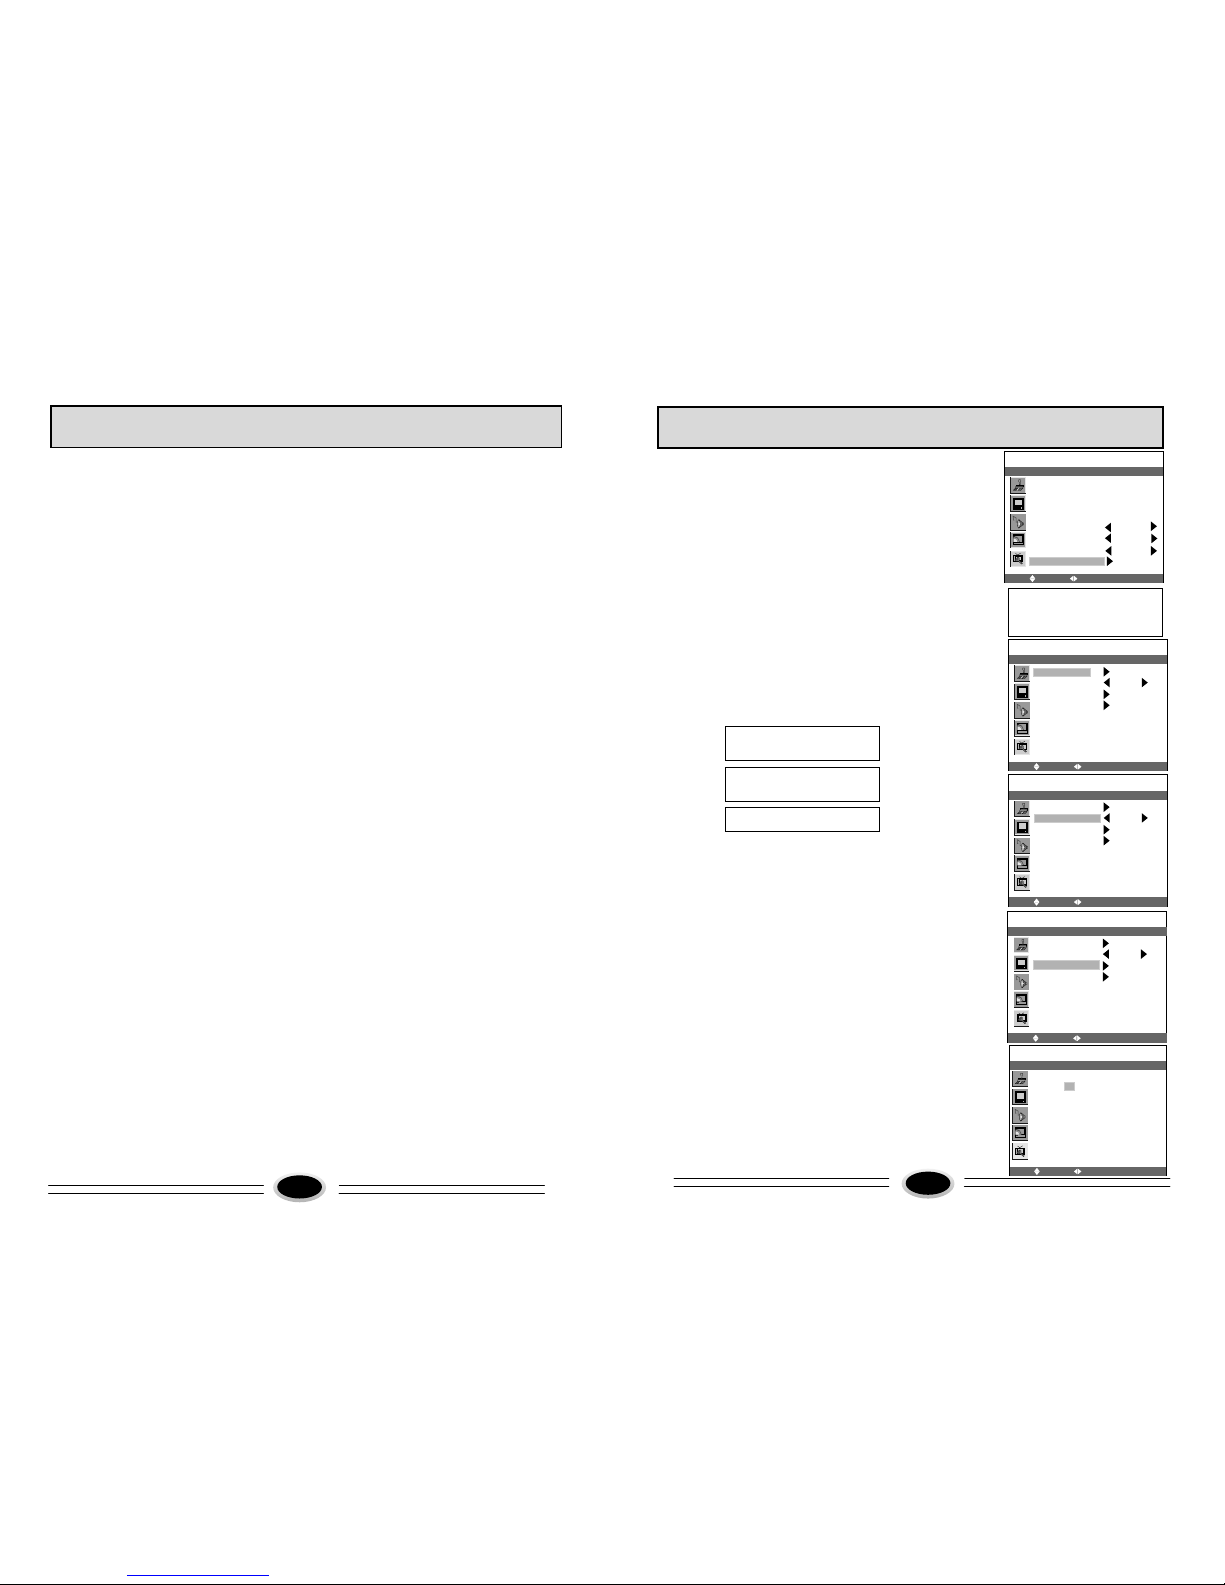
MOVE SELECT MENU RETURN
FUNCTION
CHANGE
P.G. ON
TV RATING
MOVIE RATING
INPUT PASSWORD:
PASSWORD ----
MOVE SELECT MENU RETURN
FUNCTION
CLOCK
TIME ON - -:- -
TIME OFF - -:- -
HALFTONE - -:- -
DURATION 15S
LANGUAGE ENGLISH
CLOSED CAPTION CC1
PARENT CONTROL
PARENT CONTROL
1. Press MENU button to select FUNCTION menu.
2. Press CH+/- button to select PARENT CONTROL
item.
3. Press VOL+/- button to enter PARENT CONTROL.
Note: At first, you should input the default password 0000.
MOVE SELECT MENU RETURN
FUNCTION
CHANGE
P.G. ON
TV RATING
MOVIE RATING
TV RATING SETTING
1.Press CH+/- button to select TV RATING item.
2. Press VOL+/- button to enter TV RATING menu.
3. Press CH+/- button to move the cursor to the
rating you need to set in TV RATING menu,
press VOL+/- button to move the cursor to ALL,
FV, V, S, L or D, then press P.G. button
to set it U or B.
MOVE MOVE MENU RETURN
FUNCTION
ALL FV V S L D
TV-Y U
TV-Y7 U U
TV-G U
TV-PG U U U U U
TV-14 U U U U U
TV-MA U U U U
USE P.G. KEY TO
BLOCK/UNBLOCK
INPUT PASSWORD:
PASSWORD - - - -
INPUT AGAIN:
PASSWORD - - - -
MOVE SELECT MENU RETURN
FUNCTION
CHANGE
P.G. ON
TV RATING
MOVIE RATING
CHANGE SUCCESS