manuals.online logo
Brands
  1. Home
  2. •
  3. Brands
  4. •
  5. Haier
  6. •
  7. Washer
  8. •
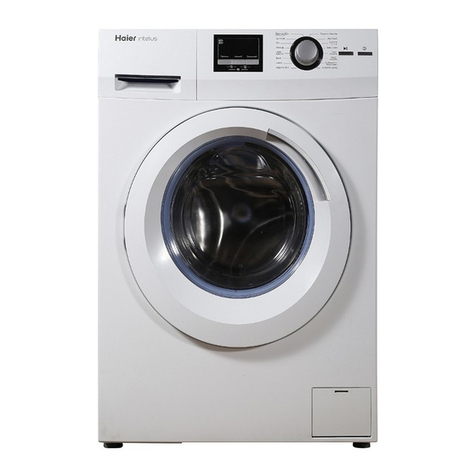
  9. Haier HW90-B14636 User manual

Haier HW90-B14636 User manual

Other manuals for HW90-B14636

2

Other Haier Washer manuals

Haier HWM50TLF User manual

Haier

Haier HWM50TLF User manual

Haier HW-B1060 User manual

Haier

Haier HW-B1060 User manual

Haier HWM100-FD10829 User manual

Haier

Haier HWM100-FD10829 User manual

Haier HW1210A User manual

Haier

Haier HW1210A User manual

Haier HNS1002A Quick start guide

Haier

Haier HNS1002A Quick start guide

Haier HWM80-113S User manual

Haier

Haier HWM80-113S User manual

Haier HW70-IM12929 User manual

Haier

Haier HW70-IM12929 User manual

Haier HW-C1270TVE-F - SERVICE User manual

Haier

Haier HW-C1270TVE-F - SERVICE User manual

Haier HWM70-9288NZP User manual

Haier

Haier HWM70-9288NZP User manual

Haier HW70-BP1439N User manual

Haier

Haier HW70-BP1439N User manual

Haier XQBM22-C User manual

Haier

Haier XQBM22-C User manual

Haier HW80-B14876 User manual

Haier

Haier HW80-B14876 User manual

Haier HMS1000TVE/ME User manual

Haier

Haier HMS1000TVE/ME User manual

Haier HWD1406 User manual

Haier

Haier HWD1406 User manual

Haier HWM70-1708T User manual

Haier

Haier HWM70-1708T User manual

Haier HBF800TE User manual

Haier

Haier HBF800TE User manual

Haier HWM70VA User manual

Haier

Haier HWM70VA User manual

Haier B1000TX User manual

Haier

Haier B1000TX User manual

Haier JW-PK90A User manual

Haier

Haier JW-PK90A User manual

Haier HWM90-7288 User manual

Haier

Haier HWM90-7288 User manual

Haier HLP21N User manual

Haier

Haier HLP21N User manual

Haier HLP23E - Electronic Touch Pulsator Ing Portable Washing... Assembly instructions

Haier

Haier HLP23E - Electronic Touch Pulsator Ing Portable Washing... Assembly instructions

Haier HA600T User manual

Haier

Haier HA600T User manual

Haier HLPW028BXW User manual

Haier

Haier HLPW028BXW User manual

Popular Washer manuals by other brands

Zanussi ZWF 14080 W user manual

Zanussi

Zanussi ZWF 14080 W user manual

Zanussi FV 825 N Instruction booklet

Zanussi

Zanussi FV 825 N Instruction booklet

LG WM8000HVA Specifications

LG

LG WM8000HVA Specifications

Whirlpool 3RGSC9400 Use and care guide

Whirlpool

Whirlpool 3RGSC9400 Use and care guide

Zanussi TJ 1284 H instruction manual

Zanussi

Zanussi TJ 1284 H instruction manual

AEG KO-LAVAMAT 74740 User information

AEG

AEG KO-LAVAMAT 74740 User information

Beko WSRE7512PRA user manual

Beko

Beko WSRE7512PRA user manual

Whirlpool LA5OOOXP Use and care guide

Whirlpool

Whirlpool LA5OOOXP Use and care guide

Miele PW 6207 operating instructions

Miele

Miele PW 6207 operating instructions

GE GE Profile WWSE3160AAA Specifications

GE

GE GE Profile WWSE3160AAA Specifications

Bush WMNB712EB instruction manual

Bush

Bush WMNB712EB instruction manual

ALLIANCE UW60AV Information manual

ALLIANCE

ALLIANCE UW60AV Information manual

Bosch WAN280H3 User manual and installation instructions

Bosch

Bosch WAN280H3 User manual and installation instructions

Maytag MAT15MNAW installation instructions

Maytag

Maytag MAT15MNAW installation instructions

LG T2109VSAL owner's manual

LG

LG T2109VSAL owner's manual

Indesit IWC 61481 Instructions for use

Indesit

Indesit IWC 61481 Instructions for use

Electrolux EWF12843 user manual

Electrolux

Electrolux EWF12843 user manual

Indesit WIN 70 Instructions for use

Indesit

Indesit WIN 70 Instructions for use

manuals.online logo
manuals.online logoBrands
  • About & Mission
  • Contact us
  • Privacy Policy
  • Terms and Conditions

Copyright 2025 Manuals.Online. All Rights Reserved.

GB
User manual
●
Washing machine
HW90-B14636
●
Thank You GB
2
Legend
●
Warning – Important Safety information
General information and tips
●
Environmental information
●
Disposal
Help protect the environment and human health. Put
the packaging in applicable containers to recycle it.
●
Help to recycle waste of electrical and electronic ap
●
-
pliances. Do not dispose appliances marked with this
symbol with the household waste. Return the product
to your local recycling facility or contact your municipal
Thank you for purchasing a Haier Product.
Please read these instructions carefully before using this appliance. The instructions con-
tain important information which will help you get the best out of the appliance and ensure
safe and proper installation, use and maintenance.
Keep this manual in a convenient place so you can always refer to it for the safe and proper
use of the appliance.
If you sell the appliance, give it away, or leave it behind when you move house, make sure
you also pass this manual so that the new owner can become familiar with the appliance
and safety warnings.
WARNING!
of it. Remove the door catch to prevent children and pets to get closed in the appliance.
GB Content
3
1-Safety information ......................................................................................................................... 4
2-Product description ...................................................................................................................... 7
3-Control panel
●
.................................................................................................................................. 8
4-Programmes .................................................................................................................................11
5-Consumption ................................................................................................................................12
6-Daily use .........................................................................................................................................
●
13
7-Eco-friendly washing
●
..................................................................................................................18
8-Care and cleaning ........................................................................................................................19
9-Troubleshooting ...........................................................................................................................22
10-Installation ...................................................................................................................................
●
25
11-Technical data
●
.............................................................................................................................29
12-Customer service ......................................................................................................................31
1-Safety information GB
4
-
ing safety hints!:
WARNING!
Make sure there is no transport damage.
●
Make sure all transport bolts are removed.
Remove all packaging and keep out of children´s reach.
Handle the appliance always with at least two persons because it
●
is heavy.
Daily use
This appliance can be used by children aged from 8 years and
●
above and persons with reduced physical, sensory or mental ca-
pabilities or lack of experience and knowledge if they have been
given supervision or instruction concerning use of the appliance
in a safe way and understand the hazards involved.
● Keep away children under 3 years of age from the appliance un
●
-
less they are constantly supervised.
Children shall not play with the appliance.
Do not let children or pets come close to the appliance when the
door is open.
Store washing agents out of reach of children.
-
vent laundry from being entangled. If necessary, use an appropri-
ate bag or net.
Do not touch or use the appliance when barefoot or with wet or
damp hands or feet.
Do not cover or encase the appliance during operation or after-
wards to allow any moisture or dampness to evaporate.
Do not place heavy objects or sources of heat or damp on top of
the appliance.
close vicinity to the appliance.
Do not wash any garments treated with solvents in the appliance
without having dried them previously in the air.
GB 1-Safety information
5
WARNING!
Daily use
gas
Do not hot wash foam rubber or sponge-like materials.
●
Do not open detergent drawer during any wash cycle.
Do not touch the door during the washing process, it gets hot.
●
Do not open the door if the water level is visibly over the porthole.
device and will open shortly after the washing procedure is ended.
● undertaking any routine maintenance and disconnect the appli-
ance from the electrical supply to save electricity and for safety.
Hold the plug, not the cable, when unplugging the appliance.
Maintenance / cleaning
●
Make sure children are supervised if they carry out cleaning and
●
maintenance.
Disconnect the appliance from the electrical supply before un-
dertaking any routine maintenance.
Keep the lower part of the porthole clean and open door and de-
tergent drawer if appliance is not in use to prevent odours.
Do not use water spray or steam to clean the appliance.
Replace a damaged supply cord only by the manufacturer, its ser-
Do not try to repair the appliance by yourself. In case of repair
please contact our customer service.
Installation
The appliance should be placed in a well-ventilated place. Ensure
a location which allows opening the door fully.
Never install the appliance outdoors in a damp place, or in an area
which may be prone to water leaks such as under or near a sink
unit. In the event of a water leak cut power supply and allow the
machine to dry naturally.
1-Safety information GB
6
Intended use
●
This appliance is intended for washing machine-washable laun-
dry only. Anytime follow the instructions given on the label of each
garment label. It is designed exclusively for domestic use inside the
house. It is not intended for commercial or industrial use.
use may cause hazards and loss of of all warranty and liability claims.
●
WARNING!
Installation
Install or use the appliance only where the temperature is above
5 °C.
Do not place the appliance directly on a carpet, or close to a wall
or furniture.
Do not install the appliance in direct sunlight or in the near of heat
sources(e.g. stoves, heaters).
Make sure that the electrical information on the rating plate
agrees with the power supply. If it does not, contact an electri-
cian.
Do not use multi-plug adapters and extension cables.
Make sure only the delivered electric cable and hose set are used.
Make sure not to damage the electric cable and the plug. If dam-
aged have it replaced by an electrician.
accessible after installation. The appliance must be earthed.
Only for UK:
-
pliance is installed, the plug should be accessible.
no leakage.
GB 2-Product description
7
2.1 Pictu
●
re of appliance
Front (Fig. 2-1): Rear side (Fig. 2-2):
2.2 Accessories
●
Check the accessories and literature in accordance with this list (Fig.:2-3):
Inlet hose-
assembly1) 5 Blanking
plugs
Drain hose
bracket User manual
Warranty-card
Note:
-
2-3
T1 T2
T3 S1
S2 S6
S4
T4
1 Detergent /Softener drawer
2 Worktop
3 Programme selector
4 Panel
1 Transportation bolts (T1-T4)
2 Back cover
3 Back cover screws (S1-S6)
4 Power cord
5 Water inlet vave
6 Drain hose
2-1 2-2
5 Rating plate
6 Recessed grip
7 Sevice ap
8 Adjustable feet
1) Type of inlet hose depends on model.
S3 S5
3-Control panel GB
8
1 “
2 Programme selec
●
tor
3 Display
4 Detergent /Softener drawer
P
●
ress this button (Fig. 3-2) gently to switch on, the dis-
play is shining, the indicator of the “Start/Pause” button
is ashing. Press it again for about 2 seconds to switch
-
●
ter a while machine will shut down automatically.
3-2
3.2 Programme selector
By turning the knob (Fig. 3-3) one of 16 programmes
can
●
be selected, related LED will light up, its default
settings will be displayed.
3.3 Displ
●
ay
The display (Fig. 3-4) shows following information:
Washing time
End time delay
Error codes and service information
3-4
5 Function buttons
6 “Delay” button
7 “Start/Pause“ button
Note : Acoustic signal
In following cases an acoustic signal sounds:
when pressing a button
when turning the programme selector
at the end of programme
in case of failures
The acoustic signal can be deselected if necessary ; see DAILY USE.
Cotton Fast wash
Spin
Bedding
Handwash
Synthetics
Mix
Sportwear
Jeans
Delicate
Daily Wash
Quick 15”
Baby clothes Wool
Cotton
+
Hygienic
3-3
3-1
GB 3-Control panel
9
3.5 Function bu
●
ttons
The function bu
●
ttons (Fig. 3-6) enable additional op-
tions in the
●
selected programme before programme
starts. The related indicators are displayed.
-
gramme, all options are disabled.
If a button has multiple options, the desired option can
be selected by pressing the button sequentially.
To delete the setting or to cancel the setting process,
press the function button until the desired LED lights
Start/Pause
3.5.1 3.5.2 3.5.3 3.5.4 3.5.5
3-6
3.5.1-Function bu
●
tton “ Temp.“
Press this button (Fig. 3-7) to change the washing
temperature of the programme. If no value is illumi-
nated the water will not heated.
In conjunction with the “Intense” button, the child lock
3.5.2-Function button “Speed”
Press this button (Fig. 3-8) to change or deselect the
spin of the programme. If no value is illuminated the
laundry will not spun.
Note: Factory settings
there is no special requirement default settings are recommended.
3.4 Detergent drawer
Open the drawer, three compartments can be
seen (Fig. 3-5):
Compartment 1 : Water inlet only, no detergent
Compartment 2 : Detergent for programme
Compartment : Softener, Conditioning agent etc.
The recommendation on the type of detergents is
suitable for the various washing temperatures, please
refer to the manual of detergent.
3-5
3.5.3-Function button “Steam“
3-7 3-8
Temp. Speed
Press this button (Fig. 3-9) to activate the steam function.When this function is activated
the default temperature is the maximum temperature of the programme selected.This
function can be activated only with the following programmes: Hygienic, Baby clothes,
Mix, Synthetics, Cotton.When the function is activated the led above the button will light up.
Pushing again this button the function can be deactivated and the led above the button
the programme cannot
be changed.
Temp. Speed Steam Delay
Extra rinse
( )
3-Control panel GB
10
3.5.4 Function bu
●
tton“Extra rinse“
P
●
ress this button (Fig. 3-10) to rinse the laundry more
in
●
tense with fresh water. This is recommended for
people with sensitive skin.
By pressing the button several times one to three ad-
ditional cycles can be selected. They appear in the dis-
play with //.
3.5.5 Function “Speed up“
T
●
his function saves time and energy. Preferable if laun-
dry is slightly soiled. Press simultaneously button “Extra
rinse“ and ”Delay” (Fig. 3-11) for about 3 seconds
to activate the “Speed up” function;


is dis-
played. This function is not available in all programmes
(see PROGRAMMES).
3.7 “Start/Pause
●
“ button
Press this button (Fig. 3-13) gently to start or inter
-
rupt the currently displayed programme. During pro
-
gramme setting and during programme run the LED
above the button is shining, or if interrupted blinking.
3.6 “Delay” button
Press this button (Fig. 3-12) to start the programme
with a delay. End time delay could be increased in steps
: means end of programme cycle will be in 6 hours
and 30 minutes. Press “Start/Pause” button to activate
the time delay. It is not applicable to programme SPIN.
Note: Liquid detergent
If using liquid detergent, it is not recommended to activate the end time delay.
3.8 Child lock
Press button “Temp.“ and ”Steam” (Fig. 3-14) for 3
seconds simultaneously to block all panel elements
against activation. For unlocking please press again
the two buttons.
The display shows 

(Fig. 3-15) if a button will be
pressed, when the child lock is activated. The change
is not running.
3-15
Extra rinse
3-10
Delay
Extra rinse
Speed up
3-11
Delay
3-12
Start/Pause
3-13
3-14
Temp Speed Steam
Steam
3-9 If “Temp.” button is pushed the “Steam” function will be
deactivated.You can activate “Steam” function only bef-
ore to start any programme. You cannot activate “Steam”
-
function while the appliance is already executing a programme.