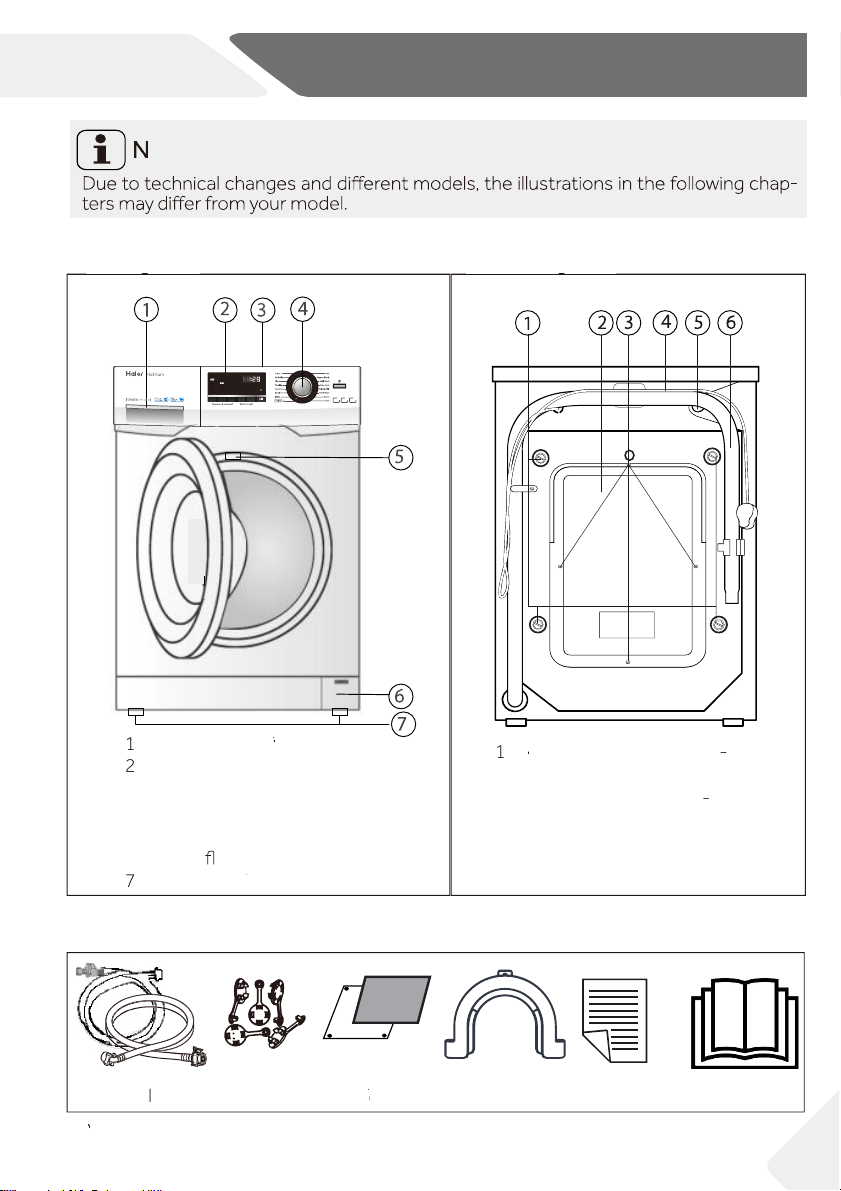
3-Control panel
10
3.5.4 Function bu
●
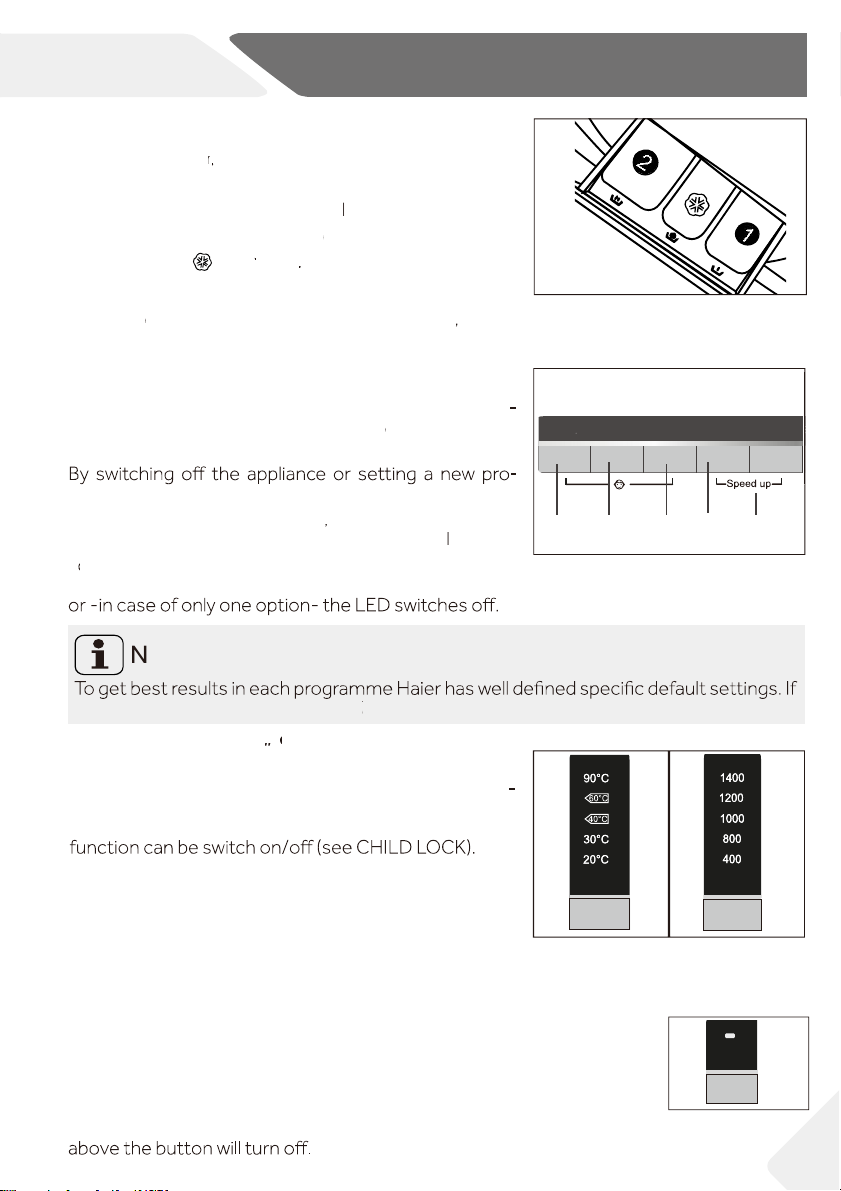
tton“Extra rinse“
P
●
ress this button (Fig. 3-10) to rinse the laundry more
intense with fresh water. This is recommended for
people with sensitive skin.
By pressing the button several times one to three ad
ditional cycles can be selected. They appear in the dis
pl
●
ay with P--1 /P--2 /P--3 .
3.5.5 Function “Speed up“
This
●
function saves time and energy. Preferable if laun-
dry is slightly soiled. Press simultaneously button „Ex-
tra rinse.“ and ”Delay” (Fig. 3-11) for about 3 seconds
to activate the “Speed up” function; is dis-
played. This function is not available in all programmes
(see PROGRAMMES).
3.7 „S
●
tart/Pause“ button
Press this button (Fig. 3-13) gently to start or inter
rupt the currently displayed programme. During pro
gramme setting and during programme run the LED
above the button is shining, or if interrupted blinking.
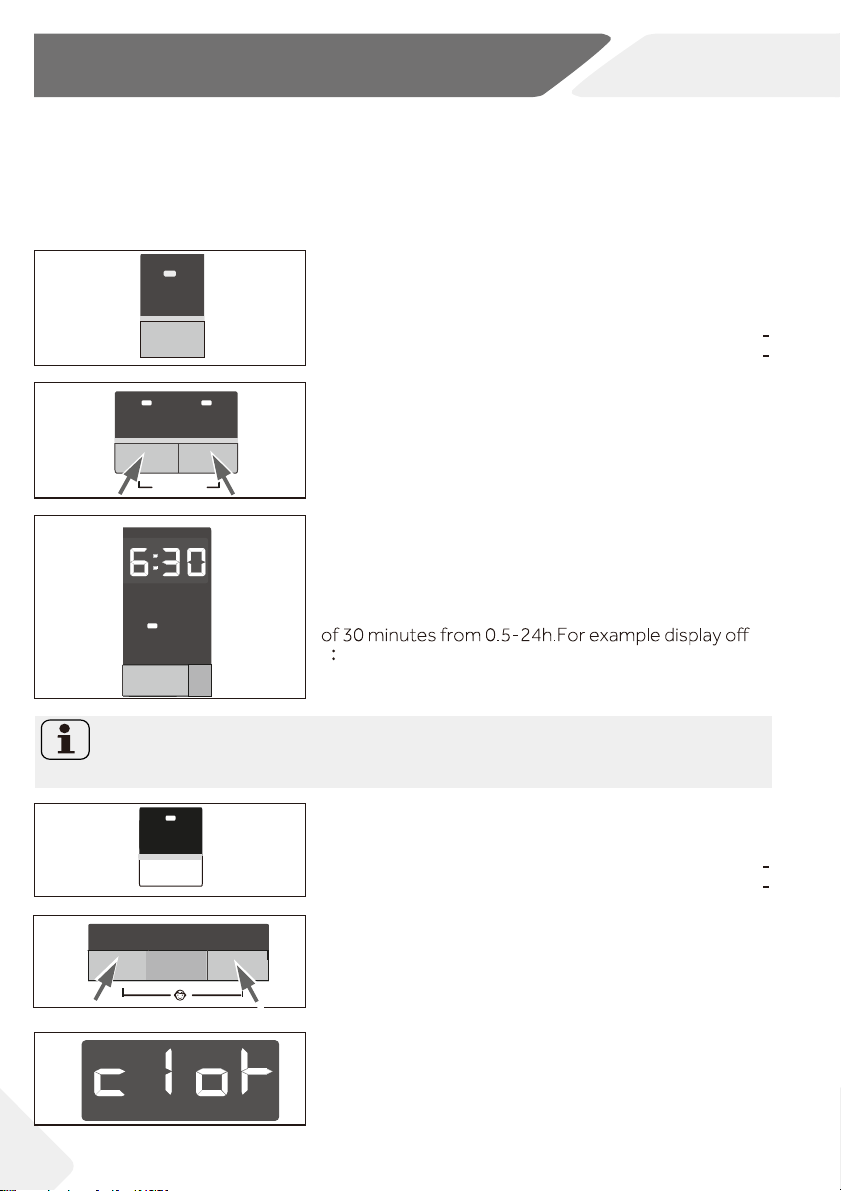
3.6 “Delay” button
Press this button (Fig. 3-12) to start the programme
with a delay. End time delay could be increased in steps
means end of programme cycle will be in 6 hours
and 30 minutes. Press “Start/Pause” button to activate
the time delay. It is not applicable to programme SPIN.
Note: Liquid detergent
If using liquid detergent, it is not recommended to activate the end time delay.
3.8 Child lock
Press button „Temp.“ and ”Steam” (Fig. 3-14) for 3
seconds simultaneously to block all panel elements
against activation. For unlocking please press again
the two buttons.
The display shows
(Fig. 3-15) if a button will be
pressed, when the child lock is activated. The change
is not running.
3-15
Extra rinse
3-10
Delay
3-12
Start/Pause
3-13
DelayExtra rinse
Speed up
3-11
3-14
Temp Speed Steam
When the function is activated the temperature of the programme cannot be changed.
If “Temp.” button is pushed the “Steam” function will be deactivated.
You can activate “Steam” function only before to start any programme. You cannot ac-
tivate “Steam” function while the appliance is already executing a programme.