Hama myScan XX052343 User manual

F
D
GB
I
Operating Instructions
Bedienungsanleitung
Mode d‘emploi
Istruzioni per l‘uso
Instrukcja obsługi
Használati útmutató
Návod k použití
Návod na obsluhu
Kullanma kılavuzu
mySCAN Mouse
HU
PL
CZ
SK
TR
XX
052343

2
GOperating instruction
3
2
1 5
4
6
7
Controls and Displays
1. Left mouse button
2. Right mouse button
3. Scroll wheel
4. Scan button with red LED
5. Scanning area
6. Scanning window with removable protective lm
7. Laser sensors
Thank you for choosing a Hama product.
Take your time and read the following instructions and
information completely. Keep these operating instructions
in a safe place for future reference. If you sell the device,
please pass these operating instructions on to the new
owner.
1. Explanation of Warning Symbols and Notes
Warning
This symbol is used to indicate safety instructions or to
draw your attention to specic hazards and risks.
Note
This is used to indicate additional information or
important notes.
2. Package Contents
•Hama mySCAN Mouse
•CD-ROM
•Quick Start Guide
•Flyer with web link and contact data
•Scanning template
3. Safety Notes
•Protect the product from dirt, moisture and overheating
and use it in dry rooms only.
•Lay all cables so that they do not pose a tripping hazard.
•Do not bend or crush the cable.
•Do not open the device or continue to operate it if it
becomes damaged.
Warning - Laser Klasse 1
Do not look directly at the laser beam! Do not look
directly at the laser beam using optical instruments!
4. System Requirements
•Operating system: Windows Vista, XP, 7 or 8; Mac OS X
10.6 or later
•Processor: Intel® Core™ Duo 1.2 GHz or AMD Athlon™
64 X2 1.7 GHz or better
•RAM: 2 GB
•Hard drive: 1 GB of available hard disk space
•Graphics card: NVIDIA® GeForce® 8400 GS with 128
MB or ATI Radeon™ X1300 with 128 MB or 384 MB
Intel GMA X3000 or better
•USB 2.0 connection
•CD-ROM drive

3
5. Getting Started
A
B
Scanner Mouse
Install
Link to manual
English
C
•Connect the mySCAN Mouse’s USB plug to a free USB
port on your computer (A).
•Insert the included CD-ROM into your CD/DVD drive (B).
The CD-ROM will start automatically.
•Start the installation by running setup.exe. This process
may take a few seconds. Follow the instructions of the
installation program (C).
•After installation, remove the CD-ROM from the CD/DVD
drive. Keep the CD-ROM in a safe place.
Note
•If your computer does not have an optical drive, you
can also download the installation le at www.hama.
de/52343.
•The Drivers tab will take you straight to the
appropriate driver. Download the driver.
•Save the installation le.
•Double-click setup.exe to start the installation
program.
•Follow the instructions of the installation program.
6. Operation
6.1 Scanning
D
b
a c
E
d
•Remove the protective lm (6) from the bottom of the
mouse.
•Place your mySCAN Mouse on the area you want to scan
and press the scan button (4) to start scan mode.
•A black screen will open (D). The green scanning window
(c) shows the area you just scanned. The description of
the scan mode functions is shown on the upper left (b).
The bar on the left (a) shows the amount of scan memory
available. As soon as the storage space is used up, the
scanning process is automatically ended.

4
Note
The amount of storage space available depends on
your computer’s performance. You can increase it by
reducing the scanning resolution under Settings.
•Move the mySCAN Mouse over the area you want to
scan.
•The areas you have scanned appear on the screen.
Note – Interruptions in scanning
•Make sure you do not lift up the mySCAN Mouse
while scanning. The scanning process will be
automatically interrupted if you lift up the mySCAN
Mouse.
•To continue, put the mouse back in the position
where the scanning process was interrupted.
Note – Scanning quality
•When scanning, ensure that part of the green
scanning window (c) is on an already scanned area
(d) (E).
•To scan areas that are missing, move the mySCAN
Mouse back to the appropriate area.
•If the scans are blurry, move the mySCAN Mouse
back over the affected area.
•If the border of the scanning window (c) changes
from green to yellow or red, the areas you want to
scan may not be scanned correctly. Move the mouse
more slowly until the border is green again.
•To end the scanning process, press the scan button (4)
again.
6.2 Editing
F
e
f
g
•After scanning is completed, the editing window (F) will
open automatically.
•The scanned area (e) is automatically straightened and
marked.
•If necessary, you can make changes to the scanned area
or select another area (f) using the marking points.
•You can edit the selected area using various editing
tools (g) (colour, saturation, brightness, contrast,
background, rotating, erasing).
•Click OK to keep using the marked/edited area.
•Click Cancel if you do not want to continue. The area
you scanned will no longer be available.

5
6.3 Directions for use
h
i
f
j
G
•If you clicked OK, the selected area will appear in the
application window (G).
•Using the application window (G), you can process the
marked/edited area (f) further in other programs, use it
with apps, share it, copy it, save it and print it.
•You can also use the application window (G) to change
the settings, manage apps, search for updates and use
the help function.
•If you want to return to the editing window to mark a
new area, click Edit in the function bar (i). Alternatively,
you can click Edit in the menu bar (h) and select Edit
scan.
Further processing in other programs
•Double-click a symbol in the application bar (j) to open
the corresponding program.
•Scanned images can be opened as image les (.jpg/.png
format) or PDFs.
•Scanned texts and tables can also be opened as text,
Word and Excel les.
•You can edit your scanned document and save it in the
relevant program.
Using apps
•Click Apps in the function bar (i) and then select the app
you want. You can choose from the Evernote, Google
Search by Image and Google Translate apps.
•Alternatively, you can click File in the menu bar (h) and
select Apps to choose the app you want.
Note – Apps
•Evernote:
You can use this app to transfer the scanned
document to Evernote. You will need an Evernote
account and an active internet connection to use
this app.
•Google Search by Image:
You can use this app to nd images that are similar
or related to your image, as well as search results
from the Google search engine. An active internet
connection is required in order to use this app.
•Google Translate:
This app allows you to send your scanned text
straight to the free Google online translation service
and translate it into the language of your choice.
Note that the scanned text cannot be translated if it
is too long. An active internet connection is required
in order to use this app.
Managing apps
•In the menu bar (h), click Options and select Manage
apps to activate or deactivate apps.

6
Share
•Click Share in the function bar (i) and then select the
application you want. You can share the marked area via
Facebook, Flickr and Twitter.
•Alternatively, you can click File in the menu bar (h) and
select Share to choose the app you want.
•Follow the instructions on the screen.
•The Share function requires an account in the relevant
social network, as well as an active internet connection.
•You can insert the marked area into you e-mail
attachment as an image le (.jpg format). - Click Share
and select E-mail. The image le will be attached to the
e-mail. Note that a program such as Microsoft Oce
must be set up as your default e-mail program.
•You can use drag and drop to attach the marked area to
the e-mail in another le format. Click on the relevant le
format symbol in the application bar (j) and hold down
the left mouse button (1). Now drag the symbol into the
e-mail attachment and release the left mouse button (1).
Copying
•Click Copy in the function bar (i) and then select the
option you want.
•Alternatively, you can click Edit in the menu bar (h) and
select Copy image or Copy text.
•You can copy the marked area to the clipboard as an
image or text and paste it into other image or text
programs.
Saving
•To save the marked area directly, click Save in the
function bar (i). The .png, .jpg, .tif, .bmp, .pdf, .xls, .doc
and .txt le formats are available.
•Alternatively, you can click File in the menu bar (h) and
select Save as.
Printing
•To print the marked area, click File in the menu bar (h)
and select Print.
Settings
•In the menu bar (h), click Options and select Settings
to adjust the software.
•Under General, you can change the language of the
user interface and adjust the scanning resolution. Low
resolution is 100 dpi, medium is 200 dpi, high is 320 dpi
and full is 400 dpi.
•You can dene the position of the application window
under Window properties.
•Under Save, you can change the automatically assigned
le name and the quality of the jpg le format saved.
•Under Text recognition, you can select the language
to recognised. You can select up to three languages at
a time.
•Under Proxy settings, you can dene these settings
manually.
•Under Advanced, you can make additional changes.
Note that making changes can make the application
unstable.
Updates
•In the menu bar (h), click Options and select Settings
and Updates to dene individual software updates.
•In the menu bar (h), click Options and select Search
for updates to start a manual update search.
Help
•In the menu bar (h), click Help and select Online help
to receive information about the product. You will be
taken to Hama’s website. Enter the item number in the
search eld. You will receive all the information that is
available online.
•If the mouse if not functioning properly, click Help in the
menu bar (h) and select Send feedback.
•In the menu bar (h), click Help and select About to
receive information about the software version.
•Also refer to section 9,Support information in these
operating instructions.
Closing and exiting the application
•If you close the application window, the application will
remain active. The software logo appears in the task bar.
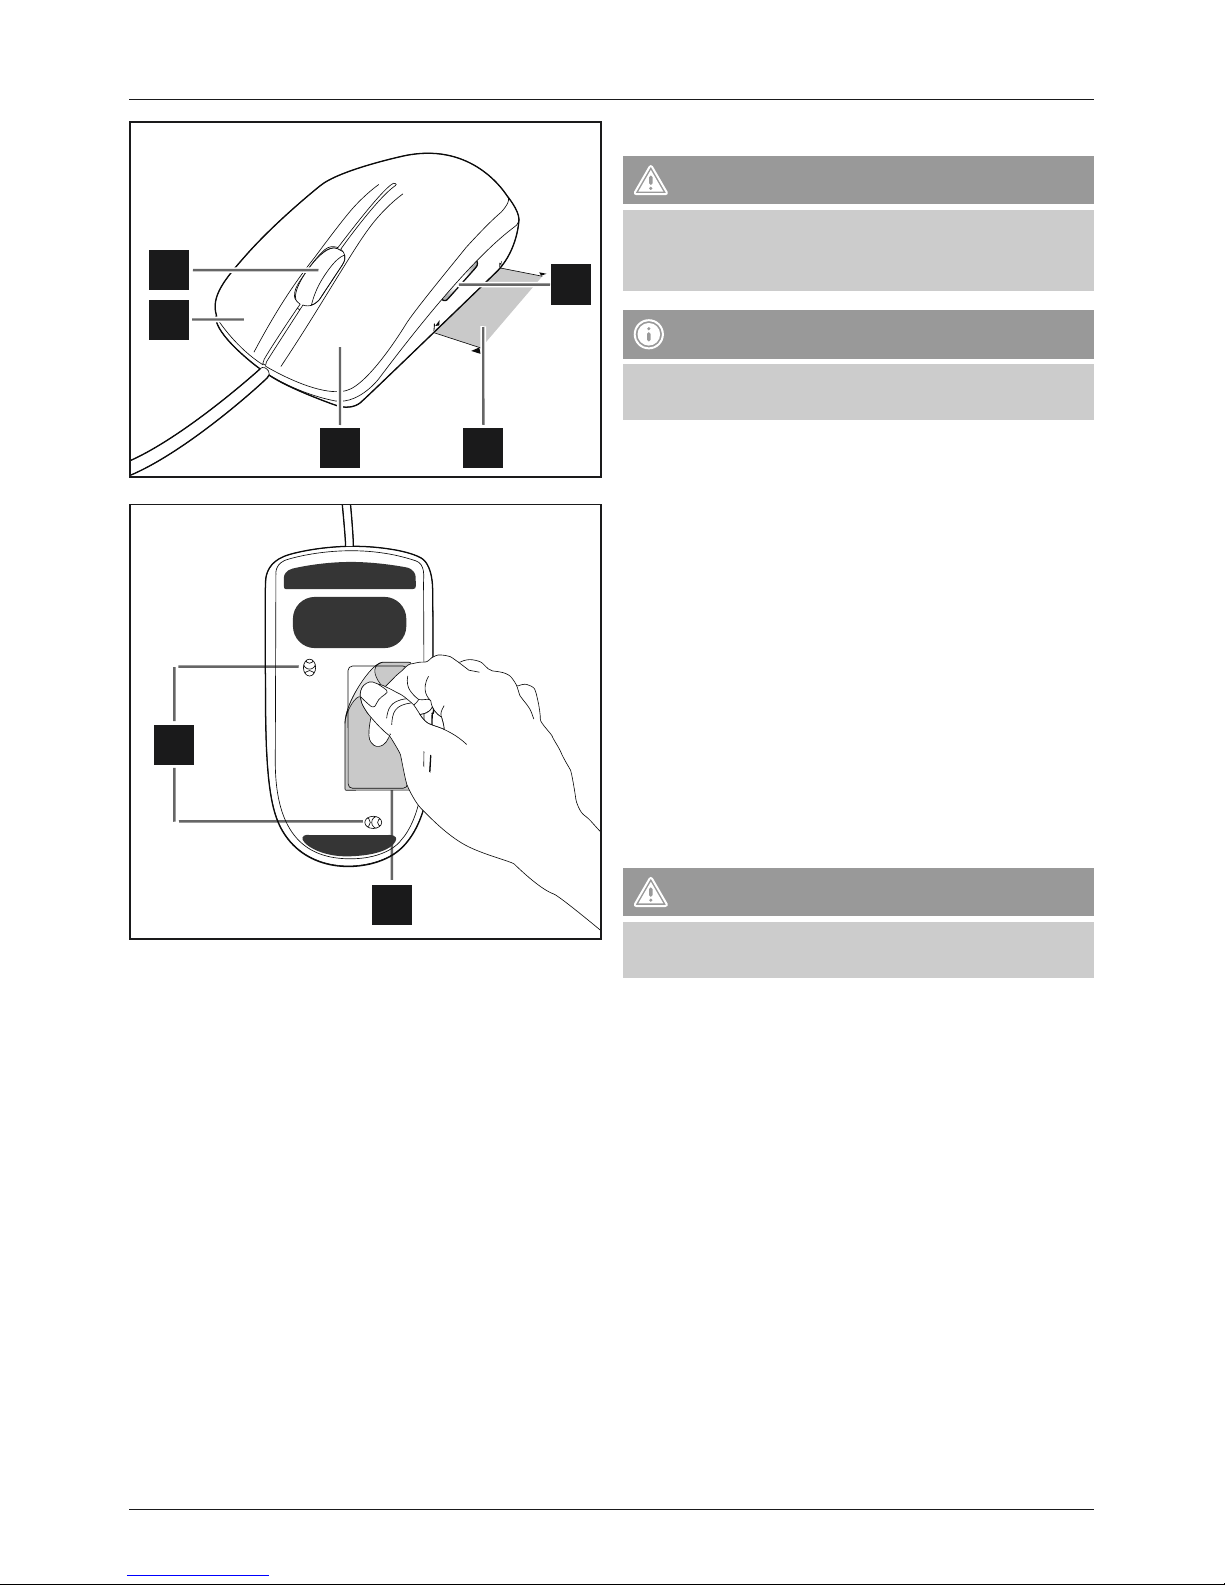
•Press the scan button (4) to start a new scanning
process.
•To exit the application, click File in the menu bar (h) and
select Exit. The application is no longer active and the
software logo will disappear from the task bar.
•To start a new scanning process, open the software
using the corresponding desktop logo or your
computer’s program structure. The application window
(G) opens. Start the scanning process as described in
section 6.1,Scanning.
Warning
When working at computer workstations, be sure to
maintain an ergonomically sound posture and take
enough breaks to get up and move around in order to
avoid straining your wrists (RSI = repetitive strain injury)

7
Note
•The mouse does work on glass surfaces. Only use a
suitable smooth, non-slip surface.
•If you do not have one, we recommend separately
purchasing an ergonomic mouse pad and an
ergonomic wrist rest. You can nd an appropriate
selection of Hama products at www.hama.com.
7. Care and Maintenance
•Only clean this product with a slightly damp, lint-free
cloth and do not use aggressive cleaning agents.
•Always keep the scanning window free of dust,
ngerprints and grease.
8. Warranty Disclaimer
Hama GmbH & Co. KG assumes no liability and provides no
warranty for damage resulting from improper installation/
mounting, improper use of the product or from failure to
observe the operating instructions and/or safety notes.
9. Service and Support
Please contact Hama Product Consulting if you have any
questions about this product.
Hotline: +49 9091 502-115 (German/English)
Further support information can be found here:
www.hama.com
10. Technical Data
Dimensions (H x L x W): 11.40 x 6.15 x 3.65 cm
Sensor Laser class 1
Sensitivity 1200 dpi
Number of mouse buttons 4 buttons incl. scroll wheel
Connection USB 2.0
Connection Cable
Cable length 150 cm
Scanning resolution 100 / 200 / 320 / 400 dpi
11. Recycling Information
Note on environmental protection:
After the implementation of the European Directive
2002/96/EU and 2006/66/EU in the national legal
system, the following applies: Electric and
electronic devices as well as batteries must not be
disposed of with household waste. Consumers are obliged
by law to return electrical and electronic devices as well as
batteries at the end of their service lives to the public
collecting points set up for this purpose or point of sale.
Details to this are dened by the national law of the
respective country. This symbol on the product, the
instruction manual or the package indicates that a product
is subject to these regulations. By recycling, reusing the
materials or other forms of utilising old devices/Batteries,
you are making an important contribution to protecting
our environment.

8
DBedienungsanleitung
3
2
1 5
4
6
7
Bedienungselemente und Anzeigen
1. Linke Maustaste
2. Rechte Maustaste
3. Scrollrad
4. Scan-Taste mit roter LED
5. Scanbereich
6. Scanfenster mit Schutzfolie zum Abziehen
7. Lasersensoren
Vielen Dank, dass Sie sich für ein Hama Produkt
entschieden haben!
Nehmen Sie sich Zeit und lesen Sie die folgenden
Anweisungen und Hinweise zunächst ganz durch.
Bewahren Sie diese Bedienungsanleitung anschließend an
einem sicheren Ort auf, um bei Bedarf darin nachschlagen
zu können. Sollten Sie das Gerät veräußern, geben Sie diese
Bedienungsanleitung an den neuen Eigentümer weiter.
1. Erklärung von Warnsymbolen und Hinweisen
Warnung
Wird verwendet, um Sicherheitshinweise zu
kennzeichnen oder um Aufmerksamkeit auf besondere
Gefahren und Risiken zu lenken.
Hinweis
Wird verwendet, um zusätzlich Informationen oder
wichtige Hinweise zu kennzeichnen.
2. Packungsinhalt
•Hama mySCAN Mouse
•CD-ROM
•Quick Start Guide
•Flyer mit Weblink und Kontaktdaten
•Scanvorlage
3. Sicherheitshinweise
•Schützen Sie das Produkt vor Schmutz, Feuchtigkeit und
Überhitzung und verwenden Sie es nur in trockenen
Räumen.
•Verlegen Sie alle Kabel so, dass sie keine Stolpergefahr
darstellen.
•Knicken und quetschen Sie das Kabel nicht.
•Öffnen Sie das Produkt nicht und betreiben Sie es bei
Beschädigungen nicht weiter.
Warnung - Laser Klasse 1
Blicken Sie nicht direkt in den Laserstrahl! Betrachten Sie
den Laserstrahl nicht direkt mit optischen Instrumenten!
4. Systemvoraussetzungen
•Betriebssystem: Windows Vista, XP, 7 oder 8; Mac OS X
10.6 oder höher
•Prozessor: Intel® Core™ Duo 1.2 GHz oder AMD
Athlon™ 64 X2 1.7 GHz oder besser
•Arbeitsspeicher: 2GB RAM
•Festplatte: 1GB freier Festplattenspeicher
•Grakkarte: NVIDIA® GeForce® 8400 GS mit 128 MB
oder ATI Radeon™ X1300 mit 128 MB oder 384MB Intel
GMA X3000 oder besser
•USB 2.0-Anschluss
•CD-Rom Laufwerk

9
5. Inbetriebnahme
A
B
Scanner Mouse
Install
Link to manual
English
C
•Verbinden Sie den USB-Stecker der mySCAN Mouse mit
einer freien USB-Buchse an Ihrem Computer (A).
•Legen Sie die beiliegende CD-ROM in das CD/DVD
Laufwerk ein (B). Die CD-ROM startet automatisch.
•Starten Sie die Installation, indem Sie setup.exe
ausführen. Dieser Vorgang kann einige Sekunden in
Anspruch nehmen. Folgen Sie den Anweisungen des
Installationsprogrammes (C).
•Entfernen Sie nach der Installation die CD-ROM aus dem
CD/DVD Laufwerk. Bewahren Sie die CD-ROM an einem
sicheren Ort auf.
Hinweis
•Wenn Ihr Computer nicht über ein optisches Laufwerk
verfügt, können Sie die Installationsdatei auch unter
www.hama.de/52343 downloaden.
• Der Reiter Treiber führt Sie direkt zum entsprechenden
Treiber. Laden Sie diesen Treiber herunter.
• Speichern Sie die Installationsdatei ab.
•Starten Sie das Installationsprogramm mit einem
Doppelklick auf setup.exe.
•Folgen Sie den Anweisungen des
Installationsprogrammes.
6. Betrieb
6.1 Scannen
D
b
a c
E
d
•Entfernen Sie die Schutzfolie (6) auf der Unterseite der
Maus.
•Platzieren Sie die mySCAN Mouse auf dem gewünschten
Scanbereich und betätigen Sie die Scan-Taste (4), um
den Scanmodus zu starten.
•Es öffnet sich ein schwarzer Bildschirm (D). Das grüne
Scanfenster (c) zeigt den neu eingescannten Bereich
an. Die Funktionsbeschreibung für den Scanmodus wird
oben rechts angezeigt (b). Der Balken links (a) zeigt den
verfügbaren Scan Speicher an. Sobald der Speicherplatz
verbraucht ist, wird der Scanvorgang automatisch
beendet.

10
Hinweis
•Der verfügbare Speicherplatz hängt von der
Leistung Ihres Computers ab. Dieser kann durch die
Reduzierung der Scanauösung unter Einstellungen
erweitert werden.
• Bewegen Sie die mySCAN Mouse über den Bereich, den
Sie einscannen möchten.
• Die von Ihnen eingescannten Bereiche werden auf dem
Bildschirm angezeigt.
Hinweis– Scanunterbrechung
•Achten Sie darauf, die mySCAN Mouse während des
Scanvorgangs nicht hochzuheben. Es erfolgt eine
automatische Unterbrechung des Scanvorgangs,
sobald die mySCAN Mouse angehoben wird.
•Um fortzufahren, legen Sie die Maus auf die Stelle,
an der der Scanvorgang unterbrochen wurde.
Hinweis – Scanqualität
•Achten Sie beim Scannen darauf, dass das
grüne Scanfenster (c) teilweise auf einem bereits
gescannten Bereich (d) liegt (E).”
•Um fehlende Bereiche einzuscannen, bewegen Sie die
mySCAN Mouse zum gewünschten Bereich zurück.
• Bei verschwommenen Scans bewegen Sie die
mySCAN Mouse erneut über den entsprechenden
Bereich.
•Wechselt die Rahmenfarbe des Scanfensters (c) von
grün auf gelb oder rot, werden die gewünschten
Bereiche möglicherweise nicht korrekt eingescannt.
Bewegen Sie die Maus langsamer, bis die
Rahmenfarbe wieder grün ist.
•Zum Beenden des Scanvorganges betätigen Sie erneut
die Scan-Taste (4).
6.2 Bearbeiten
F
e
f
g
•Nach Beenden des Scanvorganges öffnet sich das
Bearbeitungsfenster (F).
•Der gescannte Bereich (e) wird automatisch begradigt
und markiert.
•Bei Bedarf können Sie Änderungen am gescannten
Bereich vornehmen, oder einen anderen Bereich (f)
mithilfe der Markierungspunkte festlegen.
•Den ausgewählten Bereich können Sie mit den
verschiedenen Bearbeitungswerkzeugen (g) (Farbton,
Sättigung, Helligkeit, Kontrast, Hintergrund,
Rotieren, Radiergummi) bearbeiten.
•Klicken Sie auf OK, um den markierten/ bearbeiteten
Bereich weiter verwenden zu können.
•Klicken Sie auf Abbrechen, wenn Sie nicht weiter
fortfahren wollen. Der bereits gescannte Bereich steht
nicht mehr zur Verfügung.

11
6.3 Anwendung
h
i
f
j
G
•Haben Sie auf OK geklickt, erscheint der ausgewählte
Bereich im Anwendungsfenster (G).
•Mithilfe des Anwendungsfensters (G) können
Sie den markierten/ bearbeiteten Bereich (f) in
anderen Programmen weiterverarbeiten, via Apps
weiterverwenden, teilen, kopieren, speichern und
drucken.
•Im Anwendungsfenster (G) können Sie außerdem
Einstellungen ändern, Apps verwalten, Updates suchen
und die Hilfe Funktion nutzen.
•Wenn Sie zum Bearbeitungsfenster zurückkehren wollen,
um einen neuen Bereich zu markieren, klicken Sie in der
Funktionsleiste (i) auf Bearbeiten. Alternativ klicken Sie
in der Menüleiste (h) auf Bearbeiten und wählen Sie
Scan bearbeiten.
Weiterverarbeitung in anderen Programmen
•Durch Doppelklick auf ein Symbol in der
Anwendungsleiste (j) öffnet sich das zugehörige
Programm.
•Eingescannte Bilder können als Bilddatei (.jpg-/ .png-
Format), sowie als PDF geöffnet werden.
•Eingescannte Texte und Tabellen können Sie zusätzlich
als Text-, Word- und Excel-Datei öffnen.
•Im jeweiligen Programm können Sie Ihr eingescanntes
Dokument weiterverarbeiten und speichern.
Nutzung von Apps
•Klicken Sie in der Funktionsleiste (i) auf Apps, und
wählen Sie die von Ihnen gewünschte App. Sie können
zwischen den drei Apps Evernote, Google Search by
Image und Google Translate wählen.
•Alternativ klicken Sie in der Menüleiste (h) auf Datei und
wählen Sie über Apps die gewünschte App aus.
Hinweis – Apps
•Evernote:
Mit dieser App können Sie das eingescannte
Dokument in Evernote transportieren. Für die
Nutzung dieser App benötigen Sie ein Evernote
Konto, sowie eine aktive Internetverbindung.
•Google Search by Image:
Mit dieser App können Sie ähnliche oder mit Ihrem
Bild in Zusammenhang stehende Bilder sowie
Suchergebnisse über die Suchmaschine Google
anzeigen lassen. Für die Nutzung dieser App
benötigen Sie eine aktive Internetverbindung.
•Google Translate:
Mit dieser App können Sie Ihren eingescannten
Text direkt an den kostenlosen Google Online-
Übersetzungsdienst senden und in eine beliebige
Sprache übersetzen lassen. Achten Sie darauf, dass
der eingescannte Text nicht zu lang sein darf, um
übersetzt werden zu können. Für die Nutzung dieser
App benötigen Sie eine aktive Internetverbindung.
Apps verwalten
•Klicken Sie in der Menüleiste (h) auf Optionen und
wählen Sie Apps verwalten, um Apps zu aktivieren/
deaktivieren.

12
Teilen
•Klicken Sie in der Funktionsleiste (i) auf Teilen und
wählen Sie die von Ihnen gewünschte Anwendung. Sie
können den markierten Bereich über Facebook,Flickr
und Twitter teilen.
•Alternativ klicken Sie in der Menüleiste (h) auf Datei und
wählen Sie über Teilen die gewünschte Anwendung aus.
•Folgen Sie den Anweisungen auf dem Bildschirm.
•Für die Funktion Teilen benötigen Sie einen Account
bei dem jeweiligen Sozialen Netzwerk, sowie eine aktive
Internetverbindung.
•Sie können den markierten Bereich auch als Bilddatei
(.jpg-Format) in Ihren Emailanhang einfügen. Klicken Sie
hierzu auf Teilen und wählen Sie Mail aus. Die Bilddatei
wird in den Anhang der Email eingefügt. Beachten Sie,
dass z.B. Microsoft Oce als Standard Emailprogramm
eingerichtet sein muss.
•Per Drag & Drop können Sie den markierten Bereich
in Form anderer Dateiformate in den Emailanhang
einfügen. Klicken Sie hierzu auf das jeweilige
Dateiformat-Symbol in der Anwendungsleiste (j) und
halten Sie die linke Maustaste (1) gedrückt. Ziehen Sie
nun das Symbol in den Emailanhang und lassen Sie die
linke Maustaste (1) wieder los.
Kopieren
•Klicken Sie in der Funktionsleiste (i) auf Kopieren und
wählen Sie die von Ihnen gewünschte Option.
•Alternativ klicken Sie in der Menüleiste (h) auf
Bearbeiten und wählen Sie Bild kopieren oder Text
kopieren.
•Sie können den markierten Bereich als Bild oder Text in
die Zwischenablage kopieren und in anderen Bild- oder
Textprogrammen wieder einfügen.
Speichern
•Um den markierten Bereich direkt abzuspeichern, klicken
Sie in der Funktionsleiste (i) auf Speichern. Es stehen
Ihnen die Dateiformate .png, .jpg, .tif, .bmp, .pdf, .xls,
.doc, .txt zur Verfügung.
•Alternativ klicken Sie in der Menüleiste auf Datei und
wählen Sie Speichern unter.
Drucken
•Um den markierten Bereich zu drucken, klicken Sie in der
Menüleiste (h) auf Datei und wählen Sie Drucken.
Einstellungen
•Klicken Sie in der Menüleiste (h) auf Optionen und
wählen Sie Einstellungen, um Anpassungen an der
Software vorzunehmen.
•Unter Allgemein können Sie die Sprache der
Benutzeroberäche ändern und die Scanauösung
anpassen. Niedrig entspricht 100dpi, Mittel 200dpi,
Hoch 320dpi und Voll 400dpi.
•Unter Fenstereigenschaften können Sie die Position
des Anwendungsfensters bestimmen.
•Unter Speichern können Sie den automatisch
vergebenen Dateinamen beim Speichern neu denieren
und die Qualität des abgespeicherten Dateiformates jpg
ändern.
•Unter Texterkennung können Sie die zu erkennende
Sprache auswählen. Sie können bis zu drei Sprachen
gleichzeitig festlegen.
•Unter Proxy Einstellungen können Sie diese manuell
bestimmen.
•Unter Fortgeschritten können Sie weitere Änderungen
vornehmen. Beachten Sie, dass bei Änderungen die
Anwendung instabil sein kann.
Updates
•Klicken Sie in der Menüleiste (h) auf Optionen, und
wählen Sie Einstellungen und Updates, um Software-
Updates individuell festzulegen.
•Klicken Sie in der Menüleiste (h) auf Optionen und
wählen Sie Nach Updates suchen, um eine manuelle
Update-Suche zu starten.
Hilfe
•Klicken Sie in der Menüleiste (h) auf Hilfe und
wählen Sie Online-Hilfe, um Informationen über das
Produkt zu erhalten. Sie werden auf die Website von
Hama weitergeleitet. Geben Sie im Suchfenster die
Artikelnummer ein. Sie erhalten alle online verfügbaren
Informationen.
•Bei Funktionsstörungen klicken Sie in der Menüleiste (h)
auf Hilfe und wählen Sie Feedback senden.
•Klicken Sie in der Menüleiste (h) auf Hilfe und wählen
Sie Über, um Informationen über Software-Version zu
erhalten.
•Beachten Sie hierzu auch Abschnitt 9. Support-
informationen dieser Bedienungsanleitung.

13
Anwendung schließen und beenden
•Wenn Sie das Anwendungsfenster schließen, ist die
Anwendung weiter aktiv. Das Softwarelogo ist in der
Taskleiste sichtbar.
•Drücken Sie die Scan-Taste (4), um einen neuen
Scanvorgang zu starten.
•Klicken Sie in der Menüleiste (h) auf Datei und
Beenden, um die Anwendung zu beenden. Die
Anwendung ist nicht mehr aktiv und das Softwarelogo in
der Taskleiste ist nicht mehr sichtbar.
•Um einen erneuten Scanvorgang starten zu können,
öffnen Sie die Software über das entsprechende Desktop-
Logo oder über die Programmstruktur Ihres Computers.
Es öffnet sich das Anwendungsfenster (G). Starten
Sie den Scanvorgang wie in Abschnitt 6.1. Scannen
beschrieben.
Warnung
Achten Sie bei Arbeiten an Bildschirmarbeitsplätzen zur
Vermeidung von Überbelastungen der Handgelenke
(RSI Syndrom = Repetitive Strain Injury) auf eine
ergonomisch gute Haltung sowie ausreichende
Bewegungspausen
Hinweis
• Die Maus funktioniert nicht auf Glasoberächen.
Verwenden Sie eine geeignete, ebene und rutschfeste
Unterlage.
• Sofern nicht vorhanden, empfehlen wir eine separat
erhältliche, ergonomische Mausmatte sowie
eine ebenso separat erhältliche, ergonomische
Handballenauage. Eine entsprechende Auswahl an
Hama Produkten nden Sie unter www.hama.com.
7. Wartung und Pflege
•Reinigen Sie dieses Produkt nur mit einem fusselfreien,
leicht feuchten Tuch und verwenden Sie keine
aggressiven Reiniger.
•Halten Sie das Scanfenster gründlich frei von Staub,
Fingerabrücken und Fettrückständen.
8. Gewährleistungsausschluß
Die Hama GmbH & Co. KG übernimmt keinerlei Haftung
oder Gewährleistung für Schäden, die aus unsachgemäßer
Installation, Montage und unsachgemäßem Gebrauch
des Produktes oder einer Nichtbeachtung der
Bedienungsanleitung und/oder der Sicherheitshinweise
resultieren.
9. Service und Support
Bitte wenden Sie sich bei Fragen zum Produkt gerne an die
Hama-Produktberatung.
Hotline: +49 9091 502-115 (Deu/Eng)
Weitere Supportinformationen nden sie hier:
www.hama.com
10. Technische Daten
Maße (L x B x H): 11,40 x 6,15 x 3,65 cm
Sensor Laser Klasse 1
Empndlichkeit 1200 dpi
Anzahl Maustasten 4 Tasten inkl. Scroll-Rad
Anschluss USB 2.0
Verbindung Kabel
Kabellänge 150 cm
Scanauösung 100 / 200 / 320 /400 dpi
11. Entsorgungshinweise
Hinweis zum Umweltschutz:
Ab dem Zeitpunkt der Umsetzung der
europäischen Richtlinien 2002/96/EG und
2006/66/EG in nationales Recht gilt folgendes:
Elektrische und elektronische Geräte sowie
Batterien dürfen nicht mit dem Hausmüll entsorgt werden.
Der Verbraucher ist gesetzlich verpichtet, elektrische und
elektronische Geräte sowie Batterien am Ende ihrer
Lebensdauer an den dafür eingerichteten, öffentlichen
Sammelstellen oder an die Verkaufsstelle zurückzugeben.
Einzelheiten dazu regelt das jeweilige Landesrecht. Das
Symbol auf dem Produkt, der Gebrauchsanleitung oder der
Verpackung weist auf diese Bestimmungen hin. Mit der
Wiederverwertung, der stoichen Verwertung oder
anderen Formen der Verwertung von Altgeräten/Batterien
leisten Sie einen wichtigen Beitrag zum Schutz unserer
Umwelt.

14
FMode d‘emploi
3
2
1 5
4
6
7
Éléments de commande et d'affichage
1. Touche gauche de la souris
2. Touche droite de la souris
3. Molette
4. Touche de numérisation (Scan) à LED rouge
5. Zone de numérisation
6. Fenêtre de numérisation à lm de protection (à retirer)
7. Capteurs laser
Nous vous remercions d’avoir choisi un produit Hama.
Veuillez prendre le temps de lire l‘ensemble des remarques
et consignes suivantes et conserver ce mode d‘emploi
à portée de main pour toute consultation ultérieure.
Transmettez-le au nouveau propriétaire avec l’appareil le
cas échéant.
1. Explication des symboles d'avertissement et des
remarques
Avertissement
Ce symbole est utilisé pour indiquer des consignes de
sécurité ou pour attirer votre attention sur des dangers et
risques particuliers.
Remarque
Ce symbole est utilisé pour indiquer des informations
supplémentaires ou des remarques importantes.
2. Contenuto della confezione
•Souris mySCAN de Hama
•CD-ROM
•Guide de démarrage rapide
•Prospectus avec hyperlien et coordonnées
•Modèle de numérisation
3. Consignes de sécurité
•Protégez le produit de toute saleté, humidité, surchauffe
et utilisez-le uniquement dans des locaux secs.
•Posez tous les câbles de telle sorte qu’ils ne présentent
aucun risque de chute.
•Faites attention à ne pas plier ni coincer le câble.
•Ne tentez pas d‘ouvrir le produit en cas de détérioration
et cessez de l’utiliser.
Avertissement concernant la classe laser 1
Ne regardez en aucun cas directement vers le rayon
laser. Ne regardez pas directement le rayon laser à l‘aide
d‘instruments optiques.
4. Configuration système requise
•Système d‘exploitation : Windows Vista, XP, 7 ou 8 ; Mac
OS X 10.6 ou versions ultérieures
•Processeur : Intel® Core™ Duo 1,2 GHz ou AMD
Athlon™ 64 X2, 1,7 GHz ou supérieur
•Mémoire vive : 2 Go RAM
•Disque dur : 1 Go d’espace disponible
•Carte graphique : NVIDIA® GeForce® 8400 GS de
128 Mo ou ATI Radeon™ X1300 de 128 Mo ou 384 Mo
Intel GMA X3000 ou supérieur
•Connexion USB 2.0
•Lecteur de CD ROM

15
5. Mise en service
A
B
Scanner Mouse
Install
Link to manual
English
C
•Insérez la che mâle USB de la souris mySCAN dans un
port USB libre de votre ordinateur (A).
•Insérez le CD-ROM fourni dans votre lecteur (B). Le CD-
ROM démarre automatiquement.
•Lancez l‘installation en exécutant le chier setup.exe.
Cette procédure peut durer quelques secondes. Suivez
les consignes du programme d‘installation (C).
•Une fois l‘installation terminée, retirez le CD-ROM de
votre lecteur. Conservez le CD-ROM dans un endroit sûr.
Remarque
•Vous pouvez également télécharger le chier
d‘installation sur www.hama.de/52343 dans le cas où
votre ordinateur ne dispose pas de lecteur optique.
•L‘onglet Pilote vous permet de sélectionner
directement le pilote approprié. Téléchargez ce pilote.
• Sauvegardez le chier d‘installation.
•Lancez le logiciel d‘installation en double-cliquant sur
setup.exe.
•Suivez les consignes du programme d‘installation.
6. Fonctionnement
6.1 Numérisation
D
b
a c
E
d
•Retirez le lm de protection (6) placé sur la face
inférieure de la souris
•Placez la souris mySCAN sur la zone que vous désirez
numériser, puis appuyez sur la touche de numérisation
(4) an de démarrer le mode de numérisation.
•Une écran noir apparaît (D). La fenêtre verte de
numérisation (c) indique la zone que vous venez de
numériser. Le mode de numérisation est décrit dans le
coin supérieur droit (b). La barre gauche (a) indique
la mémoire de numérisation disponible. Le cycle de
numérisation se termine automatiquement en cas de
mémoire pleine.

16
Remarque
•L‘espace mémoire disponible dépend de la puissance
de votre ordinateur. Vous pouvez augmenter l‘espace
en diminuant la résolution de numérisation au point
Paramètres.
•Placez votre souris mySCAN dans la zone que vous
désirez numériser.
• Les zones que vous numérisez apparaissent à l‘écran.
Remarque concernant une interruption de
numérisation
•Faites attention à ne pas soulever votre souris
mySCAN pendant la numérisation. Le cycle de
numérisations s‘interrompt automatiquement dès que
vous soulevez la souris.
•Pour reprendre la numérisation, replacez la souris
àl‘endroit où le cycle de numérisation a été
interrompu.
Remarque concernant la qualité de
numérisation
•Pendant la numérisation, faites attention à ce que la
fenêtre verte de numérisation (c) soit partiellement
sur une zone déjà numérisée (d) (E).
•Pour numériser des zones manquantes, replacez la
souris mySCAN sur la zone concernée.
•En présence de zones numérisées oues, replacez
également la souris mySCAN sur la/les zone(s)
concernée.
•Un changement de couleur du cadre de la fenêtre de
numérisation (c) de vert à jaune ou rouge indique que
les zones numérisées n‘ont éventuellement pas été
numérisés correctement. Déplacez la souris lentement
jusqu‘à ce que le cadre redevienne vert.
•Pour terminer la numérisation, appuyez une nouvelle fois
sur la touche de numérisation (4).
6.2 Édition
F
e
f
g
•Une fenêtre d‘édition (F) apparaît à l‘écran à la n d‘un
cycle de numérisation.
•La zone numérisée (e) sera automatiquement rectiée et
sélectionnée.
•Si besoin est, vous pourrez modier la zone numérisée ou
dénir une autre zone (f) à l‘aide des points de sélection.
•Vous pourrez ainsi modier la zone sélectionnée à
l‘aide des outils d‘édition (g) (couleur, saturation,
luminosité, contraste, arrière-fond, rotation,
gomme).
•Cliquez sur OK an d‘utiliser la zone sélectionnée /
éditée.
•Cliquez sur Interrompre dans le cas où vous ne désirez
par continuer l‘édition. La zone déjà numérisée ne sera
plus disponible.

17
6.3 Application
h
i
f
j
G
•La zone sélectionnée apparaît dans la fenêtre
d‘application (G) dès que vous cliquez sur OK.
•La fenêtre d‘application (G) vous permet d‘éditer la
zone sélectionnée / éditée (f) dans d‘autres logiciels,
de l‘utiliser, la partager, la copier, la sauvegarder et
l‘imprimer à l‘aide d‘applications.
•La fenêtre d‘application (G) vous permet également
de modier des paramètres, de gérer des applications,
rechercher des mises à jour et utiliser la fonction d‘aide.
•Pour retourner à la fenêtre d‘édition, an de sélectionner,
par exemple, une nouvelle zone, cliquez sur Édition dans
la barre de fonction (i). Vous pouvez également cliquer
sur Édition dans la barre de menu, puis sélectionner
Éditer la numérisation.
Édition dans d'autres logiciels
•Double-cliquez sur une icône de la barre d‘application (j)
an d‘ouvrir le logiciel concerné.
•Vous pourrez ouvrir les images numérisées dans un chier
image (.jpg / .png), ainsi qu‘au format PDF.
•Les textes et tableaux numérisés peuvent également être
ouverts en tant que chier texte, Word et Excel.
•Vous pourrez éditer et sauvegarder les documents
numérisés dans le logiciel concerné.
Utilisation d'applications
•Cliquez, dans la barre de fonctions (i), sur Applications,
puis sélectionnez l‘application que vous désirez utiliser.
Trois applications, Evernote, Google Search by Image et
Google Translate, sont disponibles.
•Vous pouvez également cliquer sur Fichier dans la barre
de menu (h), puis sélectionner l‘application que vous
désirez utiliser à l‘aide de l‘option Applications.
Remarque concernant les applications
•Evernote :
Cette application vous permet de transférer le
document numérisé dans Evernote. Vous aurez besoin
d‘un compte Evernote ainsi que d‘une connexion
internet pour pouvoir utiliser cette application.
•Google Search by Image :
Cette application vous permet d‘acher des images
semblables aux images que vous avez numérisées,
ou ayant un rapport avec ces dernières, ou encore
utiliser le moteur de recherche Google pour trouver
des imageas similaires. Vous aurez besoin d‘une
connexion internet active pour pouvoir utiliser cette
application.
•Google Translate :
Cette application vous permet d‘envoyer directement
et gratuitement un texte numérisé au service de
traduction en ligne de Google et de le faire traduite
dans la langue désirée. Faites attention à ce que le
texte numérisé ne soit pas trop long pour pouvoir être
traduit. L‘utilisation de cette application requiert une
connexion internet active.
Gestion des applications
•Pour activer / désactiver une application, cliquez sur
Options dans la barre de menu (h), puis sélectionnez
l‘option Gestion des applications.

18
Partager
•Cliquez sur Partager dans la barre de fonctions (i),
puis sélectionnez l‘application concernée. Vous pouvez
partager la zone sélectionnée via Facebook,Flickr et
Twitter.
•Vous pouvez également cliquer sur Fichier dans la barre
de menu (h), puis sélectionner l‘application que vous
désirez utiliser à l‘aide de l‘option Partager.
•Suivez les instructions apparaissant sur votre écran.
•Vous aurez besoin d‘un compte auprès du réseau social
concerné ainsi que d‘une connexion internet active pour
pouvoir utiliser la fonction Partager.
•Vous pouvez également ajouter la zone numérisée à un
e-mail en tant que chier image (format .jpg). - Pour
ajouter un tel élément à un e-mail, cliquez sur Partager,
puis sélectionner un e-mail. Le chier image sera ajouté
à l‘e-mail. Veuillez noter que Microsoft Oce, par
exemple, doit avoir été conguré en tant que programme
d‘e-mail standard.
•Vous pouvez également utiliser la fonction glisser-
déposer an d‘ajouter la zone sélectionnée à un e-mail
sous la forme d‘un autre format de chier. Pour ajouter
un tel élément, cliquez sur l‘icône du format de chier
concerné dans la barre d‘applications (j), puis maintenez
la touche gauche de votre souris (1) enfoncée ; faites
glisser l‘icône dans la pièce jointe de l‘e-mail, puis
relâchez la touche (1).
Copie
•Cliquez sur Copier dans la barre de fonctions (i), puis
sélectionnez l‘option que vous désirez utiliser.
•Vous pouvez également cliquer sur Édition dans la barre
de menu (h), puis sélectionner Copier l‘image ou Copier
le texte.
•Vous pouvez copier la zone numérisée en tant qu‘image
ou texte dans le presse-papier, puis l‘ajouter à un autre
logiciel de traitement d‘image ou de texte.
Sauvegarde
•Cliquez sur Sauvegarde dans la barre de fonctions (i)
an de sauvegarder directement la zone numérisée. Les
formats de chier .png, .jpg, .tif, .bmp, .pdf, .xls, .doc,
.txt sont disponibles lors de la sauvegarde.
•Vous pouvez également cliquer sur Fichier dans la barre
de menu, puis sélectionner Enregistrer sous...
Imprimer
•Cliquez sur Fichier dans la barre de menu (h), puis
sélectionnez Imprimer an d‘imprimer la zone
numérisée.
Paramètres
•Pour apporter des modications au logiciel, cliquez sur
Options dans la barre de menu (h), puis sélectionnez
l‘option Paramètres.
•Vous pouvez modier la langue de l‘interface et adapter
la résolution de numérisation sous Informations
générales. Résolutions disponibles : basse - 100 dpi,
moyenne - 200 dpi, haute - 320 dpi et pleine - 400 dpi.
•Vous pouvez dénir la position de la fenêtre d‘application
sous Propriétés de la fenêtre.
•Vous pouvez redénir le nom de chier attribué
automatiquement lors de la sauvegarde ainsi que
la qualité du format de chier jpg sauvegardé sous
Sauvegarde.
•Vous pouvez sélectionner la langue que vous désirez
être reconnue sous Reconnaissance de la langue. Vous
pouvez dénir un maximum de trois langues.
•Vous pouvez dénir manuellement les proxies sous
Paramètres proxy.
•Vous pouvez effectuer d‘autres modications sous
Avancés. Veuillez noter que les modications ont
tendance à rendre l‘application instable.
Mises à jour
•Pour paramétrer individuellement les mises à jour du
logiciel, cliquez sur Options dans la barre de menu (h),
puis sélectionnez l‘option Paramètres et Mises à jour.
•Pour lancer une recherche manuelle de mises à jour,
cliquez sur Options dans la barre de menu (h), puis
sélectionnez l‘option Recherche de mises à jour.
Aide
•Pour obtenir des informations sur le produit, cliquez
sur Aide dans la barre de menu (h), puis sélectionnez
l‘option Aide en ligne.Vous serez transféré
automatiquement vers le site web de Hama. Saisissez
le numéro de votre article dans la fenêtre de recherche.
Vous recevrez toutes les informations disponibles en
ligne.
•En cas de mauvais fonctionnement, vous pouvez cliquer
sur Aide dans la barre de menu (h), puis sélectionner
Envoyer un commentaire.
•Pour obtenir des informations sur la version logicielle du
produit, cliquez sur Aide dans la barre de menu (h), puis
sélectionnez l‘option Àpropos.
•Veuillez également noter les informations du chapitre 9
Informations - assistance de ce mode d‘emploi.

19
Fermer et quitter l'application
•L‘application reste active lorsque vous fermez la fenêtre.
L’icône du logiciel est toujours visible dans la barre des
tâches.
•Appuyez sur la touche de numérisation (4) an de lancer
un cycle de numérisation.
•Cliquez sur Fichier et Quitter la barre de menu (h) an
de quitter l‘application. L‘application n‘est plus active et
l‘icône du logiciel disparaît de la barre des tâches.
•Pour lancer une nouvelle numérisation, ouvrez le logiciel
à l‘aide de l‘icône placé sur votre bureau ou à l‘aide de
la structure logicielle de votre ordinateur. Une nouvelle
fenêtre d‘application (G) apparaît à l‘écran. Lancez le
cycle de numérisation comme décrit au chapitre 6.1.
Numérisation.
Avertissement
Veillez à adopter une position ergonomique et à faire
susamment de pauses lors de votre travail devant
un écran informatique an d‘éviter toute tension au
niveau des poignets (microtraumatismes répétés (MTR) /
« Repetitive Strain Injury (RSI) ».
Remarque
•La souris ne fonctionne pas sur les surfaces en verre.
Utilisez une surface plane, adaptée et antidérapante.
•Nous vous recommandons d‘utiliser un tapis de souris
ergonomique, disponible séparément, ainsi qu‘un
repose-poignet ergonomique, également disponible
séparément. L‘entreprise Hama propose une gamme
de produits sur www.hama.com.
7. Nettoyage et entretien
•Nettoyez le produit uniquement avec un chiffon non
pelucheux légèrement humide et n‘utilisez pas de
nettoyants agressifs.
•Maintenez la fenêtre de numérisation exempte de
poussière, de traces de doigts et de résidus gras.
8. Exclusion de garantie
La société Hama GmbH & Co. KG décline toute
responsabilité en cas de dommages provoqués par une
installation, un montage ou une utilisation non conformes
du produit ou encore provoqués par un non respect des
consignes du mode d‘emploi et/ou des consignes de
sécurité.
9. Service et assistance
En cas de question concernant le produit, veuillez vous
adresser au service de conseil produits de Hama.
Ligne téléphonique directe : +49 9091 502-115 (allemand/
anglais)
Vous trouverez ici de plus amples informations concernant
l‘assistance : www.hama.com
10. Caractéristiques techniques
Dimensions (L x l x H) :11,40 x 6,15 x 3,65 cm
Capteur Laser Klasse 1
Sensibilité 1200 dpi
Nombre de touches de
souris 4Tasten inkl. Scroll-Rad
Branchement USB 2.0
Connexion Kabel
Longueur du câble 150 cm
Résolution de numérisation 100 / 200 / 320 /400 dpi
11. Consignes de recyclage
Remarques concernant la protection de
l’environnement:
Conformément à la directive européenne 2002/96/
CE et 2006/66/CE, et an d‘atteindre un certain
nombre d‘objectifs en matière de protection de
l‘environnement, les règles suivantes doivent être
appliquées: Les appareils électriques et électroniques ainsi
que les batteries ne doivent pas être éliminés avec les
déchets ménagers. Le pictogramme “picto” présent sur le
produit, son manuel d‘utilisation ou son emballage indique
que le produit est soumis à cette réglementation. Le
consommateur doit retourner le produit/la batterie usager
aux points de collecte prévus à cet effet. Il peut aussi le
remettre à un revendeur. En permettant enn le recyclage
des produits ainsi que les batteries, le consommateur
contribuera à la protection de notre environnement. C‘est
un acte écologique.

20
IIstruzioni per l‘uso
3
2
1 5
4
6
7
Elementi di comando e indicazioni
1. Tasto sinistro del mouse
2. Tasto destro del mouse
3. Rotellina di scroll
4. Tasto SCAN con LED rosso
5. Area di scansione
6. Finestra di scansione con pellicola protettiva da
rimuovere
7. Sensori laser
Grazie per aver scelto un prodotto Hama!
Leggere innanzitutto attentamente le seguenti istruzioni
e indicazioni. Inne conservarle in un luogo sicuro, per
poterle sempre consultare all‘occorrenza. In caso di
cessione dell‘apparecchio, consegnare anche le presenti
istruzioni al nuovo proprietario.
1. Spiegazioni di simboli di attenzione e avvisi
Avviso
Viene utilizzato per contrassegnare le indicazioni
di sicurezza oppure per rivolgere l‘attenzione verso
particolari rischi e pericoli.
Nota
Viene utilizzato per contrassegnare informazioni
supplementari o avvertenze importanti.
2. Contenuto della confezione
•Mouse Hama mySCAN
•CD-ROM
•Quick Start Guide
•Flyer con weblink e dati di contatto
•Modello di scansione
3. Sicherheitshinweise
•Proteggere il prodotto da sporcizia, umidità e
surriscaldamento e utilizzarlo soltanto in ambienti
asciutti.
•Disporre tutti i cavi in modo da non inciamparsi.
•Non piegare, né schiacciare il cavo.
•Non aprire il prodotto e non utilizzarlo più se
danneggiato.
Avvertenza - Laser classe 1
Non guardare mai direttamente nel raggio laser! Non
guardare mai direttamente nel raggio laser con strumenti
ottici!
4. Requisiti del sistema
•Sistema operativo: Windows Vista, XP, 7 o 8; Mac OS X
10.6 o superiore
•Processore: Intel® Core™ Duo 1.2 GHz o AMD Athlon™
64 X2 1.7 GHz o superiore
•Memoria di lavoro: 2GB RAM
•Disco rigido: 1GB di memoria disco sso libera
•Scheda graca: NVIDIA® GeForce® 8400 GS con 128
MB o ATI Radeon™ X1300 con 128 MB o 384MB Intel
GMA X3000 o superiore
•Attacco USB 2.0
•Unità CD-Rom
Table of contents
Languages:
Other Hama Mouse manuals

Hama
Hama M2110 Assembly instructions

Hama
Hama M3040 Assembly instructions

Hama
Hama M1130 Assembly instructions

Hama
Hama uRAGE Morph User manual

Hama
Hama MC-200 User manual

Hama
Hama M440 User manual

Hama
Hama 00057258 User manual

Hama
Hama 00057258 User manual

Hama
Hama Optical Mouse User manual

Hama
Hama M2110 User manual