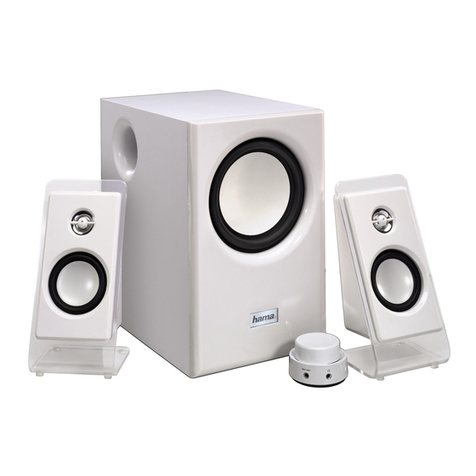
Hama 00054845 User manual

Operating Instructions /Bedienungsanleitung /Mode d‘emploi /Instrucciones de uso /
Руководство по эксплуатации /Istruzioni per l‘uso /Gebruiksaanwijzing / Οδηγίες χρήσης /Instrukcja obsługi /
Használati útmutató /Návod kpoužití /Návod na použitie /Manual de instruções /Kullanma kılavuzu /
Manual de utilizare/Bruksanvisning /Käyttöohje / Работна инструкция /Betjeningsvejledning /Manuelt stasjonssøk
Subwoofer
Subwoofer
00054845
(SW01M)

GOperating instructions
Technical data
Subwoofer
6.5" Downre
Driver /
Treiber
1
Acoustic Material Aluminum
Amplier Class D
WiFi Frequency range
20 –420 Hz
Adjustable low-pass lter
20-180Hz, 20-240Hz, 20-320Hz, 20-420Hz
Power Supply
AC Input 100-240V,50/60Hz
Connectivity LAN (10/100),WiFi2.4 GHz (b/g/n) /5GHz(a/n),USB (Update only), AUX IN,HF
IN (Cinch), LF IN (Cinch)
Encryption WEP,WPA,WPA2, WPS
Power Consumption Operation/ Betrieb <100 WStandby <2W
Dimension (W xHxD) 23.5 x30x23.5 cm
Package Content Subwoofer,Power cord, Short Manual

B
A
12
1
3
11
13
14
12
9
2
8
15
10
5
4
7
6

1
Controls and Displays
A: Radio Front
1Power status LED
2Mode status LED
B: Radio Rear
1Clip (overload) status LED
2Standby/Volume*
3Volume status LED
4Frequency controller
5[MODE] button
6[RESET] button
7[LED] switch
8Update port
9AUX-In socket
10 LAN connection
11 HF IN socket
12 LF IN socket
13 [POWER] switch
14 Mains lead
15 Ambient lighting
Note
*The rotary control has adual function. By turning the
rotary control, you can adjust the volume. By pressing
the rotary control, you can set the device to standby
mode or wake up the device from standby mode.

2
LED indicator
LED Indicator Description
POWER LED
Constant red light The device is now in standby mode.
Flashes red The device has no Internet connection.
Flashes green The device is now in setup mode. (Initial setup via UNDOK
may now commence.)
Constant green light The Internet connection was successfully established.
MODE LED
Constant green light The device is now in AUX IN mode.
Constant blue light The device is now in HF IN mode.
Constant yellow light The device is now in LF IN mode.
Constant red light The device is now in Multi-room mode.
Off No source was selected.
CLIP LED Constant red light Subwoofer is overloaded.
Note: Minimise the volume until the LED goes out.

3
Thank you for choosing aHama product.
Take your time and read the following instructions and
information completely.Please keep these instructions in a
safe place for futurereference. If you sellthe device, please
pass these operating instructions on to the new owner.
1. Explanation of Warning Symbols and Notes
Warning
This symbol is used to indicate safety instructions or to
draw your attention to specichazards and risks.
Note
This symbol is used to indicate additional information or
important notes.
Risk of electric shock
This symbol indicates product parts energized with a
dangerous voltage of sucient magnitude to constitute
arisk of electric shock.
2. Package Contents
•Subwoofer
•Power cable
•Quick guide
3. Safety Notes
•The product is intended for private, non-commercial use
only.
•Protect the product from dirt, moistureand overheating
and use it in dry rooms only.
•As with all electrical devices, this device should be kept
out of the reach of children.
•Do not drop the product and do not expose it to any
major shocks.
•Do not operate the product outside the power limits given
in the specications.
•Keep the packaging material out of the reach of children
due to the risk of suffocation.
•Dispose of packaging material immediately according to
locally applicable regulations.
•Do not modify the device in any way.Doing so voids the
warranty.
1. Explanation of Warning Symbols and Notes ...........3
2. Package Contents ................................3
3. Safety Notes ....................................3
4. Positioning the subwoofer in the room ...............4
5. Beforegetting started ............................4
5.1 LAN (wired network) ................................4
5.2 WLAN (wireless network) .............................4
6. Getting started ..................................4
7. Volume control ..................................5
8. Ambient lighting .................................5
9. Setting crossover frequency ........................5
10. Connection via Auxiliary Input .....................5
11. High Level input (HF IN) ..........................5
12. Low Level input (LF IN) ...........................5
13. Multiroom ....................................5
14. Factory settings.................................5
15. Careand Maintenance ...........................6
16. Warranty Disclaimer .............................6
17. Service and Support .............................6
18. Recycling Information ............................6
19. Declaration of Conformity.........................6
Content

4
Risk of electric shock
•Do not open the device or continue to operate it if it
becomes damaged.
•Do not use the product if the AC adapter,adapter
cable or power cable is damaged.
•Do not attempt to service or repair the device
yourself.Leave any service work to qualied experts.
4.Positioning the subwoofer in the room
Place the subwoofer on a at, stable surface that
withstands vibrations. To get the best sound quality,the
subwoofer should be placed on the oor.
5. Before getting started
Notes on use
The subwoofer is operated additionally using the UNDOK
app and your smartphone.
Note
Adetailed description of the UNDOK app and
the fullscope of functions can be found in our
UNDOK guide at:
www.hama.com ->00054845 ->Downloads
Setting up anetwork connection
5.1 LAN (wired network)
•Connect aLAN connection of your router to the LAN
connection (10) on your subwoofer.Todothis, you will
requireanEthernet cable, which is not included in the
delivery.
•Make surethat the router is on and working properly,
and that you have an Internet connection.
•See the operating instructions for your router regarding a
properly functioning LAN connection.
•Then proceed as described in point 5, 'Getting Started'.
5.2 WLAN (wireless network)
•Make surethat the router is on and working properly,
and that you have an Internet connection.
•Activate your router’sWLAN function.
•See the operating instructions for your router regarding a
properly functioning WLAN connection.
•Then proceed as described in point 5, 'Getting Started'.
6. Getting started
Warning
•Only connect the product to asocket that has been
approved for the device. The electrical socket must
always be easily accessible.
•Disconnect the product from the power supply using
the on/off switch –ifthis is not available, unplug the
power cordfromthe socket.
•When using amulti-socket power strip, make sure
that the sum power draw of all the connected devices
does not exceed its maximum throughput rating.
•If you will not be using the product for along period
of time, disconnect it from mains power.
Turning on the product
•Connect the power cable of the subwoofer to aproperly
installed socket.
•Move the [POWER] switch (13) to the ON position.
•The Power status LED (1) is lit red.
•Press [STANDBY/VOLUME] (2) to switch on the
subwoofer.
Note –Turning on for the rst time
•When switched on for the rst time, the subwoofer is
in SETUP mode.
•The Power status LED (1) begins to ash green.
•Youcan set up the device using the UNDOK app.

5
7.Volume control
Turn the [STANDBY/VOLUME] rotary control (2) to the left/
right to decrease/increase the volume.
The playback volume level is visualised through the volume
status LED/light ring (3).
8.Ambient lighting
Note
In order to use the ambient lighting, the subwoofer
must be on. (See Section 5)
•Move the [LED] switch (7) to the ON position to switch
on the ambient lighting (15).
•Move the [LED] switch (7) to the OFF position to switch
off the ambient lighting (15).
9. Setting crossover frequency
Note
•Set the frequency range in order to adjust the
subwoofer to the room acoustics or terminal devices
(for example, AV receiver).
•The subwoofer then reproduces only the frequencies
of the selected frequency range. Frequencies outside
the range are ltered out.
•Turn the frequency control (4) to set the subwoofer’s
frequency response (20–180 Hz, 20–240 Hz, 20–320 Hz
or 20–420 Hz).
10. Connection via Auxiliary Input
Youcan use the analogue audio input (AUX) to connect
mobile devices (for example, smartphone, tablet PC, MP3
player,etc.) as well as older analogue sources (CD/DVD
player etc.) to the subwoofer and play their audio signals
using the subwoofer.
Note
•Switch off the subwoofer beforeconnecting a
terminal device.
•Do not bend or crush the cable.
•Connect your terminal device to the AUX socket (9) on
the subwoofer using a3.5-mm audio cable (jack cable).
•Activate the Auxiliary Input mode by repeatedly pressing
[MODE] (5).
•The Mode status LED (2) is lit green.
11. High Level input (HF IN)
The High Level input allows you to connect your existing
sound system to the subwoofer,inorder to expand a2.0
sound system into a2.1 sound system, for example.
Note
•Switch off the subwoofer beforeconnecting aterminal
device.
•Do not bend or crush the cable.
•Connect your terminal device to the HF IN socket (11) on
the subwoofer using a3.5-mm RCAcable.
•Activate the HF IN mode by repeatedly pressing [MODE]
(5).
•The Mode status LED (2) is lit blue.
12. Low Level input (LF IN)
The LowLevel input allows you to connect an amplier
with subwoofer output to the subwoofer,for example.
Note
•Switch off the subwoofer beforeconnecting aterminal
device.
•Do not bend or crush the cable.
•Connect your terminal device to the LF IN socket (12) on
the subwoofer using a3.5-mm RCAcable.
•Activate the LF IN mode by repeatedly pressing [MODE]
(5).
•The Mode status LED (2) is lit yellow.
13. Multiroom
The subwoofer can be integrated as aclient into an
UNDOK Multi-room group.
Moredetailed information can be found in the UNDOK
Guide.
14. Factory settings
To reset the subwoofer to the factory
default settings, proceed as
follows:
Press and hold the [RESET] button (6) for approximately 3
seconds.

6
15. Care and Maintenance
•Only clean this product with aslightly damp, lint-free
cloth and do not use aggressive cleaning agents.
•If you do not use the product for along time, turn off the
device and disconnect it from the power supply.Storeit
in aclean, dry place out of direct sunlight.
16. Warranty Disclaimer
Hama GmbH &CoKGassumes no liability and provides no
warranty for damage resulting from improper installation/
mounting, improper use of the product or from failureto
observe the operating instructions and/or safety notes.
17. Service and Support
Please contact Hama Product Consulting if you have any
questions about this product.
Hotline: +49 9091 502-115 (German/English)
Further support information can be found here:
www.hama.com
18. Recycling Information
Note on environmental protection:
After the implementation of the European Directive
2012/19/EU and 2006/66/EU in the national legal
system, the following applies: Electric and
electronic devices as well as batteries must not be
disposed of with household waste. Consumers areobliged
by law to return electrical and electronic devices as well as
batteries at the end of their service lives to the public
collecting points set up for this purpose or point of sale.
Details to this aredened by the national law of the
respective country.This symbol on the product, the
instruction manual or the package indicates that aproduct
is subject to these regulations. By recycling, reusing the
materials or other forms of utilising old devices/Batteries,
you aremaking an important contribution to protecting our
environment.
19. Declaration of Conformity
Hereby,Hama GmbH &CoKGdeclares that the
radio equipment type [00054845] is in compliance
with Directive 2014/53/EU.The full text of the EU
declaration of conformity is available at the following
internet address:
www.hama.com ->00054845 ->Downloads.
Frequency band(s)
WiFi: 2.412 -2.472GHz
WiFi: 5.150 -5.350 GHz
WiFi: 5.470 -5.725 GHz
Maximum radio-frequency
power transmitted
WiFi: 2.4GHz /17dBm (EIRP)
WiFi: 5GHz /16.5dBm (EIRP)
Restrictions or Requirements in
Belgium, Bulgaria, Czech Republic, Denmark, Germany,
Estonia, Ireland, Greece, Spain, France, Croatia, Italy,
Cyprus, Latvia, Lithuania, Luxembourg, Hungary,Malta, the
Netherlands, Austria, Poland, Portugal, Romania, Slovenia,
Slovakia, Finland, Sweden, United Kingdom
Note
If channels 36–64 (frequency 5.150–5.350 GHz) are
used in a5-GHz WLAN, the product may only be used
in closed rooms.

00054845/09.18
Hama GmbH &CoKG
86652 Monheim/Germany
www.hama.com
Alllistedbrands aretrademarksofthe correspondingcompanies.Errorsand omissions excepted,
andsubjecttotechnical changes. Ourgeneral termsofdeliveryand paymentare applied.
The Spotify softwareissubject to thirdparty licenses found here:
www.spotify.com/connect/third-party-licenses
This manual suits for next models
1
Table of contents
Other Hama Subwoofer manuals

Hama
Hama Q 650 User manual

Hama
Hama I 500 User manual

Hama
Hama Sound Unlimited Sonic digital 20 User manual

Hama
Hama I 400 User manual

Hama
Hama Sound Unlimited Zeon 35 User manual

Hama
Hama I 700 User manual

Hama
Hama 52823 Series User manual

Hama
Hama Q 650 User manual

Hama
Hama Q 650 User manual

Hama
Hama 52823 Series User manual