Hamilton/Buhl VividPro CAM17SV User manual

Digital Camera
Instruction Manual
Model #: CAM17SV
VividPro
Digital Camera
18
MP
Max
/2.7”TFT
Never-Ending Learning Innovation

2
VividPro™ Digital Camera
Table of Contents
Introduction ................................................................................................................................................................. 3
Features and Specications ........................................................................................................................................ 3
Package Includes ........................................................................................................................................................ 4
Computer System Requirements for Windows XP...................................................................................................... 5
Computer System Requirements for Windows Vista/7................................................................................................ 5
Computer System Requirements for Mac ................................................................................................................... 6
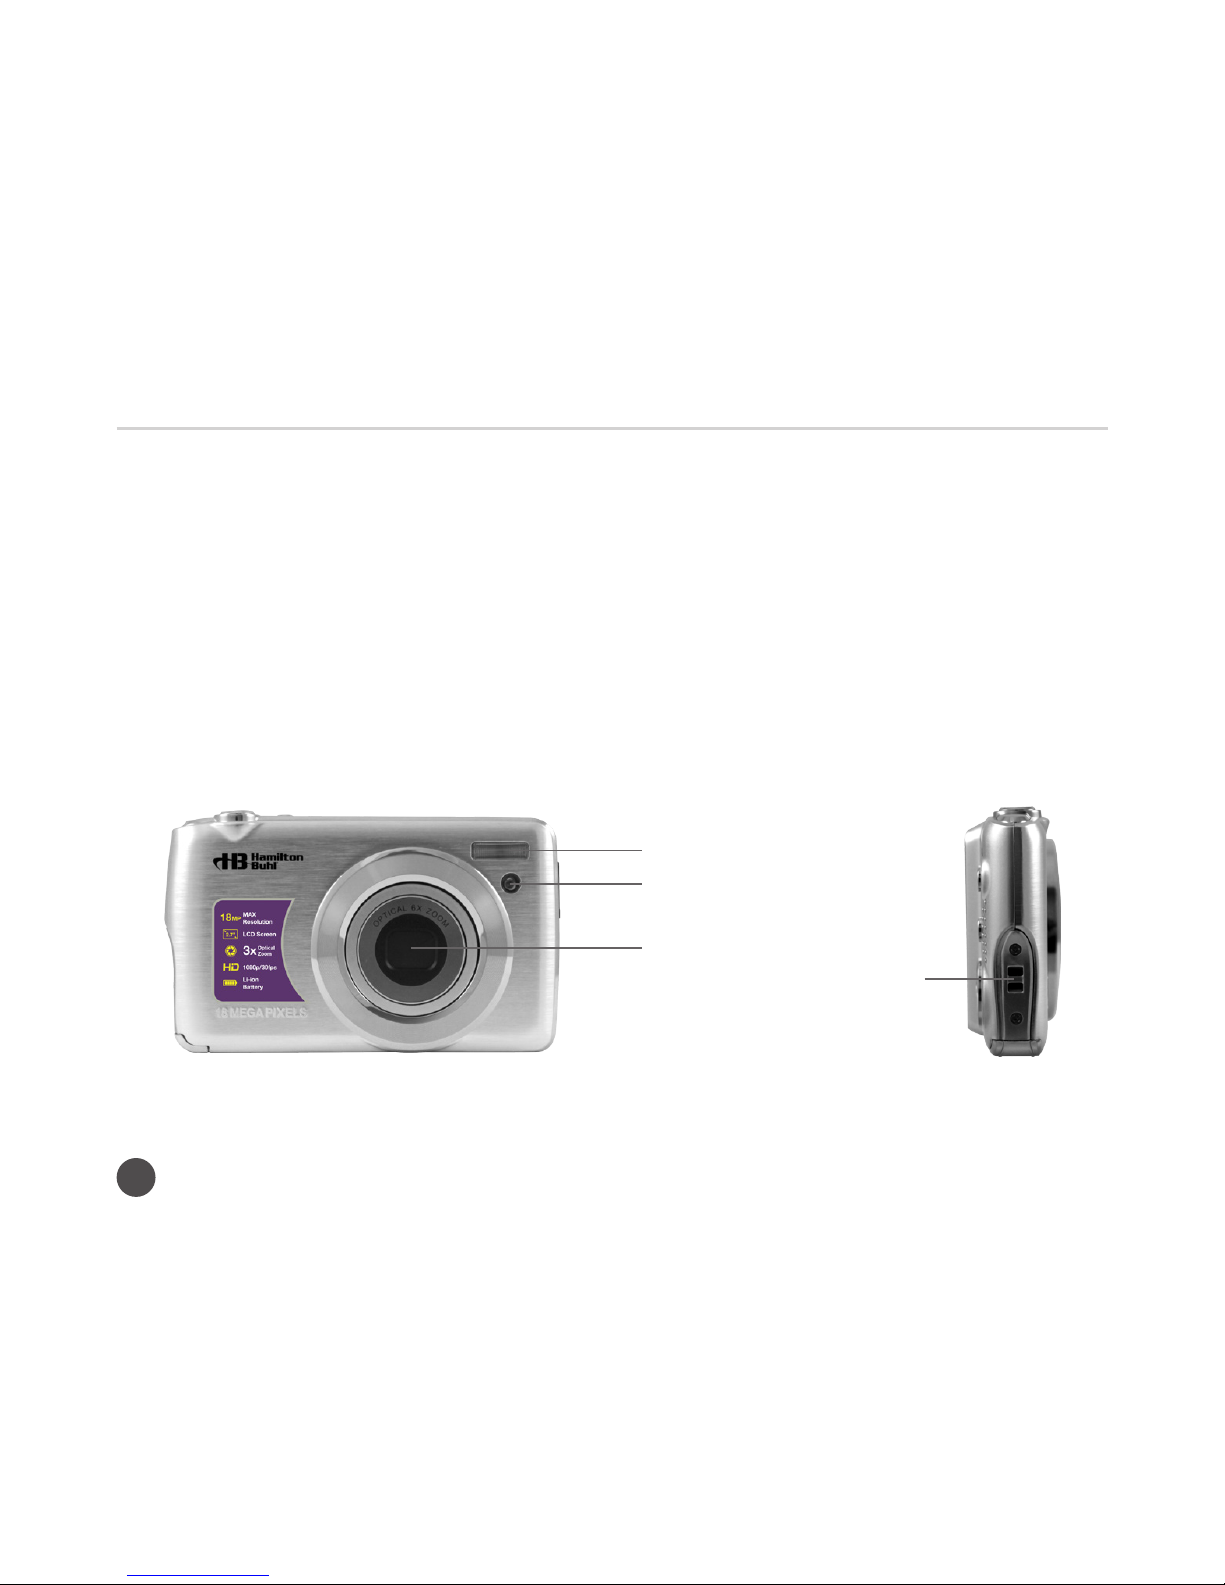
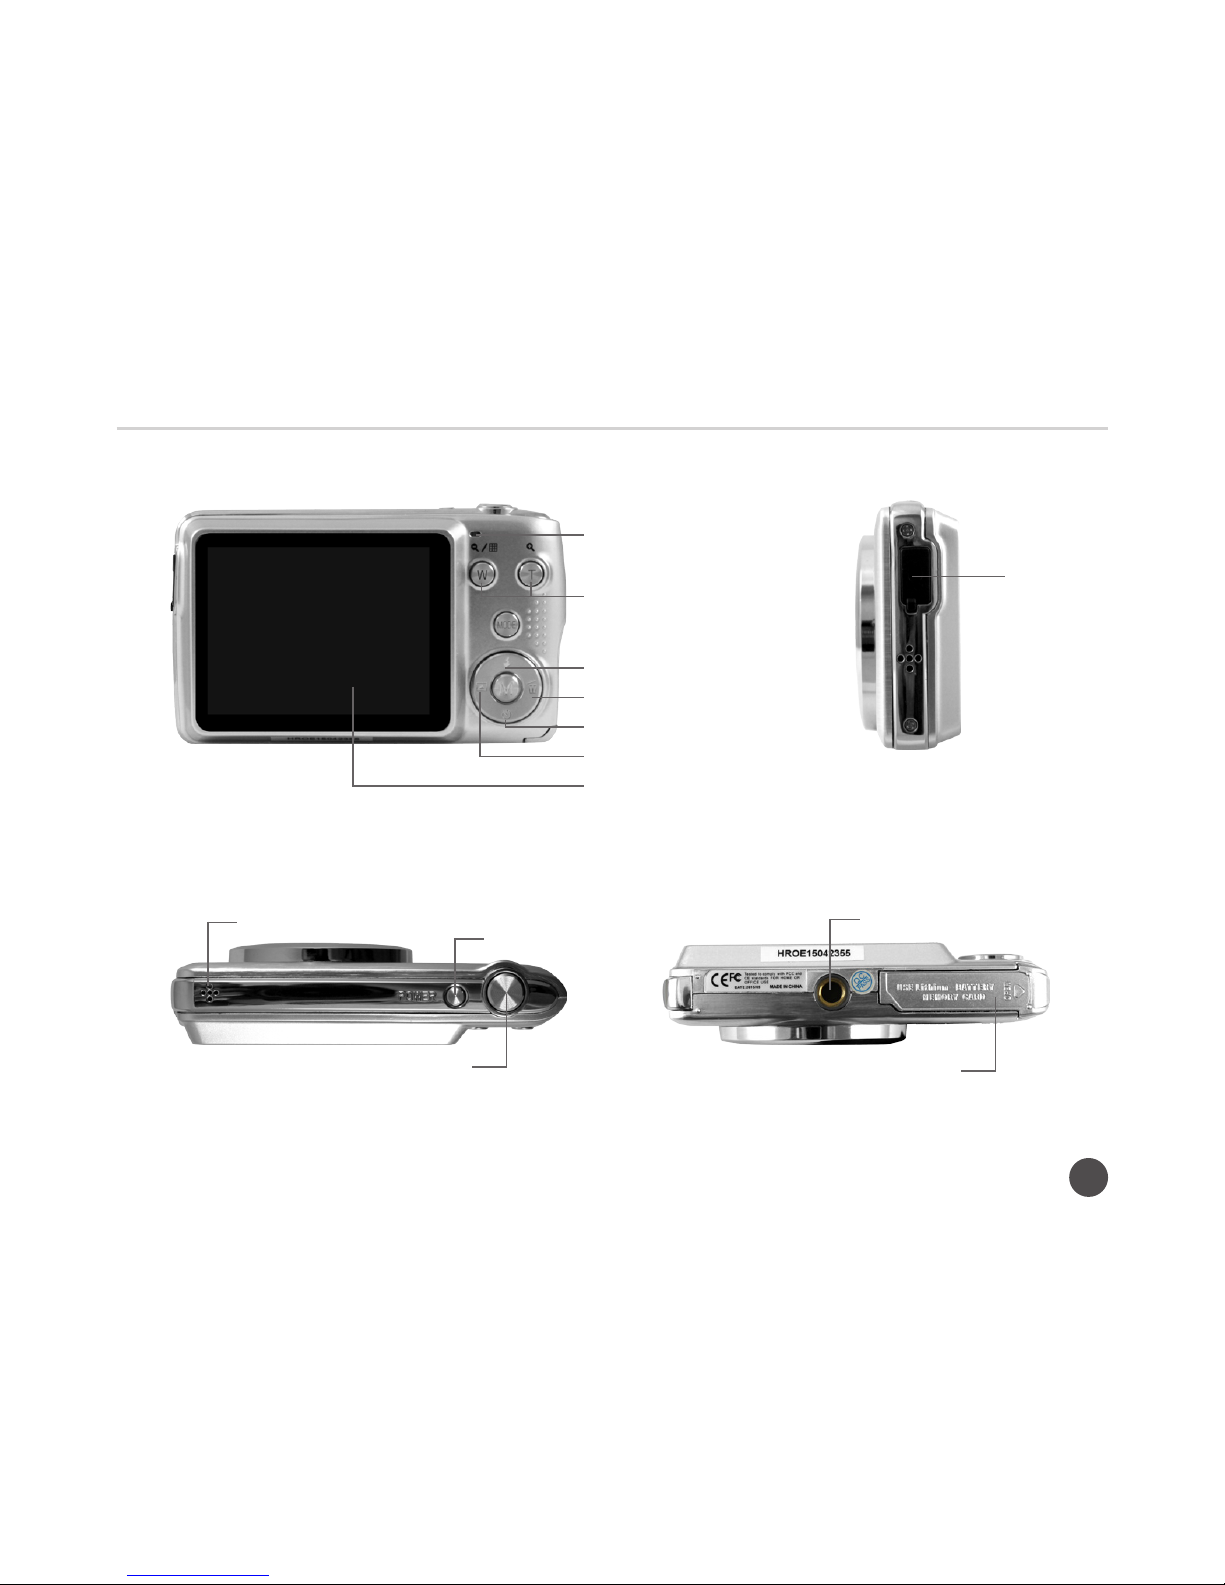
A Quick Look at Your Camera ..................................................................................................................................... 6
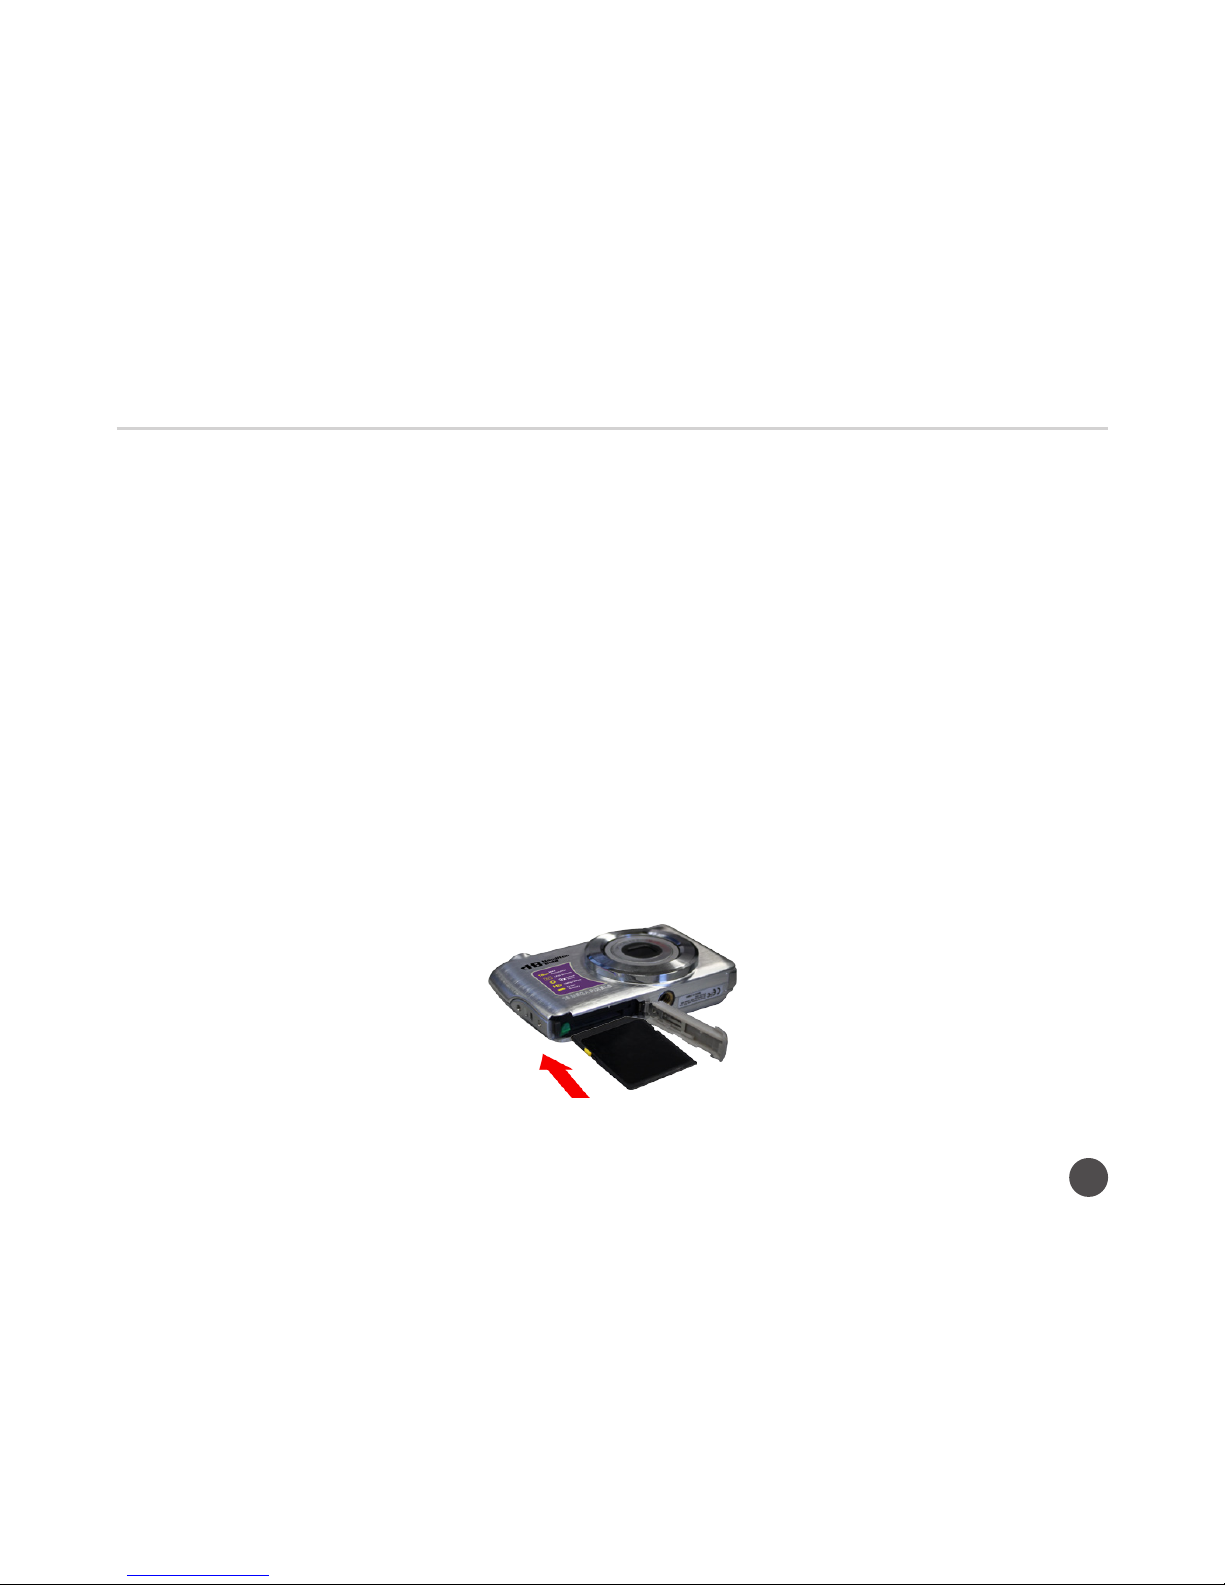
Installing Rechargeable Battery .................................................................................................................................. 8
Installing SD Memory Card ......................................................................................................................................... 9
How to Hold Your Camera Correctly ..........................................................................................................................11
Starting Your Digital Camera ......................................................................................................................................11
Camera Mode ........................................................................................................................................................... 12
Video Mode ............................................................................................................................................................... 26
Playback Mode.......................................................................................................................................................... 28
Downloading Photos And Videos to Your PC ............................................................................................................ 32
Appendix A: Technical Specications ........................................................................................................................ 33
Appendix B: Troubleshooting .................................................................................................................................... 35

3
VividPro™ Digital Camera
Introduction
As the new owner of the VividPro™ 18 Megapixel Digital Camera with Auto-Focus Zoom Lens, you have
everything you need to take high quality digital photos and videos. Your digital camera can also be used
as a removable disk when a SD card up to 32GB is inserted into the camera. Please read this manual
carefully in order to get the most out of your VividPro™.
Features and Specifications
• 18 Megapixel Camera with choice of 11 digital camera resolutions - (18M) 4896x3672 pixels,
(16M) 4608x3456 pixels, (14M) 4288x3216 pixels, (12M) 4000x3000 pixels, (10M) 3648x2736 pixels,
(8M) 3264x2448 pixels, (7M HD) 3648x2056 pixels, (5M) 2592x1944 pixels, (3M) 2048x1536 pixels,
(2M HD) 1920x1080 pixels, (VGA) 640x480 pixels.
• Digital Video Resolutions - 1080p (30fps), 720p (30fps), VGA (30fps)
• 2.7 inch TFT-LCD
• 3x Optical Zoom Function
• 5x Digital Zoom Function
• Scene Selections
• Image Size Selections
• Anti-Shake
• Macro
• Continue Shot (Burst)
• Self-Timer
• SD Memory Card Slot –
compatible with memory card up to 32GB.
• Built-in Flash

4
VividPro™ Digital Camera
Package Includes
• Digital Camera
• USB Cable
• Instruction Manual
• QRG (Quick Reference Guide)
• Wrist Strap
• Li-ion Rechargeable Battery
• Charger (Via USB port with supplied cable)
• Protective Pouch

5
VividPro™ Digital Camera
Computer System Requirements for Windows XP
To download photos to your PC, you need the following minimum configuration:
• Pentium III Processor or above with Windows XP
• 128MB RAM with 150MB of free disk space
• Available USB Interface
• CD-ROM Drive (Optional)
• 1024 x 768 Recommended screen resolution
• 16-bit Color or higher display adapter
Computer System Requirements for Windows Vista/7
To download photos to your PC, you need the following minimum configuration:
• Windows Vista/7
• 800MHz Processor and 512 MB of
system memory
• 20GB Hard Drive with at least 15GB of
available space
• Support for Super VGA Graphics (SVGA)
• Available USB Interface
• CD-ROM Drive (Optional)

6
VividPro™ Digital Camera
Computer System Requirements for Mac
• Power Mac computer G3 500 MHz or higher
• Mac OS X version 10.5.x or later
• 128MB or more available RAM (256MB recommended), 150MB free disk space
• 800 x 600 or higher-resolution monitor displaying millions of colors
Quick Look at Your Camera
LED Light
Flash
Optical Lens
Strap Hole

7
VividPro™ Digital Camera
LCD
Left/Scene Button
Down/Self-timer Button
Right/Delete Button
W/T (Zoom Out/In) Button
Up/Flash Button
LED Light
USB Port
Microphone Power Button
Shutter Button
Tripod Mount
Battery Door

8
VividPro™ Digital Camera
Installing Rechargeable Battery
1. Insert the battery correctly with the + and – designations facing up on the top left of the battery as
shown in the diagram above. Carefully push the green lever on the left out of the way with the left
side of the battery to insert it into camera. Gently push down on battery so it clicks into place.
2. Close the battery door and slide to lock.
3. On powering on your camera, the battery icon will appear at the bottom right of the LCD screen.
Full battery power Medium battery power Low battery power
Note:
1. A “Low battery” message will flash on the LCD when the battery power is insufficient.
Shortly thereafter your camera will power off.

9
VividPro™ Digital Camera
2. Please remove the battery when you don’t intend to use your camera for a long period of time.
Slide the green lever over and the battery will pop out.
3. A photo can be taken without a SD card inserted in the camera (not recommended); however, the
photo should be downloaded to a PC before the camera loses power or when the battery is removed.
Installing SD Memory Card
An external memory card is required for normal use. Your camera supports any compatible SD memory
card (up to 32GB). Inserting a memory card will allow you to increase the capacity of your camera.
Your camera is supplied with a Class 4 memory card. This will work for most pictures, however, in
order to provide proper playback of 1080P videos you record, you will need to purchase an additional
Class 10 card.
1. Locate the Memory Card slot at the base of the camera next to the battery slot.
2. Insert the Memory Card into the slot in the correct direction. (See picture below) Do not force, the card
will only go in one way.

10
VividPro™ Digital Camera
3. Push the card in until it clicks into position. The top of the card should be flush with the surface of the
battery. An icon “SD” will appear on the LCD screen after you turn on camera.
4. Once the external memory card is inserted into the camera, all the images and videos taken with the
camera will be stored on the card.
5. Please make sure the card is not locked. No images can be stored on the card if locked.
Note:
1. Limited internal memory is provided for a test image. This test image will be deleted when the battery
power is depleted or if the battery is removed. Please download the image before turning off power.
2. If there is a photo in the internal memory when you insert the card into your camera, a “Copy to Card”
message will appear on the LCD with Yes or No options. Selecting “Yes” will copy the photo to
your card.
3. Formatting will delete all data on the SD memory card, including protected data.
4. Don’t remove the SD card during formatting as this may damage the card and you may be
unable to use it again.
5. When your card is full, download the media on the SD card to your PC and delete the photos and
videos from it in order to continue using your camera to capture more high quality photos and videos.

11
VividPro™ Digital Camera
Starting Your Digital Camera
Power On: Press the power button on the top of the camera to turn the camera on. The LCD will light
up and the lens will position outward, indicating the camera is on and ready for use.
Power Off: Press the power button to turn off your camera. When there is insufficient battery power,
a red icon will appear on the LCD screen. Your camera will automatically power off after a few
seconds.
How to Hold the Camera Correctly
Press the shutter button halfway down and hold to activate Auto-Focus. When the green frame appears,
the camera is in focus. Hold the camera steady and correctly as shown in the diagram below.
Note: Do not touch or move the lens once open and in use. This would cause damage to the camera.

12
VividPro™ Digital Camera
Mode Selection: This digital camera has 3 main modes - Camera mode, Video mode and Playback mode.
• Camera mode is to take still photos and adjust camera menu settings.
• Video mode allows you to take videos and make adjustment to settings.
• In playback mode, you can preview photos and videos and delete, rotate, protect, trim and print
your photos.
In order to select a mode, please follow the below steps:
1. When the camera is powered on, it will be in the Camera mode (default).
2. Press the MODE button repeatedly to toggle between the 3 modes.
3. The camera mode will have a icon on the top left corner of the LCD screen. The Video mode will
have a icon and the Playback mode will have a icon that will appear in the top left corner of
the screen.
Camera Mode
Camera Mode is the default when your camera is powered on. The camera has 4 “Shortcut Keys” found
on the large menu button on the lower right of the rear of camera. They will be discussed in more detail
on a following page.

13
VividPro™ Digital Camera
Taking Photos:
1. Compose your photo using the LCD screen.
2. Center your object with the white frame that appears on the LCD.
3. Press and hold the shutter button halfway down to activate the auto focus. Wait for the camera to
focus in on the desired object/person. A green frame appears when the object/person is in focus.
4. Holding the camera steady, press the shutter button all the way down to take the photo. You will hear
a shutter sound from the camera.
5. The picture will automatically be saved.
6. There will be a short pause while the camera saves a JPEG photo to the memory card. After a photo is
taken, (when the camera returns to shooting mode), the number of photos left to shoot at the selected
resolution is displayed on the top right of the LCD screen.
• When the camera’s memory (photo capacity) is full, the LCD screen will display a message -
“Memory Full - Insert a SD Card”. You will not be able to save a lot of photos without an SD card.
• Download the photos to your computer using copy and paste from the SD card to your local drive.
Once you have downloaded photos and videos to your PC, you could delete the files from your
SD card to create more capacity or insert another SD (Class 10) card to continue taking more photos
and videos.
Note: This camera need a SD memory card to operate normally. The limited internal memory allows you
to take a few test photos that will automatically be erased when camera powers off.

14
VividPro™ Digital Camera
Flash On
A
Flash Auto Red Eye Reduction No Flash
Optical Zoom
You can magnify your subject up to 3 times optical zoom by pressing T button to zoom in or pressing W
button to zoom back out.
Note: When using this function, the camera will automatically adjust the lens. Be careful not to touch the
lens while the camera is adjusting.
Digital Zoom
You can magnify your subject even more by using the 5x digital zoom. After reaching the maximum optical
zoom level, press and hold the T button to zoom in and press W button to zoom back out.
Note: When using this function, the camera will automatically adjust the lens. Be careful not to touch the
lens while the camera is adjusting.
Flash: In low light conditions, it is best to use the built-in flash. You can also use the flash to compensate
for backlight conditions. Remember that if the battery is low the Flash option may not be available.

15
VividPro™ Digital Camera
To Set the Flash: The flash can only be used when the camera is not in the Macro mode .
1. Press the Flash/UP button. (Shortcut)
2. The
A
icon appears on the LCD screen. This will activate the automatic flash.
3. The
A
icon and the green LED will begin flashing indicating that the flash is charging.
4. Press Flash button again for the icon to appear. This means the flash function has been turned
on (manual flash). If the flash is not ready, a green LED will light up and the icon will flash
repeatedly. Wait until the flash is ready before taking a photo.
5. Press Flash button until the icon appears, indicating Red-Eye reduction is on.
6. Press Flash button until the icon appears again. This will turn off the flash function. This is the
default flash setting.
Note: A “low battery” warning consisting of 1 bar will appear if there is insufficient battery power to
operate the flash and the flash feature will not be available.
Other Shortcut Buttons on the MENU Dial: The camera has the 4 shortcut buttons mentioned earlier on
the MENU dial for quick access to the following settings: Scene (Left button), Self-Timer (DOWN button),
Delete (Right button), and Flash (UP button). Press the relevant button to activate a shortcut option.
Scene – 12 different scene options appear on the LCD for you to select: Auto, Scenery, Back-light, Night
Scenery, Building, Kids, Night Portrait, Food, Text, Snow, Fireworks, and Sunset. Press the left shortcut
key and then use the UP or Down buttons to select the Scene option you want. Press Menu again to exit
& save. Use Auto for general purpose photos.

16
VividPro™ Digital Camera
Self-timer – Press the Self-Timer shortcut button “Down” & then use the Up and Down buttons to select
one of the 4 self-timer options: 2 seconds, 5 seconds, 10 seconds, “Double” or Off. “Double” takes 2 shots
in a row.
Delete – Press this button to delete the last image (photos or videos) captured. In addition use the Left
button to select other previously stored images to delete, one at a time. Use the Right button to go back
in the direction of the last image stored.
1. Press Delete (Right) button .
2. A “This Image” delete confirmation message will appear on the LCD with “Yes” or “No” options.
3. Press the UP or DOWN button to choose “Yes” to delete the photo or “No” to cancel the delete.
4. Press MENU button to confirm. If you select “Yes”, the selected image will be deleted.
Camera Mode: Power on the camera and see the camera icon at the upper left hand corner of the screen.
This is a default mode for the camera. The Menu for the Camera Mode includes the following features.
Note that “Scene” is not included here but can be found as a shortcut only. Also when you enter the Menu
here you will be in the camera settings by default. If you press the Right Menu button you will switch the
general settings for the camera such as Beep, Frequency, etc. You will highlight the gear icon for these
and the camera icon for the photo settings. None of these settings with the exception of “Self Timer” are
included as shortcuts.
Image Size: Image size settings determine the quality and number of photos that can be saved and the
amount of memory required for each photo. The higher the photo quality, the more memory used.
The image size and quality will also affect the maximum size of your prints.

17
VividPro™ Digital Camera
To Set the Image Size:
1. Press the MENU button to enter into the menu screen. By default you should be in the camera settings.
2. Press the DOWN button once to select the image sizes menu. Press MENU again to enter the choices
or sub menu.
3. Press the UP or DOWN buttons to select the image size you want to use. (18M) 4896x3672 pixels,
(16M) 4608x3456 pixels, (14M) 4288x3216 pixels, (12M) 4000x3000 pixels, (10M) 3648x2736 pixels,
(8M) 3264x2448 pixels, (7M HD) 3648x2056 pixels, (5M) 2592x1944 pixels, (3M) 2048x1536 pixels,
(2M HD) 1920x1080 pixels, (VGA) 640x480 pixels.
4. Press the MENU button to confirm, save and then Press Mode to go back to the main screen.
5. The selected image size icon will appear at the top of the LCD screen.
Note: Your camera has two “7M” and “2M” high definition image sizes.
Self-timer: You can take photos with the self-timer. Use a tripod or place the camera on a stable surface
for best results. Use the “Double” setting to count down 10 sec and take 2 in a row photos.
1. Press the MENU button to enter into the menu screen.
2. Press the DOWN button twice to select the self-timer menu.
3. Press the UP or DOWN button to select a desired amount of time – 2 seconds, 5 seconds,
10 seconds, “Double” or Off.

18
VividPro™ Digital Camera
4. Press the MENU button to confirm and save. Press MODE to return to the main screen.
5. The Self-timer icon for the option you selected will appear at the top of the LCD screen.
6. The LED will flash according to the corresponding countdown times of your choice.
Burst or Continuous Shot: You can take 5 photos consecutively after you press the shutter button only
once with this function.
1. Press the MENU button to enter into the menu screen.
2. Press the DOWN button 3 times to select the Burst menu.
3. Press the UP or DOWN button to select On or Off.
4. Press the MENU button to confirm and save. Press the MODE Button to the main screen.
5. Press the shutter button. It will take 5 photos continuously if the function is on.
Image Quality: The quality of your photos also affects the number of shots you can take. A high setting
means you can take fewer photos, but they will be of better quality. The default value is Fine.
1. Press the MENU button to enter into the menu screen.
2. Press the DOWN button repeatedly until you select the Image Quality menu.
3. Press Menu again to enter the selections or sub menu.

19
VividPro™ Digital Camera
4. Use the UP and DOWN buttons to select the image quality level - Super Fine, Fine, Normal.
5. Press the MENU button to confirm & save. Press MODE to return to the main screen.
Date Stamp: This feature allows you to show the Date and Time on the photos or videos you take. Note
you must first set the date and time so it will show correctly.
1. Press the MENU button to enter into the menu screen.
2. Press the DOWN button to select “Date Stamp.” Press Menu again to enter the sub Menu.
3. Press the UP or DOWN button to select the Date Stamp option. Off, Date or Date & Time.
4. Press Menu again to confirm your selection. Press Mode to exit and return to shooting Mode.
• On selecting “Date” the date will appear on the photo once it is taken.
• On selecting “Off” no date will appear on the photo.
• On selecting “Date & time” the date and time will appear on the photo once it is taken.
White Balance: This setting allows the camera to adjust the color of your photos so they appear more
natural. Use “Auto” for general purpose photo taking.
1. Press the MENU button to enter into the menu screen.

20
VividPro™ Digital Camera
2. Press the UP or DOWN button to select the White Balance menu.
3. Press MENU again to select the desired White Balance option from the sub menu.
4. Press the UP or DOWN button to select a desired White Balance setting - Auto, Daylight, Cloudy,
Tungsten, Fluorescent H, Fluorescent L.
5. Press the MENU button to confirm. Then press MODE to save and return to the main screen.
6. The LCD screen will be adjusted as per the White Balance option you selected.
ISO: This is a special function that allows you to compensate for the light conditions when the source is
not ideal and you also specifically do not wish to use a flash or tripod. When using ISO feature, please
consider using a lower value ISO to prevent spots from possibly appearing on your photo. If you need the
higher value then use it.
1. Press the MENU button to enter into the menu screen.
2. Press the UP and DOWN button to select the ISO menu. Press Menu again to enter the sub Menu.
3. Press the UP or DOWN button to select a desired ISO value – Auto, 100, 200, 400, 800, 1600.
4. Press the MENU button to confirm. Press MODE to return to the main screen.
Exposure: This setting allows you to deliberately over or under expose a photo.
1. Press the MENU button to enter into the menu screen.
Table of contents
Other Hamilton/Buhl Digital Camera manuals

Hamilton/Buhl
Hamilton/Buhl CAMERA-DC2 User manual

Hamilton/Buhl
Hamilton/Buhl SpectraVR 360 User manual

Hamilton/Buhl
Hamilton/Buhl CAM17SV User manual

Hamilton/Buhl
Hamilton/Buhl CAMERA-DC2 User manual

Hamilton/Buhl
Hamilton/Buhl ActionPro HDV17BK User manual

Hamilton/Buhl
Hamilton/Buhl Kids-Flix CAM18-KID User manual