manuals.online logo
Brands
  1. Home
  2. •
  3. Brands
  4. •
  5. HANYOUNG NUX
  6. •
  7. Measuring Instrument
  8. •
  9. HANYOUNG NUX ED6 User manual

HANYOUNG NUX ED6 User manual

4 5 6
Power supply P3 : 10 - 24 V d.c/a.c, 50 - 60 Hz
P4 : 100 - 240 V a.c, 50 - 60 Hz
Power consumption
5.5 VA
Input K, Pt100 Ω, 4 - 20
㎃
d.c, 1 - 5 V d.c
Display accuracy
± 0.5 % of F.S ±1 Digit
Control output
Relay Contact composition : 1 c, 250 V a.c,
5 A (resistive load)
S.S.R Approx. 5 V d.c (resistive load min 500 Ω),
Approx. 50 mA max
Alarm & defrost
Relay Contact composition : 1 c, 250 V a.c,
5 A (resistive load)
Control operation
Two Position Operation (ON/OFF)
Proportional Operation (P)
Setting method
Digital method by setting, up and down keys
Other functions
Auxiliary output(Alarm & Defrosting Timer) Heating/
cooling
Resistance
between wires
Thermocouple
Below 100 Ω for each wire
R.T.D
Below 10 Ω for each wire
(Resistance of 3 wires should be the same.)
Operating ambient
temperature/humidity
0 ~ 50 ℃/ below 35 ~ 85 % R.H (With no condensation)
Model Code Description
ED6 -
☐☐☐☐☐
Digital Temperature Controller
Control
type
F ON/OFF Control
P Proportional control
Input
K Thermocouple (K Type)
PR.T.D Pt100 Ω (IEC)
C
4 - 20
㎃
d.c (attach 250 Ω of external
resistance), 1 - 5 V d.c
Control output
M Relay
S S.S.R (Voltage pulse output 5 V d.c)
Optional
A Alarm or defrosting timer
N NONE
Power supply voltage
P3
10 - 24 V d.c/a.c, 50 - 60 Hz
P4
100 - 240 V a.c, 50 - 60 Hz
Digital Temperature Controller
ED6
Thank you for purchasing HANYOUNG product.
Please check whether the product is the exactly same as you ordered.
Before using the product, please read this instruction manual carefully.
Please keep this manual where you can view at any time
INSTRUCTION MANUAL
Safety information
DANGER indicates an imminently hazardous situation
which, if not avoided, will result in death or serious injury
WARNING indicates a potentially hazardous situation
which, if not avoided, could result in death or serious injury
CAUTION indicates a potentially hazardous situation which,
if not avoided, may result in minor or moderate injury
Alerts declared in the manual are classified to Danger, Warning and Caution by their criticality
DANGER
WARNING
CAUTION
There is a danger of occurring electric shock in the input/output terminals so
please never let your body or conductive substance is touched.
• If the user use the product with methods other than specified by the
manufacturer, there may be bodily injuries or property damages.
• If there is a possibility of an accident caused by errors or malfunctions of this
product, install external protection circuit to prevent the accident.
• To prevent defection or malfunction of this product, apply a proper power
voltage in accordance with the rating.
• Since this product is not designed with explosion-protective structure, do
not use it any place with flammable or explosive gas.
• Reassemble this product while the power is OFF. Otherwise, it may be a
cause of malfunction or electric shock.
• There is a possibility of occurring electric shock so please use this product
after installing it to a panel while it is operating.
• Before using a temperature controller, there could be a temperature
difference between PV of the temperature controller and the actual
temperature so please operate the temperature controller after
compensating the temperature difference appropriately.
• The contents of this manual may be changed without prior notification.
• Make sure that there is no damage or abnormality of the product during
delivery.
• Do not use this product at any place with direct vibration or impact.
• Do not use this product at any place with liquid, oil, medical substances,
dust, salt or iron contents.(Use at Pollution level 1 or 2)
• Do not use this product at any place with a large inductive difficulty or
occurring static electricity or magnetic noise.
• In case of inputting thermocouple, use a compensating cable. (If using a
normal wire, there is a possibility of occurring temperature error.)
• For R.T.D input, use a cable which is a lead wire has small resistance and
resistances of three wires shall be the same. (If the three wires have
different resistances then there will be a temperature error.)
• Separate an input signal cable from an output signal cable. If separating is
not possible, please use the input signal cable after shielding it.
• Use non-earth sensor with thermocouple. (In case of using earth sensor,
there is a possibility of occurring malfunction caused by a short circuit.)
• If there is excessive noise from the power supply, using insulating
transformer or noise filter is recommended. The noise filter must be
attached to a panel which is already connected to a ground and the wire
between the filter output and power supply terminal must be short as
possible.
• When attaching this product to a panel, use an approved switch or circuit
breaker from IEC947-1 or IEC947-3.
• The warranty period for this product including parts is one year if this
product is properly used.
• When the power is on, the preparation period of contact output is required.
In case of using for signals of external interlock circuit, use with a delay
relay.
DANGER
WARNING
CAUTION
Suffix Code
Specification
MA0602KE120813
1381-3, Juan-Dong, Nam-Gu Incheon, Korea.
TEL:(82-32)876-4697
FAX:(82-32)876-4696
http://www.hynux.net
Jl. cempaka blok F16, No.02 Delta Silicon II
Cikarang Bekasi Indonesia
TEL : 62-21-8911-8120~4
FAX : 62-21-8911-8126
HANYOUNGNUX CO.,LTD
PT. HANYOUNG ELECTRONIC INDONESIA
HEAD OFFICE
INDONESIA
FACTORY
All manuals and user guides at all-guides.com
all-guides.com
4 5 6
Present
Temperature
To Enter Setting Mode
Press it for more than 3 sec.
Decimal Point Function
High Scale
Low Scale
Adjusting Operation
Setting
+
Lock
Cancellation
•Save SV
•Save SV
1 ℃ Resolution
0.1 ℃ Resolution
ON/OFF Control
P (Proportional) Control
Present
Temperature
•Save SV/ Return to the initial menu.
※To enter menu press key
for more than 3 sec.
•Save SV
•Save SV
※Input : 1 ~ 5 V DC
※Input : Pt100, K
Change a position
of decimal point (0 ~ 2)
0: 200 1: 20.0
2: 2.00
-1000(L-Sc)~H-Sc
L-Sc ~ 5000(H-Sc)
At the same time,
press them for more
than 3 sec.
※Default : 0
※Default : 0
※Default : 0
※Default : 200
※Default : -200
Control Method Setting
SV Lock Function
Timer Setting
Menu
Alarm Setting
Menu
5.Low Limit of Setting Range
Ex) Pt100
A: TSL(Low Limit) ~ -400 ℃(TSH)
B: TSL(Low Limit) ~ -400.0 ℃(TSH)
7.Alarm Temperature Setting
A: -100 ~ 400 ℃
B: -100.0 ~ 400.0 ℃
6.Auxiliary Output Selection
8.Deviation Setting for Alarm
•Save SV
•Save SV
•Save SV
•Save SV •Save SV
•Save SV
•Save SV
•Save SV
4.High Limit of Setting Range
Ex) Pt100
A: -100 ℃~ TSH(High Limit)
B: -100.0 ℃~ TSH(High Limit)
9.Main Output Control
9.Delay Time Setting for Alarm
•Setting Range
: 0 ~ 240 sec. 0: Output Control Cancellation
1: Output Control
7.ON Time Setting
•Setting Range: 0 ~ 999 minute
8.OFF Time Setting
A: 1 ~ 50 ℃
B: 1.0 ~ 50.0 ℃•Setting Range: 0 ~ 999 minute
•Save SV
•Save SV
Default SV display
Present
Temperature
(Press for more than 3 sec)
0. Control Method Setting
Heating Control
Cooling Control
•Deviation Setting
A: 1 ~ 50 ℃
B:1 .0 ~ 50.0 ℃
1.Deviation Setting
현재온도
(3초이상 누른다)
•
설비자 설정메뉴
+
Present
Temperature
Present
Temperature
잠 금
해 제
•설정값 저장
•잠금, 설비자
설정이 불가능합니다.
현재온도
1 ℃분해능
0.1 ℃분해능
•설정값 저장 및 기본메뉴 복귀
※기본메뉴 복귀 키를 3초이상 누른다
(동시에 키와
키를 3초이상
누른다.)
Present
Temperature
Temperature Setting (SV)
Proportional Band Setting(P.B)
•Save SV
•Output Capacity (%)
Flickering Display for 1 sec
•Setting Value (SV)
Flickering Display for 1 sec
•Save SV
•Function Selection
Present
Temperature
Present
Temperature
※PorF='0' when setting P (Proportional Control)
※PorF='0' when setting P
(Proportional Control)
※Default : 25 ℃
※Default : Heat
•Save SV
•Save SV
2.Delay Time Setting
3.Input Compensation
A: -30 ~ 30℃
B: -30 ~ 30.0℃
※Compensating for
Sensor Line Length
or error occurrance
•Setting Range: 0~ 240 sec
※Default : 1 sec.
※Default : 0.0 ℃
※Default : 0
※Default : 1 minute
※Default : 3 minute
※Default : 2.0 ℃
※Default : 1 sec.
※Only it can be used when PorF=1 (ON/OFF Control)※A : 1℃Display Mode(trSL=1)
B : 0.1℃Display Mode (trSL=0)
※Default : Pt100(400.0 ℃)
CA(999.9 ℃)
1 ~ 5 V DC (5000)
※Default : Pt100(400.0 ℃)
CA(999.9 ℃)
1 ~ 5 V DC (5000)
※Default : Pt100(-100.0 ℃)
CA(-80.0 ℃)
1 ~ 5 V DC (-1000)
※Default : 2.0 ℃
Setting Range : 1~100 ℃
※Default : 20 ℃
Offset Elimination (M.R)
Setting Range : 1~100 %
※Default : 50 %
Controlling Temperature Method Setting Menu
※ SV : Setting Value P.B : Proportional Band M.R : Offset Elimination
※ SV : Setting Value
●Cooling Control (ON/OFF)
PV=Present Temperature, SV=Setting Temperature
PV > SV →Main Output Relay ‘ON’
PV < SV →Main Output Relay ‘OFF’
0 S 5 S 10 S 15 S 20 S
[ ]
: Heating Control
: Cooling Control
0 S 5 S 10 S 15 S 20 S
Main output
[setting=-25 ℃, dlf=5, dLy=0, tyP=CoL]
Alarm Output (Low Limit Alarm)
[AtS=-40, AdF=5, AdL=0, SAo=0]
Main output
[setting=50 ℃, dlf=5, dLy=0, tyP=HEt]
Alarm Output (High Limit Alarm)
[AtS=70, AdF=5, AdL=0, SAo=0]
●Heating Control (ON/OFF)
PV=Present Temperature, SV=Setting Temperature
PV < SV →Main Output Relay ‘ON’
PV > SV →Main Output Relay ‘OFF’
-20 -35
-25 -40
50 70
45 65
ON OFF ON OFF OFF ON OFF ON
•설정값 저장
•설정값 저장
•설정값 저장
•설정값 저장
타이머 설정 메뉴알람 설정 메뉴
(초기설정값 표시)
(3초이상 누른다) (저장)
현재온도 현재온도온도설정(SV)
현재온도
현재온도
온도설정(SV)
현재온도
(3초이상 누른다)
0. 제어 방식 설정
기능선택(설정값 변경)
설정값 변경(증가/감소)
설정값 저장
5.설정범위 제한 하한
•설정 온도 범위 제한 하한
A: -40 ℃ ~ TSH(상한)
B: -40.0 ℃ ~ TSH(상한)
7.알람 온도조절
•알람 온도조절
A: -40 ~ +100 ℃
B: -40.0 ~ +100.0 ℃
6.보조출력 기능선택
8.경보에 대한 편차설정
•설정값 저장
•설정값 저장
•설정값 저장
•설정값 저장 •설정값 저장
•설정값 저장
•설정값 저장•설정값 저장
4.설정범위 제한 상한
•설정온도 범위제한 상한
A: TSL(하한) ~ +100 ℃
B: TSL(하한) ~ +100.0 ℃
가열제어
냉각제어
•편차설정
A: 1 ~ 20 ℃
B: 1.0 ~ 20.0 ℃
1.편차 설정
2.지연시간 설정
3.센서입력 보상
A: -30 ~ +30 ℃
B: -30.0 ~ +30.0 ℃
※Sensor Line 길이 또는
오차 발생 분에 대한 보상
•Delay Time
(지연시간 설정 : 0 ~ 240초)
9.메인출력제어9.경보에 대한 지연시간 설정
•경보에 대한 지연시간 설정
(0 ~ 240초)
•0 : 출력제어해제
1 : 출력제어
7.ON 시간설정
•타이머 ON 시간 설정
(0 ~ 999분)
8.OFF 시간설정
•경보에 대한 편차설정
A: 1 ~ 20 ℃
B: 1.0 ~ 20.0 ℃
•타이머 OFF 시간 설정
(0 ~ 999분)
•설정값 저장
•설정값 저장
•설정값 저장
•설정값 저장
타이머 설정 메뉴알람 설정 메뉴
(초기설정값 표시)
(3초이상 누른다) (저장)
현재온도 현재온도온도설정(SV)
현재온도
현재온도
온도설정(SV)
현재온도
(3초이상 누른다)
0. 제어 방식 설정
기능선택(설정값 변경)
설정값 변경(증가/감소)
설정값 저장
5.설정범위 제한 하한
•설정 온도 범위 제한 하한
A: -40 ℃ ~ TSH(상한)
B: -40.0 ℃ ~ TSH(상한)
7.알람 온도조절
•알람 온도조절
A: -40 ~ +100 ℃
B: -40.0 ~ +100.0 ℃
6.보조출력 기능선택
8.경보에 대한 편차설정
•설정값 저장
•설정값 저장
•설정값 저장
•설정값 저장 •설정값 저장
•설정값 저장
•설정값 저장•설정값 저장
4.설정범위 제한 상한
•설정온도 범위제한 상한
A: TSL(하한) ~ +100 ℃
B: TSL(하한) ~ +100.0 ℃
가열제어
냉각제어
•편차설정
A: 1 ~ 20 ℃
B: 1.0 ~ 20.0 ℃
1.편차 설정
2.지연시간 설정
3.센서입력 보상
A: -30 ~ +30 ℃
B: -30.0 ~ +30.0 ℃
※Sensor Line 길이 또는
오차 발생 분에 대한 보상
•Delay Time
(지연시간 설정 : 0 ~ 240초)
9.메인출력제어9.경보에 대한 지연시간 설정
•경보에 대한 지연시간 설정
(0 ~ 240초)
•0 : 출력제어해제
1 : 출력제어
7.ON 시간설정
•타이머 ON 시간 설정
(0 ~ 999분)
8.OFF 시간설정
•경보에 대한 편차설정
A: 1 ~ 20 ℃
B: 1.0 ~ 20.0 ℃
•타이머 OFF 시간 설정
(0 ~ 999분)
▒Normal User Setting Mode
▒Setting of SV Lock function, Decimal Point
function & Adjusting Operation Setting
Item SV Description
Lock 0 Lock cancellation, User Setting is possible
1 Lock and User Setting are not possible
trSL (Pt100, CA) 0Decimal point function (0.1 ℃)
1No Decimal point function (1 ℃)
trSL (1 ~ 5 V DC) 0~2 Decimal point function (Ex. 0:200, 1:20.0, 2:2.00)
PorF 0Proportional Control
(P.B value/ M.R value setting is possible)
1 ON/OFF Control
▒
Cooling/Heating Control Setting
※ SV : Setting Value
▒Auxiliary Output (Timer Mode) Setting
and Operation Description
When using as a freezer, Timer Mode can be used as Defrosting Function.
0 : Alarm Mode
※ min. : minute
1 : Timer Mode (Setting)
•설정값 저장
•설정값 저장
•설정값 저장
•설정값 저장
타이머 설정 메뉴알람 설정 메뉴
(초기설정값 표시)
(3초이상 누른다) (저장)
현재온도 현재온도온도설정(SV)
현재온도
현재온도
온도설정(SV)
현재온도
(3초이상 누른다)
0. 제어 방식 설정
기능선택(설정값 변경)
설정값 변경(증가/감소)
설정값 저장
5.설정범위 제한 하한
•설정 온도 범위 제한 하한
A: -40 ℃ ~ TSH(상한)
B: -40.0 ℃ ~ TSH(상한)
7.알람 온도조절
•알람 온도조절
A: -40 ~ +100 ℃
B: -40.0 ~ +100.0 ℃
6.보조출력 기능선택
8.경보에 대한 편차설정
•설정값 저장
•설정값 저장
•설정값 저장
•설정값 저장 •설정값 저장
•설정값 저장
•설정값 저장•설정값 저장
4.설정범위 제한 상한
•설정온도 범위제한 상한
A: TSL(하한) ~ +100 ℃
B: TSL(하한) ~ +100.0 ℃
가열제어
냉각제어
•편차설정
A: 1 ~ 20 ℃
B: 1.0 ~ 20.0 ℃
1.편차 설정
2.지연시간 설정
3.센서입력 보상
A: -30 ~ +30 ℃
B: -30.0 ~ +30.0 ℃
※Sensor Line 길이 또는
오차 발생 분에 대한 보상
•Delay Time
(지연시간 설정 : 0 ~ 240초)
9.메인출력제어9.경보에 대한 지연시간 설정
•경보에 대한 지연시간 설정
(0 ~ 240초)
•0 : 출력제어해제
1 : 출력제어
7.ON 시간설정
•타이머 ON 시간 설정
(0 ~ 999분)
8.OFF 시간설정
•경보에 대한 편차설정
A: 1 ~ 20 ℃
B: 1.0 ~ 20.0 ℃
•타이머 OFF 시간 설정
(0 ~ 999분)
0 : Main Output Control Cancellation
1 : Main Output Control
•설정값 저장
•설정값 저장
•설정값 저장
•설정값 저장
타이머 설정 메뉴알람 설정 메뉴
(초기설정값 표시)
(3초이상 누른다) (저장)
현재온도 현재온도온도설정(SV)
현재온도
현재온도
온도설정(SV)
현재온도
(3초이상 누른다)
0. 제어 방식 설정
기능선택(설정값 변경)
설정값 변경(증가/감소)
설정값 저장
5.설정범위 제한 하한
•설정 온도 범위 제한 하한
A: -40 ℃ ~ TSH(상한)
B: -40.0 ℃ ~ TSH(상한)
7.알람 온도조절
•알람 온도조절
A: -40 ~ +100 ℃
B: -40.0 ~ +100.0 ℃
6.보조출력 기능선택
8.경보에 대한 편차설정
•설정값 저장
•설정값 저장
•설정값 저장
•설정값 저장 •설정값 저장
•설정값 저장
•설정값 저장•설정값 저장
4.설정범위 제한 상한
•설정온도 범위제한 상한
A: TSL(하한) ~ +100 ℃
B: TSL(하한) ~ +100.0 ℃
가열제어
냉각제어
•편차설정
A: 1 ~ 20 ℃
B: 1.0 ~ 20.0 ℃
1.편차 설정
2.지연시간 설정
3.센서입력 보상
A: -30 ~ +30 ℃
B: -30.0 ~ +30.0 ℃
※Sensor Line 길이 또는
오차 발생 분에 대한 보상
•Delay Time
(지연시간 설정 : 0 ~ 240초)
9.메인출력제어9.경보에 대한 지연시간 설정
•경보에 대한 지연시간 설정
(0 ~ 240초)
•0 : 출력제어해제
1 : 출력제어
7.ON 시간설정
•타이머 ON 시간 설정
(0 ~ 999분)
8.OFF 시간설정
•경보에 대한 편차설정
A: 1 ~ 20 ℃
B: 1.0 ~ 20.0 ℃
•타이머 OFF 시간 설정
(0 ~ 999분)
If ‘MOC’ is 1 then Timer is ON as Main Output is automatically OFF. When using
MOC function, you can effectively use Timer Output as Defrosting Function.
0 S 5 S 10 S 15 S 20 S
15 min OFF
Relay OFF Relay ON
Relay OFF Relay ON
15 min OFF
ton = 5 min, tof = Timer Output at 15 min
5 min
ON
5 min
ON
▒
Delay Timer Setting
At present temperature,
1. Press [ ] key for more than 3 sec
2. Go to ‘ ’ by pressing [ ] key
3. Change the setting by using [ ] / [ ] key
4. Save it by pressing [ ] key
[ ]→[ ]→[ ] (0 ~ 240 sec.)
●Operation Description of Delay
①Delay Time ‘dLy’ = 0
②Delay Time ‘dLy’ = 5
※ In case of Delay Time=0, Relay is immediately ON when output signal
is generating. In case of Delay Time=5, Relay is ON after 5 sec. when
output signal is generating. In the interval of 5 sec, the output
indicator is flickering during Delay Timer Operation. After the delay
time, the output indicator lights as the relay is on.
•설정값 저장
•설정값 저장
•설정값 저장
•설정값 저장
타이머 설정 메뉴알람 설정 메뉴
(초기설정값 표시)
(3초이상 누른다) (저장)
현재온도 현재온도온도설정(SV)
현재온도
현재온도
온도설정(SV)
현재온도
(3초이상 누른다)
0. 제어 방식 설정
기능선택(설정값 변경)
설정값 변경(증가/감소)
설정값 저장
5.설정범위 제한 하한
•설정 온도 범위 제한 하한
A: -40 ℃ ~ TSH(상한)
B: -40.0 ℃ ~ TSH(상한)
7.알람 온도조절
•알람 온도조절
A: -40 ~ +100 ℃
B: -40.0 ~ +100.0 ℃
6.보조출력 기능선택
8.경보에 대한 편차설정
•설정값 저장
•설정값 저장
•설정값 저장
•설정값 저장 •설정값 저장
•설정값 저장
•설정값 저장•설정값 저장
4.설정범위 제한 상한
•설정온도 범위제한 상한
A: TSL(하한) ~ +100 ℃
B: TSL(하한) ~ +100.0 ℃
가열제어
냉각제어
•편차설정
A: 1 ~ 20 ℃
B: 1.0 ~ 20.0 ℃
1.편차 설정
2.지연시간 설정
3.센서입력 보상
A: -30 ~ +30 ℃
B: -30.0 ~ +30.0 ℃
※Sensor Line 길이 또는
오차 발생 분에 대한 보상
•Delay Time
(지연시간 설정 : 0 ~ 240초)
9.메인출력제어9.경보에 대한 지연시간 설정
•경보에 대한 지연시간 설정
(0 ~ 240초)
•0 : 출력제어해제
1 : 출력제어
7.ON 시간설정
•타이머 ON 시간 설정
(0 ~ 999분)
8.OFF 시간설정
•경보에 대한 편차설정
A: 1 ~ 20 ℃
B: 1.0 ~ 20.0 ℃
•타이머 OFF 시간 설정
(0 ~ 999분)
•설정값 저장
•설정값 저장
•설정값 저장
•설정값 저장
타이머 설정 메뉴알람 설정 메뉴
(초기설정값 표시)
(3초이상 누른다) (저장)
현재온도 현재온도온도설정(SV)
현재온도
현재온도
온도설정(SV)
현재온도
(3초이상 누른다)
0. 제어 방식 설정
기능선택(설정값 변경)
설정값 변경(증가/감소)
설정값 저장
5.설정범위 제한 하한
•설정 온도 범위 제한 하한
A: -40 ℃ ~ TSH(상한)
B: -40.0 ℃ ~ TSH(상한)
7.알람 온도조절
•알람 온도조절
A: -40 ~ +100 ℃
B: -40.0 ~ +100.0 ℃
6.보조출력 기능선택
8.경보에 대한 편차설정
•설정값 저장
•설정값 저장
•설정값 저장
•설정값 저장 •설정값 저장
•설정값 저장
•설정값 저장•설정값 저장
4.설정범위 제한 상한
•설정온도 범위제한 상한
A: TSL(하한) ~ +100 ℃
B: TSL(하한) ~ +100.0 ℃
가열제어
냉각제어
•편차설정
A: 1 ~ 20 ℃
B: 1.0 ~ 20.0 ℃
1.편차 설정
2.지연시간 설정
3.센서입력 보상
A: -30 ~ +30 ℃
B: -30.0 ~ +30.0 ℃
※Sensor Line 길이 또는
오차 발생 분에 대한 보상
•Delay Time
(지연시간 설정 : 0 ~ 240초)
9.메인출력제어9.경보에 대한 지연시간 설정
•경보에 대한 지연시간 설정
(0 ~ 240초)
•0 : 출력제어해제
1 : 출력제어
7.ON 시간설정
•타이머 ON 시간 설정
(0 ~ 999분)
8.OFF 시간설정
•경보에 대한 편차설정
A: 1 ~ 20 ℃
B: 1.0 ~ 20.0 ℃
•타이머 OFF 시간 설정
(0 ~ 999분)
0 S 5 S 10 S 15 S 20 S
15 min OFF
Relay OFF Relay ON
Relay OFF Relay ON
15 min OFF
ton = 5 min, tof = Timer Output at 15 min
5 min
ON
5 min
ON
All manuals and user guides at all-guides.com
4 5 6
Timer Setting
Menu
Alarm Setting
Menu
5.Low Limit of Setting Range
Ex) Pt100
A: TSL(Low Limit) ~ -400 ℃(TSH)
B: TSL(Low Limit) ~ -400.0 ℃(TSH)
7.Alarm Temperature Setting
A: -100 ~ 400 ℃
B: -100.0 ~ 400.0 ℃
6.Auxiliary Output Selection
8.Deviation Setting for Alarm
•Save SV
•Save SV
•Save SV
•Save SV •Save SV
•Save SV
•Save SV
•Save SV
4.High Limit of Setting Range
Ex) Pt100
A: -100 ℃~ TSH(High Limit)
B: -100.0 ℃~ TSH(High Limit)
9.Main Output Control
9.Delay Time Setting for Alarm
•Setting Range
: 0 ~ 240 sec. 0: Output Control Cancellation
1: Output Control
7.ON Time Setting
•Setting Range: 0 ~ 999 minute
8.OFF Time Setting
A: 1 ~ 50 ℃
B: 1.0 ~ 50.0 ℃•Setting Range: 0 ~ 999 minute
•Save SV
•Save SV
Default SV display
Present
Temperature
(Press for more than 3 sec)
0. Control Method Setting
Heating Control
Cooling Control
•Deviation Setting
A: 1 ~ 50 ℃
B:1 .0 ~ 50.0 ℃
1.Deviation Setting
현재온도
(3초이상 누른다)
•
설비자 설정메뉴
+
Present
Temperature
Present
Temperature
잠 금
해 제
•설정값 저장
•잠금, 설비자
설정이 불가능합니다.
현재온도
1 ℃분해능
0.1 ℃분해능
•설정값 저장 및 기본메뉴 복귀
※기본메뉴 복귀 키를 3초이상 누른다
(동시에 키와
키를 3초이상
누른다.)
Present
Temperature
Temperature Setting (SV)
Proportional Band Setting(P.B)
•Save SV
•Output Capacity (%)
Flickering Display for 1 sec
•Setting Value (SV)
Flickering Display for 1 sec
•Save SV
•Function Selection
Present
Temperature
Present
Temperature
※PorF='0' when setting P (Proportional Control)
※PorF='0' when setting P
(Proportional Control)
※Default : 25 ℃
※Default : Heat
•Save SV
•Save SV
2.Delay Time Setting
3.Input Compensation
A: -30 ~ 30℃
B: -30 ~ 30.0℃
※Compensating for
Sensor Line Length
or error occurrance
•Setting Range: 0~ 240 sec
※Default : 1 sec.
※Default : 0.0 ℃
※Default : 0
※Default : 1 minute
※Default : 3 minute
※Default : 2.0 ℃
※Default : 1 sec.
※Only it can be used when PorF=1 (ON/OFF Control)※A : 1℃Display Mode(trSL=1)
B : 0.1℃Display Mode (trSL=0)
※Default : Pt100(400.0 ℃)
CA(999.9 ℃)
1 ~ 5 V DC (5000)
※Default : Pt100(400.0 ℃)
CA(999.9 ℃)
1 ~ 5 V DC (5000)
※Default : Pt100(-100.0 ℃)
CA(-80.0 ℃)
1 ~ 5 V DC (-1000)
※Default : 2.0 ℃
Setting Range : 1~100 ℃
※Default : 20 ℃
Offset Elimination (M.R)
Setting Range : 1~100 %
※Default : 50 %
Connection
Unit : mm
6.560.5 10
28.5
35
77
35
71 0.5
0
29
0.5
0
판넬 가공 치수
ED6
6.560.5 10
28.5
35
77
35
71 0.5
0
29
0.5
0
판넬 가공 치수
ED6
Part name
ED6
Aux.
Setting
output indicate
Decvease
Increase
Main output indicate
Dimension and panel cutout
▒Confirmation mode of Output Capacity & Setting Value
▒Setting mode
※ SV : Setting Value
Timer Setting
Menu
Alarm Setting
Menu
5.Low Limit of Setting Range
Ex) Pt100
A: TSL(Low Limit) ~ -400 ℃(TSH)
B: TSL(Low Limit) ~ -400.0 ℃(TSH)
7.Alarm Temperature Setting
A: -100 ~ 400 ℃
B: -100.0 ~ 400.0 ℃
6.Auxiliary Output Selection
8.Deviation Setting for Alarm
•Save SV
•Save SV
•Save SV
•Save SV •Save SV
•Save SV
•Save SV
•Save SV
4.High Limit of Setting Range
Ex) Pt100
A: -100 ℃~ TSH(High Limit)
B: -100.0 ℃~ TSH(High Limit)
9.Main Output Control
9.Delay Time Setting for Alarm
•Setting Range
: 0 ~ 240 sec. 0: Output Control Cancellation
1: Output Control
7.ON Time Setting
•Setting Range: 0 ~ 999 minute
8.OFF Time Setting
A: 1 ~ 50 ℃
B: 1.0 ~ 50.0 ℃•Setting Range: 0 ~ 999 minute
•Save SV
•Save SV
Default SV display
Present
Temperature
(Press for more than 3 sec)
0. Control Method Setting
Heating Control
Cooling Control
•Deviation Setting
A: 1 ~ 50 ℃
B:1 .0 ~ 50.0 ℃
1.Deviation Setting
현재온도
(3초이상 누른다)
•
설비자 설정메뉴
+
Present
Temperature
Present
Temperature
잠 금
해 제
•설정값 저장
•잠금, 설비자
설정이 불가능합니다.
현재온도
1 ℃분해능
0.1 ℃분해능
•설정값 저장 및 기본메뉴 복귀
※기본메뉴 복귀 키를 3초이상 누른다
(동시에 키와
키를 3초이상
누른다.)
Present
Temperature
Temperature Setting (SV)
Proportional Band Setting(P.B)
•Save SV
•Output Capacity (%)
Flickering Display for 1 sec
•Setting Value (SV)
Flickering Display for 1 sec
•Save SV
•Function Selection
Present
Temperature
Present
Temperature
※PorF='0' when setting P (Proportional Control)
※PorF='0' when setting P
(Proportional Control)
※Default : 25 ℃
※Default : Heat
•Save SV
•Save SV
2.Delay Time Setting
3.Input Compensation
A: -30 ~ 30℃
B: -30 ~ 30.0℃
※Compensating for
Sensor Line Length
or error occurrance
•Setting Range: 0~ 240 sec
※Default : 1 sec.
※Default : 0.0 ℃
※Default : 0
※Default : 1 minute
※Default : 3 minute
※Default : 2.0 ℃
※Default : 1 sec.
※Only it can be used when PorF=1 (ON/OFF Control)※A : 1℃Display Mode(trSL=1)
B : 0.1℃Display Mode (trSL=0)
※Default : Pt100(400.0 ℃)
CA(999.9 ℃)
1 ~ 5 V DC (5000)
※Default : Pt100(400.0 ℃)
CA(999.9 ℃)
1 ~ 5 V DC (5000)
※Default : Pt100(-100.0 ℃)
CA(-80.0 ℃)
1 ~ 5 V DC (-1000)
※Default : 2.0 ℃
Setting Range : 1~100 ℃
※Default : 20 ℃
Offset Elimination (M.R)
Setting Range : 1~100 %
※Default : 50 %
※ When operating Proportional Control, display Present Output
Capacity (0 ~ 100 %).
-In case of occurring Offset, eliminate M.R value by decreasing as
referring Present Output Capacity.
● Heating Control MODE
PV < SV: Increase M.R value
PV > SV: Decrease M.R value
● Cooling Control MODE
PV > SV: Increase M.R value
PV < SV: Decrease M.R value
※ PV : Present Value
SV : Setting Value
M.R : Offset Elimination
●
Panel cutout
● Dimension
All manuals and user guides at all-guides.com

Other HANYOUNG NUX Measuring Instrument manuals

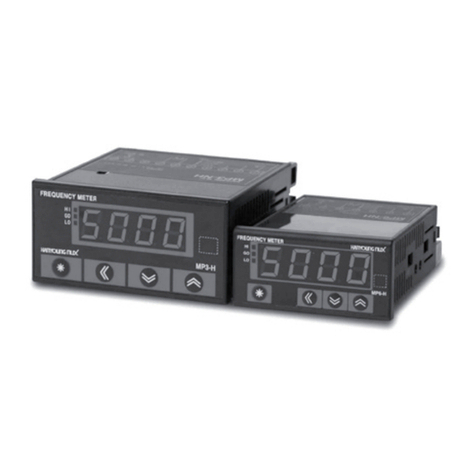
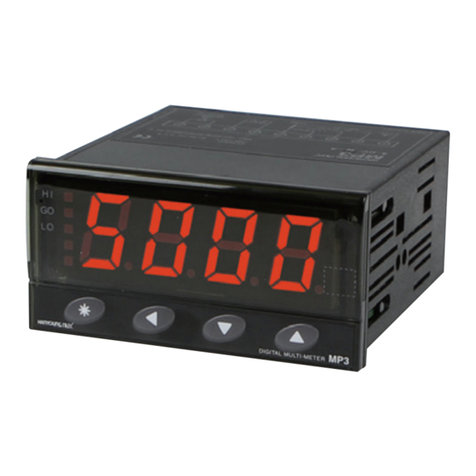
HANYOUNG NUX MP3-4 H Series User manual

HANYOUNG NUX

HANYOUNG NUX MP3-4 H Series User manual

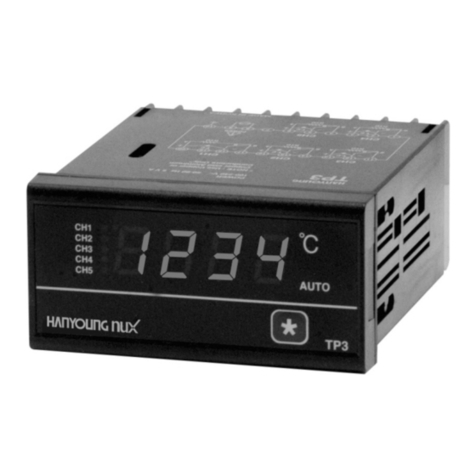
HANYOUNG NUX TP3 User manual

HANYOUNG NUX

HANYOUNG NUX TP3 User manual

HANYOUNG NUX BS6 User manual

HANYOUNG NUX

HANYOUNG NUX BS6 User manual

HANYOUNG NUX BS Series User manual

HANYOUNG NUX

HANYOUNG NUX BS Series User manual

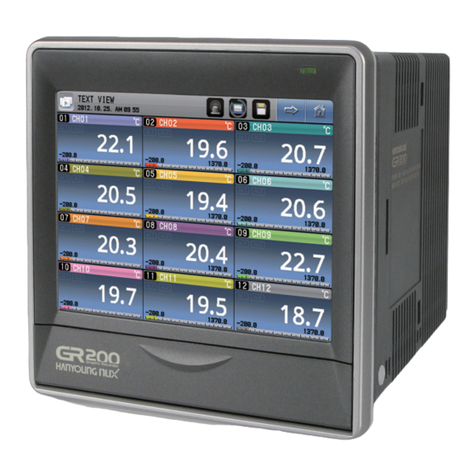
HANYOUNG NUX GR200 Series User manual

HANYOUNG NUX

HANYOUNG NUX GR200 Series User manual

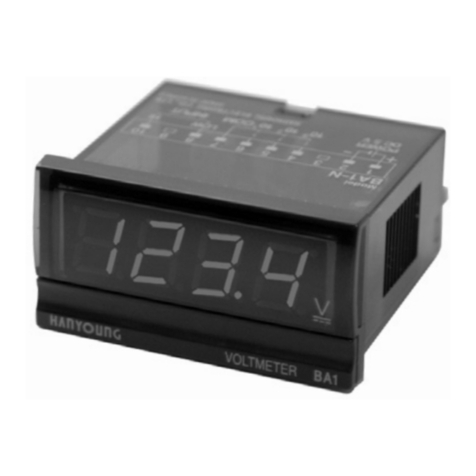
HANYOUNG NUX BA 1 Series User manual

HANYOUNG NUX

HANYOUNG NUX BA 1 Series User manual

HANYOUNG NUX MP3 User manual

HANYOUNG NUX

HANYOUNG NUX MP3 User manual

HANYOUNG NUX TP3 User manual

HANYOUNG NUX

HANYOUNG NUX TP3 User manual

HANYOUNG NUX HL Series User manual

HANYOUNG NUX

HANYOUNG NUX HL Series User manual

HANYOUNG NUX TP3 User manual

HANYOUNG NUX

HANYOUNG NUX TP3 User manual

HANYOUNG NUX HE Series User manual

HANYOUNG NUX

HANYOUNG NUX HE Series User manual

HANYOUNG NUX PF3 User manual

HANYOUNG NUX

HANYOUNG NUX PF3 User manual

HANYOUNG NUX GE Series User manual

HANYOUNG NUX

HANYOUNG NUX GE Series User manual

HANYOUNG NUX HP3 User manual

HANYOUNG NUX

HANYOUNG NUX HP3 User manual

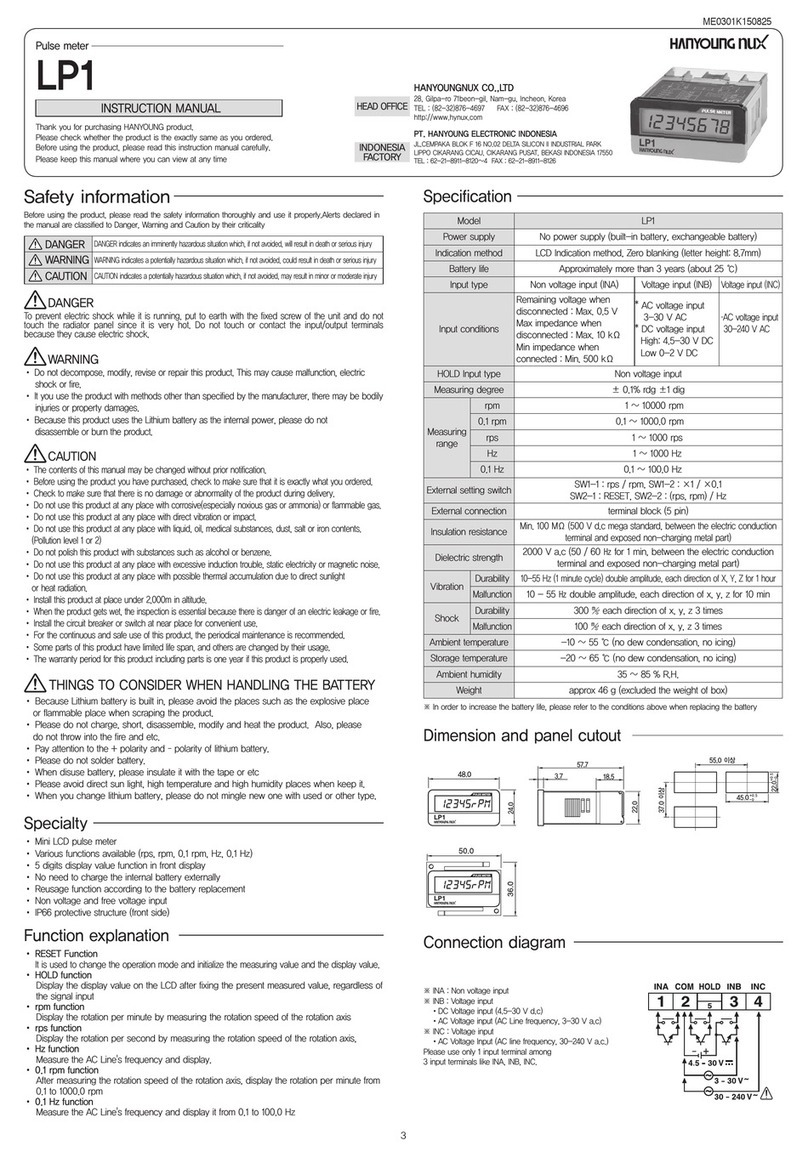
HANYOUNG NUX LP1 User manual

HANYOUNG NUX

HANYOUNG NUX LP1 User manual

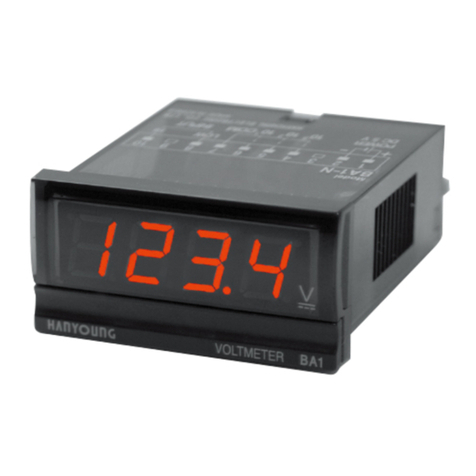
HANYOUNG NUX BA1 User manual

HANYOUNG NUX

HANYOUNG NUX BA1 User manual

HANYOUNG NUX RP3 User manual

HANYOUNG NUX

HANYOUNG NUX RP3 User manual

HANYOUNG NUX MP3 User manual

HANYOUNG NUX

HANYOUNG NUX MP3 User manual

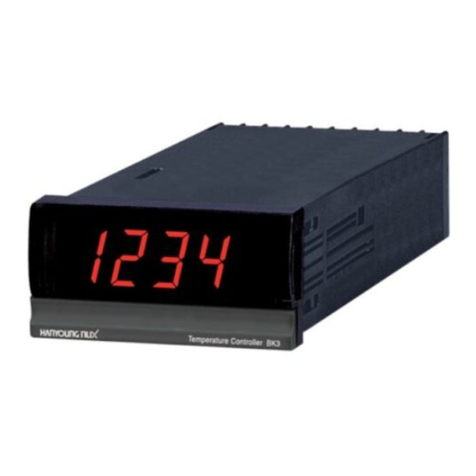
HANYOUNG NUX BK3 User manual

HANYOUNG NUX

HANYOUNG NUX BK3 User manual

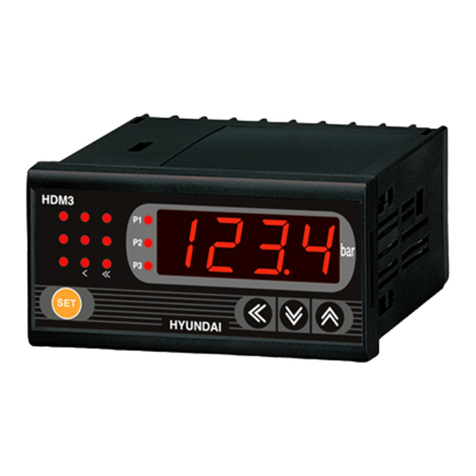
HANYOUNG NUX HDM3 User manual

HANYOUNG NUX

HANYOUNG NUX HDM3 User manual

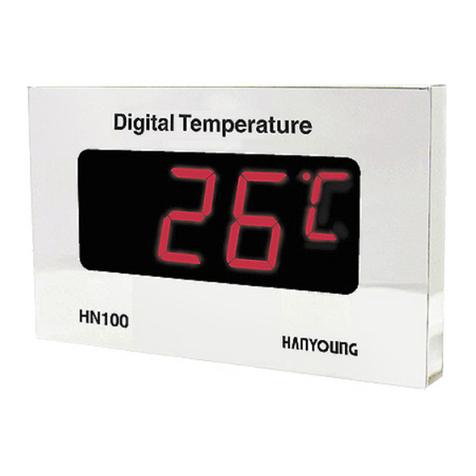
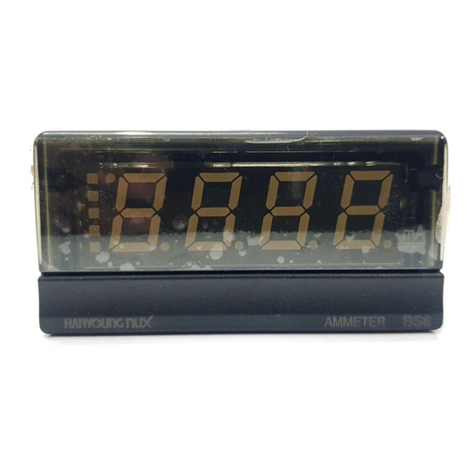
HANYOUNG NUX HN100 Series User manual

HANYOUNG NUX

HANYOUNG NUX HN100 Series User manual

Popular Measuring Instrument manuals by other brands

Haglof Postax user manual

Haglof

Haglof Postax user manual

GE AB Series instructions

GE

GE AB Series instructions

Tokheim MA26 Technical manual

Tokheim

Tokheim MA26 Technical manual

Endress+Hauser Levelflex M FMP4 Series manual

Endress+Hauser

Endress+Hauser Levelflex M FMP4 Series manual

Microtrac S3500 Operation and maintenance manual

Microtrac

Microtrac S3500 Operation and maintenance manual

Renishaw PH10M-iQ PLUS Installation and user guide

Renishaw

Renishaw PH10M-iQ PLUS Installation and user guide

GOK BC-1 Series Assembly and operating manual

GOK

GOK BC-1 Series Assembly and operating manual

HP 432A manual

HP

HP 432A manual

BNC 7550 user guide

BNC

BNC 7550 user guide

Stabila TECH 700 DA user manual

Stabila

Stabila TECH 700 DA user manual

Bosch GTL 3 Professional Original instructions

Bosch

Bosch GTL 3 Professional Original instructions

PCB Piezotronics Triaxial ICP 339A32/NC Installation and operating manual

PCB Piezotronics

PCB Piezotronics Triaxial ICP 339A32/NC Installation and operating manual

PCE Instruments PCE-CSM 1 manual

PCE Instruments

PCE Instruments PCE-CSM 1 manual

Bosch Professional GLM 400 Series Original instructions

Bosch

Bosch Professional GLM 400 Series Original instructions

DeWalt DW089 instruction manual

DeWalt

DeWalt DW089 instruction manual

VCA sound SMART RLT Sport user manual

VCA

VCA sound SMART RLT Sport user manual

DMP Electronics 1118 installation guide

DMP Electronics

DMP Electronics 1118 installation guide

Nikon LASER 50 user manual

Nikon

Nikon LASER 50 user manual

manuals.online logo
manuals.online logoBrands
  • About & Mission
  • Contact us
  • Privacy Policy
  • Terms and Conditions

Copyright 2025 Manuals.Online. All Rights Reserved.