Haglof Postax User manual

User manual
Postax
Version 2.2
Revised: 2018-03-05
A software for DP II

Contents
User manual................................................................................................ 0
Support contract ......................................................................................... 1
Important Information.................................................................................. 1
Postax for DPII............................................................................................. 2
Getting started ............................................................................................ 3
Digitech Professional........................................................................................... 3
Navigation keys, overview................................................................................. 3
How to navigate in a menu................................................................................ 3
How to change a text string .............................................................................. 3
How to change a value ..................................................................................... 3
Load Program .................................................................................................... 4
Program specifications ........................................................................................ 4
Version history................................................................................................... 4
Version 1.8 ..................................................................................................... 4
Version 1.9 ..................................................................................................... 4
Version 2.0 ..................................................................................................... 5
Version 2.1 ..................................................................................................... 5
Version 2.2 ..................................................................................................... 5
Flow sheet for measuring .................................................................................... 5
Main menu................................................................................................... 6
Plot menu.......................................................................................................... 6
How to enter Plot menu .................................................................................... 6
How to create a new Plot .................................................................................. 6
How to print an active Plot ................................................................................ 6
How to reach the main menu............................................................................. 6
Measure............................................................................................................ 7
How to start to measure ................................................................................... 7
How to delete a tree ........................................................................................... 7
How to measure heightselete a tree...................................................................... 7
Double scale.................................................................................................... 7
How to transfer distances from Postex VL5 Instrument via Infra Red...................... 8
How to transfer distances from Postex VL5 Instrument via Bluetooth...................... 8
How to measure distances, Postex DME .............................................................. 8
How to switch on/off cross scaling ........................................................................ 9
How to switch on/off edit tree number .................................................................. 9
How to switch on/off Postex DME ......................................................................... 9
How to switch on/off receiving positions via Bluetooth ............................................ 9
Printing ..................................................................................................... 10
Printout Excel ...................................................................................................10

Printout Google Earth.........................................................................................10
Printout Comma separ .......................................................................................10
How to send .....................................................................................................11
To File ...........................................................................................................11
Kermit...........................................................................................................11
ASCII, Printer.................................................................................................12
Quick Guide Postex System ....................................................................... 13
Transponders....................................................................................................13
Turn transponder on/off .....................................................................................14
Adapters ..........................................................................................................14
Setting up the tripod..........................................................................................15
Calibration of Postex DME...................................................................................16
CALIBRATING WITH T3 TRANSPONDER ON AN ADAPTER .....................................17
Haglöf Sweden®........................................................................................ 18
Support contract
Support agreements for software products concluded separately
between the buyer / user and seller, and are in some cases in the
purchase price for a limited period of time (usually 12 months). If the
support agreement entered into with Haglöf Sweden, sent a bill for
extended support contracts automatically when this time expires. To
terminate the support agreement, please contact Haglöf Sweden. Please
contact us in case of doubts and questions so that we can help you.
Important Information
Read the manual before using the application.
!Should you upgrade your application please read the section on Revision
history before performing the upgrade. Otherwise, data could be lost.

Postax
Version 2.
2
User Manual
Revision
:
201
8
-
0
3
-
0
5
2
© Haglöf Sweden AB, 2014. All rights reserved.
Postax for DPII
Postax is used for determining a trees relative position to a plot center.
Plot Coordinates, Plot Id, Plot Radius, Coordinate system, Distances,
Species, Diameters and Heights are entered into the program.
With the received distances and diameter, coordinates, Cartesian and
Polar, for the center of the tree relative to a plot center are calculated
and shown in the display continuously.
The distance from the tree to the plot center can be measured with the
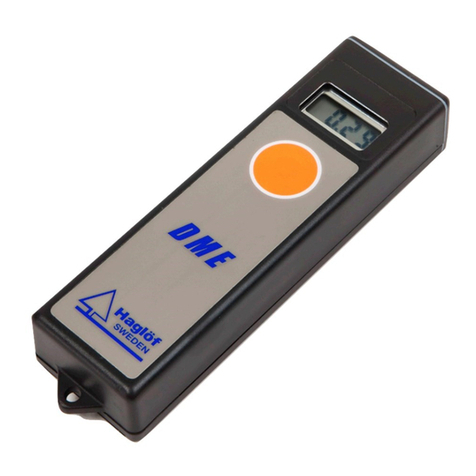
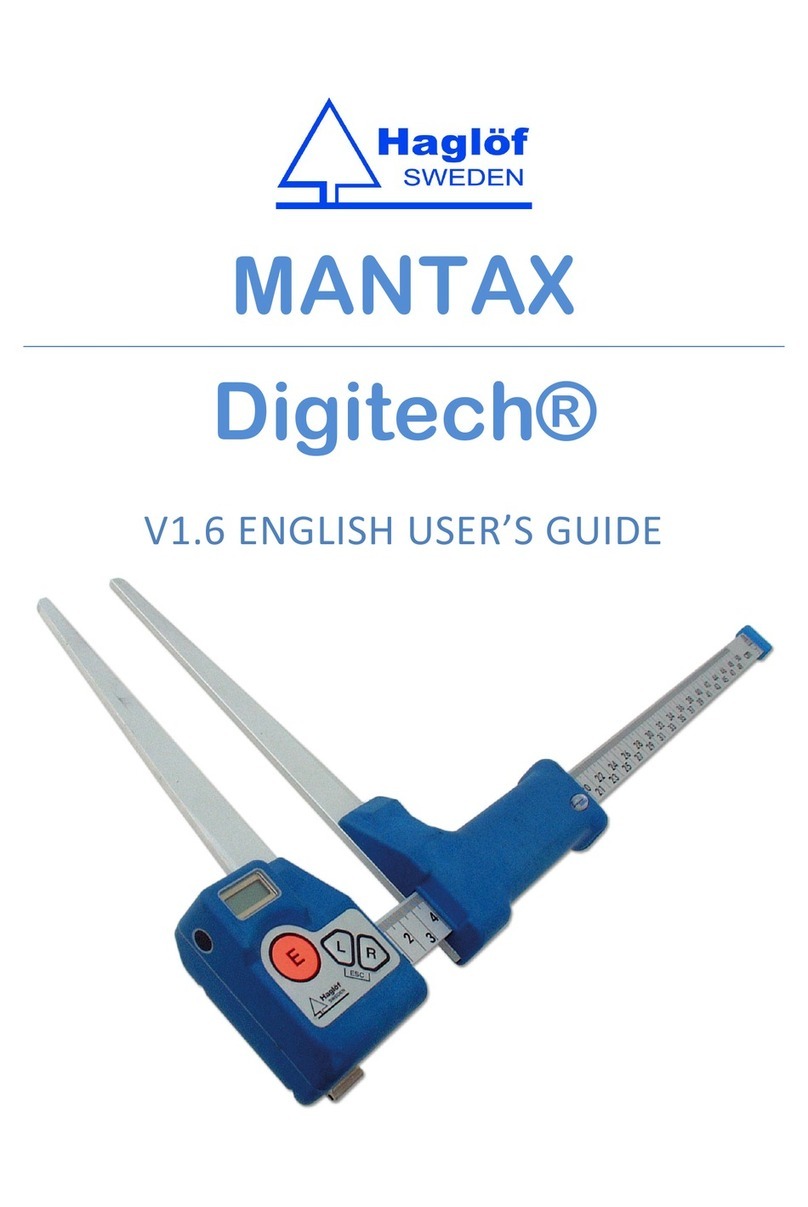
Postex VL5 instrument and transfered to the DPII caliper or using the
Postex DME instrument directly attached to the caliper.

Postax
Version 2.
2
User Manual
Revision
:
201
8
-
0
3
-
0
5
3
© Haglöf Sweden AB, 2014. All rights reserved.
Getting started
Digitech Professional
To be able to get started and using the
Digitech Professional it can be a necessity to
comprehend the functions of icons and
keystrokes.
Navigation keys, overview
Ico
n
Key(s)
Description
1
Left
Step/Move Left, decrease a value
2
Right
Step/Move right, increase a value
3
Up
Step/Move up, increase
a value
4
Down
Step/Move down, decrease a value
5
Up + Left
Shut off
6
Up + Right
Activate background light.
7
Down + Left
Exit,Escape
8
Down +
Right
Activate IR receive
How to navigate in a menu
Use Up- or Down-button to select an alternative
in the menu. Press Enter to confirm a choice in
the menu. Go back in the menu by pressing
Escape (Left- and Down button
simultaneously).
How to change a text string
Use Left- and Right-button to change position in
the text string and use Up- and Down-button or
the scale to change value. Press Enter when finished.
How to change a value
In most cases the value is changed by using the Down-button to
decrease the value by 1, the Left-button to decrease the value by 10,
the Up-button to increase the value by 1, the Right-button to increase
the value by 10. The scale can also be used. Press Enter when finished.
But sometimes the value is changed the same way as a text string, that
is: use Left- and Right-button to change position in the string and use
Up- and Down-button or the scale to change value. Press Enter when
finished.

Postax
Version 2.
2
User Manual
Revision
:
201
8
-
0
3
-
0
5
4
© Haglöf Sweden AB, 2014. All rights reserved.
Load Program
With the new DP II caliper you use a USB cable and your file explorer in
your PC to load a new program into the caliper.
·A program file for the caliper DP II must have a
`.DP2`extension.
1. Reset the caliper by pressing all five (5) buttons simultaneously.
In the System menu choose USB. Attach the USB cable and
adapter to the caliper.
2. PC: Start the File Explorer, choose the program file which you
shall install. (DP2 extension). Then copy the file and paste it in
the calipers file directory \PRG in the calipers SD CARD.
3. In the System menu in the caliper select Select program and
select the file, press enter and choose open file.
4. Before you start the program a valid license key must be
specified. Select license in the program menu. The retailer of the
caliper will handle you a valid license code. The press Start and
the program will start.
Program specifications
Max number of plots 300
Min Diameter 1 mm
Max Diameter 2 m
Min Height 1 dm
Max Height 500 dm
Version history
Version 1.8
Developed from Postax DP version 1.8
Version 1.9
·When using Postex DME and angle to plot center the three distances
showing are calculated to horizontal distances.
·When the measuring of distance is unsuccessful you will now end up
retaking the diameter and distance again.
·When entering tree number the scale can not be used for editing
values.
·Earlier warning of tree is outside of the plot.
·Can enter heights on measured trees from menu alternative.

Postax
Version 2.
2
User Manual
Revision
:
201
8
-
0
3
-
0
5
5
© Haglöf Sweden AB, 2014. All rights reserved.
Version 2.0
·Corrected printouts regarding loxal x and y coordinates and lat lon
values in csv, kml and txt printouts.
·This version is compatible with previous version 1.9, so you can
print data entered with previous version 1.9.
Version 2.1
·Added species, 30 species now.
·Updated printout of polar coordinate variable angle when using
Postex DME to print two decimals, only printed in whole degrees
before.
·Updated printout of local tree coordinates, lat lon, to print seven
decimals instead of 6 as before.
·Added separator information in the *csv file in order to be able to
just double click on it to be opened in directly in excel.
·Added the editable tree nr to csv printout.
·This version is NOT compatible with previous versions, so you can
NOT print data entered with previous versions.
Version 2.2
·Updated conversion between coordinate systems in order to retrieve
more precision on tree coordinate, variables latitude and longitude.
·This version is compatible with previous version 2.1, so you can
print data entered with previous version 2.1.
Flow sheet for measuring
1. Choose Plots and press Enter. Choose whether to make a new
plot or choose an existing one.
2. If you have chosen to edit tree number you will be able to do so
now.
3. Choose Species and press Enter. Enter Diameter.
4.
Use the Postex VL5 instrument or the Postex DME instrument to
measure the 3 distances. The X and Y coordinates relative to the
center of the equipment is calculated and shown, in dm. You can
skip the distances as well by pressing Enter.
5. Enter height if wanted. Note that you also can enter heights
among measured trees when the plot is done.

Postax
Version 2.
2
User Manual
Revision
:
201
8
-
0
3
-
0
5
6
© Haglöf Sweden AB, 2014. All rights reserved.
Main menu
Main menu is reached when starting the program Postax.
PLOTS Handling of plots
PRINT ALL Prints all data, tab separated or KML
DELETE Delete one or all plots
SETTINGS Settings for the caliper, switch Postex DME
ON/OFF, Cross Scaling ON/OFF and the possibility
to edit the tree number ON/OFF.
RESET Quits the program and resets the caliper to the
system menu.
SHUT OFF Shuts the caliper OFF.
USB Puts the caliper in USB mode to get access to the
files on the caliper SD Card.
Plot menu
This is where you work with your plots by measuring trees, creating new
plots, erasing trees and printing single plots.
How to enter Plot menu
Choose Plots and press Enter.
How to create a new Plot
Choose Plots èNew Plot and press Enter.
Enter Plot Id , Plot Radius , and which Coordinate
System
to be used
for
displaying coordinates.
Then choose to take plot coordinates from a Bluetooth GPS or not.
A new Plot is created and activated.
How to print an active Plot
1. Choose Plots èPrint and press Enter.
2. Choose Tab separated printout or Googel Earth printout.
3. Choose To File to create a printout file. This file will be saved on
the caliper SD Card and can latter be transferred to a PC via
USB.
Choose Kermit or Ascii printout via the caliper serial port.
How to reach the main menu
1. Choose Plot èExit and press Enter and you’ll end up in the
main menu.

Postax
Version 2.
2
User Manual
Revision
:
201
8
-
0
3
-
0
5
7
© Haglöf Sweden AB, 2014. All rights reserved.
Measure
How to start to measure
1. Whilst in the Plot menu choose Measure and press Enter. The
display now shows the number of trees.
2. If you have chosen to edit the tree number you can do so now.
The number is automatically increased by 1.
3. Enter Species by using the navigation keys, Press Enter to
confirm.
4. Scale the Diameter and press Enter.
5. Transfer the 3 distances from a Postex VL5 instrument or use the
Postex DME to measure them from the caliper. Press Enter to
confirm.
6. If Postex DME is used the 3 distances showing will be the
horizontal distanses if angle to plot center is used.
7. Enter Height if wanted. You can also enter heights after the plot
is finished by choosing among the measured trees.
8. If the calculated distance from plot center to the tree is larger
than the plot radius a question whether to save the tree or not
will be posed.
9. Return to 3.
How to delete a tree
1. Choose Delete Tree.
2. Then choose the tree you want to delete.
How to measure heightselete a tree
1. Choose Heights.
2. Then choose the tree you want to edit/take a height on.
3. Enter the height and press Enter to store.
Double scale
1. While measuring diameter press navigation key down when the
scale is at 0.
2. Then 50 cm will be added to the value of the scale reading. It will
also show in the display as (+50).
3. It will switch off for the next tree or by repeating the procedure
in point 1.

Postax
Version 2.
2
User Manual
Revision
:
201
8
-
0
3
-
0
5
8
© Haglöf Sweden AB, 2014. All rights reserved.
How to transfer distances from Postex VL5 Instrument via Infra Red
1.
Data from the Postex VL5 instrument can be transferred to the
Handheld Computer
via Infra Red (IR)
2. Measure distances to the transponders with
the Postex VL5.
3. Activate IR-reading in the Handheld by pressing Speed Button ê
(Simultaneous pressing Down- and Right button).
4. Aim the Postex VL5´ IR transmitter towards the Handheld
computer IR-receiver and press one or more times on the
Vertex´ IR-button. When data is received the display in the
Handheld will feature a square containing the information
transferred from the Postex VL5.
How to transfer distances from Postex VL5 Instrument via Bluetooth
1.
Data from the Postex VL5 instrument can be transferred to the
Handheld Computer via Bluetooth
.
2.
Activate the Bluetooth in the Postex VL5
.
3. Make sure that you have activated the receiving positions via
Bluetooth option under Settings èBluetooth VL in the main
menu of the program.
4. Go to Measure and connect to the Postex VL5.
5. Start measuring the tree.
6. Activate IR-reading in the Handheld by pressing Speed Button ê
(Simultaneous pressing Down- and Right button).
7. Measure distances to the transponders with the Postex VL5. Send
the positions to the Handheld. When data is received the display
in the Handheld will feature a square containing the information
transferred from the Postex VL5.
For more information about how to use the Postex VL5 Instrument,
look in the User Manual for the Postex VL5.
How to measure distances, Postex DME
1. Make sure that you have activated the PosTex DME option under
Settings èPostex DME in the main menu of the program.
2. Attach the Postex DME unit to the caliper.
3. In the Plot menu use the PostexDME Dist function to activate the
transponders and to check that the transponders are placed at the
correct position on the tripod.
4.
Go to Measure and start measuring the tree. The program will
automatically measure the distance after the diameter has been
entered.
5. If Postex DME is used the 3 distances showing will be the horizontal
distanses if angle to plot center is used.
For more information about how to use the Postex DME Instrument;
look in the User Manual for the Postex DME or in the quick guide
latter on in this manual.

Postax
Version 2.
2
User Manual
Revision
:
201
8
-
0
3
-
0
5
9
© Haglöf Sweden AB, 2014. All rights reserved.
How to switch on/off cross scaling
Cross Scale allows the option of making two diameter readings. For
example, at the datum height two caliper measurements at right angles
can be made and the result averaged, or measurements above and
below the datum height in the event that there is some anomaly with
the tree at the datum height.
1. In the main menu choose Settings èCross Scale and press
Enter.
2. With the navigation key right you switch cross scaling ON/OFF.
Press Enter and your choice is stored.
How to switch on/off edit tree number
1. In the main menu choose Settings èTree Number and press
Enter.
2. With the navigation key right you switch the possibility to edit
tree number ON/OFF.
3. Press Enter and your choice is stored.
4. You should decide before creating a new plot whether editing tree
number should be active or not, otherwise it can be perceived as
confusing if the numbers do not add up.
How to switch on/off Postex DME
1. In the main menu choose Settings èPostex DME and press
Enter.
2. With the navigation key right you switch if to use Postex DME
ON/OFF.
Press Enter and your choice is stored.
How to switch on/off receiving positions via Bluetooth
1. In the main menu choose Settings èBluetooth VL and press
Enter.
2. With the navigation key right you switch if to use Bluetooth
ON/OFF.
Press Enter and your choice is stored.

Postax
Version 2.
2
User Manual
Revision
:
201
8
-
0
3
-
0
5
10
© Haglöf Sweden AB, 2014. All rights reserved.
Printing
Printout Excel
If you print in the main menu all the plots will be printed. If you print in
the plot menu only the active plot will be printed.
The structure of the print out is a tab separated text file with columns
consisting of these variables for each tree:
1. Plot Id
[xxx]
2. Plot Radius [m]
3. Plot Coord Lat
4. Plot Coord Lon
5. Tree Number (counter)
6. Tree Species
7. Tree Diameter [mm]
8. Tree Distance 1 [cm]
9. Tree Distance 2 [cm]
10.Tree Distance 3 [cm]
11.Tree Height [dm]
12.Tree Cartesian Coordinate X [m]
13.Tree Cartesian Coordinate Y [m]
14.Tree Polar Coordinate R (Distance) [m]
15.Tree Polar Coordinate T (Angle) [deg]
16.Tree number (The editable tree number)
Printout Google Earth
Print a file to be opened in Google Earth. Print the plot center with plot
information (Id,radius,lat,lon, and the trees on that plot) and the trees
with their specific info (Nr,spec,hgt,dist1-3,x,y,r,theta)
Printout Comma separ
Comma separated text file.
1. Plot.
2. Plot_Radius [m]
3. Nr
4. Tree_Spc
5. Tree_Dia [mm]
6. Tree_Hgt [dm]
7. Tree_PosTex1 [cm]
8. Tree_PosTex2 [cm]
9. Tree_PosTex3 [cm]
10.Tree_Local_x [m]
11.Tree_Local_y [m]
12.Tree_Local_Dist [m]
13.Tree_Local_Angle [dd.dd]
14.Latitude [dd.ddddddd]
15.Longitude [dd.ddddddd]
16.Tree number (The editable tree number)

Postax
Version 2.
2
User Manual
Revision
:
201
8
-
0
3
-
0
5
11
© Haglöf Sweden AB, 2014. All rights reserved.
How to send
To File
The files will be created and stored on the caliper SD CARD. To retrieve
them:
1. Connect the caliper with a USB cable to the PC and select the option
USB in the main menu.
2. Open a File Explorer in the PC and locate the folder “Data\POSTAX”
on the caliper SD CARD.
Kermit
1. Connect a USB or serial cable and adapter between the Handheld
serial port and the PC.
2. PC: Start WinDP
3. PC: Kermit receive
4. PC: Select directory and press Open.
5. Caliper: Choose Kermit and press Enter.

Postax
Version 2.
2
User Manual
Revision
:
201
8
-
0
3
-
0
5
12
© Haglöf Sweden AB, 2014. All rights reserved.
ASCII, Printer
The only difference between ASCII and Printer is that in Printer the baud
rate is set to 4800 while in ASCII the baud rate is what it is set in the
handheld.
1. Connect a USB or serial cable and adapter between the Handheld
serial port and the PC.
2. PC: Start WinDP
3. PC: Use Receive data (ASCII) for ASCII and Data to
printer(4800baud) for Printer.
4. PC: Select any filename or accept the default name (treelist.txt)
where to store data.
5. PC: Select Save
6. Handheld: Select ASCII (or Printer).
7. Handheld: Press ENTER to start transmission from the Handheld.
8. PC: Press Print to print out.

Postax
Version 2.
2
User Manual
Revision
:
201
8
-
0
3
-
0
5
13
© Haglöf Sweden AB, 2014. All rights reserved.
Quick Guide Postex System
Transponders
Three (3) transponders work together in the Postex system. Each
transponder has its unique setting. For identification, each transponder
has its unique color ring.
The transponders have ultrasound transmitters and a receiver that
communicates with the Postex instrument. The transponders can be
used both for aimed/direct measuring and for circular measuring with
the 360 degree adapter. If you need to use a transponder for height
measuring, remove Transponder A WHITE from the adapter at the tripod
rack. It is important not to move the position of the arm when removing
the transponder. The transponders WHITE, GREEN and BLACK should
not be mixed up, and they should always be consistently positioned in
its adaptor.
The Transponders are equipped with a beep signal, indicating ON or OFF
status. The Transponders have no switch. The Postex instrument is used
as a remote control to turn off and on. When turned on, the
Transponder stays active for app. 20 minutes. After 20 minutes of
inactivity, the transponder will turn itself OFF.
Each transponder uses one alkaline 1.5 volt AA battery placed under the
battery lid
Transponder A White. Transponder B Green. Transponder C Black
White ring under
the battery
cover.
Battery cover
Transponder
housing
Ultrasound
transceiver
Green ring under
the battery
cover.
Black ring under
the battery
cover.

Postax
Version 2.
2
User Manual
Revision
:
201
8
-
0
3
-
0
5
14
© Haglöf Sweden AB, 2014. All rights reserved.
Turn transponder on/off
Start the T3 transponder by holding the ultrasonic transceiver on the
Postex instrument close to the centre of the transponder. If using the
Postex VL5 Instrument press the DME button. If using the Postex DME
Instrument; start a distance measurement in the caliper program. Await
two (2) short beeps from the transponder. The T3 transponder is now
turned on and will remain active in ON mode for approx. 20 minutes
before automatic turn off (battery saving function). To turn the T3
transponder off (OFF), repeat the procedure and wait for four (4) beep
signals
Adapters
Four (4) adapters are included in a Postex system.
Each transponder has an adapter. The fourth
adapter is placed in the tripod center and used to
place the bubble/libell on.
The adapter allows the ultrasonic signals to spread in
a 360 degrees circle and enables the user to measure from any
position from the tripod,(within the distance limit).

Postax
Version 2.
2
User Manual
Revision
:
201
8
-
0
3
-
0
5
15
© Haglöf Sweden AB, 2014. All rights reserved.
Setting up the tripod
1. Position the tripod
and assemble and
fold down the
telescopic arms on
the tripod rack
with the three
transponders
mounted.
2. Security check:
Test the arms to
be equal in length
by aiming the
Postex instrument
facing down in the
adapter placed in
the centre.
Measure the
distances with the
instrument using
the ultrasound
method.
C= black
B=greenA= white
Image 1
Transponder Tripod / Rack seen from above.
1 = Arm’s length = center of tripod to center of adapter =
115.5 cm/3,79 ft.
2 = The center of the transponders form an equilateral
triangle, where each side measures 200 cm/6.56ft.
Yaxis
Xaxis
1
2

Postax
Version 2.
2
User Manual
Revision
:
201
8
-
0
3
-
0
5
16
© Haglöf Sweden AB, 2014. All rights reserved.
NOTE! It is of great importance that the distances to the
transponders from the centre are equal. Divergences should
never exceed 1cm/0.39”. Also note that due to the height of the
adapter on the tripod, distances greater than the arm’s length
will be obtained (arm length = centre of the tripod to center of
the adapter = 115.5cm/45.04”)
3. Place rack arms at horizontal level.
4. Aim transponder C facing north by aiming a compass through the
tripod centre and through transponder C.
If aiming transponder C (Black) towards North, the local
coordinate system has a Y axis north-south and an X axis
east-west (Image 1). NOTE! In land survey contexts, the X
axis can sometimes be stated as north-south.
5. Measure the distances by aiming the Postex instrument towards the
plot centre where the tripod is placed, with the backside of the
instrument at the tree stem (image 2). Press the DME button on the
Postex VL5 and hold the instrument steady until the three distance
results are featured in the Postex display.
Max radius with the T3 transponders mounted on the tripod is, 0.00m-
15.00m/0.00ft-50.00ft
Calibration of Postex DME
Ultrasonic pulses travel with different speed. In open terrain and without
disturbing objects between the instrument and the transponder,
distances up to 40 m or more can be measured to the T3 transponder.
Always calibrate the ultrasound in the current temperature and make
sure that the Postex has the same temperature as the air where
measurements are to be made. To obtain maximum precision it is
recommended to control and if necessary calibrate the instrument
periodically, preferably daily.
To obtain maximum accuracy level in ultrasound measuring operations,
the instrument needs to be calibrated.
1. Make sure the instrument has ambient temperature –not colder
and not warmer.
2. Measure the exact distance of 10m/32.8 feet with a tape or
similar.
3. Place the T3 transponder at the finish of the exact 10 m distance.
4. In the caliper and the Postax program go to Settings->System-
>Test->DpDme.
5. Start the T3 transponder by holding the ultrasonic transceiver on
the Postex close to the centre of the transponder and use the
DME function in the caliper. Wait for two (2) short beep signals
from the transponder. The T3 transponder is now turned on and

Postax
Version 2.
2
User Manual
Revision
:
201
8
-
0
3
-
0
5
17
© Haglöf Sweden AB, 2014. All rights reserved.
will be in ON mode for approx. 20 minutes before automatic turn
off. To turn the transponder OFF, repeat the procedure and wait
for four (4) short beep signals..
6. Go to the zero point on the measured distance and aim the front
of the Postex instrument to the transponder.
7. Press Escape in the caliper..
8. Select CAL and press Enter to confirm.
9. When the digits 10.00 are shown in the display, the calibration of
the Postex ultrasound is ready.
The temperature sensor in the Postex must be given time to adjust to
ambient temperature. The adjustment can take more than 10 minutes.
If the Postex is in a pocket with a temperature of +15°C and the outside
temperature is at -5°C, the measuring result will be 10.40 m instead of
the correct 10.00 m. the temperature pending measuring fault at 10.00
m is approx. 2 cm/°C.
It is important that the temperature sensor is given enough time to
correctly determine the ambient temperature. If you are carrying the
instrument in your pocket you might have to allow up to 10 minutes
before you obtain accurate measurement results.
The error will decrease rapidly, but the final accuracy might take up to
10 minutes to achieve. Taking this into account, calibrating the
instrument before the sensor has had time to stabilize will make the
error “permanent”. The display will then show the correct 30.00 feet for
a short while, but a few minutes later the measurements will be
inaccurate.
CALIBRATING WITH T3 TRANSPONDER ON AN ADAPTER
When the T3 transponder is mounted on an adapter the ultrasound is
spread in a 360 - degrees circle. Measuring can be done from any
optional position to the T3 transponder. The ultrasound travels three (3)
extra centimetres/1,17”, and the measurement result should always be
read in the front of the Postex display on the Postex instrument.
An alternative way of performing calibration is to attach a measuring
tape that passes through the T3 transponder centre at one (1) meter,
and then calibrate the Postex at eleven (11) meters/36,8ft.

Postax
Version 2.
2
User Manual
Revision
:
201
8
-
0
3
-
0
5
18
© Haglöf Sweden AB, 2014. All rights reserved.
Haglöf Sweden®
Haglöf Sweden® AB is a company with long time experience of developing and
manufacturing professional inventory and cruising products. Our solid knowledge
in engineering mechanics has been growing and now also includes high
technology electronics and specialized software development. Today Haglöf
Sweden offers the most complete assortment of products for forest inventory
and cruising on the market, all developed and manufactured in Sweden. Our
portfolio includes increment borers, manual calipers, Walktax and complete
measuring systems including both instruments and software.
Digitech Professional and DP II are the markets leading computer calipers and is
used for cruising, log measuring, harvester calibration and much more. With
many unique accessories and compatibility with other measuring instruments,
DP II is the most complete measuring system for efficient fieldwork.
Haglöf Sweden works continuously to improve, simplify and make more effective
the work for users of our products, and in DP II we guarantee that you have an
instrument that is very flexible and which can be adapted after your demands
and needs. A great amount of software solutions with hundreds of programs
gives a flying start to new users.
More accessories and new solutions- often requested from users are
continuously developed. Please contact us and visit us at
www.haglofsweden.com for more information and news.
Haglöf Sweden’s instrument is not only used within forestry, but also in building,
planning and construction work. Also the police, army, research, archeology,
geology, geography, power line control, fish measuring, conservation is areas
were our products is used.
More than 200 companies around the world represent Haglöf Sweden’s products
and efforts quick and skilled service. For our Swedish customers we are never
more far away than a phone call. If you as a software customer have signed a
support contract, you will be given quick and professional help directly from our
experienced software programmers. Please contact us if you have further
questions.
Haglöf Sweden AB
Box 28, 882 21 Långsele. Address. Klockarg. 8, 882 30 Långsele.
Tel +46 620 255 80. Fax +46 620 205 81. www.haglofsweden.com
Table of contents
Other Haglof Measuring Instrument manuals

Haglof
Haglof Vertex III V1.5 User manual

Haglof
Haglof HCH User manual

Haglof
Haglof Vertex 5 User manual

Haglof
Haglof Vertex 5 User manual

Haglof
Haglof Vertex Laser Geo User manual

Haglof
Haglof DP II User manual

Haglof
Haglof DME User manual

Haglof
Haglof Vertex Laser II VL402 User manual

Haglof
Haglof DP II User manual

Haglof
Haglof MD II User manual