Harbor Freight Tools 90448 User manual

MINI AMPLIFIER THIS IS NOT A MEDICAL DEVICE.
THIS HAS NOT BEEN APPROVED BY THE FDA.
OPERATING INSTRUCTIONS SPECIFICATIONS
DESCRIPTION
Miniature Sound Amplifier Current: 5-8 mA-1.4 Volts A Battery
A312 - Qty. 4
24 Hour
3 Sizes-Ear Tips-Soft Clear Rubber
> 35 dB
- 8 dB
Cleaning Tool, Cleaning Brush
Beige PVC Housing
ITEM
Operating Current
Replacement Batteries
Battery LIfe
Ear Pieces
Signal to noise raito
Sensitivity
Cleaning Tools
Case
SAFETY WARNINGS AND PRECAUTIONS
1. KEEP PRODUCT USAGE AREA CLEAN.
Keep the product free from moisture, oil or lotions.
2. KEEP CHILDREN AWAY FROM PRODUCT
USAGE AREA. Do nor allow children to handle this
product.
3. CHECK FOR DAMAGED PARTS. Before using
this product, carefully check that it will operate
properly and perform its intended function. Check for
damaged parts and any other conditions that may
affect its operation. Replace or repair damaged or
worn parts immediately.
4. DO NOT GET PRODUCT WET. It is not
waterproof.
5. REPLACEMENT PARTS AND ACCESSORIES.
Use only identical replacement parts.
6. HANDLE THIS PRODUCT CAREFULLY. This
delicate Mini Amplifier could be damaged if dropped.
7. BEFORE USING UNIT for the first time, the
battery must be new and fully charged. After each
use, switch to the OFF position. Battery life is only
24 hours.
8. ALWAYS BE AWARE THAT THIS IS NOT A
MEDICAL DEVICE APPROVED BY FDA.
It is designed to inhance hearing. If you need more
volume or improved audio sound, contact your
Doctor or a hearing aid specialist for testing and a
recommendation.
9. DISPOSE OF BATTERY PROPERLY. Never put
in fire. Contact local Hazard Waste Disposal
authorities for proper guidelines.
DESCRIPTION: The Mini Amplifier can improve your
hearing. It fits in your ear comfortably and the 3
SAVE THIS MANUAL: You will need the manual
for the safety warnings and precautions,
assembly instructions, operating and mainte-
nance procedures, parts list and diagram. Keep
your invoice with this manual. Write the invoice
number on the inside of the front cover. Keep
the manual and invoice in a safe and dry place
for future reference.
Reminder: This is not a Medical Device. See you
Doctor for a hearing test to evaluate if you have
permanent hearing loss.
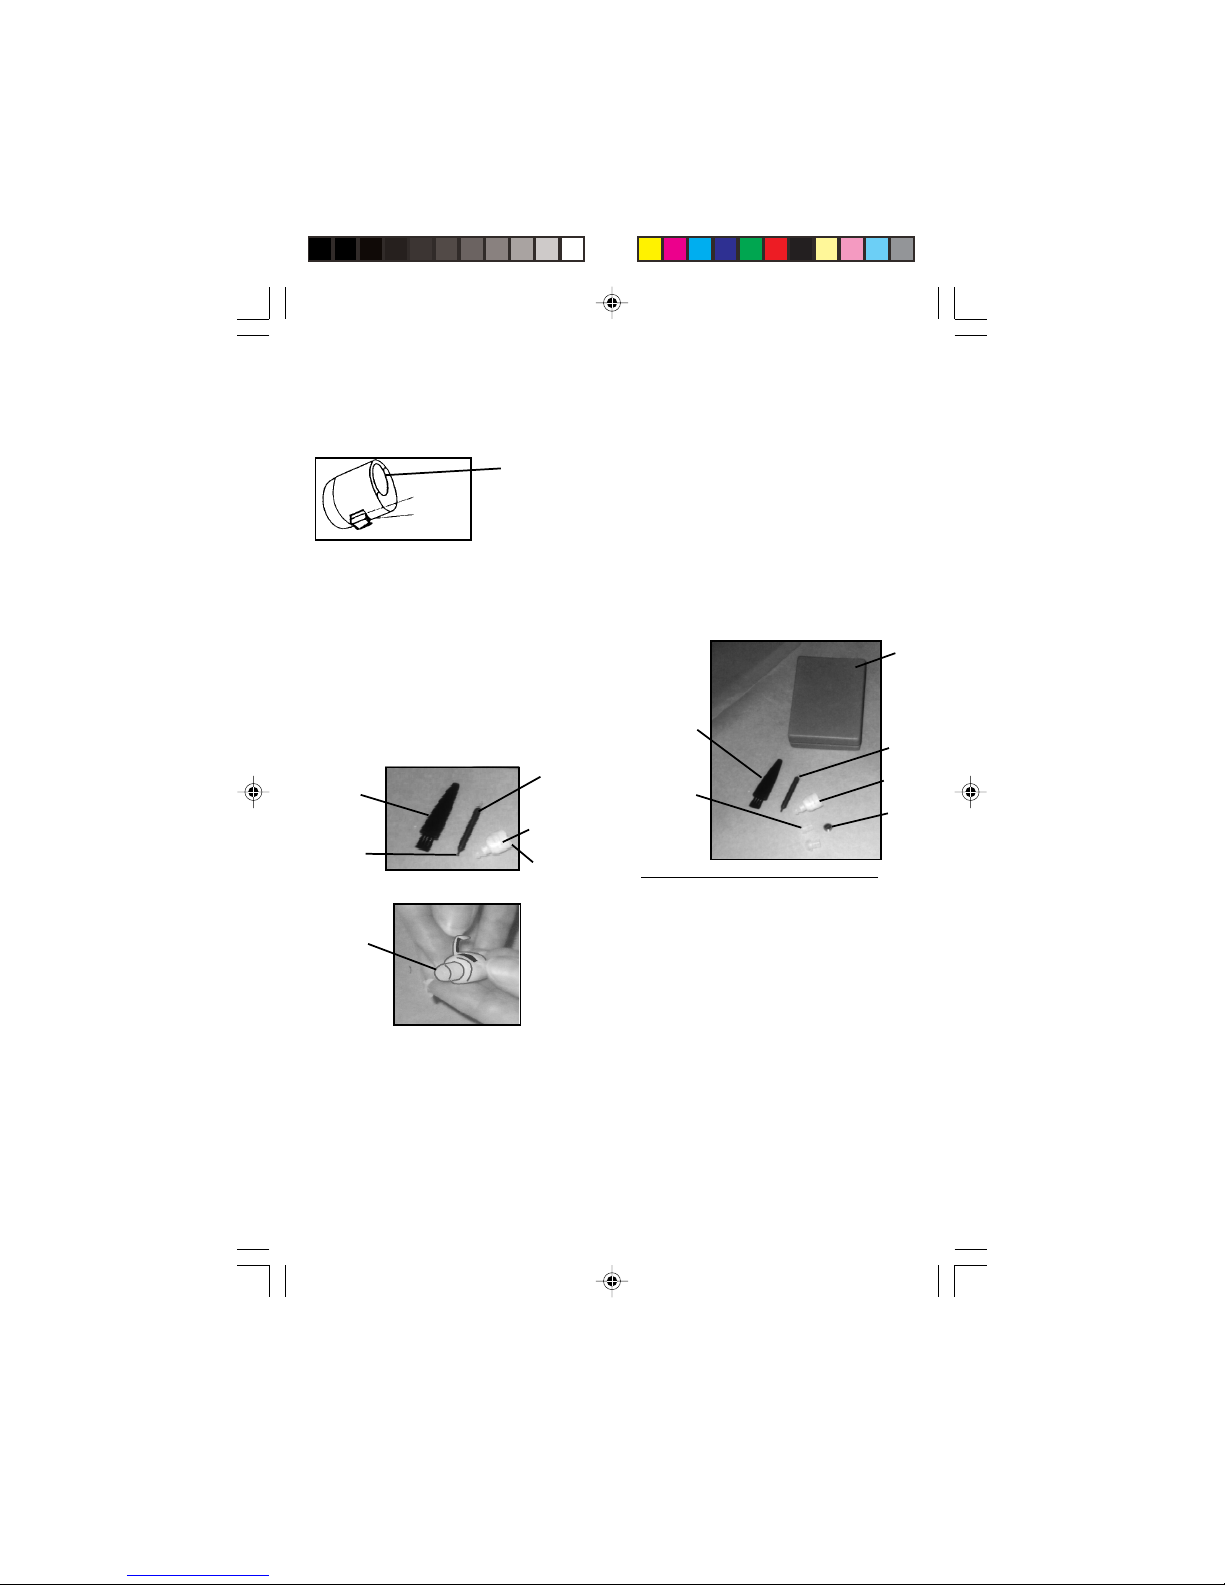
BATTERY INSTALLATION: 1. Open the Battery Door
of the Mini Amplifier (#1) with your finger tips and
insert the Battery (#2). See Figure 1.
2. The Battery Door also acts as the ON/Off Switch.
NOTE: There are two lines engraved into the Battery
Door. When the Battery Door is closed, just in
BETWEEN THE TWO ENGRAVED LINES, it is ON.
See Figure 2.
3. When the Battery Door is closed to the FIRST
ENGRAVED LINE, it is OFF. See Figure 2.
Battery
Door
#2
Battery
Figure 1
#3 Ear
Tip
#1 Mini
Amplifier
VOLUME CONTROL
1. Close the Battery Door to the ON position. Adjust
the Volume Control (turning counterclockwise) to a
lower level. See Figure 2.
2. Insert the Mini Amplifier (#1) deeply into your ear
with the correct size of Ear Tip (#3) for your ear size.
With your finger, slowly turn Volume Control clockwise
until volume is at a suitable level. See Figure 1 & 2.
sizes of soft rubber ear tips assure you a perfect fit.
The volume control allows you to adjust the sound.
It has an ON/OFF switch and the batteries are
replaceable. It comes with a convenient carrying
case that fits in your pocket or purse.
®
90448a mini amp manual.p65 10/9/03, 8:51 AM1

90448 Page 2
3. After use, close Battery Door to the Off position
and place in Case (#4) for safe keeping.
4. When the Battery (#2) is used over 24 hours,
sound will be lower. Try adjusting the level or
replace with an identical A312 Battery. Additional
Batteries are available at a local drug store.
CLEANING
1. Use the Soft Brush (#5) included with your Mini
Amplifier Case to clean Amplifier. Brush back and
forth over the receiver end of the Ear Tip (#3) to
remove any ear wax. This will help amplification
and keep ear wax from building up.
See Figure 3 & 4.
2. If ear wax does build up, use the Plastic Cleaner
(#6) with the steel tip to clean the Ear Tip (#3).
Pass the Steel Tip of the Cleaning Tool (#6)
through the hole of the Ear Tip (#3) to remove the
ear wax. See Figure 3 & 4.
Two lines
ON
One line
OFF
Figure 2
Volume
Control
(Turn Clock-
wise)
#5
Soft
Brush
#6
Plastic
Cleaner
Mini
Amplifier
with
Ear Tip #3
Steel
Tip Volume
Control on
Back of
Mini
Amplifier
Figure 3
#3 Ear
Tip
Figure 4
IMPORTANT
To prevent a “high pitch” sound-
1. After you have turned unit on, set the Volume
Control to it’s lowest level.
See Figure 1.
2. Place the unit in your ear. Remove your hand.
Note: If your hand is covering the “housing”, you will
hear a “high pitch” sound.
3. Slowly adjust the volume to the level that is
comfortable for you.
1
2
3
4
5
6
Mini Amplifier
Battery-A312
Ear Tips
Case
Soft Brush
Plastic Cleaner
with Steel Tip
1
4
3
1
1
1
PART # DESCRIPTION QTY
PARTS LIST
#1
#2
#3
#4
#5
#6
PARTS
DRAWING
PLEASE READ THE FOLLOWING CAREFULLY
THE MANUFACTURER AND/OR DISTRIBUTOR HAS PRO-
VIDED THE PARTS DIAGRAM IN THIS MANUAL AS A REFER-
ENCE TOOL ONLY. NEITHER THE MANUFACTURER NOR
DISTRIBUTOR MAKES ANY REPRESENTATION OR WAR-
RANTY OF ANY KIND TO THE BUYER THAT HE OR SHE IS
QUALIFIED TO MAKE ANY REPAIRS TO THE PRODUCT OR
THAT HE OR SHE IS QUALIFIED TO REPLACE ANY PARTS
OF THE PRODUCT. IN FACT, THE MANUFACTURER AND/OR
DISTRIBUTOR EXPRESSLY STATES THAT ALL REPAIRS AND
PARTS REPLACEMENTS SHOULD BE UNDERTAKEN BY
CERTIFIED AND LICENSED TECHNICIANS AND NOT BY THE
BUYER. THE BUYER ASSUMES ALL RISK AND LIABILITY
ARISING OUT OF HIS OR HER REPAIRS TO THE ORIGINAL
PRODUCT OR REPLACEMENT PARTS THERETO, OR ARIS-
ING OUT OF HIS OR HER INSTALLATION OF REPLACEMENT
PARTS THERETO.
3491 Mission Oaks Blvd., Camarillo, CA 93011
Visit our Web site at http://www.harborfreight.com
Copyright © 2003 by Harbor Freight Tools®. All rights
reserved. No portion of this manual or any artwork
contained herein may be reproduced in any shape or
form without the express written consent of Harbor
Freight Tools. For technical questions please call
1-800-444-3353
4. If you have the volume all the way up and the
sound is still not loud enough, you should replace
the Battery and try again.
MAINTENANCE
1. For better and safer performance, keep all parts of
this product clean and dry.
2. Periodically check to see that all hardware is in
place.
90448a mini amp manual.p65 10/9/03, 8:51 AM2
Other Harbor Freight Tools Amplifier manuals
Popular Amplifier manuals by other brands

Peavey
Peavey Combo 210TX operating guide

Krell Industries
Krell Industries Preamplifier KRS-IA owner's manual

CESVA
CESVA PA-13 user manual

Hifonics
Hifonics Series VIII Aphrodite user guide

Dan D'Agostino
Dan D'Agostino MOMENTUM M400 MONOBLOCK owner's manual

Audiotec Fischer
Audiotec Fischer Helix Precision P400 instruction manual