Harbor Freight Tools 90751 User manual

SOLAR LIGHT
RODENT REPELLER
ASSEMBLY AND OPERATING INSTRUCTIONS
3491 Mission Oaks Blvd., Camarillo, CA 93011
Visit our Web site at http://www.harborfreight.com
Copyright © 2003 by Harbor Freight Tools®. All rights reserved. No portion of
this manual or any artwork contained herein may be reproduced in any shape
or form without the express written consent of Harbor Freight Tools.
For technical questions and replacement parts, please call 1-800-444-3353
90751
90751.p65 10/13/03, 10:46 AM1

Page 2SKU 90751
Specifications
Save This Manual
You will need the manual for the safety warnings and precautions, assembly instructions,
operating and maintenance procedures, parts list and diagram. Keep your invoice with this
manual. Write the invoice number on the inside of the front cover. Keep the manual and
invoice in a safe and dry place for future reference.
Safety Warnings and Precautions
WARNING: When using product, basic safety precautions should always be followed
to reduce the risk of personal injury and damage to equipment.
Read all instructions before using this product!
1. Keep work area clean. Cluttered areas invite injuries.
2. Observe work area conditions. Keep work area well lighted during set-up.
3. Keep children away. Children must never be allowed in the work area during set-up.
Do not let them handle or play with the Solar Rodent Repeller.
4. Store idle equipment. When not in use, products must be stored in a dry location to
inhibit rust. Always lock up products and keep out of reach of children.
5. Use the right product for the job. Do not attempt to force a small product to do the
work of a larger industrial product. There are certain applications for which this
product was designed. Do not modify this product and do not use this product for a
purpose for which it was not intended.
6. Dress properly. Protective, electrically non-conductive clothes and non-skid
footwear are recommended during set-up. Wear restrictive hair covering to contain
long hair.
7. Use eye protection. Always wear ANSI approved impact safety goggles during set-
up.
8. Maintain products with care. Keep products clean for better and safer
performance. Follow instructions for changing accessories.
9. Stay alert. Watch what you are doing, use common sense. Do not assemble any
product when you are tired.
Repellant Range 6600 Sq. Ft.
Dimensions 25-3/4” h x 5-1/2” OD (point)
LED Brightness 1,500 MCD
Battery 1.2 V, 600mA, “AA” Ni-cad Rechargeable
Features: Every 60 seconds sonic sound waves are generated and sent into
the ground to repel sound sensitive gophers. The solar light automatically
comes on at night and shuts off in the morning.
90751.p65 10/13/03, 10:46 AM2

Page 3SKU 90751
10. Check for damaged parts. Before using any product, any part that appears
damaged should be carefully checked to determine that it will operate properly and
perform its intended function. Check for any broken parts or mounting fixtures; and
any other condition that may affect proper operation. Any part that is damaged should
be properly repaired or replaced by a qualified technician.
11. Replacement parts and accessories. When servicing, use only identical
replacement parts. Use of any other parts will void the warranty. Only use accessories
intended for use with this product. Approved accessories are available from Harbor
Freight Tools.
12. Do not set-up the product if under the influence of alcohol or drugs. Read
warning labels if taking prescription medicine to determine if your judgment or reflexes
are impaired while taking drugs. If there is any doubt, do not set-up the product.
13. Maintenance. For your safety, service and maintenance should be performed
regularly by a qualified technician.
14. Pacemaker safety warning. People with pacemakers should consult with their
physician(s) before using this product; operation of equipment in close proximity to a
heart pacemaker could cause interference or failure of the pacemaker.
Warning: The warnings, cautions, and instructions discussed in this instruction manual
cannot cover all possible conditions and situations that may occur. It must be under-
stood by the operator that common sense and caution are factors which cannot be
built into this product, but must be supplied by the operator.
Specific Solar Rodent Repeller Warnings
1. The Solar Rodent Repeller must be installed in a sunny location where it will receive at
least 8 hours of sunlight daily. Do not allow anything to shade or cover the solar panel (on top
of the unit), or it will keep the solar panel from absorbing enough sunlight to operate at full
capacity.
2. Do not place Solar Rodent Repellers less than five feet from each other or they may cause
the lights to flicker from such a close adjacent light source.
3. Position the Solar Rodent Repeller away from any other night lighting sources as they may
interfere with the lights ability to turn on and off automatically.
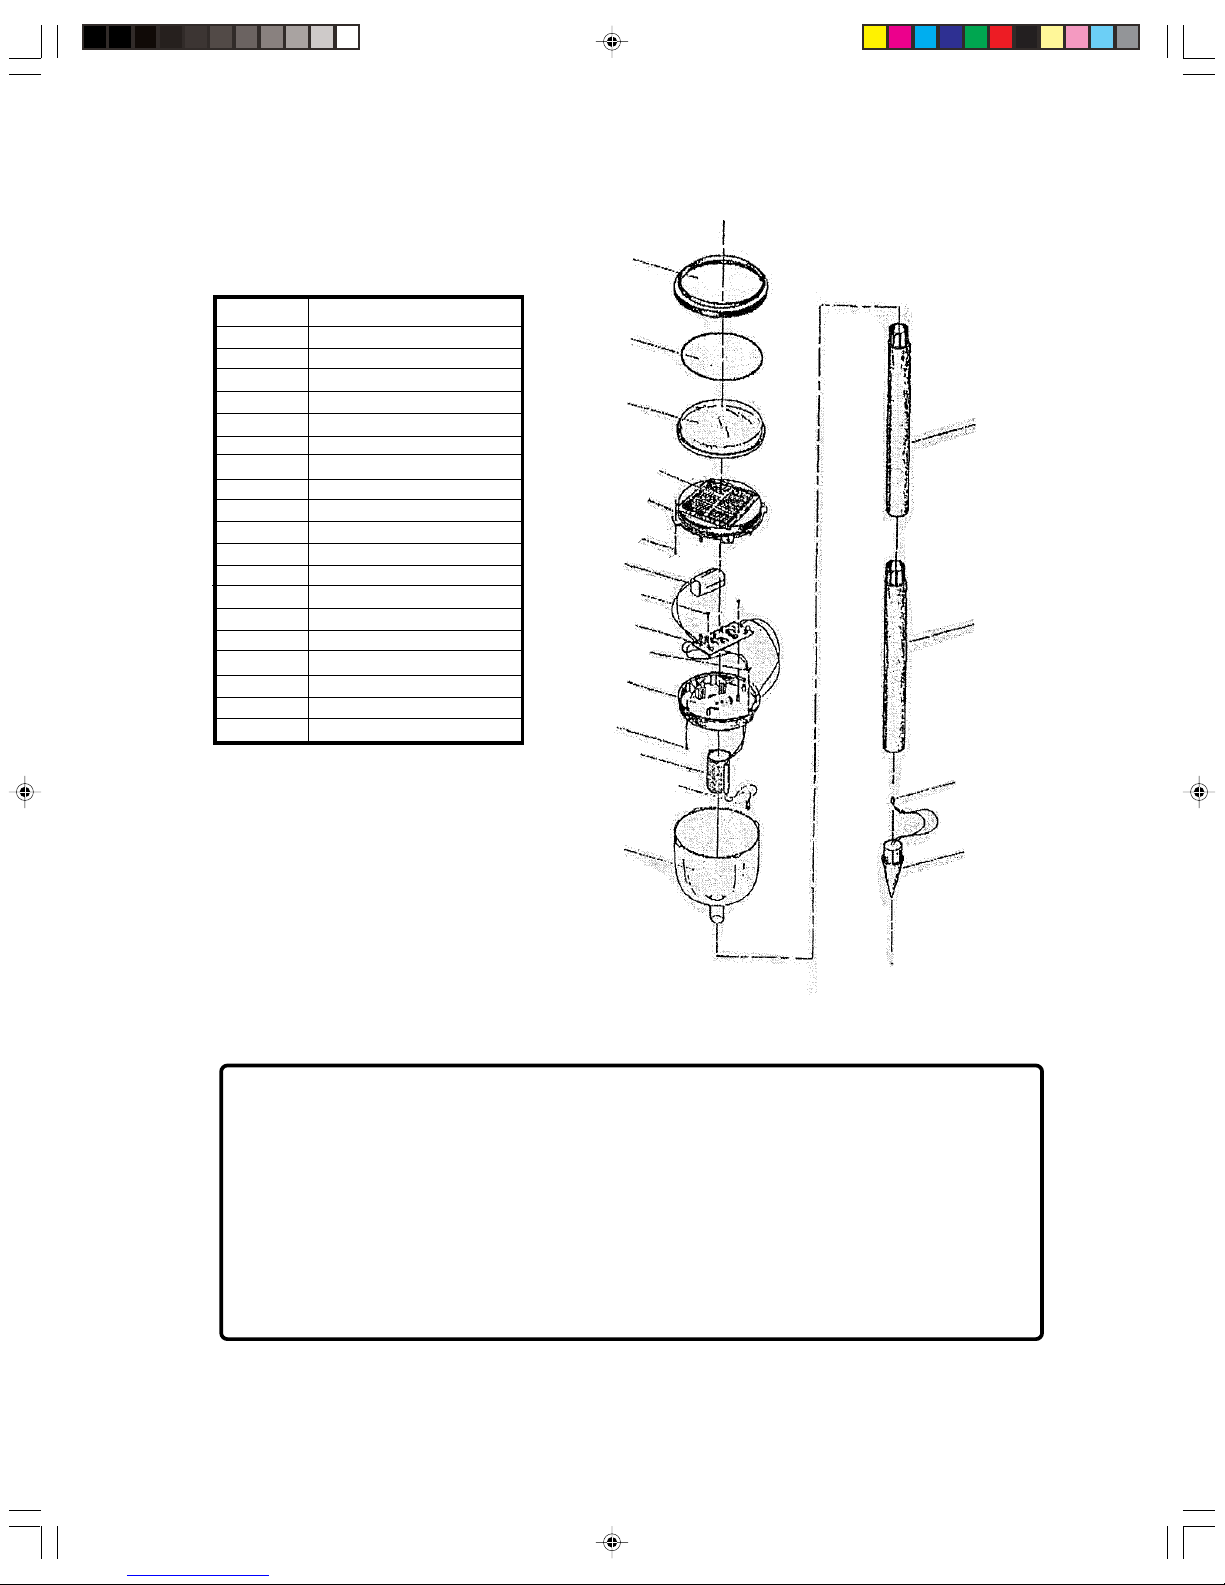
Unpacking
When unpacking, check to make sure the parts listed on page 6 are included. If any parts
are missing or broken, please call Harbor Freight Tools at the number on the cover of this
manual as soon as possible.
90751.p65 10/13/03, 10:46 AM3

Page 4SKU 90751
Assembly
Installation
Note: Stake parts assemble by simply slip-fitting them together.
1. Join Stake 2 (16) to Stake 3 (17). Fit the Lens (15) on the Top Cover (1) by fitting the tabs
on the Lens in the slots on the Top Cover. Insert the tip of Stake 2 (16) into the hole on the
bottom of the Lens (15).
2. Choose a location away from other night time light sources and dig a hole approximately 6
inches in the ground. If the ground is hard, soak it with water prior to digging.
3. Work the pointed tip into the ground without forcing it or hammering it. Forcing or hammer-
ing will break the unit and permanently damage the Solar Rodent Repeller. Fill in the dirt
around the stake and make sure it is stable.
See FIGURE 1.
FIGURE 1
Stake 3 (17)
Stake 2 (16)
Lens (15)
Top Cover (1)
Tab
Slot
Switch
90751.p65 10/13/03, 10:46 AM4

Page 5SKU 90751
Operation
1. Charge the Solar Light in the sun for three days with the On/Off Switch turned off.
2. Remove the Top Cover (1) and turn the switch to “on”. Replace the Top Cover (1). You will
only need to turn on the unit once, and from then on it will switch on and off automatically.
Once you activate the unit, the Rodent Repeller will be sending out Sonic Sound Waves every
60 seconds.
Note: We recommend testing the light by waiting until after the 3 day initial charge period
and then taking the Solar Rodent Repeller indoors into a dark room to make sure it comes on
automatically.
Troubleshooting
Dim Light:
1. The on/off switch contacts may be poor. Turn the switch on and off several times to
alleviate the problem.
2. The battery may be low or under charged. Make sure the Solar Light is located in an
unobstructed location where it will receive 8 hours of sun. Allow the battery to recharge for 3
full, sunny days with the On/Off switch turned off. Overcast days will limit performance.
3. Dirty Solar Panel (on top of the Top Cover (1)). A dirty Solar Panel will not allow the unit to
charge, shortening the life of the battery. Clean the Solar Panel regularly with a damp cloth.
Do not use detergents or solvents.
No Light:
1. An external light source (i.e. streetlight, porch light, flood light) may prevent the light from
turning on. Re-position the Solar Rodent Repeller.
2. Battery may need recharging (3 full days with the On/off switch turned off).
Maintenance
1. This Solar Rodent Repeller is designed for year-round outdoor usage. If you intend to
store it indoors for more than 2-3 days, follow the following protocols:
a. Store in a dry location at room temperature.
b. During storage, the battery still needs some light to keep it charging so it will not become
completely discharged. Store it where it can receive minimal sun or room light.
c. During prolonged storage you must completely discharge and fully charge the battery at
least once a month.
Note: We do not recommend storing the Solar Rodent Repeller for long periods of time.
2. Make sure the Solar Panel is clean and clear of any dirt or debris. Use a soft, damp cloth
to clean the Solar Panel. Do not use bleaches or detergents.
Note: The bulb (LED type) and battery cannot be replaced.
90751.p65 10/13/03, 10:46 AM5

Page 6SKU 90751
NOTE: Some parts are listed and shown for illustration purposes only and are not available
individually as replacement parts.
PLEASE READ THE FOLLOWING CAREFULLY
THE MANUFACTURER AND/OR DISTRIBUTOR HAS PROVIDED THE PARTS DIAGRAM IN THIS
MANUAL AS A REFERENCE TOOL ONLY. NEITHER THE MANUFACTURER NOR DISTRIBU-
TOR MAKES ANY REPRESENTATION OR WARRANTY OF ANY KIND TO THE BUYER THAT HE
OR SHE IS QUALIFIED TO MAKE ANY REPAIRS TO THE PRODUCT OR THAT HE OR SHE IS
QUALIFIED TO REPLACE ANY PARTS OF THE PRODUCT. IN FACT, THE MANUFACTURER
AND/OR DISTRIBUTOR EXPRESSLY STATES THAT ALL REPAIRS AND PARTS REPLACEMENTS
SHOULD BE UNDERTAKEN BY CERTIFIED AND LICENSED TECHNICIANS AND NOT BY THE
BUYER. THE BUYER ASSUMES ALL RISK AND LIABILITY ARISING OUT OF HIS OR HER
REPAIRS TO THE ORIGINAL PRODUCT OR REPLACEMENT PARTS THERETO, OR ARISING
OUT OF HIS OR HER INSTALLATION OF REPLACEMENT PARTS THERETO.
Parts List and Assembly Drawing
1
2
3
4
5
6
7
8
9
10
11
12
13
14
15
16
17
18
19
Part No. Description
1 Top Cover
2 Gasket
3 Transparent Mantle
4 Solar Board
5 Support Board
6 Screw
7 Battery Box
8 Screw
9 PCB Board
10 Switch
11 Bottom Cover
12 Screw
13 Reflective Mantle
14 Two Pin Switch
15 Lens
16 Stake 3
17 Stake 2
18 Two Pin Plug
19 Stake 1
90751.p65 10/13/03, 10:46 AM6
Table of contents
Other Harbor Freight Tools Landscape Lighting manuals
Popular Landscape Lighting manuals by other brands

Volt
Volt RGBW Max All-Star VAL-2045-ABK installation instructions

Jasco
Jasco PRO Series manual

Intermatic
Intermatic Malibu CL905K quick start guide

AMP Lighting
AMP Lighting AFL-40 LI-B-BZ Series Installation & maintenance guide

Intermatic
Intermatic Malibu CM110P quick start guide

Angelo Decor
Angelo Decor Pond Building Series quick start guide

Techmar
Techmar Garden Lights GILVUS + manual

LIGMAN
LIGMAN MASK 2 installation manual

Cooper Lighting
Cooper Lighting MCGRAW-EDISON GAR Specification sheet

Paradise Datacom
Paradise Datacom GL23158 quick start guide

Jula
Jula 422-262 operating instructions

Coopers of Stortford
Coopers of Stortford G045 Instructions for use