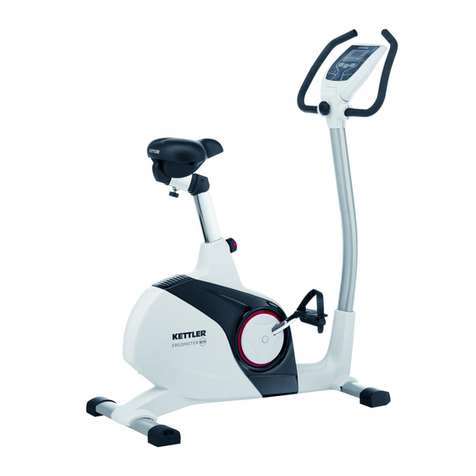
Harison SHARP X2 User manual

SHARP X2
OWNER’S MANUAL
Attention:
Read and follow all instructions in
this owner’s manual.

inspect whether packages are in good condion and whether spare parts are complete in accordance
transport precauons and the list of spare parts.
Prior to exercise, make sure equipment fasteners are in locking state.
Please place the exercise bike on a dry and flat ground.
To prevent the boom of the equipment from damage such as abrasion and stain, put under the boom
object such as a rubber cushion or a thin wood plate.
When starng the exercise, be sure to have no any object within 2m (79 IN) from the exercise bike.
Please use the aached or other appropriate tools to assemble or repair the exercise bike. Aer exercise,
please wipe sweat off it.
Improper use and excessive exercise endanger your health. Please carry out your exercise plan under
direcon of a doctor. He can provide you with excellent suggesons on your exercise gestures, exercise
and your food. Never make exercise aer a meal. This exercise bike is not for the medical purpose.
Please use the exercise bike when the equipment is in good operaon. Make necessary maintenance
original spare parts.
When regulang the equipment, note to observe the best posion and largest adjustable posion to ensure
the adjusted posion is safe.
Unless otherwise specified in the instrucon, this exercise bike is only for use by one person at one me.
During exercise, please wear sports cloths and shoes. The clothes shall not be too long and too wide so
prevent them from being hooked or hung during exercise. The shoes must be suited for the feet and the
shall be an-slip.
When feeling uncomfortable during the process, please stop exercise immediately, and where necessary,
consult a doctor.
Please the sports equipment are not toys for playing with, and thus, shall be used by those people for exercise
purpose.
Children and disabled persons shall use the equipment in the presence of adults or healthy people.
Appropriate measures shall be taken to ensure a child is unable to use the equipment without the supervision
of an adult.
Make sure any part of another person will not be accessible to the equipment during the exercise.
To protect the environment, never discard packages or baeries, and please put them into a designated
dustbin or other waste collecon point.
The exercise bike has a maximum load of 120KGS(265LBS)
Safety Precauons – Please Read the Instrucon before Using!
1. Assembly this product properly using original parts according to the installaon instrucon. Before assembly,
with
2.
3.
4. an
5.
6.
7. the
goals
8. using
9.
10.
11. as to
soles
12.
13.
14.
15.
16.
17. .
1

EXPLODE VIEW
2
UPPER LOWER

No. DESCRIPTION No. DESCRIPTION
1 Main Frame 14 Mobile holder
2 Cap nut 15 Monitor
3 Flat washer 16 Monitor holding bracket
4 Front stabilizer 17 Self-tapping screw
5 Fixing bolt 18 Handlebar
6 Pedal L/R 19 Combinaon screw with
washer
7 Rear stabilizer 20 Handlebar supporter tube
8 Adjustable knob M16 21 L shape knob
9 Water bole 22 Adjustable foot
10 Seat supporter tube 23 Screwdriver
11 Seat horizontal sliding tube 24 Wrench
12 Saddle 25 Plasc cover for brake
13 Screw
PART LIST
3

6 easy steps to assemble then you’re ready to workout – it takes approx 30 mins to assemble.
STEP 1
1. Fix the front (4) and rear stabilizers (7) to the main frame (1).
2. Lock into the proper place with the fixing bolts (5), washers (3) and nuts (2) by the provided screwdriver (23)
– see the illustraons.
STEP 2
1. To loosen the knob, insert the seat supporter tube (10) to the frame, adjusng up to the proper height and
align the holes, then screw the knob back unl ght - see the illustraon A and B.
2. Slide the seat horizontal tube (11) into the seat supporter tube (10), to lock it in place with the adjustable
knob (8) – see the illustraon B and C.
3. Fix the saddle (12) on the seat horizontal tube (11) - see the illustraon C and D.
ASSEMBLY INSTRUCTIONS
4

STEP 3
1. Insert the handlebar supporter tube (20) into the lower part of the mobile holder (14), then into the frame,
to ghten with the L shape knob (21) - see the illustraon.
2. Fix the handlebar (18) on the handlebar supporter tube (20) with the combinaon screws with washers (19)
to ght - see the illustraon.
3. Connect the upper part of mobile holder (14) with the lower part with the screws (13) provided – see the
illustraon.
5

nsert the monitor bracket (16) into the flute on the back of the monitor (15) - see the illustraon.
remember to load the 2AA baeries, and connect the sensor line with the pulse line – see the illustraon.
STEP 5
Firmly fix the pedal marked L (6) to the crank arm marked L in a an-clockwise direcon unl ght.
Now firmly fix the pedal marked R (6) to the crank arm marked R in a clockwise direcon unl ght.
Failure to follow the above instrucons could result in damage to the cranks and pedals.
STEP 4
1. Fix the monitor bracket (16) on the handlebar , to ghten it with one screw (17) by the screwdriver (23).
2. I Then
1.
2.
6

STEP 6
Please adjust the 4 feet (22) under the stabilizers unl flat if don’t feel smooth while riding the bike.
Most Important
Aer all above 6 steps finished, the most important is to make sure all the bolts and parts are
securely fixed before you are riding on the bike.
7

Using your EXERCISECYCLE will provide you with several benefits, it will improve your physical
fitness, tone muscle and in conjuncon with calorie controlled diet help you lose weight.
1. The Warm Up Phase
This stage helps get the blood flowing around the body and the muscles working properly. It will
also reduce the risk of cramp and muscle injury. It is advisable to do a few stretching exercises
as shown below. Each stretch should be held for approximately 30 seconds, do not force or jerk
your muscles into a stretch - if it hurts, STOP.
2. The Exercise Phase
This is the stage where you put the effort in. Aer regular use , the muscles in your legs will
become more flexible. Work to your own pace but it is very important to maintain a steady
tempo throughout. The rate of work should be sufficient to raise your heart beat into the target
zone shown on the graph below.
SIDE BENDS
FORWARD
BENDS
OUTER THIGH
INNER THIGH
CALF / ACHILLES
HEART RATE
TARGET ZONE
MAXIMU
M
COOL DOWN
AGE
EXERCISE INSTRUCTIONS
8

EXERCISE MONITOR INSTRUCTION MANUAL
NO:0003-2
SPECIFICATIONS:
TIME(TMR)……………………………………………………………… .…00:00-99:59
SPEED(SPD) …………………………………………………………0.0-99.9KM/H(621.3MPH)
DISTANCE(DIST) ……………………………………………………… 0.00-99.99KM(62.1MI)
CALORIES(CAL) ……………………………………………………………0.0-999.9KCAL
※TOTAL DISTANCE(ODO) ………………………………………………0-9999KM(6213MI)
※PULSE(PUL) ……………………………………………………………… . …40-240BPM
KEY FUNCTIONS:
MODE: This key lets you to select and lock on to a particular function you want.
Hold the key 3 seconds to reset all of the values to zero.
RESET: The key to reset the value to zero by pressing the key.
OPERATION PROCEDURES:
1. AUTO ON/OFF
◆The system turns on when any key is pressed or when it sensor an input from the speed sensor.
◆The system turns off automatically when the speed has no signal input or no key are pressed for
approximately 4 minutes.
2. MODE
To choose the SCAN or LOCK if you do not want the scan mode, press the MODE key when the pointer
on the function you want which begins blinking.
FUNCTIONS:
1. TIME: Press the MODE key until pointer lock on to TIME. The total working time will be shown when
starting exercise.
2. SPEED: Press the MODE key until the pointer advance to SPEED. The current speed will be shown.
3. DISTANCE: Press the MODE key until the pointer advance to DISTANCE. The distance of each workout
will be displayed.
4. CALORIE: Press the MODE key until pointer lock on to CALORIE. The calorie burned will be displayed
when starting exercise.
5. ODOMETER (IF HAVE): Press the MODE key until the pointer advance to ODOMETER. The total
accumulated distance will be shown.
6. PULSE (IF HAVE): Press the MODE key until the pointer advance to PULSE. User’s current heart rate
will be displayed in beats per minute. Place the palms of your hands on both of the contact pads (or put
ear-clip to ear), and wait for 30 seconds for the most accurate reading.
SCAN: Automatically display changes every 4 seconds.
BATTERY:
If improper display on monitor, please reinstall the batteries to have a good result.
9

HARISON FITNESS LTD
113 BARKSDALE PROFESSIONAL CENTER NEWARK,
DE 19711 USA
www.harisonfitness.com
info@harisonfitness.com
Table of contents
