12 MACRO PROGRAMMING
Programming the Remote Operating Products With the USR 1
NOTE: While entering commands for Power
On/Off of any device during a macro sequence,
press the Mute button. DO NOT press the actual
Power button.
3. When all the steps have been entered,
press the Sleep button to enter the
commands. The red light under the Device
Selectors will blink and then turn off.
Example: To program the Macro 1 button so
that it turns on an AVR, a TV and a cable box,
follow these steps:
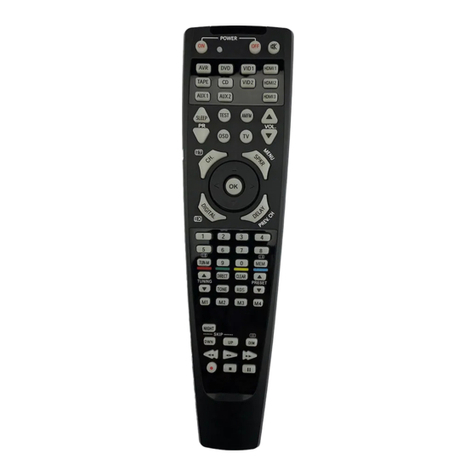
1. Press the Macro 1 and Mute buttons at the
same time and then release them.
2. Note that the Program LED will flash amber.
3. Press the AVR Selector.
4. Press the Mute button to store the AVR’s
power on command.
5. Press the VID 2 Device Selector button to
indicate the next command is for “TV Power
On.”
6. Press the Mute button to store the TV Power
On command.
7. Press the VID 3 Device Selector button to
indicate the next command is for “Cable
Power On.”
8. Press the Mute button to store the Cable
Power On command.
9. Press the Sleep/Channel Up button
to complete the process and store the macro
sequence.
After following these steps, each time you press
the Macro 1 button, the remote will send the
Power On/Off command.
13 MACRO PROGRAMMING 14 OPERATING PRODUCTS
Erasing Macro Commands
To remove the commands that have been
programmed into one of the Macro buttons,
follow these steps:
1. Simultaneously press the Mute button
and the Macro button that contains the
commands you wish to erase.
2. Note that the Program LED will flash
amber, and the LED under the AVR
Selector will turn red.
3. Within ten seconds, press the Surround
Mode Selector/Channel Down button.
4. The red LED under the AVR Selector
will go out, and the Program LED will
turn green and flash three times before
it goes out.
5. When the Program LED goes out, the
Macro has been erased.
Once the USR 1 has been programmed with the
codes for the desired products, it operates in the
same manner as traditional remotes.
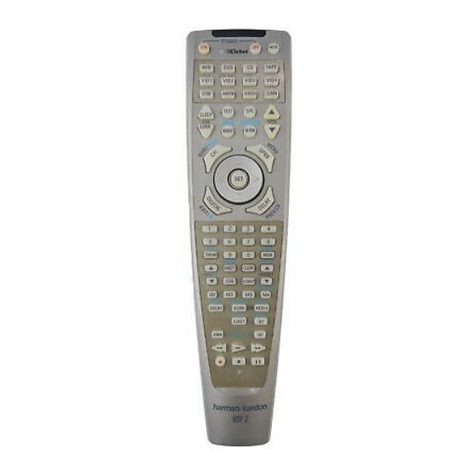
To change between devices, simply press one of
the Device Selector buttons at the top of the
remote. When one of these buttons is pressed, a
red LED underneath the button will momentarily
flash to confirm your device selection. The red
LED will also light when any button programmed
for a function associated with that device is
pressed. If the red LED for a device does NOT
light when a function button is pressed, it is
your indication that the button does not work in
conjunction with the device. For example, when
the AVR Device Selector has been pressed to
operate an audio/video receiver, the red light
under the AVR button will go on when the
Volume Up button is pressed. However, it will
not normally light when the Stop button is
pressed as this is not an AVR function. How
the USR 1 responds to specific commands is
greatly dependent on the device in use and
the way in which the specific buttons have
been programmed.
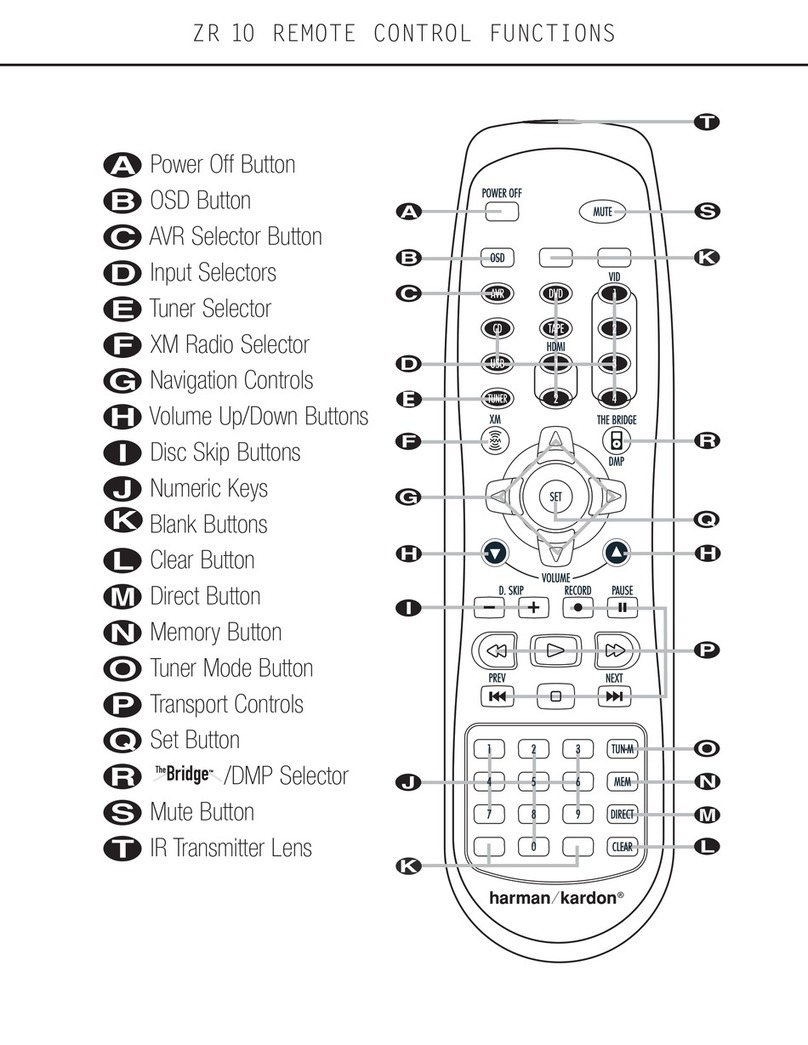
For use with Harman Kardon products, consult
the owner’s manual that came with the product
to find the functions for specific buttons. If you
do not have the manual for a Harman Kardon
product, you may be able to download it at
no charge from Harman Kardon’s Web site,
www.harmankardon.com.
When operating a device other than a
Harman Kardon product, the controls may not
correspond exactly to the functions printed on
the remote or button. Some commands, such as
the volume control, work normally while other
buttons will change their function so that they
correspond to a secondary label on the remote.
For example, the Sleep and Surround
mode selector buttons also function as the
Channel Up and Channel Down buttons
when operating most TV sets,VCRs or cable
boxes. The Channel Up/Down indication is
printed directly on the remote. For many
standard CD players, cassette decks,VCRs
11 MACRO PROGRAMMING
2. When the red LED under the Device
Selector turns red and the Program LED
flashes amber, release the buttons.
3. Press and release the same Device Selector
again.
4. Press the 9button three times.
5. The Program LED will turn off and the red
light under the Device Selector will flash on
and off once to indicate that the codes have
been erased and the USR 1 has returned to
its factory default codes. Macro commands
and “Punch-Through”programming will
remain active, but may not have the effect
you originally intended.
Macro Programming
Macros enable you to easily repeat frequently
used combinations of commands with the
press of a single button on the USR 1. Once
programmed, a macro will send out up to 19
different remote codes in a predetermined
sequential order, enabling you to automate the
process of turning on your system, changing
devices, changing to a favorite channel with one
button press, or other common tasks.The USR 1
can store up to five separate macro command
sequences: one that is associated with the
Power On button, and four more that are
accessed by pressing the Macro buttons.
1. Press the Mute button and the Macro
button to be programmed or the Power On
button at the same time. Note that a
Device Selector will light red, and the
Program LED will flash amber.
2. Enter the steps for the macro sequence by
pressing the button for the actual command
step. Although the macro may contain up to
19 steps, each button press, including those
used to change devices, counts as a step.
The Program LED will flash green to
confirm each button press as you enter
commands.
USR 1
Universal
Remote Control
OWNER’S MANUAL
Power for the Digital Revolution.
™
Introduction
2INTRODUCTION
Installing the Batteries
4PROGRAMMING THE REMOTE
3INSTALLING THE BATTERIES
Programming the Remote Programming the Remote Programming the Remote Programming the Remote
buttons. If the unit turns off, the correct
code has been entered. Press the Device
Selector again, and note that the red light
will flash three times before going dark to
confirm the entry.
5. If the device to be programmed in does NOT
turn off, continue to enter three-digit code
numbers until the equipment turns off.
At this point, the correct code has been
entered. Press the Device Selector again
and note that the red light under the
Device Selector will flash three times
before going dark to confirm the entry.
6. Try all of the functions on the remote to
make certain that the product operates
properly. Keep in mind that many
manufacturers use a number of different
combinations of codes, so it is a good idea
to make certain that not only the Power
control, but the Volume, Channel and
Transport controls work as they should. If
functions do not work properly, you may
need to use a different remote code, or
choose the best remote code and program
some individual buttons as explained below
in the “Learning Codes”section.
7. If a code cannot be entered to turn the
unit off, if the code for your product does
not appear in the tables in this manual,
or if not all functions operate properly, try
programming the remote with the Auto
Search Method.
For Harman Kardon products, consult the
Harman Kardon Products code table to locate
your model. Program the code on the far left
after pressing the Device Selector shown in
the column in which the code is found. For
example, if you wish to program an AVR 85,
you will need to press the AVR Device
Selector and then program code 002 into the
USR 1 following the instructions shown. The
additional codes listed to the right will
automatically be programmed into the CD,
DVD and Tape Device selectors, respectively.
Harman Kardon’s USR 1 is a full-featured, eight-
device remote control that is specially designed
as a replacement for the remote controls used
with most Harman Kardon components manu-
factured since 1995, along with some products
produced before 1995. In addition to the codes
used for operating Harman Kardon products, the
USR 1 may be programmed with the commands
for most contemporary home entertainment
products, either from the extensive built-in code
library, or via a simple “learning”technique,
regardless of brand. To further extend the
flexibility of the USR 1, it may also be “taught”
the codes for most infrared remote controls even
when they are not in the built-in library. Discrete
controls are available for operating the transport
functions of CD, DVD and tape machines, and
users may create up to five macro command sets
for automating frequently repeated actions.
NOTE: Although every effort has been
made to include all features and
functions available on the original
remotes, in some instances not all
functions will be available. In cases
where you still have the original,
working remote, you may attempt to
program individual button codes into
the USR 1 using the method described
later in this manual.
You may reprogram those device selectors
to operate other products.
Although every effort has been made to
program the USR 1 with all of the functions
of the original Harman Kardon remotes, some
functions may not be available, although
individual buttons can be programmed if
you have the original working remote.
Auto Search Method
If the unit you wish to program into the USR 1
is not listed in the code tables in this manual or
if the code does not seem to operate properly,
you may wish to program the correct code using
the Auto Search method that follows:
1. Turn on the product that you wish to
program into the USR 1.
2. Press the Device Selector for the type of
product to be entered (e.g., VCR, TV) and the
Mute button at the same time. Hold both
buttons until the red light under the Device
Selector stays lit. Note that the next step
must take place while the red light is on, and
it must begin within 20 seconds after the
light appears.
3. Point the USR 1 towards the product to be
programmed, and press either the
⁄
or
¤
button. Each press will send out a series of
codes from the remote’s built-in database.
When the unit being programmed turns off,
release the
⁄/¤
button, as that is your indi-
cation that the correct code is in use.
4. Press the Device Selector, and note that
the red light under the Device Selector will
flash three times before going dark to con-
firm the entry.
5. Try all of the functions on the remote to
make certain that the product operates.
Keep in mind that many manufacturers use
a number of different combinations of codes,
and it is a good idea to make certain that
not only the Power control works, but also
that the Volume, Channel and Transport
5PROGRAMMING THE REMOTE 6PROGRAMMING THE REMOTE 7PROGRAMMING THE REMOTE 8LEARNING CODES 9LEARNING CODES 10 LEARNING CODES
controls, as appropriate. If all functions
do not work properly, you may need to
Auto-Search for a different code, or enter
a code via the Direct Code Entry method, or
choose the best remote code and program
some individual buttons as explained below
in the “Learning Codes”section.
Code Readout
When the code has been entered using the Auto
Search method, it is always a good idea to find
out the exact code so that it may be easily reen-
tered if necessary. You may also read the codes
to verify which device has been programmed to
a specific Control Selector button.
1. Press and hold both the Device Selector
for the device you wish to find the code
for and the Mute button at the same time.
Note that the Program LED will initially
turn amber. Release the buttons and begin
the next step within 20 seconds.
2. Press the Set button. The Program LED
will then blink green in a sequence that
corresponds to the three-digit code, with a
one-second pause between each digit. Count
the number of blinks between each pause to
determine the digit of the code. One blink is
the number 1, two blinks is the number 2, and
so forth. A series of three rapid flashes is used
to indicate a “0.”
Example: One blink, followed by a one-second
pause, followed by six blinks, followed by a
one-second pause, followed by three fast flashes
indicates that the code has been set to 160.
For future reference, enter the Setup Codes for
the equipment in your system here:
AVR/AUDIO ______ DVD ______________
CD______________ VID1/VCR __________
VID2/TV__________ VID3/CBL/SAT______
VID4 ____________ TAPE______________
Learning Codes
In addition to using codes from its internal code
library, the USR 1 is able to “learn”codes from
remotes that may not be in the code library. You
may also use this function to “learn over”the
codes from a preprogrammed device to add
functions not included in the preprogrammed
codes. To learn or transfer codes from an IR
remote to the USR 1, follow these steps:
NOTE: Not all buttons on the USR 1 may be
taught codes from another remote. Only the
following buttons may be programmed for a
remote code: Power On, Power Off, Mute,
Channel +, Channel –, T/V, Volume Up, Volume
Down, CH./Guide, Menu/Spkr, ‹,›,
⁄
,
¤
, Set,
Digital/Exit, Delay/Prev. Ch., the 0 to 9 “Numeric
Keys”, Play, Stop, FF, REW, Record, Pause, Skip
Down, Skip Up.
1. Place the front of the original remote with
the code being sent so that it is facing
the USR 1’s IR Transmitter Window
“head-to-head.”The two remotes should
be between one and three inches apart.
2. Select the button on the remote that you
wish to use as the device selector for the
codes about to be entered. This may be any
of the Device Selectors.
3. Press the Device Selector button chosen
and the Learn button at the same time.
Hold these buttons until the Program LED
flashes amber and the light under the
Device Selector button turns red. Release
the buttons.
4. Press the button on the USR 1 that you wish
to program. Note that the Program LED
will stop flashing.
5. Within five seconds, press and hold the
button on the original remote that you
wish to “teach”into the USR 1. When
the Program LED turns green three times,
release the button. Note that the Program
LED will then begin to flash amber again.
NOTE: If the Program LED turns red
during Step 5 or 6, the programming was
not successful. Repeat the steps to see whether
the code will “take.”
6. Repeat Steps 4 though 6 for each button on
the source remote that you wish to transfer
to the USR 1.
7. Once all codes have been transferred from
the original source remote to the USR 1,
press the Learn button.
8. Repeat Steps 1 through 7 for any additional
remotes you wish to “teach”into the
USR 1.
NOTE: Each programmable key may be
programmed with a separate function for each
of the eight devices the USR 1 is capable of
controlling. Note, also, that once a key is
programmed for a specific function, any code
previously stored for that specific button/device
combination will be erased.
Erasing Learned Codes
The USR 1 allows you to remove or erase the
code learned into a single button for a single
device, to remove or erase the code set for all the
codes that have been programmed into specific
device buttons, or to erase all commands that
have been learned to all devices.
To erase a single learned code from within a
single device’s settings, follow these steps:
1. Press and hold both the Device Selector
within which the individual button to be
erased has been programmed and the
Learn button.
2. When the red LED under the Device
Selector turns red and the Program LED
flashes amber, release the buttons.
3. Press and release the Device Selector again
for the device within which the individual
button to be erased has been programmed.
4. Press the 7button three times.
5. Press and release the individual button for
which the code is to be erased.The Program
LED will blink green two times and then
return to amber.
6. To erase other buttons within the same
device, press them as noted in Step 5.
7. When all buttons to be erased have been
pressed, press the Learn button to complete
the process.
To erase all codes within a single device, follow
these steps:
1. Press and hold both the Device Selector for
which you wish to erase the codes and the
Learn button.
2. When the red LED under the Device
Selector turns red and the Program LED
flashes amber, release the buttons.
3. Press and release the Device Selector again
for the device whose code you wish to erase.
4. Press the 8button three times.
5. The Program LED will turn off and the red
light under the Device Selector will flash on
and off once to indicate that the codes have
been erased.
To erase all codes that have been programmed to
all devices in the remote, follow these steps:
1. Simultaneously press any Device Selector
and the Learn button.
To install the batteries, first remove the cover
on the back side of the remote by placing your
thumb on the round indented area on the
battery compartment cover. Gently push down
and then up away from the remote. The cover
will slide off.
Place the three AAA batteries in the
compartment as shown in the diagram below,
being certain to observe the “+”and “–”
polarity indications on the batteries and in
the bottom of the compartment.
To replace the cover, place it in the grooved
edges of the compartment side. Then, gently
slide the cover down towards you until you
hear and feel the latch click as indication of
a secure closure.
When the remote will not be used for a
significant length of time (over a few weeks)
it is always a good idea to remove the batteries
to prevent the possibility of damage to the
remote due to corrosion or leakage.
When replacing batteries, always replace all
three at the same time and observe any local
regulations that may apply in your area with
regard to the proper disposal of used batteries.
We recommend the use of high-quality alkaline
batteries in the USR 1.
The USR 1 is shipped from the factory already
programmed to operate most current-model
Harman Kardon AV receivers, processors, CD
and DVD players, CD-R/RW decks and cassette
decks. However, for older Harman Kardon
products, or if you find that the preset codes
do not properly operate your Harman Kardon
products, or if you wish to use the remote with
products made by manufacturers other than
Harman Kardon, you may use a variety of
methods to program in the code information
from the USR 1’s built-in IR code library or to
directly program the codes from another remote.
Before starting the programming process, please
note that throughout these instructions you will
see mention of the “Program LED”. This refers
to the three-color LED that is at the very top of
the remote between the ON and OFF buttons.
Depending on the specific programming
operation underway, this LED may light or flash
in green, red or amber. During normal operation
it will not light.
Direct Code Entry
This method is the easiest way to program your
remote to work with different products.
1. Use the tables in the following pages to
determine the three-digit code or codes that
match both the product type (e.g., VCR, TV),
and the specific brand name. If there is more
than one number for a brand, make note of
the different choices.
2. Turn on the product you wish to program
into the USR 1.
3. Press and hold both the Device Selector
for the product you wish to control (e.g.,
VCR, TV) and the Mute button at the same
time. When the Program LED turns amber
and begins flashing, release the buttons.
It is important that you begin the next step
within 20 seconds.
4. Point the USR 1 towards the product to be
programmed, and enter the first three-digit
code number using the Numeric Key
