3
CAUTION
Installation
WARNING
CAUTION
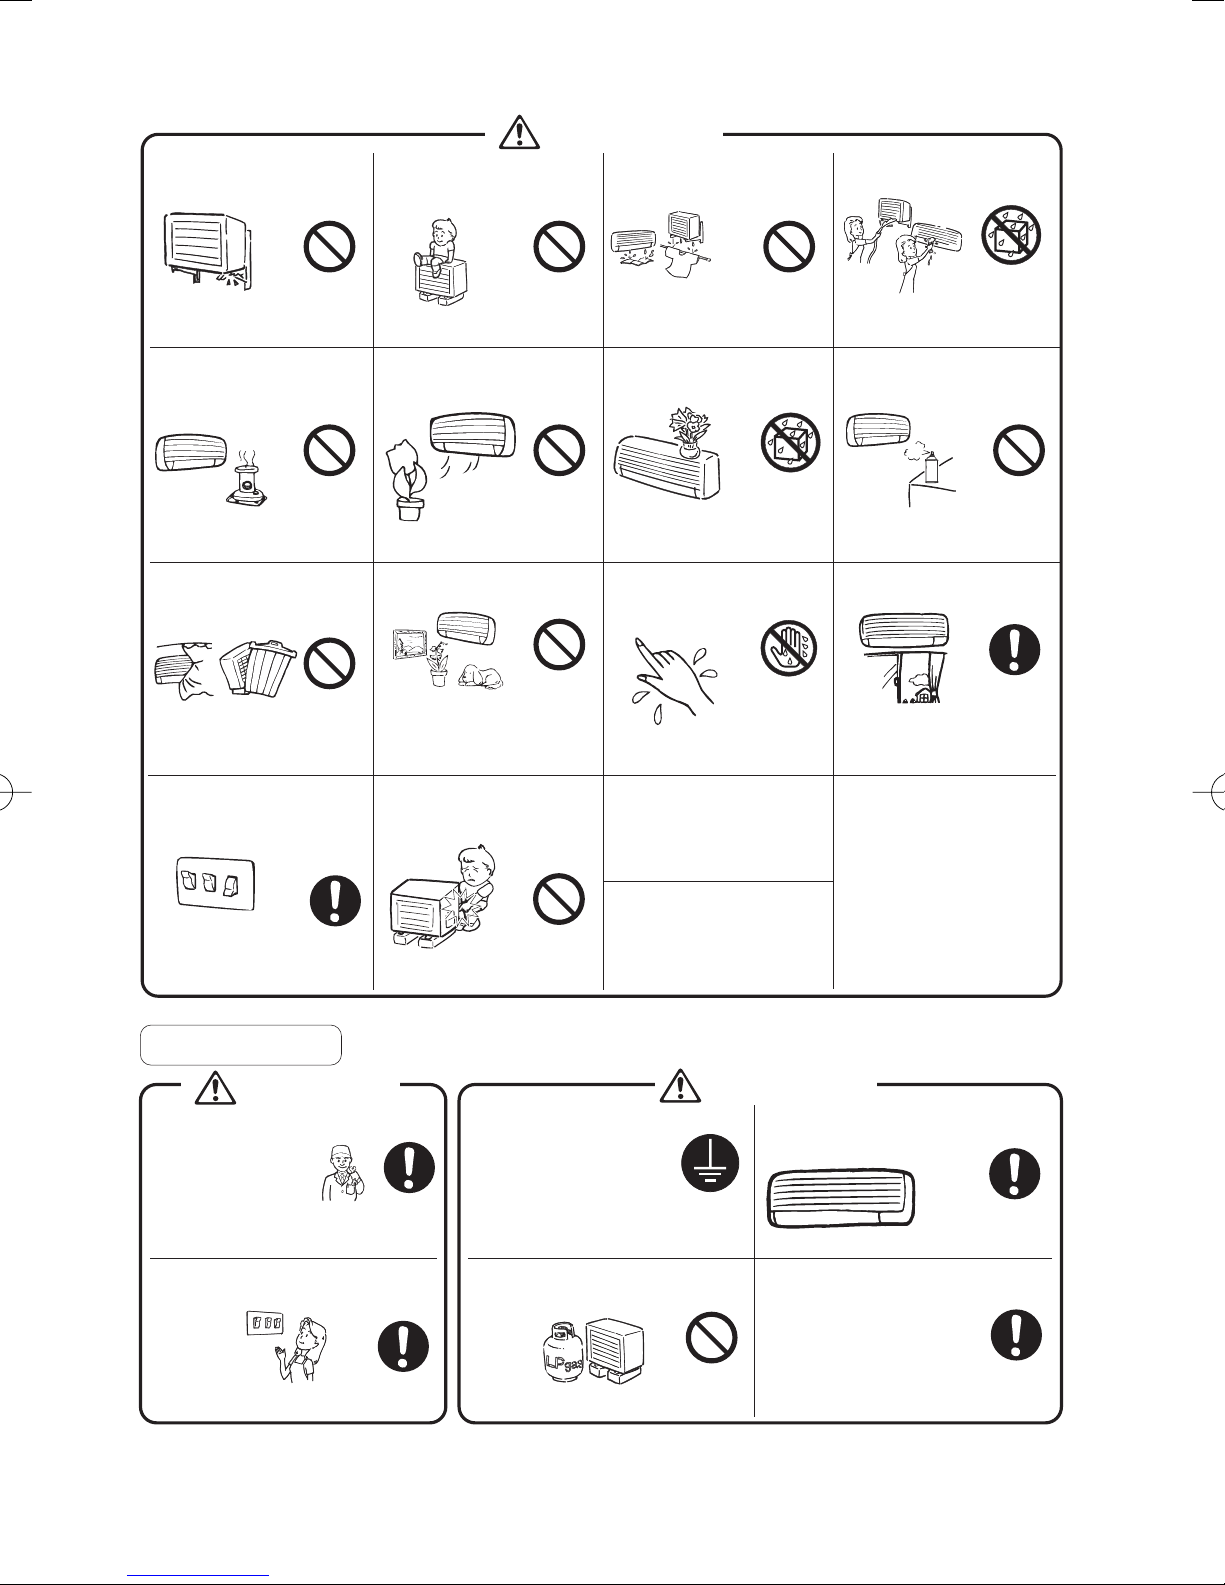
After a long use,
check the unit stand
and fittings for damage.
The unit may drop and cause
injury if damage is left
unrepaired.
Do not stand or sit on the outdoor
unit. Do not place any object on the
unit. Do not remove the fan guard.
The object or the person may
fall down or drop, causing injury.
Do not place a burning appliance
in places exposed to the airflow
from the unit or under the indoor
unit.
It may cause incomplete combus-
tion or deformation of the
unit from heat.
Do not expose young children,
plants or animals directly to
the airflow.
It may cause adverse effects on
the plant or the animal.
Do not block air inlets
or outlets.
Impaired airflow may result in
insufficient performance or
troubles.
Do not use the air conditioner
for preservation purposes.
Do not use it for preserving precision
instruments, foods, plants, animals,
works of fine arts etc.
Performance or quality may deteriorate
and animal or plant life may be shorter.
Do not touch the air inlets
or aluminum fins of the
outdoor unit.
You may get injured.
Before cleaning, be sure
to stop the operation and
turn the breaker OFF.
As a fan is rotating at a high speed,
cleaning during operation may cause
injury.
The air conditioner must be
earthed.
Incomplete earthing may result
in electric shocks or fire.
Do not connect the earth line to a gas pipe,
water pipe, lightening rod, or a telephone
earth line.
Do not connect the air conditioner
to a power supply different from
the specification.
It may cause trouble or fire.
Do not install the air conditioner
in places where flammable gas
may leak.
If leaked gas should accumulate near the unit,
fire may occur.
Arrange the drain hose to ensure
smooth drainage.
Incomplete drainage may cause wetting of
the building, furniture etc.
Do not operate the air
conditioner with a wet
hand.
It may cause an electric shock.
Ventilate the room from
time to time.
Be careful especially when using
a burning appliance in the same
room. Insufficient ventilation may
cause shortage of oxygen.
Do not place a vessel
containing water on the
unit.
Water may penetrate into the unit
and degrade electrical insulations,
resulting in an electric shock.
Do not leave sprays and
the like within 1m from
the air outlet.
Such containers may explode by
hot air coming from the indoor or
outdoor unit.
Do not wash the unit
with water.
It may cause an electric shock.
Do not place under the indoor
or outdoor unit anything which
must be kept away from moisture.
Indoor unit : Moisture in the air
may condense and drip in certain conditions.
Outdoor unit : During cooling operation, conden-
sation may drip from the piping connections.
Do not attempt to install the air
conditioner by yourself.
Incorrect work will result in water leakage, electric
shocks or fire. For installation, consult the service
shop where you bought the unit or a qualified technician.
Consult the service
shop or a qualified
technician.
Depending on the environment,
an earth leakage breaker must be
installed.
Lack of an earth leakage breaker may result
in electric shocks or fire.
Water
Prohibited
Water
Prohibited
Prohibited Prohibited
Prohibited
Prohibited
Prohibited
Prohibited
Prohibited
Prohibited
Prohibited
Prohibited
The appliance is not
intended for use by
young children or infirm
persons without supervi-
sion.
Young children should
be supervised to ensure
that they do not play with
the appliance.
Do not place objects in direct
proximity of the outdoor unit
and do not let leaves and
other debris accumulate
around the unit.
Leaves are a hotbed for small
animals which can enter the unit.
Once in the unit, such animals
can cause malfunctions, smoke
or fire when making contact with
electrical parts.
Water
Prohibited
3P202922-1A.indd33P202922-1A.indd3 2007/04/1616:14:452007/04/1616:14:45