9English
OPERATION
• Verify that the power cord is disconnected from
theoutlet.
• In order to prepare your vacuum for dry
vacuuming, make sure the cartridge filter
completely covers the filter cage against the
powerhead.Yourwet/dryvacuumcomeswith
thecartridgefilterpre-installed.Forinstallation
instructions,seepage13.
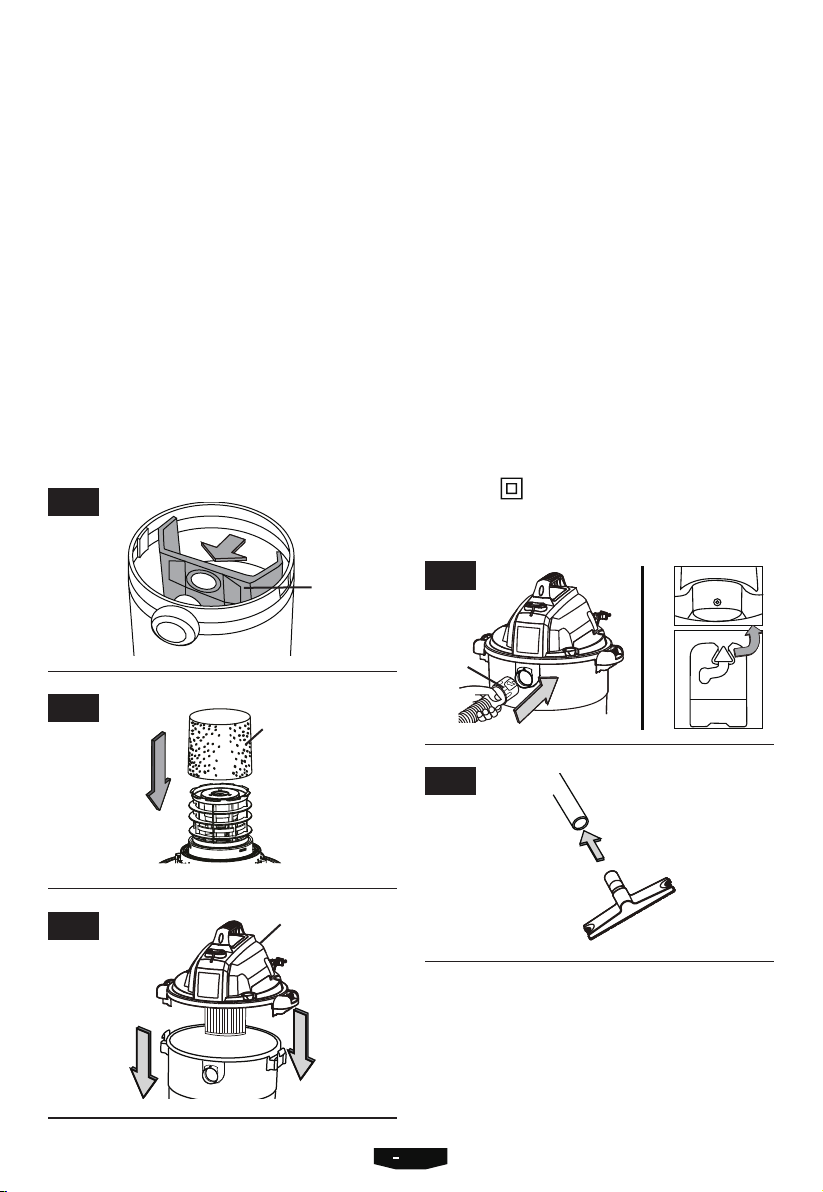
• Place the filter retainer on the top of the
cartridge filter and tighten down by turning the
retainerhandleclockwise.
• Optional:Forimproveddustfiltration,fitthedust
bag flange onto the inlet port, taking care not to
damagethebag.
• Place the power head back on the collection
tankandsecureitinplaceusingthelatches.
• Insert the locking end of the hose into the
vacuum port on the collection tank and lock
intoplace.
• Push the required attachment onto the free end
ofthehoseorextensionwand.
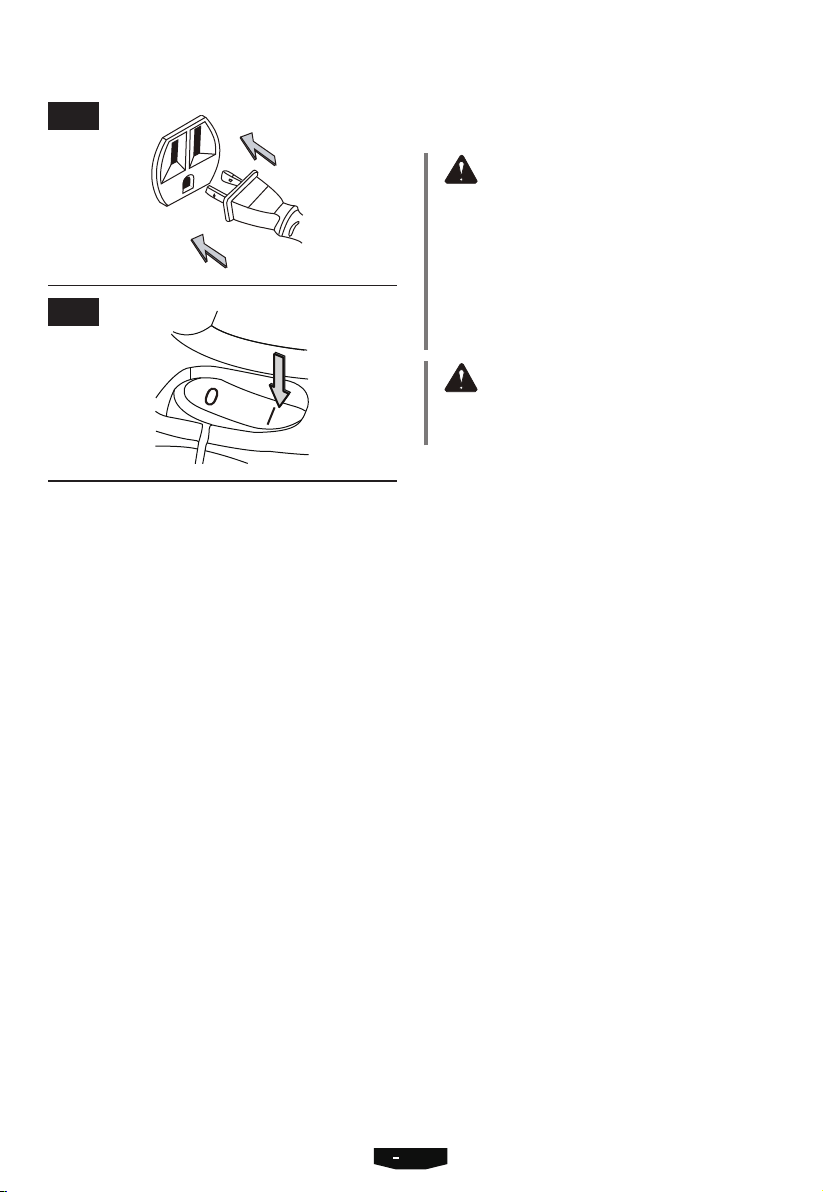
• Verifythattheswitchisinthe‘O’OFFposition
before plugging the power cord into the power
outlet.Plugthepowercordintotheoutlet.
• Turn the motor on by flipping the switch to the
‘I’ONpositionandbeginvacuuming.
• Onceyouhavecompletedvacuuming,flipthe
switchtothe‘O’OFFpositionandunplugthe
powercordfromtheoutlet.
O = OFF I = ON
DO NOT USE THE CARTRIDGE FILTER FOR
LIQUID VACUUMING.
DO NOT USE THE DUST BAG FOR LIQUID
VACUUMING.
• Verify that the power cord is disconnected from
theoutlet.Makesurethatthecollectiontankis
cleanandfreeofdustanddirt.
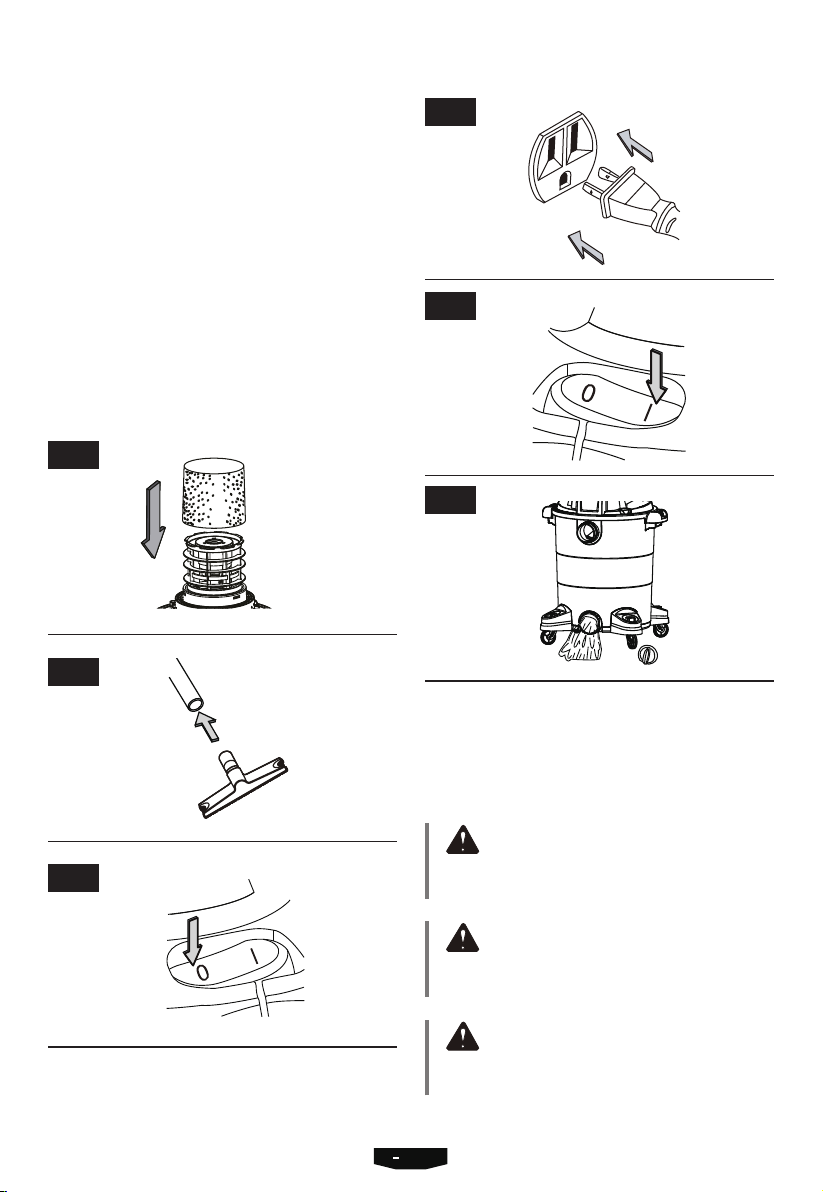
• Removethecartridgefilter,thencarefullyinstall
thefoamwetfilteroverthefiltercageandplace
thepowerheadbackonthecollectiontank.For
foam wet filter installation instructions, see page
14.
DO NOT USE THE CARTRIDGE FILTER FOR
LIQUID VACUUMING.
DO NOT USE THE DUST BAG FOR LIQUID
VACUUMING.
• Insert the locking end of the hose into the
vacuum port on the collection tank and lock
intoplace.
• Push the required attachment onto the free end
ofthehoseorextensionwand.
• Verifythattheswitchisinthe‘O’OFFposition
before plugging the power cord into the power
outlet.Plugthepowercordintotheoutlet.
• Turn the motor on by flipping the switch to the
‘I’ONposition.
• Onceyouhavecompletedvacuuming,flipthe
switchtothe‘O’OFFpositionandunplugthe
powercordfromtheoutlet.
• After use, empty the collection tank by
unscrewingthedraincap.Drainliquidsintoa
suitablereceptacleordrain.Oncethecollection
tank is cleaned and dried, refit the drain cap to
thecollectiontank.
WARNING:
Be sure to read, understand, and apply information
entitled “SAFETY INFORMATION”. Do not vacuum
inareaswith flammable gases, vapors, orexplosive
dustsintheair.Flammablegasesorvaporsincludebut
arenotlimitedto:lighterfluid,solventtypecleaners,
oil-basedpaints,gasoline,alcohol,oraerosolsprays.
Explosivedusts include but arenot limited to: coal,
magnesium,grain,orgunpowder.Toreducetherisk
ofhealthhazardsfromvaporsordust,donotvacuum
toxicmaterials.
WARNING:
Do not plug the power cord into the power outlet.
Make sure the plug is disconnected before changing
thefilters.
FIG. 24
FIG. 23 LIQUID VACUUMING
See Figures 25-30.