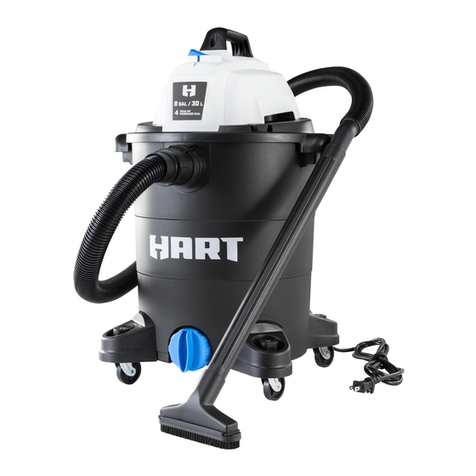
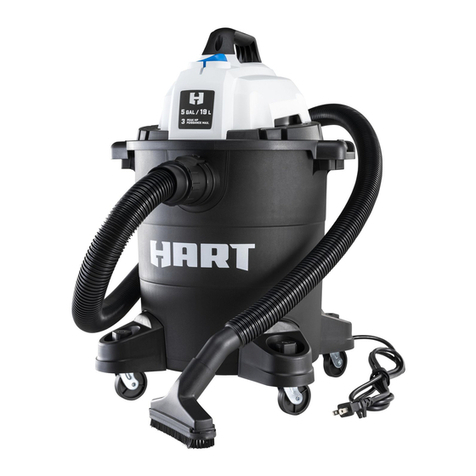
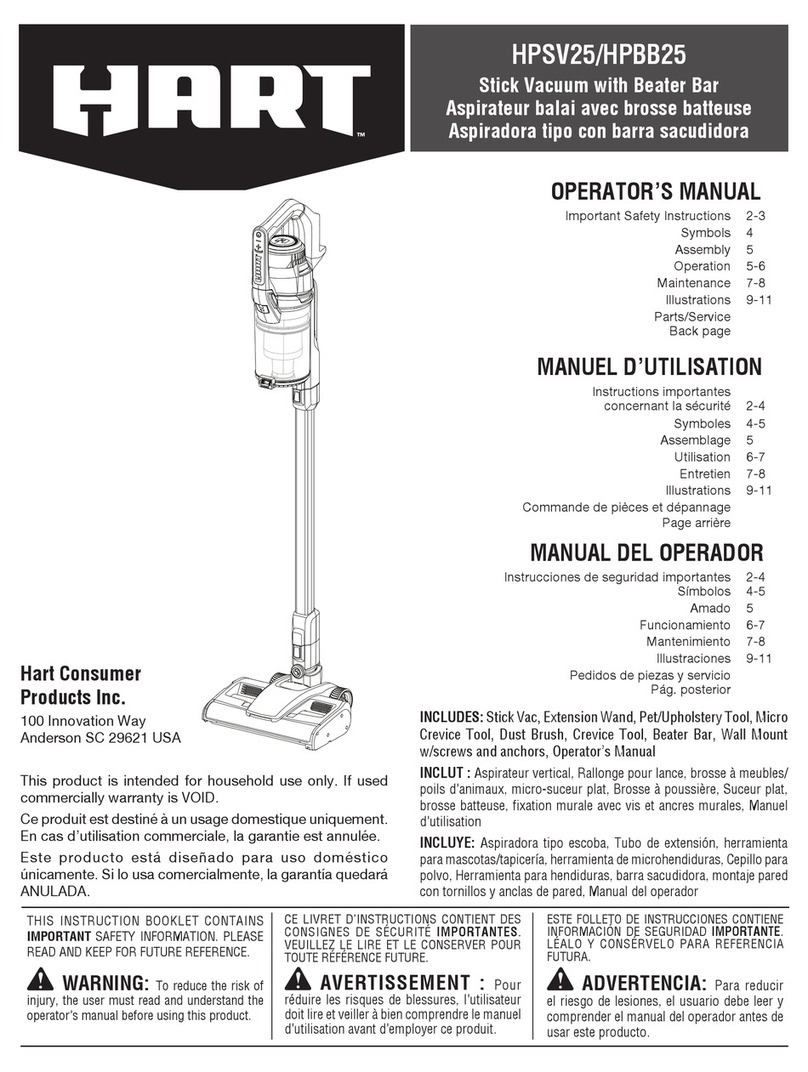
HART VP205-C-3701 User manual

OPERATOR’S MANUAL
Safety Information 2-3
Symbols 4
Features 5
Assembly 5-6
Operation 7-10
Maintenance 11-13
Troubleshooting 14
Warranty 14
Exploded View 15
Parts List 16
Parts/Service
Back Page
THIS INSTRUCTION BOOKLET CONTAINS
IMPORTANT SAFETY INFORMATION. PLEASE
READ AND KEEP FOR FUTURE REFERENCE.
WARNING: To reduce the risk of
injury, the user must read and understand the
operator’s manual before using this product.
LE PRÉSENT LIVRET D’INSTRUCTIONS CON-
TIENT DES CONSIGNES DE SÉCURITÉ IMPOR-
TANTES. VEUILLEZ LE LIRE ATTENTIVEMENT
ET LE CONSERVER AFIN DE POUVOIR VOUS
Y RÉFÉRER ULTÉRIEUREMENT.
AVERTISSEMENT: An de
réduire tous risques de blessures, l’utilisateur
doit lire et assimiler le contenu du manuel
d’utilisation avant de se servir de ce produit.
ESTE MANUAL DE INSTRUCCIONES CON-
TIENE IMPORTANTE INFORMACIÓN DE
SEGURIDAD. POR FAVOR LEA Y CONSERVE
PARA REFERENCIA FUTURA.
ADVERTENCIA: Para reducir
el riesgo de lesiones, el usuario debe leer y
comprender el manual del operador antes de
usar este producto.
MANUEL D’UTILISATION
Consignes de sécurité 1-3
Symboles 3
Caractéristiques 4
Assemblage 4-6
Utilisation 7-10
Entretien 11-13
Dépannage 14
Garantie 15
Vue Éclatée 16
Liste Des Pièces 17
Pièces/Réparations
Dernière Page
MANUAL DEL OPERADOR
Información de seguridad 1-3
Símbolos 3
Características 4
Armado 4-5
Funcionamiento 6-9
Mantenimiento 10-12
Resolución De Problemas 13
Garantía 14
Vista En Detalle 15
Lista De Piezas 16
Partes y Servicio
Páginas Posteriores
VP205-C-3701
2.5 Gallon / 10 L Wet/Dry Vacuum
Aspirateur D’Atelier Sec Et Humide 10 L / 2,5 Gallons
Aspiradora en Seco / Mojado de 10 L / 2,5 Galones

2English
SAFETY INFORMATION
WARNING:
To reduce the risk of re, electric shock, or injury:
CAUTION:
To reduce the risk of injury from moving parts - Unplug
before servicing.
READ AND UNDERSTAND ALL INSTRUCTIONS
BEFORE USING THIS VACUUM.
Read and understand this operator’s manual and
all labels on the vacuum cleaner before operating.
Safety is a combination of common sense, staying
alert and knowing how your vacuum works. Use
this vacuum only as described in this manual. To
reduce the risk of personal injury or damage to your
vacuum, use only manufacturer recommended
accessories.
SAVE THIS MANUAL FOR FUTURE REFERENCE.
When using a vacuum, basic precautions should
always be followed including the following:
• Do not run vacuum unattended.
• Do not use to pick up ammable or combustible
liquids, such as gasoline, or use in areas where
they may be present.
• Do not vacuum, or use this vacuum near
ammable liquids, gases, or explosive vapors
like gasoline or other fuels, lighter fluids,
cleaners, oil-based paints, natural gas,
hydrogen, or explosive dusts like coal dust,
magnesium dust, grain dust, or gun powder.
Sparks inside the motor can ignite ammable
vapors or dust.
• To reduce the risk of health hazards from vapors
or dusts, do not vacuum toxic materials.
• Do not use or store near hazardous materials.
• Do not pick up anything that is burning or
smoking, such as cigarettes, matches, or hot
ashes.
• Do not expose to rain. Store indoors.
• If vacuum is not working as it should, has been
dropped, damaged, left outdoors, or dropped
into water, return it to a service center.
• Do not unplug by pulling on cord. To unplug,
grasp the plug, not the cord.
• Do not use with damaged cord or plug.
• Do not pull or carry by cord, use cord as a
handle, close a door on cord, or pull cord around
sharp edges or corners.
• Keep cord away from heated surfaces.
• Do not run the vacuum over cord.
• Do not handle plug or vacuum with wet hands.
• Do not use without dust bag and/or lters in
place.
• Do not allow to be used as a toy. Close attention
is necessary when used by or near children.
• To reduce the risk of injury from accidental
starting, unplug power cord before changing
or cleaning lter.
• Do not leave vacuum when plugged in. Unplug
from outlet when not in use and before servicing.
• Turn off all controls before unplugging.
• Unplug before connecting or disconnecting
hose, or any other accessories.
• Do not put any object into openings. Do not use
with any opening blocked; keep free of dust, lint,
hair, and anything that may reduce air ow.
• Keep hair, loose clothing, ngers, and all parts
of body away from openings and moving parts.
• Use extra care when cleaning on stairs.
• Use only as described in this manual. Use only
manufacturer’s recommended attachments.
• This vacuum is provided with double insulation.
Use only identical replacement parts. See
DOUBLE INSULATION INSTRUCTIONS.
IMPORTANT INFORMATION
GALLONS
"Tank Size" refers to the actual tank volume, and does not reect capacity available during operation.
PEAK HP
“Peak Horsepower” is a term used in the wet-dry vac industry for consumer comparison purposes. It does not
denote the operational horsepower output of a wet-dry vac, but rather the horsepower output of a motor, including
the motor’s inertial contribution, achieved in laboratory testing. In actual use, motors do not operate at the peak
horsepower shown.

3English
Extension Cords
When using an extension cord with your Wet/Dry Vacuum refer to the following table to determine the
required A.W.G. wire size. Before using the vacuum make sure the power cord and extension cord are
in good working condition. Make repairs or replacements before using the vacuum cleaner. Only use
extension cords that are rated for outdoor use.
Length of Extension Cord
120V 25ft (7.62m) 50ft (15.24m) 100ft (30.48m) 150ft (45.72m)
Ampere rating
A.W.G. Wire Size
More than Not more
than
0 6 18 16 16 14
610 18 16 14 12
10 12 16 16 14 12
12 16 14 12 Not recommended
SAFETY INFORMATION
WARNING:
To reduce the risk of electric shock - Do not expose to
rain. Store indoors.
WARNING:
Servicing of double-insulated wet/dry vacuum - With
a double-insulated wet/dry vacuum, two systems
of insulation are provided instead of grounding. No
grounding means is provided on a double-insulated
appliance, nor should a means for grounding be
added. Servicing a double insulated wet/dry vacuum
requires extreme care and knowledge of the system
and should be done only by qualied service personnel.
Replacement parts for a double-insulated wet/dry
vacuum must be identical to the parts they replace.Your
double-insulated wet/dry vac is marked with the words
‘DOUBLE INSULATED’ and the symbol (square within
a square) may also be marked on the appliance.
WARNING:
For your own safety, read and understand the
operator’s manual. Do not run unattended. Do not
pick up hot ashes, coals, toxic, ammable, or other
hazardous materials. Do not use around explosive
liquids or vapors.
CAUTION:
Do not vacuum drywall dust, replace soot, or ash
with standard wet/dry lter. This type of dust is very
ne which may not be captured by the lter and cause
damage to motor. When vacuuming ne dust use a ne
dust lter (sold separately).
DOUBLE INSULATED
Grounding not required - When servicing use only
identical replacement parts.
When using as blower:
• Direct air discharge only at work area.
• Do not use Wet/Dry Vacuum as a sprayer.
• Do not direct air at bystanders.
• Keep children away when blowing.
• Wear safety goggles.
SAVE THESE INSTRUCTIONS
For Household Use Only
Double Insulation Instructions
This Wet/Dry Vacuum is double insulated,
eliminating the need for a separate grounding
system. Use only identical replacement parts.
Read the instructions for Servicing Double-
Insulated Wet/Dry Vacuum before servicing. Use
this vacuum as described in this manual.
Observe the following warnings that appear on the
motor housing of your vacuum.
WARNING:
To reduce the risk of electric shock - Unplug before
cleaning or servicing.

4English
SYMBOLS
The following signal words and meanings are intended to explain the levels of risk associated with this product.
SYMBOL SIGNAL MEANING
DANGER: Indicates an imminently hazardous situation, which, if not avoided, will
result in death or serious injury.
WARNING: Indicates a potentially hazardous situation, which, if not avoided, could
result in death or serious injury.
CAUTION: Indicates a potentially hazardous situation, which, if not avoided, may
result in minor or moderate injury.
NOTICE: (Without Safety Alert Symbol) Indicates a situation that may result in
property damage.

5English
FEATURES
ASSEMBLY
PRODUCT SPECIFICATIONS
Weight ….........................................................................................................................5.51 lbs. (2.5 kg)
Assembled Dimensions......…...........................................11.42 x 9.69 x 13.07 in. (290 x 246 x 332 mm)
FIG. 1
LOOSE PARTS LIST
See Figure 1.
Remove all contents from the box. Remove the
power head and take out any contents inside
the collection tank. Check each item against the
loose parts list.
• Vacuum Assembly……….....................………..1
• Hose...….………………...................…………..1
• Reusable Cloth Filter…..................…….......…..1
• Foam Wet Filter………...........................…….....1
• Utility Nozzle…..…………....................……….1
• CreviceTool...………...........................…….......1
• Operator’s Manual.…...........................…….......1
VACUUM ASSEMBLY HOSE
FOAM WET FILTER
REUSABLE CLOTH
FILTER
UTILITY NOZZLE CREVICE TOOL OPERATOR’S
MANUAL
2
1
UNPACKING YOUR WET/DRY VACUUM
See Figures 2-4.
• Verify that the power cord is disconnected from
the outlet.
• Undo the latches.
• Lift the power head off the collection tank.
• Remove the contents from inside the collection
tank; make sure you have all contents as listed
on page 5.
WARNING:
Do not plug the power cord into a power outlet. Make
sure the plug is disconnected before assembling the
wet/dry vacuum. To reduce the risk of electric shock,
do not expose to rain.
FIG. 4
FIG. 3
FIG. 2
LATCH
POWER HEAD
NOTE: The hose and accessories for this
vacuum are 1.25'' (31.75 mm) diameter.

6English
ASSEMBLY
FIG. 7
FIG. 6
FIG. 5
INSTALLING THE REUSABLE CLOTH FILTER
See Figure 5.
• Your vacuum comes ready for dry vacuum
cleaning. If the reusable cloth lter is not
installed, refer to page 12 for installation
instructions.
REUSABLE
CLOTH FILTER
INSTALLING THE FOAM WET FILTER
See Figure 6.
• For wet vacuum cleaning, remove the reusable
cloth filter, and install the supplied foam
wet lter. See page 13 for the foam wet lter
installation instructions.
ATTACHING THE POWER HEAD
See Figure 7.
• Place the power head back on the collection
tank aligning the top section with the latches,
and snap into place.
FOAM WET
FILTER
FIG. 9
FIG. 8
HOSE
of the hose.
POLARIZED PLUG
To reduce the risk of electrical shock, this
appliance has a polarized plug (one blade wider
than the other). This plug will t in a polarized
outlet only one way. If the plug does not t fully in
the outlet, reverse the plug. If it still does not t,
contact a qualied electrician to install the proper
outlet. Do not change the plug in any way. Double
insulation eliminates the need for the three-
wire grounded power cord and grounded power
supply system.
ATTACHING THE HOSE
See Figure 8.
• Insert the locking end of the hose into the
suction port of the collection tank and lock into
place.
INSTALLING ATTACHMENTS
See Figure 9.
• Push the required attachment onto the free end

7English
OPERATION
DRY VACUUMING
See Figures 10-17.
FIG. 13 FIG. 17
FIG. 12 FIG. 16
FIG. 11 FIG. 15
FIG. 10 FIG. 14
WARNING:
Be sure to read, understand, and apply information
entitled “SAFETY INFORMATION”. Do not vacuum
in areas with ammable gases, vapors, or explosive
dusts in the air. Flammable gases or vapors include but
are not limited to: lighter uid, solvent type cleaners,
oil-based paints, gasoline, alcohol, or aerosol sprays.
Explosive dusts include but are not limited to: coal,
magnesium, grain, or gun powder. To reduce the risk
of health hazards from vapors or dust, do not vacuum
toxic materials.
CAUTION:
Do not vacuum drywall dust, replace soot, or ash with
standard wet/dry lter. This is a very ne dust which will
not be captured by the lter and may cause damage to
motor. When vacuuming ne dust use a ne dust lter
(sold separately).
WARNING:
Do not plug the power cord into a power outlet. Make
sure the plug is disconnected before changing the
lters.

8English
OPERATION
• Verify that the power cord is disconnected from
the outlet.
• In order to prepare your vacuum for dry
vacuuming, make sure the reusable cloth
lter completely covers the lter cage against
the power head. Your wet/dry vacuum comes
with the reusable cloth lter pre-installed. For
installation instructions, see page 12.
• Place the power head back on the collection
tank and secure it in place using the latches.
• Insert the locking end of the hose into the
vacuum port on the collection tank and lock
into place.
• Push the required attachment onto the free end
of the hose.
• Verify that the switch is in the ‘O’ OFF position
before plugging the power cord into the power
outlet. Plug the power cord into the outlet.
• Turn the motor on by ipping the switch to the
‘I’ ON position and begin vacuuming.
• Once you have completed vacuuming, ip the
switch to the ‘O’ OFF position and unplug the
power cord from the outlet.
O = OFF I = ON
DO NOT USE THE REUSABLE CLOTH FILTER
FOR LIQUID VACUUMING.
• Verify that the power cord is disconnected from
the outlet. Make sure that the collection tank is
clean and free of dust and dirt.
• Remove the reusable cloth lter, then carefully
install the foam wet lter over the lter cage and
place the power head back on the collection
tank. For foam wet lter installation instructions,
see page 13.
WARNING:
Be sure to read, understand, and apply information
entitled “SAFETY INFORMATION”. Do not vacuum
in areas with ammable gases, vapors, or explosive
dusts in the air. Flammable gases or vapors include but
are not limited to: lighter uid, solvent type cleaners,
oil-based paints, gasoline, alcohol, or aerosol sprays.
Explosive dusts include but are not limited to: coal,
magnesium, grain, or gun powder. To reduce the risk
of health hazards from vapors or dust, do not vacuum
toxic materials.
WARNING:
Do not plug the power cord into the power outlet.
Make sure the plug is disconnected before changing
the lters.
LIQUID VACUUMING
See Figures 18-23.
DO NOT USE THE REUSABLE CLOTH FILTER
FOR LIQUID VACUUMING.
• Insert the locking end of the hose into the
vacuum port on the collection tank and lock
into place.
• Push the required attachment onto the free end
of the hose.
• Verify that the switch is in the ‘O’ OFF position
before plugging the power cord into the power
outlet. Plug the power cord into the outlet.
• Turn the motor on by ipping the switch to the
‘I’ ON position.
• Once you have completed vacuuming, ip the
switch to the ‘O’ OFF position and unplug the
power cord from the outlet.
• After use, empty the collection tank. Drain
liquids into a suitable receptacle or drain. Once
the collection tank is cleaned and dried, ret the
power head to the collection tank.
IMPORTANT! When vacuuming large quantities
of liquids, do not immerse the nozzle completely
in the liquid; leave a gap at the tip of the nozzle
opening to allow air inow. The machine is tted
with a oat valve that stops the suction action
when the collection tank reaches its maximum
capacity. You will notice an increase in motor
speed. When this happens, turn off the machine,
disconnect from power supply, and drain the liquid
into a suitable receptacle or drain. To continue
vacuuming, ret the power head to the collection
tank. After wet vacuuming, turn the machine off
and remove plug from power supply. Empty the
collection tank, clean, and dry the inside and
outside before storage.
REMEMBER! The foam wet lter must be removed
after wet vacuuming and the reusable cloth lter
must be installed before dry vacuuming again.
FIG. 18

9English
OPERATION
BLOWER OPERATION
See Figures 24-29.
This wet/dry vacuum has blowing capabilities.
To use the blower feature follow the instructions
listed.
FIG. 20
FIG. 19
WARNING:
Always wear safety goggles complying with ANSI Z87.1
(or in Canada, CSAZ94.3) before using blower.
WARNING:
Keep bystanders clear from blowing debris.
WARNING:
Wear a dust mask if blowing creates dust that might
be inhaled.
FIG. 23
FIG. 22
FIG. 21
• Verify that the power cord is disconnected from
the outlet.
• Make sure the collection tank is empty before
using as a blower. Clear all dirt and debris from
the hose and collection tank.
• Remove the hose from the vacuum port.
• Insert the locking end of the hose into the blower
port on the back side of the power head and
lock into position.
• Push the required attachment onto the free end
of the hose or extension wand.
• Verify that the power switch is in the ‘O’ OFF
position before plugging the power cord into
the outlet. Plug the power cord into the outlet.
• Before turning on the vacuum, rmly hold the
loose end of the hose. Turn the motor on by
ipping the switch to the ‘I’ ON position.
• Once you have completed blowing, ip the
power switch to the ‘O’ OFF position and unplug
the power cord from the outlet.
FIG. 24

10 English
OPERATION
FIG. 28
FIG. 27
FIG. 26
FIG. 29
FIG. 25

11 English
MAINTENANCE
EMPTYING THE COLLECTION TANK
See Figures 30-33.
IMPORTANT! Clean or change the filter
regularly for best performance. ALWAYS USE
THE REUSABLE CLOTH FILTER FOR DRY
VACUUMING. If the machine is used without the
reusable cloth lter, the motor will burn out and
the warranty will be voided. Always keep spare
lters on hand.
NOTICE! The lters included are made of high-
quality materials designed to stop small dust
particles. The reusable cloth lter should be used
for dry pick-up only. A dry reusable cloth lter is
necessary to pick up dust. If the reusable cloth
lter is wet, it will clog quickly and be very difcult
to clean. Handle the lter carefully when removing
it for cleaning and replacing it. Check the lters for
tears or small holes. A small hole can let dust pass
through and out of the lter. Do not use a lter with
holes or tears; replace it immediately.
STORAGE
Before storing your vacuum, the collection tank
should be emptied and cleaned. The accessories
should be cleaned and stored so they can be
readily available when needed. Store the wet/dry
vacuum indoors.
REPAIRS
Repairs for this wet/dry vacuum should be
performed only by qualied service personnel
using only identical replacement parts.
FIG. 32
FIG. 31
FIG. 33
FIG. 30
WARNING:
Always disconnect the plug from the power outlet
before removing the power head from collection tank.
• Verify that the power cord is disconnected from
the outlet.
• Disconnect the hose from the vacuum.
• Undo the latches and remove the power head
from the collection tank. Place power head on
a soft, clean surface upside down.
• Clear all dirt or debris from the collection tank
and hose into a proper waste container.
• Clean or replace the lters.
• Check the hose, attachments, and power cord
to ensure that they have not been damaged.
• Place the power head back onto the collection
tank and secure latches.

12 English
MAINTENANCE
INSTALLING REUSABLE CLOTH FILTER
See Figures 34-36.
• Verify that the power cord is disconnected from
the outlet.
• Remove the power head and place in an upside-
down position.
• Install the reusable cloth lter over the lter cage
making sure the cage is completely covered.
• Place the power head back onto the collection
tank.
REMOVING & CLEANING REUSABLE CLOTH
FILTER
See Figures 37-38.
• Remove the power head and place in an upside-
down position.
• Clean the reusable cloth lter by gently brushing
or rinsing off the debris. Cleaning should not
be done indoors in living areas. For optimal
performance a new lter is recommended.
• Allow the wet lter to air dry for 24 hours before
installing onto the lter cage.
FIG. 36
FIG. 35
FIG. 34
FIG. 37
FIG. 38

13 English
MAINTENANCE
INSTALLING FOAM WET FILTER
See Figures 39-41.
• Verify that the power cord is disconnected from
the outlet.
• Remove the power head and place in an upside-
down position. Follow instructions to remove the
reusable cloth lter on page 12.
• Carefully slide the foam wet lter down over the
lter cage making sure the cage is completely
covered.
• Place the power head onto the collection tank.
CLEANING FOAM WET FILTER
See Figures 42-43.
•
With the removed power head in an upside-down
position, carefully remove the foam wet lter.
• Use a mild soap and water solution to wash the
foam wet lter and rinse with clean water.
• Allow the wet lter to air dry for 24 hours before
installing onto the lter cage.
FIG. 41
FIG. 43
FIG. 40
FIG. 42
FIG. 39

14 English
TROUBLESHOOTING
WARRANTY
We take pride in producing a high quality, durable product. This HARTTM product carries a limited three
(3) year warranty against defects in workmanship and materials from date of purchase under normal
household use. If product is to be used for commercial, industrial, or rental use, a 90 day limited warranty
will apply. Please keep your receipt as proof of purchase. This warranty gives you specic legal rights,
and you may have other rights, which vary from state to state. For product service call Customer Service
at 1-866-384-8432.
Not Covered by Warranty:
• Any part that has become inoperative due to misuse, negligence, direct/indirect abuse, accidents,
improper maintenance, repairs, or alterations;
• Consumables such as lters and accessories;
• Normal wear and tear of parts and attachments, such as hose, nozzles, or casters;
• Normal deterioration of the exterior nish due to use or exposure;
•Any product where serial number/data label is tampered with or removed;
• Any product purchased from an unauthorized retailer.
PROBLEM POSSIBLE CAUSE SOLUTION
The wet/dry
vacuum will
not operate.
No power supply. Check the power supply, cord, breakers, and
fuses.
Faulty power cord. Unplug and check the power cord. If
damaged, have it repaired by a professional.
Collection tank is full. Empty the collection tank.
Switch in the wrong position. Press the ON ‘I’ button on the power head.
The dust
comes out
from the motor
cover.
The cartridge lter is missing or
damaged. Attach or replace the cartridge lter.
Vacuum has been used to collect ne
dust, such as dry wall dust, replace
soot, or ash, without a ne dust lter.
Remove the standard cartridge lter and install
the appropriate ne dust lter (available
separately).
Reduced
efciency and
motor/speed
vibration.
There are blockages in the nozzle,
hose, or the collection tank inlets.
Unplug and check nozzle, hose, and collection
tank inlets for blockages.
The cartridge lter is clogged by ne
dust.
Take off the lter and clean it or install a new
cartridge lter.
WARNING:
To reduce the risk of electric shock, unplug before troubleshooting.

15 English
EXPLODED VIEW

16 English
PARTS LIST
PART PART NUMBER DESCRIPTION QUANTITY
1 551652101 Handle 1
2 Power Head 1
3Collection Tank 1
4 551081106 Hose 1
5 551004113 Utility Nozzle 1
6551012109 Crevice Tool 1
7 551081109 Foam Wet Filter 1
8551012110 Reusable Cloth Filter 1

1French
• Ne pas faire fonctionner l’aspirateur sans
surveillance.
• Ne pas utiliser l’appareil pour aspirer des liquides
inammables ou combustibles, notamment de
l’essence, et ne pas l’utiliser dans des endroits
où ces substances peuvent être présentes.
• Ne pas aspirer ni utiliser cet aspirateur à proximité
de liquides inammables, de gaz ou de vapeurs
explosives, notamment de l’essence ou tous
autres carburants, de l’essence pour briquets,
des nettoyants, des peintures à base d’huile, du
gaz naturel, de l’hydrogène ou des poussières
explosives telles que la poussière de charbon,
CONSIGNES DE SÉCURITÉ
AVERTISSEMENT:
An de réduire tout risque d’incendie, d’électrocution
ou de blessures:
VEILLEZ À LIRE ET ASSIMILER TOUTES LES
CONSIGNES AVANT TOUTE UTILISATION DU
PRÉSENT ASPIRATEUR.
Veillez à lire et assimiler le présent manuel
d’utilisation ainsi que toutes les étiquettes
apposées sur l’aspirateur avant toute utilisation.
La sécurité est une combinaison de bon
sens, de vigilance et de familiarisation avec le
fonctionnement de votre aspirateur. Utilisez cet
aspirateur exclusivement conformément aux
descriptions fournies dans le présent manuel
d’utilisation. Afin de réduire tous risques de
blessures corporelles ou de détérioration de votre
aspirateur, utilisez exclusivement les accessoires
recommandés par le fabricant.
VEUILLEZ CONSERVER LE PRÉSENT MANUEL
AFIN DE POUVOIR VOUS Y RÉFÉRER
ULTÉRIEUREMENT.
L’utilisation d’un aspirateur exige le respect de
certaines mesures de sécurité élémentaires,
notamment les suivantes:la poussière de magnésium, la poussière de
céréales ou la poudre à canon. Les étincelles
à l’intérieur du moteur peuvent déclencher des
vapeurs ou poussières inammables.
• Afin de réduire les risques pour la santé
provenant des vapeurs ou poussières, n’aspirez
pas de matières toxiques.
• Ne pas utiliser ni entreposer l’aspirateur à
proximité de matériaux dangereux.
• Ne pas aspirer de matières en combustion
ou qui dégagent de la fumée, telles que des
cigarettes, des allumettes ou des cendres
chaudes.
• À ne pas exposer à la pluie. Veillez à le ranger à
l’intérieur.
• En cas de dysfonctionnement, de chute, de
détérioration, d’abandon à l’extérieur, ou de
chute dans de l’eau, de l’aspirateur, ramenez
celui-ci à un centre de réparation.
• Ne pas débrancher l’appareil en tirant sur le
cordon. Pour débrancher le produit, saisissez
la che, pas le cordon.
• Ne pas utiliser l’appareil si le cordon ou la che
est endommagé(e).
• Ne pas tirer ni porter l’appareil en utilisant le
cordon. Ne pas utiliser celui-ci comme poignée
ou pour fermer une porte et ne pas l’enrouler
autour de bords coupants ou d’arêtes vives.
• Maintenez le cordon à l’écart de toutes surfaces
chaudes.
• Ne pas faire passer l’aspirateur sur le cordon.
• Ne pas manipuler la che d’alimentation ou
l’aspirateur avec des mains mouillées.
• Ne pas utiliser sans le sac à poussières et/ou
les ltres en place.
• Ne pas permettre que l’appareil soit utilisé
comme un jouet. Soyez très attentif s’il est utilisé
par des enfants ou si des enfants se trouvent à
proximité.
• Afin de réduire les risques de blessures
provoquées par un démarrage accidentel,
débranchez le cordon d’alimentation avant le
changement ou le nettoyage du ltre.
• Ne pas laisser l’aspirateur branché. Pensez à le
INFORMATIONS IMPORTANTES
GALLONS
La « Taille du Réservoir » correspond au volume réel du réservoir et ne reète pas la capacité disponible en fonc-
tionnement.
PUISSANCE MAX.
La « Puissance Maximale » est un treme utilisé dans le secteur des aspirateurs pour matières sèches et liquides à
des ns de comparaison pour les consommateurs. Il ne désigne pas la puissance opérationnelle d’un aspirateur
pour matières sèches et liquides, mais plutôt la puissance du moteur, y compris l’apport d’inertie du moteur, at-
teinte en laboratoire. En utilisation réelle, les moteurs ne fonctionnent pas à la puissance maximale indiquée.

2French
ATTENTION:
An de réduire tous risques de blessures dues à
des pièces mobiles, débranchez l’appareil avant de
procéder à sa réparation.
AVERTISSEMENT:
An de réduire tous risques d’électrocution, débranchez
l’appareil avant de procéder à son nettoyage ou à sa
réparation.
DOUBLE ISOLATION
Mise à la terre non requise - Lors de travaux d’entretien
ou de réparation, utilisez exclusivement des pièces de
rechange identiques.
Lorsque vous utilisez l’aspirateur en guise de
souffleur:
• Orientez le rejet d’air vers la zone de travail
exclusivement.
• Ne pas utiliser l’Aspirateur D’Atelier Sec Et
Humide en guise de pulvérisateur.
• Ne pas orienter le rejet d’air vers les personnes
se trouvant à proximité.
• Tenez les enfants à l’écart lors du soufage.
• Portez des lunettes de sécurité.
VEUILLEZ CONSERVER LES
PRÉSENTES CONSIGNES
Conçu pour une utilisation domestique
exclusivement
Instructions relatives à la double isolation
Cet aspirateur d’atelier sec et humide est équipé
d’une double isolation, ce qui élimine le besoin
AVERTISSEMENT:
Afin de réduire tous risques d’électrocution, ne
pas exposer le produit à la pluie. Veillez à le ranger à
l’intérieur.
AVERTISSEMENT:
Entretien ou réparation de l’aspirateur d’atelier sec
et humide pourvu d’une double isolation: avec un
aspirateur d’atelier sec et humide pourvu d’une double
isolation, deux systèmes d’isolation sont fournis à la
place de la mise à la terre. Aucune mise à la terre n’est
fournie sur un appareil à double isolation et il ne convient
pas d’en ajouter une. L’entretien ou la réparation d’un
aspirateur d’atelier sec et humide à double isolation
exige une attention extrême et une connaissance du
système et doit être effectué exclusivement par du
personnel d’entretien qualié. Les pièces de rechange
d’un aspirateur d’atelier sec et humide à double isolation
doivent être identiques aux pièces remplacées. Votre
aspirateur d’atelier sec et humide à double isolation porte
la mention « DOUBLE ISOLATION » et le symbole (un
carré dans un carré) peut également être apposé
sur l’appareil.
AVERTISSEMENT:
Pour votre propre sécurité, veuillez lire et assimiler
le manuel d’utilisation. Ne pas faire fonctionner
l’appareil sans surveillance. Ne pas aspirer de cendres
chaudes, de charbons ou autres matériaux toxiques,
inammables ou dangereux. Ne pas utiliser l’aspirateur
à proximité de vapeurs ou liquides explosifs.
ATTENTION:
Ne pas aspirer de la poussière de cloison sèche, de la
suie de foyer ou de la cendre à l’aide d’un ltre ordinaire
pour déchets humides et secs. Ce type de poussière
est très n et ne peut être retenu par le ltre et risque
d’endommager le moteur. Lorsque vous aspirez des
poussières nes, veuillez utiliser un ltre à poussières
nes (vendu séparément).
CONSIGNES DE SÉCURITÉ
d’un système de mise à la terre distinct. Utilisez
exclusivement des pièces de rechange identiques
aux pièces d’origine. Veuillez lire les instructions
d’entretien ou de réparation de l’Aspirateur
D’Atelier Sec Et Humide à double isolation avant de
procéder à son entretien ou sa réparation. Utilisez
cet aspirateur conformément aux descriptions
fournies dans le présent manuel d’utilisation
d’utilisation.
Respectez les avertissements suivants qui
sont apposés sur le boîtier du moteur de votre
aspirateur.
débrancher de la prise lorsque vous ne l’utilisez
pas ou avant de le réparer ou de l’entretenir.
• Coupez toutes les commandes de l’appareil
avant de le débrancher.
• Débranchez le produit avant de raccorder ou de
détacher le tuyau ou tous autres accessoires.
• N’introduire aucun objet dans les orices de
l’appareil. Ne pas utiliser l’appareil si un orice
est bouché. Faites en sorte que les orices ne
soient pas encombrés de poussières, peluches,
cheveux ou de toute autre objet susceptible de
gêner la circulation de l’air.
• Maintenez vos cheveux, vêtements amples,
doigts et toutes parties du corps à l’écart des
orices et des pièces mobiles.
• Faites très attention lorsque vous nettoyez des
escaliers.
• Utilisez cet appareil exclusivement
conformément aux descriptions fournies
dans le présent manuel d’utilisation. Utilisez
exclusivement les accessoires recommandés
par le fabricant.
• Cet aspirateur est livré doté d’une double
isolation. Utilisez exclusivement des pièces de
rechange identiques aux pièces d’origine. Voir
la section « INSTRUCTIONS RELATIVES À LA
DOUBLE ISOLATION ».

3French
Cordons Prolongateurs
Lors de l’utilisation d’un cordon prolongateur avec votre aspirateur d’atelier sec et humide, veuillez
consulter le tableau suivant an de déterminer le calibre du câble A.W.G. requis. Avant toute utilisation
de l’aspirateur, assurez-vous que le cordon d’alimentation et le cordon prolongateur sont en bon état
de fonctionnement. Effectuez toute réparation ou tout remplacement avant d’utiliser l’aspirateur. Utilisez
exclusivement des cordon prolongateurs conçus pour une utilisation à l’extérieur.
Length of Extension Cord
120V 25ft (7.62m) 50ft (15.24m) 100ft (30.48m) 150ft (45.72m)
Ampere rating
A.W.G. Wire Size
More than Not more
than
0 6 18 16 16 14
610 18 16 14 12
10 12 16 16 14 12
12 16 14 12 Not recommended
SYMBOLES
Les termes de mise en garde suivants et leur signification visent à expliquer le degré de risque associé à cet appareil.
SYMBOLE SIGNAL SIGNIFICATION
DANGER: Indique une situation de danger immédiat qui, si elle n’est pas
évitée, provoquera des blessures graves, voire la mort.
AVERTISSEMENT: Indique une situation de danger potentiel qui, si elle n’est pas
évitée, peut provoquer des blessures graves, voire la mort.
ATTENTION: Indique une situation de danger potentiel qui, si elle n’est pas
évitée, pourrait provoquer des blessures mineures ou modérées.
REMARQUE: (Sans symbole d’alerte de sécurité) Indique une situation pouvant
entraîner des dommages matériels.
CONSIGNES DE SÉCURITÉ

4French
CARACTÉRISTIQUES
CARACTÉRISTIQUES DU PRODUIT
Poids …............................................................................................................................. 2,5 kg (5,51 lb)
Dimensions du produit monté......………………...……... 290 x 246 x 332 mm (11,42 x 9,69 x 13,07 po)
VOIR ILLUSTRATION 1.
REMARQUE: Diamètre du tuyau et des accessoires
de cet aspirateur : 31,75 mm (1,25 po).
TUYAU
SUCEUR À USAGES
MULTIPLES MANUEL
D’UTILISATION
FILTRE EN MOUSSE
POUR DÉCHETS
HUMIDES
SUCEUR PLAT
ASSEMBLAGE
LISTE DES PIÈCES DÉTACHÉES
VOIR ILLUSTRATION 1.
Retirez tout le contenu de la boîte. Retirez le bloc-
moteur, puis videz tout le contenu du réservoir
collecteur. Vériez chaque élément par rapport à
la liste des pièces détachées.
• Ensemble Aspirateur …….....................………..1
• Tuyau ..….………………...................…………..1
• Filtre Réutilisable enTissu ...............…….......…..1
• Filtre en Mousse pour Déchets Humides .......1
• Suceur à Usages Multiples ..................……….1
• Suceur Plat .………...........................…….......1
• Operator’s Manual ...........................……........1
ENSEMBLE ASPIRATEUR
FILTRE
RÉUTILISABLE EN
TISSU
DÉBALLAGE DE VOTRE ASPIRATEUR
D’ATELIER SEC ET HUMIDE
Voir les illustrations 2 à 4.
• Assurez-vous que le cordon d’alimentation est
débranché de la prise de courant.
• Desserrez les loquets.
• Soulevez et retirez le bloc-moteur du réservoir
collecteur.
• Videz le contenu du réservoir collecteur;
assurez-vous que vous disposez de la totalité
du contenu ainsi qu’indiqué à la page 4.
AVERTISSEMENT:
Ne pas brancher le cordon d’alimentation à une prise
de courant. Assurez-vous que la che est débranchée
avant de procéder au montage de l’aspirateur
d’atelier sec et humide. An de réduire tout risque
d’électrocution, ne pas exposer l’aspirateur à la pluie.
2
1
LOQUET
VOIR ILLUSTRATION 2.
VOIR ILLUSTRATION 3.
Table of contents
Languages:
Other HART Vacuum Cleaner manuals

HART
HART HZUV01 User manual

HART
HART HPSV01 Quick setup guide

HART
HART VOC812SW 3701 User manual

HART
HART HPHV34 User manual

HART
HART HPHV33 User manual

HART
HART VJC809PF-C-3701 User manual

HART
HART HPSV60 20V User manual

HART
HART HPSV01 User manual

HART
HART VJC507PF-C-3701 User manual

HART
HART HPHV01 User manual
Popular Vacuum Cleaner manuals by other brands

Sencor
Sencor SVC 308BK Translation of the original manual

Philips
Philips FC8769 user manual

Metabo
Metabo ASR 36-18 BL 25 M SC Original instructions

Clarke
Clarke ASHVAC1200 Operating & maintenance instructions

Chibli
Chibli CleanStar T1 Use and maintenance

Nilfisk-Advance
Nilfisk-Advance Spectrum 12D Instructions for use