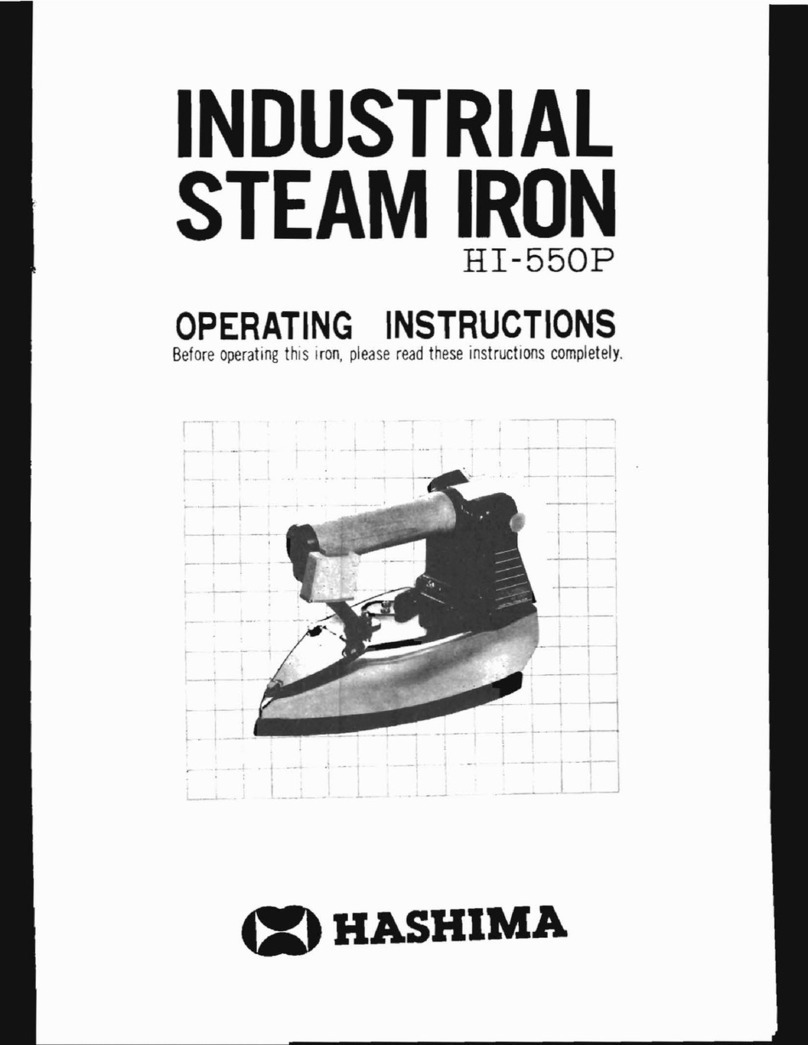
HASHIMA HI-360DS User manual

HASHIMA
INDUSTRIAL
STEAM
IRON
Hl-36008
OPERATING
INSTRUCTIONS
Before operatingthis iron, please read these instructions
co
mpletel
y.
From the library of: Superior Sewing Machine & Supply LLC

PARTS
IDENTIFICATION
~I!Jm:~ftli
PowerOn Lamp
71~0011
Thermo Lamp
Jt4BJUI
Thermo Dial
n~J~ttem
TimerDial
i!ll~Mim
MainsSwitch
PowerCord
Plug
Steam Button
Sole Plate
~~
Rest
ACCESSORIES
l'f;H~
Clamps
~7-
Cleaning Pin
HexagonalWrench
~11Jtltteitt
Hose
Valve ConnectorB
Steam Valve Unit / llllit:ti!BB
}l~llll
Valve Control
- 2 -
~
Valve ConnectorA
I/ llllil!UBA
,....---!
lsteamG~n~
i
1I
;
~JI~~-
l
From the library of: Superior Sewing Machine & Supply LLC

SPECIFICATIONS
r-
Electrical e120V/1
200W
Ratings:
e 220V/1200W(230V/1310W, 240V/1430W)
Features:
• STEAM and DRY ironing modes
•
Magne
tic STEAM
/D
RY sel
ec
ti
on s
wit
ch
e1
30-....2
10°C ran
ge
fo
rTHRMOSTAT
co
ntrol
e SOLE P
LA
TE finished with special Hard
t-
Anodic
Oxidation Coating
Dimensions:
135(H)X 105(W)X 269(D)mm
Weight:
L....-
1.6kg(3.51
b)
-
-
-
~·
•120fXfq/1200li
• 220fXfq/12001H230fXfq/1310Ji,240fXfq/ 1
430li
)
-
·
~~&*~iifiim"it
fq ~
•
~rat"it~~
I
*'-MiUJ!m~
•
'@:5E[E:e$tl~lll
:
130
-
210
°C
•
~4Ji:
:
1Jffil.:J.~J$at.JU.g.fi
iifi1JOiffiil£
o
- -
R
-t
135(~)
X105(1:)
X269
(
~
)
mm
Ji:
•
1
.
6~fT
(
3.5~
)
- 8 -
--
From the library of: Superior Sewing Machine & Supply LLC

CAUTIONS
1.
When
not
using the iron even for a while, for safety purpose, be sure to
disconnect thepowercord.
2. Makesure tousea wall outletforthe powersupply.
3. Do
NOT
let the cord become wet, and do
NOT
handle the cord with wet
hands.
4.
Check the cord every time before use as damaged cord can pose as fire
and electricshock hazards.
5.
NEVER
touch metal parts while using or immediately after using the iron
as they are extremely
HOT.
6. Handle the iron carefully to prevent hot water
from
coming out from the
vents.
7. Do NOT loopthecord around the iron while
it
is still hot.
8. After cooled down, wipe the sole plate and other parts, with a soft dry
cloth.
Do NOT use corrosive polishing cloth, metal or hard brush to avoid
scratches.
9.
Do
NOT
placethehotiron directlyon a button, hookorzipper.
5t
••
Jj
l
.
V~~m~4~.~~~~~~.-~~~~~~
o
2 .
-~~~m•~~~#til:
o
3.~~~~~~~~~*~~~~g·-~
o
4 .
~mM,
-~~$'i:~il:~~~*~,
~t~IY-J11U~~Fie•i31~*1R.~Ui~
o
s.
~m~
I
1'~MHl~fi!B~,
~~jU~F'*'ifj,
~m~i~~
~?'1.{
0
6 .
~m~~'J"L.',
!.:L~~*ilE1£~~HL~Plt±B~
o
7 .
~4*~~~~~~~~~~M#~
o
8 .
ti4~~~i,
!.:L~fXIY-Jfi1titJlHitr!;iii&#'i?:!Bffl:
o
·
~~m:tB't1ti
I
~-~~~ljjiJ-=f!.:Lit);~Jflti4
o
9 .
91~~.
B~lmiHfD,
t!Lil~
o
- 4 -
From the library of: Superior Sewing Machine & Supply LLC

10
. NEVER press theSteambuttonwhen
the
ThermoDialis
set
outside the red
(lowertemperatures)STEAM zone.
e
lf
hot water remains in the steam generating chamber and kept inside
the
i
ron
when
the
latter is not in use, corrosion
of
the
chamber
and/or
the soleplatewill beaccelerated.
• When Steam button is pushed erroneously, hold
the
iron horizontally,
and turn
ON
the
poweruntill steam emissionstops.
11. Avoid
contact
ofthe
hosewith
the
hotiron.
12
. NEVER letthe ThermoControllerbecomewet. (Fig.
1)
13. If
the
iron does
not
heat up even when the Thermo(Heat
ON)
Lamp lights
up continuously (without flickering),
the
heating element may have been
cut
or
the
over-heating prevention device have been activated. Request
the local dealer
to
carry out
the
necessarymaintenance.
(Fi
g.1)
(1111
)
10
.
f!Unl1iUHi!ti@.?IE7\Qiz9~C~;.i)~.
o/J~T-7\iH
o
•
~.A~:!:{
f-t~IY-J7tc~o!J~~
:ff?\
f-t~~fflt:1tat1¥WIP.F,
~iB~
/
~Ji;&BRJtie~
S~
o
·
~*~~•Rm~.-~4•m.n~•~.~~•R•~~~
o
11
.
o/J~ti:WflMJ:!Jt'-l!tr-J~4
o
12.
o/J~)_i/lt11Ji7ijfi~;f}l
o
(!Ill
)
13.
~o*mi.i(1JO'-I!ffM!)it#fd~~C1l~fl)imti4iill~'-ll~.
~~1JO'-I!ft3~
m•~M~Y~~M~~-
o
~~m~~~~@~~~~n~~tr-J-~
o
- 5 -
From the library of: Superior Sewing Machine & Supply LLC

PREPARATION
BEFORE
USE
1.
Th
e
rm
o Contro
ll
er
When attaching
to
a vertical
pole,
interlock
the
latter in-between the
Thermo Controllerand
the
Clamps. (Fig.2)
When attaching
to
a wooden wall, fix theclamps
to
the
ThermoController,
andthen fix the
set
onto
the
wall using
the
suppliedscrews.(Fig
.3)
Make
sure
to
select
a secure location so
that
the
Thermo Controller
does
not
dropoff.
ThermoController
~fltlilin&
Pole
~iitt
Clamps
-
~
(Fig.2)
((II
2 )
il
m
iiHI~
~
1.1
1 .
~lltJ!Iiii&
(Fig.3) Cil 3 )
~flii~itttJ:~,
ilfc!ii.U:!IU1i&~~-T~ifiB
o
Clll
2 )
~flii*t&lliJ:~,
~~-1'-Ifi±iUi/11
iiifiJ:,
P.Mi~
m
llf:t1Mtt-lt1**~1t
riM.J:
oCIII3)
-6-
From the library of: Superior Sewing Machine & Supply LLC

Cleaning Pin
2.Steam
Valv
e
Takethe
caps
outthe SteamValve by using
the
cleaning pin.
Screwthe ConnectorC onto
the
<OUT>
side, and with the ConnectorA
through theConnector8 onto the
<IN>
side
of
theSteam Valve.
Connect it
to
theSteamGenerator
by
Connector
B.
(Fig.4)
3.
Hose
Secure
the
Hose end with long protector
to
the Valve Control, and the
otherend with
the
short protector
to
theSteam Valve.
(Fig.S)
I I
SteamGenerator
--~f~~~
(Fig.4)
(Ill
4 )
ConnectorS
ilti~B
B
ConnectorA
2
.•
?\IN!
~m~•~ttl&l±l~?\IN!tr-J
a
o
Hose
(Fig.5)
(Ill
5 )
~iltliBC
'1C~i±
<
OUT(fiUtD
>
-
iii,
3E#filflfiBA
~~ilti!B
8
'1C~i£
7!?\INI
<IN
(fAA.)
>-
iii
o
~miltt~B
B#ftf?\IN!iltt:?£tf?\fl~*
o<
lll4)
3.
~ •
~·~lliii¥m:!t~5atr-J~W
-
~ilttE£1HUIIJi1i~&H,
m~Mii~IY-1~9~
~iltlE£7!?\IHl
o
Ciils)
-7-
Long
(;l!t)
From the library of: Superior Sewing Machine & Supply LLC

HOW TO
USE
AS
A
STEAM
IRON
1.
Plug the power cord into the mains outlet. (Turn off the mains switch
before insertingthe plug.)
2.
Turn
ON
the mains switch
of
theThermo Controller. The green Power
ON
lampwill light.
3. SettheThermo Dial
to
the
•STEAM-
red• zone. (Fig.6)
4. TumtheValve
of
thesteam Generator counterclockwise unit
it
stops.
5. Place the iron on Rest. After about2 minutes, the red Thermo(HeaterON)
lamp begins to flash
to
indicate
that
the set temperature level has been
reached.
6.
Press Steam button untilforover 30 seconds.
Neverpush the Steam button when the red lamp on the Thermo Controller
is lit.
7. StartSTEAM operation
When not using STEAM TIMER, turn OFF the time switch
of
the Thermo
Controller.
Steam emits onlywhilepushingtheSteam Button.(Fig.7)
When using STEAM TIMER,
set
the Timer Dial
to
the 1
........
20 (seconds)
zone.
(Fig
.8)
Once push the Steam Button, steam continues until the preset time is
over.
Bypushing onceagain,thestops emitting.
Make sure
to
use ironing cloth when steaming fabrics whose finishing
temperatures are belowthesteam temperature range.
Red
Zone
tr@.~
(Fig.6)
(Ill
6 ) (Fig.?}
Clll
7)
tF
lUll
Rtf
4(f:}i!
Jfn~g
1 . •
J...115Jj!~tff3mi
o
Cti.AtlmiM~$1C/D1t¥1Jf!IDI
.
)
2.
n!Jfl~~~~e!Jf!IDI
.
~@~•~~~~
.
3 .
~tlll~1.i1U1U.IIJ~"1!7\
-
tt@"J~LCIII6)
4
.
~&·~~~~-7\~~H~~~~-~~
o
(@
[g J
(Fig.8}
(Ill
8 )
5.
~Jt4fi~~JtJ:¥l2
5'Hl:ti:;b,
[email protected]~~*il)f!Rfi~--.
~~Ei!iiJ~
;iE~~u
.
6 .
~fi117\S30ti>t1J.:Ll:
o
~~~lnm~n@m~m~~-.~~~m1!7<m
o
7 .
l)f!Rfi{f,EJ!
S~{f,EJI
STEAM
TIMER(1!7t~:-H)
••
1JiQ5.:.tfVUi'iiH~OFF
(
lUI
•)•ra,l)f!IU!
o
{i{itf~r?l7\~1Hi,
~7\::tPJW
o
CIII
7 )
S{J!Jfl
STEAM TIMER
••
~#filliii;J:ItitH~~
l-20(t.JI)~I't,
o
CIII8)
-~~r1!R&,1!7\~diiJW,~~m~~¥J•~~tt
o
M~~m-~.
•R•f'ttlllt±io
fl:ftti~5Uilt~-7\~IJJlfffllli!~.:Z.·*II!~~-7\ti~-,
ai~
• -
11
;(fjtfJ:
im
::tno
- 8 -
From the library of: Superior Sewing Machine & Supply LLC

8. AdjustSteam
Turn
the
<-> head pin
of
theValve Control using a screwdriver.
Turn
it
clockwise
orcounterclockwise
to
adjustfor higher or lowersteam.
(Fig.9)
9. Finish
•1•Turn
the
valve
of
theSteam Generator clokwise until
it
stops.
•2•Press
the
Steam button while holding the iron horizontally, and
wait
till
steam emissionstops.
(Fig.10)
10.
Turn OFF
the
mains switch for theThermo Controller, and disconnect
its powercord.
(Fig.11)
11.
Intermission
Keepthe iron on the Rest.
(Fig.12)
(Fig.9) C
il
9 )
(F
ig.1
1)
Cllll)
(Fig.12)(11112)
8 .
~~5{Att-.JID!li1i
~m~Mn~q~~~~att-.J
<
-
>
~W~
o
RX~-~d&•~~~~
fl.
l.:J.i!ID!lfril!f.hdl!~tt-.Ji«7\ii
o
Ciil9
)
9 .
~mjtn·•
" 1
"
fJI&•tt:n~~lmr,ttttJQjiJ~
o
u 2 "
71c:<JitliftJX4,
~'"fi«~5{£H,
iiJIJ1.«7\5E:i-511t$t::
aC
III10)
10
.
IUI~5UID!li1illlfm!Dl.
~~~~'"fm~**
o
(
!1111
)
n.
'fma;J
#ti!41Ni£1!4J.iJ:0
(i!12
)
- 8 -
From the library of: Superior Sewing Machine & Supply LLC

HOW TO
USE
AS
A
DRY
IRON
1.
Turn off the mains switch
of
the Thermo Controller and plug the power
cord intoan electrical outletwhile the iron is placedon the Rest.
2. Switch
ON
the mains switch
of
the Thermo Controller.
3. Set the Thermo Dial to the position most suitable to the material
of
the
item to be ironed.
•1•When ironing different materials requiring various settings, it advisable
to iron items requiring lower settings first, and gradually proceed to
those requiring highersettings.
•2•When changing from high to low temperature settings,be sure to wait
forawhile.
4.
Startironing.
•1•Piace the iron on the Rest. After about 2 minutes, the
red
lamp of the
Thermo Controller begins to flash
to
indicate the set temperature level
has been reached.
•2•1t is advisable
to
use an ironing cloth when pressing synthetic
materials, or to iron on the wrong side
to
test for compatibility before
pressing directontothematerial.
5. Finish
Switch
OFF
the mains switch
of
the Thermo Controller, and disconnect
thepower cord.
6. Intermission
Keep the iron on the Rest.
tF•~~~t4-tt-Ji!m••
1 .
rul~~Ullilfriintr-JimliJJ,
~ff~4:1N:ffJl4~J:~l
.~~liRJHiltA.71;};l!mi~
o
2 .
n-~m
~Jtrtllil
iii
mrm
liJl
o
3 .
~~VIJJfi:fR£H11i!J'l¥1
J
·~~PJT~~~~~*Itt't-J~J.Jlfftfti
o
II
1
"~~~~,~~~i~JJ:::f!iiltr-J~na~,
•~tr-J7757H~:$'t:~~.~ll~tr-J~na,
~
~i
Pi
~jJ.If
i!i
tr-J~
ijfl0
11
2
"~ifjj
J.Jl~NlEf~jJ.~,
-~~~~I.HHi
o
4.
!Ml~{fffl
"1
"~ti41.ilr~tl4~J:.~
2
~-~~.~U&miiiSt'[email protected]~ffd.tOO~~,;e,
~~
e~¥1Jilm~tr-J5U
0
"2
"ti~{{.~fl*lt~~~'
~:(f}tJ:ft-ll:tfi
,~$'t:lit~~l
1
:;Jij£~f7Z
o
5 .
{fffl7i:1"~
~~&miiiStr-JOO~~~.~~~~miD
o
6 .
:::t'ffl~
~ti41.ilri£tl4~J:
o
-10
-
From the library of: Superior Sewing Machine & Supply LLC

WHEN
STEAM
EMISSON
IS
REDUCED
Be
sure
to
disconnectthe power
co
r
d,
and after the iron has cooled
off
, clean
it inaccordance
with
the
following directions.
1.Cieaning
the
steamvents
•1•Ciean
the
steamvents thoroughly by using the small cleaning pin. (Fig.
13)
•
Make
sure
to
carry
out
a steaming test fora few minutes after cleaning
to
avoid soilage
of
clothes.
(Fig.14)
2.Cieaning
the
interior
of
steamgeneratingc
hamber
•1•
Turn
off
the mainsswitch of
the
Thermo Controller and plug the power
cord into
an
electrical outletwhile
the
iron isplaced on the Rest.
•2•Set
the
ThermoDial
to
the position. <SelfCleaning>
(Fig.15)
•3•Switch
ON
the
mainsswitch
of
theThermoController.
•4•Press theSteam Button
fo
r more than
30
seconds.
(F
i
g.14)
(Fig.13)
Clil13)
0
()
~
SelfCleaning Position
(Fig.15)
(111
15)
(Fi
g.14)
Clll14)
1A
5~PI
tti
a
~
1)
a~
~~~MT·-~.~~4~W·.~MT~~--~
o
1 .
~~~~~tfj
[J
"1
"{fJJJ,HA'~lUt~~I!Jl~CJoCIII13)
·
~~~~,
~~5~~:ffi*4,
~~{f~~PJJi5)-jj.:{"iiJ{fJJJ
o
(llll4)
2 .
~~~
ft:i:P-1~
"I
"IIJI~~UI/!lfriiHtt-.JOOfUI,
~~4~t£1&B!...t~~~~mlrulti.Af;~tlli
o
"2
"~1/!l~tJ:ijH~~
(
131JJ~;1t
>
i1tff
o
(11115)
" 3
"triM!
i~l~AIUiiiHOOIDl
"4
"Mfi~~~iH30fJ&L:J....t
oC
III14)
-1
1-
From the library of: Superior Sewing Machine & Supply LLC

3.
Cieaning
the Steam
Valve
(Be sure
to
disconnect
the
power cord, and after the iron has cooled off,
clean it.)
•1•Remove the Valve Connector A and B from theSteam Valve.
(Fig.16)
•2•Cieanthe
<IN>
sidehole.
(Fig.17)
•3»Roll a tapearound the Valve Connector
A.
(Fig.18)
•4•Screwthe ConnectorB with
the
ConnectorA ontotheSteam Valve.
l
oo
not damage
the
filter inside the Steam Valve when using the
Lcleaning pin. tii
(Fig.17)
Cll17)
~~
(F
ig.16)
ClilG)
~
(Fig.18)
(fillS)
3 .
;·~S\:117\rMI
(~'~Ji$'C~I±I11~**•
~~~ffl~4~fJJ~~MfT;.~S\:
o
)
" 1
~~~-~~fMIJ:iOT
IMI
~fiHBA
fiJ
Bo
(l.illG)
"2
";-~S\;
<
INCti«A.)
>
-imoCII17)
"3
"iffM!i;fli!BAJ:f.IJ:~~
o
(lill8)
"4
~~~~fi!BA
~~~fi!BB
~~if?lU=tfMI..t
o
~~mm~~-.~m~~7\rMI~~~-~
o
3-18.
Higashi Kimpo-cho. Gifu-city. Japan Tel.:(0582)
47-8400
TELEX
4722118
HASHIMA J
From the library of: Superior Sewing Machine & Supply LLC
Table of contents
Other HASHIMA Iron manuals

