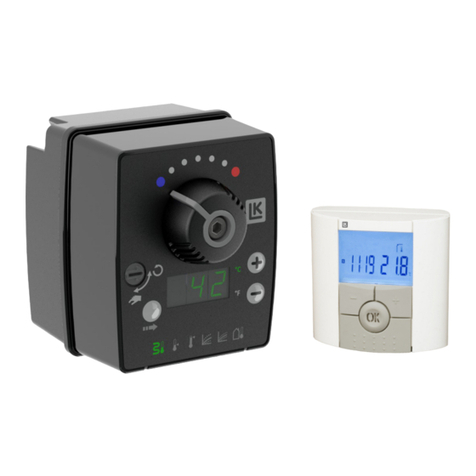
Hass Intellifaucet 250 User manual

Table 2 Spare parts list.
Table 3 Troubleshooting.
Hass Manufacturing Company
371 NY Highway 351
Averill Park, NY 12018 USA
Tel (518) 67 -8151 [email protected]
www.hassmfg.com
Intellifaucet Owner's Manual
INSTALLATION
Mechanical Connections
Connect hot water to the left side of the
Intellifaucet, and cold water to the right. Use
ball valves for shutoffs for the hot and cold
water. Install a vacuum breaker if your local
code requires it. Install water filters if your
water has sand, dirt or rust in it. Install
check valves on the inlets if connected to a
closed piping system. o not use iron or
steel pipes for water supply.
FIGURE 1. Hot on the left, cold on the
right, outlet in the center.
Electrical Connections
Connect Intellifaucet to 12V – 24V C
power source, then plug power supply in or
turn it on. Appropriate power supplies are
included with all Intellifaucets.
O tional Remote Interface (RK Models)
A 4-20mA current source and 2 momentary,
dry contact closures (relay or pushbutton) are
needed.
FIGURE 2. Remote connections.
FIGURE 3. Remote temperature input.
FIGURE 4. Remote Start/Stop inputs
FIGURE 5. Remote Switches.
Ref.
Name
Intellifaucet 250 Intellifaucet 375 Intellifaucet 500 Intellifaucet 750
1008 1014 1023 1024 1009 1015 1021 1022 1025 1026 1049 1050 1041 1048 1149 1090
1Knob (2) 10001
3Step Motor (2) 10003 10535
4Motor Screw (8) 10413 10629
7Motor Platform 10098 10600 (2)
9Coupling (2) 10009 10536
11 Jam Nut (2) 10011 10510
12 Compression Fitting 10012 10428 10012 10428 10012 10428 10012 10428
13 Bonnet (2) 10013 10549 10321A 10321C 10454A 10454C 10483A 10483C
14 Bonnet O-ring (2) 10014 10323
15 Stem O-ring (2) 10015 10347
16 TFE Stem Washer (2) 10016 10324 10466 (4)
17 Stem (2) 10017 10496 10489 10525 10479
19 Faucet Assembly 10594 11120 10595 10738 10882 1121 10730 11122
20 Plunger Assembly (2) 10093C 10326C 10462C 10627C
23 Plunger Tip (2) Not available as separate item. 10469
25 Plate 10025 10474
26 Knob Extension (2) 10026 10472
28 Knob Screw (2) 10729
63 Thermocouple 10063 11060
Rebuild Kit 10491 10494 10493 10526 10847
Rebuild kits contain stems, plunger assemblies, o-rings, washers and o-ring lube for a complete Intellifaucet.
K
Brass
RK
Brass
K
303ss
RK
303ss
K
Brass
RK
Brass
K
303ss
RK
303ss
K
Brass
RK
Brass
K
303ss
RK
303ss
K
Brass
RK
Brass
K
303ss
RK
303ss
Symptom Cause What to Do
Valves were overtightened Loosen by hand, then close gently.
Nothing happens Power cords not connected Check cables
Fuses blown in power supply Replace fuses
Random numbers appear
Electronic component failed Have unit serviced
Valves oscillate Flow too low. Increase supply pressure or press Flow Down
Flow won't stop or start Sticky valves, mineral or rust buildup Fill faucet with mild acid then rinse
Valves do not open and make
stuttering noise after pressing
START
Power supply turned off and on too
quickly
Turn power off, wait 5 seconds, turn power
on.

OPERATION
Manual Control
Rotate knobs on top of the Intellifaucet to
open and close the hot and cold water valves.
Make sure both are gently closed before
starting automatic control. Both valves close
clockwise (looking from above).
Automatic Control
Press START to begin automatic control.
Press STOP to shut off the water. You can
change the temperature, flow or timer
settings at any time.
The flow setting is a percentage of full flow,
not an absolute value. Press START TIMER
to start water flow and activate the timer,
which will shut off the water after the preset
time.
Presets
Press and hold the “Show” keys for 3
seconds until you hear a short beep to save
the current temperature, flow or timer
settings. Press and hold F/C key for 3
seconds to change and save the F or C mode.
Jum ers
There are three jumpers on the logic board.
JP2: isable the speaker. Simply remove
shunt and put on one pin of jumper for
storage.
JP3 and JP4: Let ground float for remote 4-
20mA signals.
Remote Automatic Control
Flip the Remote/Local switch to Remote.
The Intellifaucet will now use the 4-20mA
remote signal as a temperature setpoint. The
remote start and stop lines are always active
regardless of Remote/Local switch position.
The scaling equations for the remote current
signal are:
F = 10.7 * mA – 10.75 +/- 1 F
or
mA = 0.0936 * F + 1 +/- 0.2 mA
C = 5.94 * mA – 23.75 +/- 2 C
or
mA = 0.17C + 4 +/- 0.2 mA
The standard temperature range is 32 – 203
F. The current range is 4-20mA.
Hold the remote START or remote STOP dry
contact closed for a minimum of 50 mS to
start or stop water flow. Hold both remote
START and STOP closed for idle mode.
Release both to return to control mode.
CALIBRATION
Each Intellifaucet is calibrated at the factory
and rarely needs re-calibration.
Here's how to calibrate the Intellifaucet:
irect the outlet from the Intellifaucet into a
1 quart container equipped with an accurate
thermometer. Set the Intellifaucet for 68 F,
20 to 30 percent flow and press START. Let
the temperature stabilize. Record the actual
temperature. Repeat at 102 F. Press STOP.
To enter calibration mode, press and hold the
STOP key for 3 seconds until you hear a
short beep and the letters CAL appear on the
display. The Zero offset is set with the
FLOW keys, and the Gain is set with the
TIMER keys.
IMPORTANT: When finished calibrating,
press STOP for 3 seconds until you hear a
beep to save the calibration values and return
to normal mode.
There are 4 possible cases:
1. There is no error. Unit is calibrated.
2. Both errors are the same. Press the FLOW
keys (offset) to raise or lower the
temperature.
3. The error at the high temperature is more
positive than the error at the low
temperature. Press the TIMER (gain) key
down.
4. The error at the low temperature is more
positive. Press the TIMER key up.
Repeat as necessary.
MAINTENANCE AND REPAIR
Most problems can be solved by cleaning all
of the internal parts with a mild acid
solution. An easy way to do this is to
uninstall the unit, plug the inlets, lay the unit
on it's back in a sink or tray, and pour the
mild acid into the outlet. Let sit for a few
hours, rinse and reinstall. isassemble the
unit and manually clean all the parts if
needed.
To disassemble the Intellifaucet, remove
parts top down, and assemble bottom up.
Please contact us for help at any time.
LIMITED WARRANTY
Hass Manufacturing Company (HMC) warrants
the Electronic Control Valve against defects in
materials and workmanship for a period of Five (5)
years from the date of original retail purchase. If
you discover a defect, HMC will, at its option,
repair, replace, or refund the purchase price of the
product at no charge to you, provided you return it
during the warranty period, transportation prepaid,
to HMC. Prior to returning the product for
warranty consideration, contact Hass
Manufacturing Company for a return authorization
number and shipping instructions
This manual suits for next models
19
Popular Temperature Controllers manuals by other brands

PNI
PNI SafeHome PT255 user manual

Quick-Ohm
Quick-Ohm QC-PC-C01H-100 user manual
Quark-Elec
Quark-Elec QK-W016 Setup guide
M&C
M&C TRN operating manual

MISSION CONTROLS
MISSION CONTROLS LOGiCFAN User instructions
S+S Regeltechnik
S+S Regeltechnik THERMASGARD RGTF1 Series Operating Instructions, Mounting & Installation
Dometic
Dometic 9600011575 installation manual
VOLTCRAFT
VOLTCRAFT ETC 902 operating instructions
ThermoWorks
ThermoWorks BlueTherm operating instructions
Johnson Controls
Johnson Controls A419ABG-3C installation instructions
Omega
Omega CN8200 Series user guide
Ropex
Ropex RESISTRON RES-5012 operating instructions
