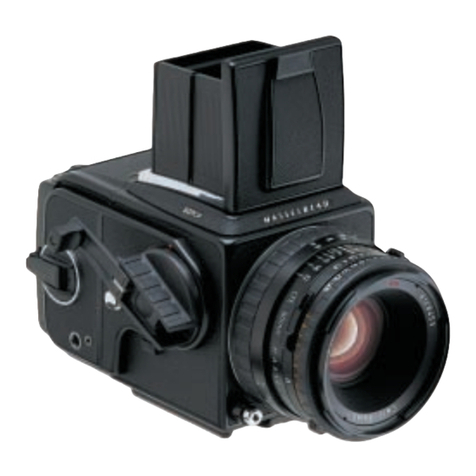
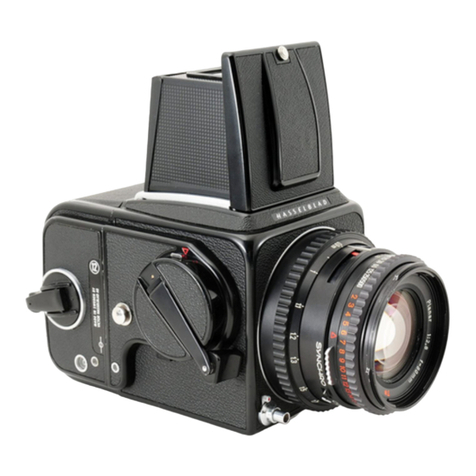
Hasselblad 202FA User manual

+TASSfIBTAD
lnstructionmanual
2O2 FA
. | :i;i:::i::l:::iiii::':i:tri
i':':.:'
::':.:':':-::;'l;':
:
i.:t::: :::::::t:::t:: :t:::tt.
:l:::t::::::.:: :.ti:ltat:.
:l?t::i
i.:::.:il:..:l.l.l:
::::l:l:a:l:l::::.;:::).
" ;::::::::it::,,.,.
...,,t::ii:ii.;:
i
I
I
1
.t

Hasselblad
202rn
1:i:ij:i:ii:l:it
ii::iri:ir::i::i'
- speed
and
precision
Thonkyou
for
choosingaHasselblad202FA.The
combination
of
precise
metering,
outo-exposure
andflashmetering
createsa
sophisticated
camerathotremains
eosy
qnd
comfortabletoop-
erote.lt is
particularly
usefulinrapidly
changinglightcondi-
tionsondforfast-moving
subjects,
producing
superb
profes-
sionalimage
quality.With
the
202FAyou
hove
ochoice
ofeither
aperture
priority
automatic
ortrulymanuolfunction.ln
theau-
tomaticmodes
you
conmanuolly
adjust
thecomputer-con-
trolledexposurewithin
the
ronge
+5to
-5
EV.The
extremely
ac-
curote
focal
plane
shutter
provides
oneof
the
widestranges
of
shutterspeedsinthe
mediumformat
field:34
minutesto
ultra
fast|
/1000
s
withl
/z
stop
increments
inmanuol
mode
or
90
s
to 1/l000
s
with1/tz
stopincrements
inoutomaticmode
with
FElenses.lt
olso
provides
thefostest
flash
synchspeedamong
mediumformatfocolplane
shutters:l/90s.
Primarily
designed
totakeadvontage
ofthis
remorkable
shutter
aretheHasselbladFE
series
lenses,ranging
from
themedium
wide-angle
50mm
f/2.8totheshort
telephotof/4,including
the
powerful
Planor110mmf/2.
And
usingtheHosselblad
Converter2XE
doublestherange
of
focallengths
atastroke!
These
outstanding
lenses
by
produced
Carl
Zeiss
oresupported
bythebrightest
possible
viewfinderimage,
provided
bythe
Acute-Matte
Dfocusing
screen,
completedwith
the
illuminated
LCD
displaywithallrelevant
exposure
andset-updota.

Themetering
systemcompiles
the
information
from
the
lens,
thebuilt-inexceptionallysensitivelight
meter,
andthe
film
speedsettingontheottachedE
orTCC
magozineto
calculate
theaccuroteshutterspeed.
lfony
ofthe
porometers,
e.g.the
pre-
setoperture,is
changedtheshufterspeed
changesaccordingly.
AHasselblad
winder
is
avoilobleasanoptionol
extroto
motor-
ize
you
r202FAfor
moxim
umco
nveni
ence.
Thisinstruction
monual
describes
indetailhow
tooperote
your
202FA,so
please
readitcarefully.lf
you
have
aquery
donot
hesitate
tocontact
your
dealer
- wewant
youtobe100ok
sat-
isfied!Your
dealercsnalso
provideyou
with
the
latestin
news
andtechnicaldevelopmentsfrom
Hasselblad.Aquarterly
mog-
ozine
- FORUM
- is
published
withthe
emphasison
photo-
graphic
imageryfeaturing
photogrophers
from
alloverthe
worldto
provide
youwithinspirotion!
Ourinternet
site
-
http://www.hasselblad.com
- isosource
of
generol
andtech-
nicalinformotion
and
you
cane-m0ilus
- forfurther
inquiries.
Yournew202FA
provides
occess
tothe
Hasselblad
potential.The
realization
ofthis
potentialis
onlydependant
upon
your
skill,
careand
judgement
osa
photographer.
Congratulationsonofinechoice!

.i:iiti.l
6
I
Hossel
blad
202FAIntrod
uction
Contents
,,' ,: ,i ,
Ports
ond
Componen9
, .
:,,.
GETTING
STARTED
I Battery , ,,
8 Winding
thecamera
' : ,
:
8 Front
protective
6sygJ
,::
,,
I Attachingthe
lens...l.'..:..:.'..;.''..'..,.;i;
I Removing
thelens ::' ,
8 Rearcover
Multi(ontrol
,.'.............
8 Attachingthe
magazine
:,''
9 Removing
themagazine
:
9 Magazine
statusindicator:r:r,
,,
9 Openingthefocusinghood
:
9 Thebuilt-inmagnifier
9 flosingthe
focusinghoOd
:,i,]:ii::].
10Windingcrank
10Removingthe
windingcrank
10Attachingthe
windingcrank
10Strap,
attaching
andremoval
:
1A'.MAIN
FEATURES
12Activating
(amera
&meteringsystem
:,.,. ,i
12Focusing,exposure
release
and
viewfindet
diiplai.
12
Viewfinderdisplay
&
symbols
13
Double
exposure ,
14Minorandmechanism
pre-release,,,.ii...ii.i'iii..i...t'.ii,,
14Selftimer
,: '' , .i,.,...:.i.,.l:,.:..,.i'l.
15Focalplaneshuttbl:
;,
, :,,
,,
i,,
'"' '
16Automaticexposure
lock
(AE)
lock.
,.,....,.1'.'..,.,..'.'.liiii.li.ilii.i,lil.iliili.iiililii
16Adjustmentbuttons . ,r :, ,',
l1 Automaticexposure
{AE}
lock
11Adjustment
buttons
11Lefthandgrip
',
i,i,:,'
12OPERATINGDETAILS
.I6VIEWFINDER
SYSTEM
17LENSES
10Focusingscreen ::: ::i
::::
10Exposuremeter :
,, ,
1
0 Viewfinder
display:..:'l...,l,...lllll..l.,.l.,
11Control
panel ,:,,
,;,
1
1 Flashconnecton,,]:]i:i:iiii|iijil:iitil.ii::l]iit|ii,i:]'iii
11
P(-socket ' "' : '
11Dedicatedflashconnector
11Displayillumination ,
11
Mode
selectordial
',
,,
' ,
4
16(hanging
thefocusinghood/viewfinder
17Changingthe
magnifie
r
17Changingthefocusingscreen ,,,
lS FElenses
': , .
,.:
18
Aperture
, , ;:, ,
18Focusing
and
depth-of-field

18Ddpth-of-fi
eldscaf
e' .
r1
:.1i;ir1';.1.1.1i;.i';,1.;;i1.;.;i..;';.i:
18Depth-of-field
previewl:.,,1.;,,:;;:.:1li;..',;.l1....:.
18
Infra-red
(IR)
photography
.,,,',.'.',.'
19
Exposure
value
(EV) :::,
190ther
Hasselblad
lenses
::.;i:i
t,,
:lt,l::::t:l:,::t::llt:
19MAGAZINE
OPERAflAN
itl;iliilil;'il;;i;;
, .','
19 Step-by-step
fi
|
m
loaOin
g,ili
:i:
:iii
iili:i.l
20Magazine
loadstatus ,'
,
,'
20Removing
thefi
lm ...i.i.....i...ii...,..,ii.liii.iit.i.ti
20Film
tabholder.,,.,,.......,,...'l',..,.;i.1.;..1'....,....i...t'...:...
20 Filmspeed
dial lliliil,.i:ji.i....ii::.:.:l.iil..'l..iii:.ii.ii.:i
20Ma
gazin
eslide
pocket,.
..'..,.,.'...'.....t,t.lt.......
21
Film
plane
index '
27Flaih
tit rtTTt
m0de ,,, :,,,i:,:,i,,::::.,i:i.,::,,,i
ia ftastrsetatautomaticmodt
.
':,,;;,,,:,,,,:iiliili.iiii.iiiliii:iiliiiiiii.
29 Flashsetatmanualmode, : :,, r
i,i.l,,ii..ii,..i.i..,i.,i.jiil
29Non-dedicatedflashunits':'
" : :
:,',,
30 How
tousea
non-dedicated
flashunit i'ili..i.i.i.i.i,i.i.ili.i..iil
,,:i:',::
totur iozFAwtrH
F-ANb
cFtENsES,i:.:'
30
Flenses : :: , , ,,
31Flash
photobraphi*ittri ienie;
. ' ''ri
''
31How
touseadedicated
flashunit :,,
,
31 Non-dedicated
flash
units ..,..,.,....,..,,.,,',.,;.,,,,.,.,,,.',.,.,.,'
31
CFlensgs i,,,
,,
', ,,'',
'
31Depth-of-field
preview
knob ,
'i,
,,
,
,i
31 FSetting 'Iiiii,ili:|]|li|]l|:l:]l|ll:lllll]ll:r]::
l1 CFlensin
Fmodeand
flash
photography
32
How
touseadedicated
flash
unit
22 Pr
programming
mode , :,:.,]:r,,:i,],:,,,t]i,],,],,],:,':':ii:.:,::,.
22 How
touse
the
.P/'mode
,.,:l'.iili::li:li.i:ililli:li:li:ii:iiliiii.iil::l:li:l
22
Setting
thefilmspeed '.' ,''
',,'..
23Setting
theselftimerdelay '
' ;':r"""":';
23Adjusting
the
automatic
flash
metering
23D-differential
mode
:' : :::':::
24How
touse
the
"D"
mode .,:,
,
l ,
24
A-Automaticmode,',',
:::'
25M-Manualmode
'i,
iri' i.,,,
25
ML-
Manual,
locked
, ' ,:,
25
Warning
functions
::
:
':
' , ,:::
;,;,
,,,
2I THE
METERING'SYSTEM
22 OPERATING
MODES
26 FLASH
PHOTOGRAPHY
26 Dedicated
flash
units
.,..i,,..,.ii.i,'.i
27 Using
a
dedicated
flashunit
32 ACCESSOR'Es
32Accessory
mounts
33MNOR FEACCESSORIES
33 Winder ::i:,,:,:!]i:.,:,..:::,::.i,.::,]:i,:.]:l]:.l,.:l'::.,
,:::i.,:,.l:,
33 Viewfind€IS :, rr: ' : ,
ll ftype
extension
tubei
.
.,;.......',l.....l.'..lt.
33External
battery
cassette,,..
...'..1:'.,........
33 GENERAL
ACCESSORIES
,94Trbubleshoofing
,,,..,:,,,,.,i,:...i.,..,..i..ii,',......i..,.............'...'i'..
37 Technicol
specifications'
.i::,:::l!]ii]i:i,i].,::,::,:i]:i:,:]|
i9 hmera
Core,Servire
ondfiuarantee

1 Focusing
hood
cover
2 Display
recess
3 Focusing
screen
Acute-Matte
D*
4 Focusing
screen
catch
5 Liquid
crystaldisplay
(LCD)
6 Display
illumination
window
7 Vievufinder
mirror
8 Shutter
release
button
9 Aperture
scale
10 Depth-of-field
scale
11 Interlock
button
(not
onFE)
12Focusing
ring
13 Lens
front
bayonet,
exterior
14 lens
front
bayonet,interior
15 Depth-of-field
preview
knob
16 System
mark
17Lens
mount
18 Driveshaft
19 Data
busconnection
bracket
20 lens
catch
21 Selftimer
indicator
22 Battery
compartment
23 Adjustment
button
24 Cushioned
grip
25 Battery
cassette
26 Battery
27 Mode
selector
dial
28 P(socket
29 Automatic
exposure
lock,
AE{ock
6
30 Dedicated
flash
connector
31 Flash
connector
socket
cover
32 Display
illumination
button
33 Strap
lug
34 Indicator
trigger
slot
35 Film
plane
indicator
36 System
mark
37 Film
load
indicator
38 Filmholder
key
39 Film
speed
dial
40 Film
holder
41 Film
magazine
42 Magazine
slide
43 Filmmagazine
catch
44 Magazine
hookslots
45 Magazine
gear
46 System
connectors
47 Focusing
hood
48 Film
winding
crank
49 Magazine
slide
holder
50 Filmtab
holder
51 Magazine
support
slot
52 Frame
counter
53 Magazine
support
54 Magazine
status
indicator
55 Camera
support
56 Quick
coupling
plate
57 Tripodthread
1/4"
58 Magazine
indicatortrigger
59 Data
bus
connectors
60 Self
timer
indication
61 Data
busconnectors
62 lens
driveshaft
63 Lens
driveshaft
catch
64 Lens
bayonet
plate
ffi#,i,4

65 Cushioned
grip
66 Minor
release
/selftimer
button
67 Winder
coupling
68 Double
exposure
button
69(rank
hub
70 Winding
crank
catch
71Winding
crank
72 Winder
bayonet
mount
73 Winding
crank
index
74 Strap
lug
75 Magazine
driving
gear
76 Magnifier
77 Shutter
blind
78 Magazine
hooks
*Acute-Matte
desiqned
byMIN0LTA
202FAcannnaBi cflR( :.i:i:i:ii:iiii]i:]i:]i:ii:i:l|]i:]i
supplied
withthe
fotlowing
eqiiikii |:
WndingirankE
' ',
,,',
i. : ,' 44096
Focusing
hood
E,
chrome
::
: : :::::
::
: ' ,, 42317
Focusing
screen
Acute-Matte
D2AU203
. 42210
Standardstrap : : , ,' 59110
Frontprotectivecover
',,.::
'':
,:, : 51438
RearcoverMlltiControi
,,,,
,.. i,,,
, . ,, 51020
10542
11099
11101
202FA cAM
ERABoDy,
BLAIK 10546
supplied
as10542
above,
but
equipped
with
black
Focusinghood
E4z3Z5 : ii
lhthe
tex1
pasitionts
ofcompaninfsaido ttaiion
aie
describedin
relotion
tothe
comera
as
seenwhen
taking
a
photagraph,
i.e.the
lens
otthefront
the
viewfinder
an
np and
thewinding
uank
onthefight
hord
tidr. ;;, ,,,;,,
.::.:...
The
oppropriate
illustrotions
are
indicated
bythefiEuirei
beside
the
smollheodings
in
the
text.
':',.'r0)iA'iiti*ioini,iin;1;
",
,,,
,
' ',,
i'
Complete
camera
including
z}zRlcamera
body,chrome
and
ZeissPlanar
FE
2.S/80
mm
andFilm
magazine
El2-6x6,
chrome
',,';;;;^,;^;;;,;;r,;;i" '' ,'', j,.'''
' "
Complete
camera
including
202FA
camera
body,
black
andZeiss
Planar
FE2.8/80
mm
and
Filnmagazine
El2-6x6,
black , ,',

This
section
outlinesthebasicfunctionsandoper-
ationsofthe
Hasselblad
202FA.
Moredetailedin-
formotioncon
befoundinlotersections.
Thebattery
compartmentandcassetteis
locatedinthe
lowerforward
corneron
the
lefthand
sideofthecamera
body.Pull
outthecassetteandinstall
thebattery
-6V
type
PX28L
orequivalent
-accordingtothemarking
on
thecassette.Pushthecassette
allthewaybackinto
the
compartment.
Afterinserting
thebatterp
windthecamerabyrotating
thewinding
crankontherighthand
sideclockwise
one
completeturnuntilitlocks.Ifitwillnot
turnthen
itis
locked
whichmeansthat
thecameraisalready
wound.
:::::.:.:.::.::.::.::.::::.::.1:.:t::.:
Turn
thecover
(bayonet
fitting)
inthedirectionofthear-
row
intheillustration
and
lift itout.Donotremove
itun-
til you
are
ready
toattachalens.
Removethelens'rearprotective
cover
by
rotating
it
counter-clockwise
and
lifting
itoffthelens.
Checkthatboth
thecameraandthelens
arewound.Fig5
shows
theproperposition
againsttheindexmarksfor
thecamera
driveshaft
(top)
andthelensdrive
shaft
(bot-
tom).lf
the
lensisnot
wound
you
can
insert
acoin
ora
I
similarobjectintheslotand
turntheshaft
in
thedirec-
tionofthe
arrowapproximately
als
ofafullturn.You
mayfind
that
holding
thecamerabodyinyourlefthand
andthelensinyourrighthand
asshownintheillustra-
tion
(top,
right)is
theeasiestwaytoattach
the
lens.When
youhave
alignedthe
red
indexon
the
lens
withthaton
thecamerabody
asshown
in
theillustration,thelens
willfiteasilyintothebayonetmount.You
canthenrotate
itclockwiseuntilitstopswitha
faint
clickasthelens
locksin
place. ::::.i
::i::
Removing the lens i'i,,'f;:'.,1":'l
Depress
the
lensrelease
button,rotate
the
lens
counter-
clockwiseandliftitoutofthebavonetmount.
Youcanonlyattachandremove
the
lenswhen
thecameraisfullywound
andnotinpre-released
mode
(see'pre-
releaseandcable
release').
RearcoverMultiControl
Depressthecatch,
tiltthecoverbackwards,
and
lift
off.Donotremove
it until
vouare
readv
toattacha
magazine.
A Alwayskeep
the
Rear
coverMultiControl
/-!), or a magazine
in placetoprotect the
shutter.
':).::tl:.1:..:.1:.::.:).:::l:::.:.1:.:).::.::::.:t.:.:::::.:::l
Attaching the magazine ttilr:g;',t?jrt:ttt:tl
Ensure
thatthemagazineslideisfullyinserted
with
hinge
towardthefrontofthecamera
andthatthe
maga-
zine
statusindicatoriswhite.lf
the
indicator
isred,then
see
'Magazine
statusindicator'.Itis
alsoadvisableto
have
thecamerafully
wound.Restthemagazineonthe
magazinesupportswith
thesupportlugsproperly
en-

gagingthe
recesses.
Carefullyswingthe
magazine
to-
wardsthecamerabody,checkingthatthecamera'sup-
per
support
hooksfitinto
theslots
inthe
magazine.
Push
the
magazine
gentlybut
firmly
againstthe
hooks
whileslidingthe
magazine
catchtothe
right.
Release
the
button
whenthemagazinehasmadecontactwiththe
camerabodyand
thenpushthebuttontothelefttoen-
surethat
ithasreachedthelocked
position.
Removethe
slideto
positivelylock
the
magazine
tothe
camerabody.
Thecameraisnowreadytouse.
':,:t:t:.1:.,:.a::t:.t:.:i.i:.1::.t::
Removing the mag_azin
Removingthe
magazineis
simplythe
reverse
ofthe
at-
taching
procedure.ltisadvisabletohavethecameraful-
lywoundandthe
magazine
status
indicator
displaying
white.lnsert
the
magazine
slide
fullyandwiththehinge
towardsthe
frontofthecamera.Slidethemagazinecatch
totheright,tiltthe
magazine
backand
liftitoffthe
lower
supports.
Themagazinecannot be removed
withoutinserting
the
magazine
slide.
Theslide
protects
thefilmfromfogging.
Ensure
thattheslide
is
pushed
allthe
wayinto themagazine.
Note
alsothatthe
camera
cannot
be
operatedwhenamagazine,with
the
slide inserted,is attached to the
camera. :::
::::|
|:|:::::::::::|:||:
Themagazinestatusindicator :,it.:tjt,.$::,'tl
Thestatusindicatoronthe
righthand
sideofthe
maga-
zine
shows
whitewhenthemagazineisreadytooperate
andredwhenthe
filmhasnot
beenadvancedafteran
exposure.
Ifthestatus
indicator
shows
red,release
the
camerafirstbeforeattachingthemagazine.Then,wind-
ing
thecameraagainwillautomaticallyadvancethe
film
by
one
frame.
Do not attach a magazine
showing
white
toacomerathatisnotrewound!
Wind
thecamera
first
or
youwilllose
a
frame.
Donotattachamagazine
showingred
toa fullywoundcamera!This
couldre-
sult
inadoubleexposure.
Op91.in.g.the_fo-cusinghood. ,.l.i..I*lli
Liftthe
lidwithafirmgriponthetabatitsrearedgeand
swingit uptoaverticalposition.Thehood
unfolds
auto-
maticallyandlocksin
open
position.
Thebuilt-in magnifier ::::)..1:l::tt::::tl::::
,l:.T.::,iEtl,
Themagnifierflips
up
into
theviewingpositionwhen
theoval
button
inside
the
lidismoved
tothe
right,
as
in
the
illustration.
Tofold
the
magnifier
downsimplypressitbackdownto-
wardsthe
liduntilitlocksintoplace.
Itcaneasilybeexchangedtosuitindividualeyesight
(see
"Changing
the
magnifier").
Closing the focusing hood
Fold
awaythe
magnifier
bypressing
itbackdownto-
wardsthe
liduntil
itlocks
intoplace.'PincHinthe
side
platesatthe
hingepoints
andthenpushthelidlightly
backwards.
Thehood
thenautomaticallvfoldsback
down.
A
A

The.wilyding
cra.nk
onefull
revolution
"f,h;ili;; ;;;;k;#; ih;;-
era,
cocks
thelens
mechanism
andtransports
thefilm
to
thenext
frame.
Underneath
thecrank
arethe
drive
shaft
and
the
bayonet
mount
for
theHasselblad
Wnder,
which
can
beattached
afterremoving
thecrank.
Itis
recom-
mended
that
the
camera
isfully
wound
when
the
crank
isremoved
or
replaced.
Removing the winding uank
Toremove
the
crank
push
the
catchlever
ontherear
of
thecrank
hub
downwards
whilerotating
thecrank
counter-clockwise.
Then
pullit straight
outfrom
the
shaft.
A;ttaching
thewin.ding
crank ,......}#'..
Attach
the
crank
tothe
shaft,
aligning
thesmaller
trian-
gular
index
mark
against
thered
dot
just
above
the
mount.
Keep
the
crank
pushed
against
thecamera
while
turning
itclockwise
until
thelarger
triangular
mark
is
aligned
with
thered
dot.
Strap ....,.,,,i.*t*AioAt
rr,
The
202FA
is
delivered
with
amedium
wide
shoulder
strap,
packed
separately.You
willfind
other
types
of
straps
intheHasselblad
Product
Catalogue.All
straps
are
provided
withspecial
clips
for
easy
attaching
and
remov-
ing
ofthe
strap.
Srntptrrrcumnxr
Place
themain
body
ofthe
strap
clipfrom
behind
over
thestrap
lug
onthe
camera
with
thestrappointingback-
wards.
Press
thetipofthe
clip
towards
the
camera
while
pulling
the
strap
toslide
the
clipover
thelug
tothelocked
position.
10
Srntp
nmtoutt
Hold
the
strappointing
backwards
andliftthelocking
plate
ofthe
cliphigh
enough
to
pass
over
thetopofthe
lug.Push
theclipforwards
toslideitoffthelug.
This
section
is
obrief
overview
ofthemain
fentures.
Eoch
feoture
is
described
indetaillater
onin the
monu0l.
Seeunder
relevont
heodings.
Focusingscreen iffi1t:
The2020FA
isfitted
withafocusing
screen
Acute-Matte
Dfor
unrivalled
brightness
and
sharpness.A
circle
of
dotsindicates
themetering
areaused
by
thebuilt-in
se-
lective
meter.
The
screen
can
easily
beexchanged
for
others
specially
designed
forvarious
applications
(see"
Changing
thefo-
cusing
screen").
The
exposure
meter
is
acentre-weighted
selective
meter
where
the
metered
valueis
measured
over
acircular
028
mmcentral
areawhich
is
approximately
200lo
ofthe
totalimage
area.
The
{1yf1
The
viewfinder
display
-theinformation
centre
of
the
camera-
is
located
above
the
upperedge
of
theviewfind-
erimage.You
willfind
acomprehensive
description
of
the
display
andits
symbols
inalater
section.

Thecontrolponel
Thecontrol
panel
occupies
most
ofthe
lefthand
side
of
thecamerabody.ltincludesallthecontrols
for
the
vari-
ous
functionsofthe
202FA,
suchas:
.The
flash
connectors
.Thedisplay
illumination
switch
.The
mode
selector
dial
.The
adjustment
buttons
Flashconnectors
Theflashconnectorsarelocatedunderneaththe
protec-
tivecover
intheupper
forwardcornerofthecontrolpan-
el.Thesmallerone
is
astandard
PC-socketandthelarg-
erone
is
a6-pin
connectorforTTl-controlleddedicated
flashunits.
The PC-socket
Non-dedicated
flashunitsandSCAadaptersshouldbe
connectedtothissocket.
The dedicated flash con.n.ec.to.r.
.
Adedicated
flash
unitconnectedtothis
6-pinoutletdi-
rectlyorthroughasuitableadapter
isfully
controlledby
the
cameraprocessor.Youwill
find
detailed
information
onflashphotography
inlater
sections.
The disp! ay iIlumi n.atiotn
Pressingthebuttonabovetheflashconnectorsturnsthe
display
illumination
onoroff.
Theswitchhasatoggle
function
(press
once
for'on'andonceagain
for'off
').
It
works
only
whenthecamera
is
activated.
24l': Themode selectordial 'i::..:l.t::ltlt:::,.1,:t::
126,:,
l:::.::.i::l).::.:::l:.:).:::
ij..g,f
With
the
modeselectordialyou
canselectanyofthe
five
operating
modesPr,A,D,M
orMt
availableonthe
202FA.
The
A,D,M
and
ML
areused
for
photographyand
Prfor
theprogrammingofcertainfunctions.
The automatic exposure (AE) lock
In
thecentreofthe
mode
selectordial
is
a
push-button,
marked
witha
red
circle.ltoperatesthe
AE-lock
andcer-
tainotherfunctions,dependingonthesettingofthe
mode
selectordial.
You
canalsouse
it
tostarttheelec-
tronicoperatingsysteminthecamera.
Th
eali us;t
m
e
nt butto1s.
Thesekeysalsohavemultiplefunctions
dependingon
thesettingofthemodeselectordial.
Thefunctions
of themodeselectordial,
the
AE-lockand
theadjustmentbuttons
aredescribedin detail
inlater
sections.
Youmayfindthatholdingthe202FAinyourlefthand
withyourindexfinger
onthe
release
button,
as
shown
in
theupper
illustration
below,
is
the
most
convenientgrip.
You
can
reach
the
AE-lock
andtheadjustment
keys
with
yourleft
thumb
(see
illustration)
and
yourrighthandis
freeforfocusing,aperturesetting,operatingthecrankor
changingthelensorthemagazine.
t1

Assuming
afresh
bottery
is
in
place
ond
olens
and
film
magazine
are
ottached
to
the
clmerl,you
cnn
go
through
thefollowingprocedures
step-by-step
tobecome
fomiliar
with
operating
detoils.
Actiuatlngthecamera
andme'teringsysltern.
Before
you
operate
the202FA
you
have
towind
the
cam-
era
tocock
the
shutter
(ifit isreleased)
and
switch
on
the
metering
system.
To
be
able
torelease
the
camera
you
alsohave
to
remove
the
magazine
slide.
Thefully
wound202F|can
beswitched
onintwo
differ-
ent
ways:
l.By
depressing
the
exposure
button
halfway
in,
i.e.
to
the
"pressure
point".
2.By
depressing
theAE-lock
button.
Activation
asin(l )above
can
only
beperformed
when
the
magazine
slidehas
been
removed.
Atnormal
light
levels
this
activation
occurs
when
theexposure
button
is
dEressed
for
an
exposure.
Atlow
light
levels
the
camera
should
be
activated
afew
seconds
beforereleas-
ingtheexposure
inoneof the
automatic
modes.
Activation
asin
(2)
isnot
possible
if
the
AE-lock
has
beenkept
depressed
for
more
than
l6seconds.
Keep
themagazine
slide
inserted
toavoid
unwanted
bat-
terypower
consumption
caused
by
unintentional
activa-
tion
ofthemetering
system.
The
electronic
system
and
theviewfinder
display
turnoff
12
automatically
l6
seconds
after
thelastkey
or
button
op-
eration,
butallrelevant
datais
stored
in
thememory.
Foc
usin
g,expos
u
r
ereI
eose
and.vi
e.y.finder
disptay ttffi'#ii;#Ei1:
Turn
thefocusing
ring
until
theimage
ofthesubject
ap-
pears
sharpintheviewfinder.
Depress
theexposure
but-
tonhalf-way
intothepressure
point.
Ifthemode
selector
dialis
set
attheD
orAposition
the
display
now
shows
-
besides
afew
other
symbols
de-
scribedinafollowing
section
-theshutter
speed
calcu-
lated
asaresult
ofthe
preselected
aperture
andfilmsen-
sitivity.Mth
themode
selector
set
atM
the
display
shows
theletter
M,
thepre-selected
aperture
andthe
shutter
speed
seton
the
shutter
speedring.
Iftheexposure
but-
tonisreleased
again,
the
displayinstead
shows
the
se-
lected
shutter
speed
and
thedifference
inEV
between
themetered
and
themanually
setvalues.
You
cannow
press
the
exposure
button
allthe
wayin
to
make
theexposure.
Afterreleasing
thebutton,
rotate
the
winding
crank
onefull
turn
untilitlocks,
torewind
the
camera
and
advance
thefilmone
frame.
However,
you
donot
need
torelease
thepressure
onthe
release
button
towind
onifyou
wish
tomake
a
rapid
se-
ries.You
caninstead
keep
the
button
depressed
and
wind
on
after
every
exposure.
Viewfinder
disp.lay
an! symb9ls. .'8B','
Fig.34
depicts
theactual
view
of
thedisplay
as
seenwith-
outaprism
viewfinder.
When
aprism
viewfinder
is
used
the
position
of
the
symbols
becomes
reversed,
but
the
microprocessor
adjusts
their
appearance
tomake
them
fullv
readable.

Manualmode
Themode
selectordialis
setatM.
Selftimerfunction
Flash
ready signal
Theflash
symbolisilluminated
green
when
adedicated
flash
isconnected,
turned
onandreadyto
befired.
:8,:ifi,,t;,ifi,,,',t
Film Speed
Indicates
film
speedset
onE-magazine
(or
TCC-
)dialor
inserted
manually
inPrmode
(see
later
section)
S
inIS0
is
alsoused
to
indicate
seconds
atveryslow
shutter
speeds(O.7
sto60
s)or
long
exposures
(l min
30sto
34
min).
Battery check t,::&4:r*:::ir:::::
i1/;{t::li:::#.t
:::t:l:l:::::l:l:::::l:l:l:l:l:::l:::::::
;94,.i;'lfi,
Appears
when
battery
capacityislow
(see'w.r;iil
i;;.-
tions').
.:::::
:::::::: :j::::::j:':: ::::.:::
: :i::
Mogazine
Indicates
that
theattached
magazineis
not
an
E
(or
TCC)
-magazine.
::1
: :::::::::::j::::.:::::
::::::::::::::
Automatic mo-de ,iti8,#:,it.Iirlit
Indicates
that
themode
selector
dial
is
setatA.
Warning symbol '#$lliitfi
,,:i:ttiflfitir"f1,Flashesred
together
with
oneormore
ofthe
othersym-
bols
to
indicate
various
problems.
l:l:::,:::::
::::::::::::::::.::::t::.::.:
,84.,,,*,:,9
0ntherighthand
side
ofthecomera
body
arethe
winding
cronk,the
pre-releose
(to
liftthemirro0
ond
selftimerlever.
Double
exposure ,::fr,#:,'
',$fi:,,i,';'fi1, You
canmake
double
(or
multiple)
exposures
by
rewind-
ing
thecamera
withoutadvancing
the
film.
Thisispossi-
ble
bydepressing
thedouble
exposure
buttonin
thecen-
treofthecrank
hub
andsimultaneously
turningthe
crankslightly
clockwise.
Thenyou
canrelease
the
button
and
complete
thewinding
untilthe
cranklocks.
:::..:::t:::.:::t:
::.:::t:.tt::::::t:::::::,t
::
:::::ffi;ilbtl
,;,',,:fi
.4;:i:,tflt:;,,
Flashes
whentheselftimeris
activated.Appears
alsoby
programmingthe
selftimer
delayinPrmode.
Differential.mode
The
mode
selectordialissetatD.
PIus
/ minus
sign
Appears
togetherwith
acorrection
ordeviation
value
when
themode
selectordialis
setatD,A,orM
andincer-
tain
Pr
functions.
Therighthandplus/minus
signcan
alsobedisplayed
togetherwith
the
"Flash
ready
signal".
Figures
Eight
7-segmentfigures
indicate
corrections,
deviations,
EV
shutter
speed,aperture
andcertain
other
informa-
tioninoperation
modesD,A
andMaswell
as
program-
mingfunctionsinPrmode
andcertainwarnings
invari-
ousmodes
ofoperation.
Fraction indication
0neortwo
dashestotheright
ofthefigureindicate
1/i
andzltstephigher
valuethanindicated
by
thefigure.
Minutes indication
Avertical
dashtotheright
ofthefigureindicates
thatthe
preceding
figure
showsthenumber
ofminutes
atshutter
speeds
of60sorslower.
13

Mirro
r
.o.n
d mecha
ni
s
m.
pr* re
I
ea1.e. :t::8-$::':,
By
pre-releasingcertain
camera
functionsand
lifting
up
the
mirroryoucanavoid
cameravibrations,
reducethe
sound
levelandshorten
thetimedelaybetween
thede-
pressingoftheexposure
buttonand
shutter
release.Pre-
releasing
isdonebysliding
thepre-release
leveronce.To
resetthe
mechanismand
lowerthe
mirroragainyou
per-
formthe
operation
for
a
doubleexposure
asdescribed
above.
Since
themirrorislifted thelight meter-
ingisinterrupted
andlockedon the
lat-
est
recordedvalue
The
selftimer
Pressingthe
pre-release
leverasecondtime
starts
the
selftimer
function.
Thisisindicatedbythe
selftimer
symbol
inthe
viewfinderdisplay
andbya
flashing
red
lighton
thecamerabody
tothe
leftofthe
lensmount.
Thestandard
delay
intheselftimer
isl0sbut
it
can
be
setat
intervalsbetween
2
s
and60s
inthe
Prmode.
At
the
beginning
ofthe
delaythe
li$t flashestwice
persecond,
butwhentwo
seconds
remainofthedelay
time
itin-
creasesto
fourtimes
persecondandchanges
toacontin-
uous
lightduring
the
lasthalfsecond.
Youcaninterrupt
theselftimer
functionatanytime
bypressingthe
pre-
release
leveragainorby
a'blind'
rewindasfordouble
exposure.
Theselftimer
function
isinoperative
whentheshutter
speed
issetat
B.
Thecushioned
grip .89
Arubbercushion
alongthe
loweredgeofthe
right
hand
sideprovidesa
safeandcomfortable
grip.
14
':::::::::::::l:::t:::l:l:ll':
E_x
p,o.s
u.r.e.
releaseb
Inthe
lowerright
handcorneratthe
front,within
com-
fortable
reachofthe
left
handgrip,
is
the
exposure
re-
leasebutton.
The
button
has
fourdifferent
functions:
Whendepressed
tothe"pressure
point" it:
l.activates
thecamera.
2.changesthe
displaytoindicateaperture
and
shutter
speed.
3.locksthe
lightvalue
inA
mode.
Whendepressed
all thewayin it:
4.
releasestheshutter
to
make
the
exposure
with
preset
orcalculated
values.
The
exposure
buttonislocked
whenthe
magazineslide
isin themagazine.
:::::::l:.:.1:l:::l:1.::.::1.:
Cable releose '11;l$,fi1,1::
When
usingshutter
rp..a, ri"*.; ih;; i/30t itisrec-
ommended
that
youmountthe
camera
onatripod
or
support.Use
acable
releasetoo,screwed
intothethread-
edmount
inthecentre
oftheexposure
releasebutton.
Theexposure
button
retainsits
functionswitha
cablere-
leaseattached.
Lenscatch ,,'il.l::42
The
lenscatchbutton
islocated
onthe
lowerleft
handof
the
camera
front.Toreleaseand
removethe
lensyou
have
to
keepthebutton
depressed
while
rotatingthe
lens
clockwise
asseen
frombehind.

The
focalplane
shutter lrfi,g;i
The
opening
in
tr,...u,
liil; ;;;;; t;;;.;;Iil;;-
ered
by
the
shutter
blinds.
The
202FA
has
amechanical-
ly-powered,
electronically-controlled
focal-plane
shutter
with
twotextile
blinds
running
from
left
toright
across
the
opening.
The
running
time
for
the
blinds
is1/90
s.In
all
modes
except
M,
theshutter
speeds
are
calculated
by
themetering
system
which
controls
theshutter.
The
shut-
ter
speeds
are
adjusted
inincrements
of
l/rz
EV-step
in
theinterval
from
l/1000s
tol6s and,ll+EV
stepin
the
interval
from
I6I
/4sto90
s,
butfor
practical
reasons
only
the
shutter
speedforeacht
lzEV-step
isindicated
in
the
viewfinder
display.
0nthe
underside
ofthe
camera
are
the
quick-coupling
plate,
thetripod
thread
and
the
two
supports
that
steady
the
camera
whenplaced
on
a
flat
surface.
The
quick-cou-
pling
plate
fits
the
Hasselblad
accessories,
suchas
the
tri-
pod
quick-coupling
and
theflash
bracket.
The
tripod
threadis
l/4".
The
viewing
components
occupy
most
of
tiieiimeratop.
The
camera
body
is
supplied
with
the
collapsible
focui-
ing
hood,
which
also
serves
as
a
protective
cover
for
the
focusing
screen.
Infront
of
the'Hasselblad'
signis
a
win-
dowfor
daylight
illumination
ofthe
viewfinder
display
screen.
Quick-coupling
plate w"
system
provides
youwith
themaiimum
The
mode selector dial |ffit
rhe
mode
selector
di.l
i i;ih;;;il;iih;;;;;;fi;-
el
on
theleft
hand
side.
To
select
any
ofthe
operaiing
modes
ofthe
202FA
simply
turn
the
dial
until
the
sym-
bolfor
that
particular
mode
is
aligned
with
thered
index
mark.
The
different
operating
modes
are:
Pr: Programming
mode
A: Automatic
mode
Whether
theshutter
is woundor re-
leased,one
shutter
blind
is
always
ex-
posed
inthe
opening.Take
utmost
core
when
handling
the
camero
when
nei-
ther
theRear
cover
MultiControl
nor
o
magazine
is
inplace
astheblinds
are
vulnerable
todamage. in.exposure
control.lt
is
not
only
convenient
but
ols.ouersatile
producing
0voriety
ofworking
meth-
odsf9r.0
v0riety
of
situotions
ina
comptelely
de-
pendable
monner.
To
theright
of
the
opening
arethe
magazine
driving
gear
and
the
trigger
for
themagazine
status
indicator
.There
are
also
the
contactpins
for
the
data
bus
connection
be-
tween
the
magazine
and
the
central
processor
in
the
camera
body.The
contact
pins
aresensitive
tocontami-
nation
and
should
not
be
touched.At
thelower
edge
of
the
backare
the
magazine
supports
andtowards
the
top
arethe
magazine
hooks
-both
together
serving
toposi-
tively
fix
themagazine
tothe
camera
body.
t5

D: Differential
mode
M: Manualmode
ML:Manual
(locked
shutter
speed)
Thefunctionsofthesemodesaredescribed
indetaillaten
The
outoma.tic
expo-sure
(AE)
lock ,:::$;fi,,:;
TheAElock
is
the
push-button
inthecentre
of
the
mode
selector
dial,markedwitha
redring.Ithasdifferent
functions,depending
onthe
modes
ofoperation
asde-
scribedlater.Itcanalso
beusedtoactivatethe
camera's
meteringsystem
exceptafterthe
AE-lockhasbeende-
pressedformorethan
l6 seconds,e.g.
ifthecamera
has
been
layingonthe
lefthand
side.ln
thatcasethecamera
canonlybe
activated
fornormalusebydepressingthe
exposurereleasebuttonto
thepressure
point.
Theadjustment buttons t:tffi;::
The
adjustment
buttonsalso
havedifferentfunctionsde-
pending
onthe
selected
mode.With
a
fewexceptionsa
single
push
on
theupperbutton
increasesandonthe
lowerbuttondecreasesthe
valuetobeadjusted.
Ifyou
keep
thebutton
depressed
formore
than
halfasecond
the
value
starts
tochangeata
rateof4- 5steps
per
sec-
onduntilthebutton
isreleased.
::t::::.::.:::,:,:t:l:..:it::t.
Thelarger
six-pin
TTL-connector
providesautomatic
controlofdedicated
flashunits.
TheHasselbladD-Flash
40canbeconnected
directlytothe
202FA
butother
ded-
icated
flash
units
willrequireasuitableadapter,such
as
the
HasselbladSCA-adapter390,between
theunitand
thecamera.Thesmaller
connector
is
a
commonPCsock-
et
for
any
kindofflashunit.You
canfindfurther
instruc-
tionson
flashphotographyina
later
section.
16
Disp.tay.i.ttu.
Inlow
lightlevelsdepressingtheswitch
buttononthe
up-
peredgeofthecontrol
panelswitches
ontheillumination
ofthe
viewfinderdisplay.
Thebutton
hasatoggle
function.
The
202FAhason
integralviewfindersystem
com-
prising
afocusingscreen
Acute-Matte
Dfor
the
op-
timum
inresolutionondbrightness
providing
a
through-the-lens
laterally
reversedimoge.Thesup'
plied
focusinghood
islight,compoct
qnd
foldable
formaximumconvenience
and
providesprotection
forthe
focusingscreen.lt
is
supplied
witho
4xm0g-
nifierfor
precise
focusing.
Thereisaselectionof
focusingscreenstochoose
from for special
needs,oll ropidlyand easily
chongeoble.
Arangeof
viewfindersisolsoovail'
able,
featurin
gongled
vi
ewi
n
gco
p
abi
liti
es,
prisms
ond
meteringfacilities.See
fi9.162foravoilobility
ondthe
HasselbladProductCatalogue
for
further
details.
Changing thefocusinghood
or viewfinder 11t'E;fr":',
ft ;;;; ii;'i;;;;il'hil"i;; u'infuny
o,n..
viewfinder
withinthe
TCC
system
detachthe
magazine
(or
theRearcover
MultiControl).Also
folddownthe
fo-

cusing
hoodtoavoiddamaging
it.
Remove
thehoodby
siiding
ittotherearin
its
guideslots.Slidethe
replace-
mentviewfinderintotheslotsand
pushitforwarduntil
itstops.When
fullyinsertedtheviewfinderisretained
in
positionbyaspring-loadedball
latch
until
youhavere-
attached
themagazineorthe
rear
cover.
Chonging-th.e magnifier ',.;fel';'.
Thestandard
4.5xmagnifierlensplate
canbe
changed
for
aplatewithacorrection
lenstocompensatefor
indi-
vidual
eyesight.
Thesuppliedmagnifiermarked
-
l pro-
vides
comfortable
viewingofthefocusingscreenandthe
displayformostusers.Correction
lenses,however,are
availablewith
powersrangingfrom+ 3to-4
dioptres.
Change
themagnifieras
follows:
l. Remove
thefocusinghood
from
thecamerabodyand
open
it
by
liftingthelid.
2.Releasethe
magnifier
by
pushingthecatchtotheleft.
Pushthemagnifier
halfivay
downand
pulloutthelens
plate.
3.
Keep
the
plateholderhalfi,vaydownand
insert
the
re-
placement
lensplatewiththeprintedsideup.
Fold
the
hood
and
putitbackonthecamera.
Changin.g the focusing screen i..'':'.ll5:iiit
i[r't:l
Your202FA
is
equipped
withtheexceptionallybright
andsharp
focusingscreen
Acute-MatteD.Thearea
in-
sidethedotted
circle
indicates
thearea
measuredbythe
built-inexposure
meter.lfyouwishtoreplacethe
focus-
ingscreenwithany
oftheother
focusing
screens
inthe
Hasselbladsystem,simply
followthe
procedure
below:
l.Detachthe
magazineandtheviewfinder.
2.Pushthetwoscreencatches
totheside
into
their
3.Place
yourhand
overthescreenand
invert
thecamera.
The
screenshould
now
drop
intoyourhand.
(Should
thescreen
refusetodropoutbyitself,ensure
thatthecamera
isfullywound,removethelensand
checkthatthe
mirrorisinthedown
position.Putafin-
gerthroughthelensmountandpush
gently
atthe
screen
from
underneath,
preferably
withasoftcloth
between
thefingerandthe
screen.)
4.lnsertthereplacementscreenwiththesmoothsideup
and
the
sharp-edged
cornersdown.Ensurethatall
fourcornersofthescreenare
positively
seatedontheir
supports.You
neednotreturn
thescreencatches.
This
is
doneautomatically
whentheviewfinderisreplaced.
Always
avoidallowing directlight to
enterthe viewfinder
eyepiece
when
makinganexposure.
17

Hasselbladlenses
made
since
1957
canbe
separot-
edintwomajor
groups,
eochwith
twosub-groups:
Lenseswithabuilt-inleaf
shutter:
C lenses
and CFlenses
Lenseswithout
shutter:
Flenses
and FElenses
CF,
F
ondFElenses
conbeused
onthe
202FA,
but
onlytheFElenseswill
giveyou
lccesstothefull
range
of
exclusiveandsophisticatedfeatures
ofthe
202FA.
FElenses
arementionedherefirst
asitisas-
sumedthis
will
bethemain
typeoflens
used.
The
built-inleaf
shutters
of Cand CF
lenses
cannotbeusedwhenfittedtoa
202FA.Please
seespecific
sectionslater
in thismanuol
aboutusingtheselenses.
The
HasselbladFElenses,which
haveno
built-inshutter.
caneasilybeidentified
bytheirsystem
sign,
i.e.
thedou-
bleblue
lines
onthelefthand
sideoftheaperturering.
Another
sign,visibleonlywhen
the
lens
isdetachedfrom
thecamera
body,arethefourdata-bus
contact
pins
inthe
bayonetplate
attherearofthe
lens.
Theyareusedfor
the
data
transmissionbetween
thelenselectronics
andthe
electronicsysteminthecamerabody.The
contactsur-
faces
ofthesepins
aresensitivetocontamination
and
shouldnot
betouchedwithyourfingers.
Attachthepro-
tectivecover
afterremoving
the
lensfrom
thecamera
and
never
setthelensdown
ontheunprotected
bayonetplate.
t8
Settingtheaperture '56l,i!i::l
Theapertureringis
theoneclosesttothecamerabody.
Useit topre-set
theselected
f-stop.
Thefullf stops
markedontheringhave
clickstops,buttherearealso
clickstopsforeachintermediatehalff-stop.
Thesetaper-
turevaluecanberead
againstthe
heavy
indexlineonthe
groovedringinfront
oftheaperturering.Itwillalso
show
onthe
viewfinder
displaywhen
youdepresstheex-
posurebuttonhalfwayin,i.e.
tothepressurepoint.The
aperture
ring
hastwo
groovedgrips
forhandling
conve-
nience.
Oneofthesegripshas
a
push-button
whichhas
nofunction
onthe202FA.
Focusing.and
depth-of-fietd 11S#....
Thefocusingring
istherotatingring
witha
knurled
rubber
gripclosestto
the
front
ofthe
lens.
Ithas
two
scalesforthefocusing
distance,the
white
metre
scale
andthe
orange
inch/foot
scale.Rotatethefocusingring
untiltheimage
ofyoursubjectappearsabsolutely
sharp
onthefocusing
screen.
Thedepth-o=f-.fi.eld.1ca{e .1
'8...'..
Thedepth-of-field
scalerepeatsthe
aperturevalueson
bothsidesoftheheavierindexline
betweenthefixed
ring
withthe
index
lineand
the
focusing
ring.Whenthe
imageisfocused
onthe
screen
you
canreadthefocusing
distanceoppositetheindexlinein
thedepth-of-field
scale.Thedepth-of-fieldlimits
canbereadopposite
the
leftandrightvalues
correspondingtothepre-set
aper-
turevalue.Theillustration
depicts
thedepth-of-fieldfor
the
pre-set
aperturevalueoff/8.
Dep'th.-of-field previ
Thelensisnormally
setatthelargest
apertureto
provide

the
brightest
possible
viewfinder
image
withtheshal-
lowest
depth-of-field.You
canstopdown
the
lensdi-
aphragm
tothe
pre-setaperture
by
pushingdown
the
depth-of-field
preview
knobuntil
itlocks.
Tore-openthe
diaphragm,
depress
the
lowerend
oftheknob.
lnfrared
(tR)
ph.o1o-groply ii'.i6fi.il
Infrared
lightwithwavelengths
beyond
800
nmare
re-
fractedby
the
lenstoan
imageplanefurther
away
from
the
lensthan
the
imageplane
forvisiblelight.When
pho-
tographing
withIRlightyou
have
tocompensate
forthis
difference
bysetting
the
focusingdistance
atthe
redIR
indextothe
rightofthecommon
indexline.
Proceedas
follows:
1.Focusasusual
onthe
focusingscreen.
2.
Markor
memorisethedistance
onthe
focusingscale
opposite
thecommon
index
line.
3.Rotatethe
focusing
ringtoset
thisdistance
opposite
the
IR
index.
Exposurevalue (EV) :::::l:::::::1.:::::
::
6::,fi,,,
Theorange
scaleon
the
righthandside
indicatesthe
ex-
posurevalue
forthesetaperture/shutter
speed
combina-
tion.
Thescale
hasnoparticular
functionon
202FA.
Do
notconfuse
the
exposure
valuewiththe
lightvaluestored
inthe
meteringsystem
whenyou
depressand
releasethe
AE-lock.
O-the
r Hosse
Ib-lad I
ens
es
The
use
ofother
Hasselblad
lenseswith
your202FA
is
described
inalatersection.
Hasselblod
filmmogozines
provide
theopportuni-
tytovary
format,lengthnndtype
of
filmused.They
con
be
quickly
andeasily
switched
mid-film
with-
out
the
loss
of
q
single
frome.
The
followingdescription
opplies
toA-ond
Eiype
mlglzine; Elype
mlgazines
havetheadditional
feotureof
afilmspeedsetting
dial.The
information
is
outomatically
tronsferred
tothe
camero's
meter-
ing
system
vio
the
datobusconnections.
)peration
ofthe
mlgozines
isnotdifficultbut
pay
particular
attention
tothesection
on
loading.Go
through
the
procedure
onestep
ot0time
and
proc-
ticealittleuntil
you
feelconfident.
Noteespeciolly
which
wly roundthespool
of
filmis
ploced
ond
the
positioning
ofthebacking
paper
under
the
clamp
bar.
The
filmisautomotically
odvanced
frame-by-
frame
inthe
magzzineby
thecamera
winding
mechonismnnd
consequently
only
whenattached
tothecnmerl
body.Therefore
when
seporoted,
the
magazine
lnd comera
bodycould
become
un-
motched.This
canbe
determinedby
checkingthe
magozine
stotus
indicatororby
thewinding
crank
st0tus.
Trytoodopt
o
routinethatsuits
you
regarding
windingand
removalaswelloschecking
onthe
statusofeoch
item.Thiswillensurethat
thecam-
ero
/lens/m
ogazi
necombi
nationstotus
i
salways
fullyoperative.
T9

Themagazine
canbeloaded
on,
oroffthecamera.
Ifitis
tobeloaded
offthe
camera,
thenthemagazine
slidemust
beinsertedfirst.
Ineithercase,
wheninserting
theslideensure
thatitsflat
sideistowards
therear
(see
detail
inillustration)
asthis
facilitates
theremoval
of
thefilmholder.
Step-by-stepfilm loading
Follow
theprocedure
belowinthecorrect
order.
62 Foldout
thefilmholderkey.
63 Turn
thekey
counter-clockwise
andwithdraw
the
film
holder
(magazine
insert).
64 Place
anempty
take-up
spoolunder
thegrooved
knob
ofthespool
clamp
bar.lnsert
a
roll
offilm
under
theother
endof
thebar,
turnedthe
same
way
asintheillustration.
Be
sure
toremove
allof
thepaper
band
surrounding
a
new
roll
offilm.
65 Turn
thefilm
holderkey
clockwise
toopen
thefilm
clamp.Pull
8-10
cm
(3
-4in.)
ofpaper
backing
off
thefilmrollandslide
theedge
underthe
clamp.
66 Insert
thetongue
ofthe
backingpaper
into
theslot
in
thetake-up
spool.
67 Turnthe
groovedknob
clockwise
untilthearrow
onthepaper
backingis
aligned
opposite
thetrian-
gularindex
onthe
spoolclamp
bar,butno
further.
68 Turn
thefilmholder
key
counter-clockwise
and
insert
thefilmholder
into
themagazine.
Ensure
thatitis
correctlypositioned.lirrn
the
film
holder
key
clockwise
tolock
thefilmholderinthemaga-
zine
and
thenfold
the
key
backinto
place.
69 Fold
out
thefilmcrank
androtate
itclockwise
aboutten
turns
until
itstops.Then
turnitcounter-
clockwise
andfolditin.
Thefigure
(
I
)willnow
be
displayedin theautomatic
frame-counter
window
indicating
thatthemagazine
isloaded
andready
for
use.
' Themagazinet
film
winding
crankisonly
blockedat
framel.Apartially
exposedfilmmay
bewound
offat
any
frame
afterwards.
' Do
notput
thefilmholder
down
onanunclean
surface
orwhereitcanattract
dust.
' Cleanoutthemagazine
housing
regularly
removing
not
onlydust
andparticles
butalso
anyscraps
ofpa-
perfrom
previous
rolls
that
may
haveremained
inside.
' Each
magazine
housing
andfilmholder
form
acare-
fully
matched
pair.Be
careful,therefore,
whenloading
more
thanonemagazine
ata
timenotto
switchhous-
ings
andholders.The
last
threefigures
ofthehousing
serialnumber
should
correspond
withtheserialnum-
ber
onthefilmholder.
' Load
andunload
themagazine
awayfrom
directlight
sources.
Mag.azine
In
thecentreofthe
filmholder
key
there
is
acrescent-
shapedindicator
window
that
showswhite
whenthe
magazine
isfreshly
loaded.lt
gradually
changes
to
red
as
thefilmis
wound
through.An
allredindicator
shows
that
thefilmis
usedupor
thatthemagazine
isempty.
After
thelastframe
has
beenexposed
and
the
film
ad-
vanced,
themagazine
blocks
thecamera
againstfurther
release.
Toremove
theexposedfilm
fold
outthefilm
winding
crankandrotate
itclockwise
untilyou
canfeel
thatthefilm
isleaving
the
supplyspool.
Withdrawthe
filmholder
from
themagazine
andremove
thefilm.
20
Other manuals for 202FA
1
Table of contents
Other Hasselblad Film Camera manuals

Hasselblad
Hasselblad Xpan User manual

Hasselblad
Hasselblad 503CW User manual

Hasselblad
Hasselblad 501CM User manual

Hasselblad
Hasselblad 500 C User manual

Hasselblad
Hasselblad 501CM User manual

Hasselblad
Hasselblad 2000FC/M User manual

Hasselblad
Hasselblad 2000FC User manual

Hasselblad
Hasselblad XPAN II User manual

Hasselblad
Hasselblad 503CX User manual

Hasselblad
Hasselblad H2F - User manual