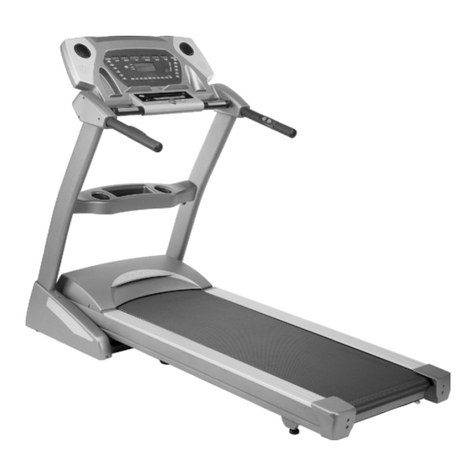
Haswell Fitness T-302A User manual

Owner’s Manual
T-302 Series Treadmill
By Haswell Fitness

Menu
1. Caution...............................................................................................................................................................................1
1.1. Electrical Safety.................................................................................................................................................1
1.2. Machine Check ..................................................................................................................................................1
1.3. Sport Attention...................................................................................................................................................1
1.4. Children and Pets:..............................................................................................................................................1
2. Introduction........................................................................................................................................................................2
2.1. Overall View ......................................................................................................................................................2
3. Specifications.....................................................................................................................................................................3
4. Assembly and Installation..................................................................................................................................................4
4.1. BeforeAssemble................................................................................................................................................4
4.2. Installation..........................................................................................................................................................5
5. Operation............................................................................................................................................................................9
5.1. Main Interface....................................................................................................................................................9
5.2. Manual Operation Interface ...............................................................................................................................9
5.3. Multimedia Interface........................................................................................................................................10
5.4. Target Interface ................................................................................................................................................ 11
5.5. Programs Interface...........................................................................................................................................12
5.6. System Set Interface.........................................................................................................................................12
5.7. Shortcut Panel..................................................................................................................................................13
6. Maintenance.....................................................................................................................................................................14
6.1. Lubrication of Running Belt and Running Deck..............................................................................................14
6.2. Judge Friction of Running Belt and Running Deck.........................................................................................14
6.3. Running Belt Position Adjustment...................................................................................................................14
6.4. Running Belt Tension Adjustment ................................................................................................................... 14
6.5. Motor Belts Adjustment...................................................................................................................................14
7. Error code.........................................................................................................................................................................15
8. Quality Warranty..............................................................................................................................................................15

Commercial Treadmill
1/ 15
1. Caution
(Safety Precautions)
Note: Please read this instruction carefully before using this treadmill, and pay attention to the following safety matters.
1.1.Electrical Safety
Always turn off and unplug the power after the use of the treadmill or before cleaning or maintenance to avoid
electric shock.
This treadmill default adopts power ofAC200V~250V 50/60HZ, To reduce danger of accident when it breaks
down, Connect the power plug to a grounded socket as required by law
Do not use the treadmill if the power cord was damaged or the treadmill does not work normally.
Do not operate the treadmill if it is doused with water or other liquid, stop the machine and clean liquid.
Do not install the treadmill near water, in very dusty or humid areas nor on thick carpeting to avoid damage.
Do not use a multi-socket simultaneously with other electrical equipment to avoid fire due to overload.
1.2.Machine Check
Replace the worn-out running belt immediately as it may cause excessive friction with foot panel leading to
static-induced motor damage and electric shock.
Prevent foreign matter from getting into moving parts such as in motor and rollers, Prevent clothing or any part
of your body from touching moving parts.
Check all screw nuts and bolts were locked firmly every day.
Please get down from treadmill once found something unusual or unusual noises find the problem and fix it
before running on it again.
Users should not stand on the running belt when adjust, test or just start this treadmill.
1.3.Sport Attention
Wear suitable gym suits or shoes when exercising
Long hair should be tied in the back
Please wear the gym shoes so as to avoid sprains, muscle strains and fall accidents, do not wear the high-heeled
shoes, leather shoes, hard-soled shoes, barefoot and so on. People who are suffering from fatigue, weakness,
cardiovascular and cerebrovascular disease, dizziness, hypertension and other diseases are not allowed to use,
and ensure no dirty things, rocks or hard things under shoes, in order to avoid damaging your running belt.
Elder and teenagers will be allowed to use under the guidance and supervision of adults
Users should stop running once feel uncomfortable.
Don't jump on running belt, and stand on foot rail if needed.
This treadmill is for single use only, two or more people on the treadmill at the same time is not allowed.
The max limited weight on the treadmill is 160kg.
1.4.Children and Pets:
Children are not allowed to use the treadmill.
Keep pets away from the treadmill, especially when the machine is working.

www.haswell-fitness.com
2/ 15
2. Introduction
2.1.Overall View
Parts Name
Remarks
1
Display/Console Set
T-302A: LED
T-302T: Touch Screen
T-302Pad: Android Pad
2
Safe Key
These three together component the docking station
3
Heart Rate Hand Sensor
4
Handle bar
5
Console Mast / Support
6
Upper Motor Cover
7
Running Belt
8
Foot Rail
with non-slip sticker
9
Real Roller
10
Real Roller Adjustor
11
Adjustable Pad
12
Side Rein

Commercial Treadmill
3/ 15
3. Specifications
Models
T-302A
T-302T
T-302PAD
TV / Console
LED digital tube
(1) LED shows speed, slope, heart
rate, Program, Distance, Time,
Calories, etc.
1) 15 Inch Touch Screen
2) USB input port to read
multi-media from U-Disk
3) Audio output for earphone,
4) Bluetooth for headphone
5) English and Chinese available
1) 15 Inch Touch Screen Android
Pad within Wi-Fi to surface
internet
2) USB input port to read
multi-media from U-Disk
3) Audio output for earphone,
4) Bluetooth for headphone
5) English and Chinese available
N.W. / G.W.
222KGS / 262 KGS
222KGS / 262 KGS
222KGS / 262 KGS
Occupy Floor
2145 ×960mm
84 ×37.4inch
2145 ×960mm
84 ×37.4inch
2145 ×960mm
84 ×37.4inch
Slope
0~20%,
0~20%
0~20%
Speed
1.0~20 KM/H
1.0~20 KM/H
1.0~20 KM/H
AC Motor
normal 3HP, max 7HP
normal 3HP, max 7HP
normal 3HP, max 7HP
Belt
(W×G×T)
580 ×3380 ×2.5mm
580 ×3380 ×2.5mm
580 ×3380 ×2.5mm
Run Surface
3380*580mm
3380*580 mm
3380*580 mm
Max loading
170 KGS
170 KGS
170 KGS
Power
200V~250V (50 HZ) as Default
110V for MOQ 10PCS
200V~250V (50 HZ) as Default
110V for MOQ 10PCS
200V~250V (50 HZ) as Default
110V for MOQ 10PCS
Packing
Volume
1.8 m³
1.8 m³
1.8 m³
* Belt (W×G×T): Width ×Girth ×Thickness

www.haswell-fitness.com
4/ 15
4. Assembly and Installation
4.1.Before Assemble
1) Please check if the ground surface is level and solid, otherwise it may cause noise, vibration, and tripping over.
2) Please keep the location in door with low humidity and dust level, otherwise will let machine break-down.
3) Please check if any solvent or inflammable substance is nearby, in case electric spark occurs within the machine due to
electric leakage or static, it may lead to an explosion or fire.
4) Please keep enough safety space from surrounding. Length 2000mm at backside, width at least same as treadmill
width.
5) Please install the machine with enough space in front to allow easy access to the power switch. .
6) Please link no more than 2 sets of treadmills with power cable coming from one 30A ELB (Earth Leakage Breaker),
Over load current could generate abnormal operation of treadmill;
7) Please use standard plug and socket and make sure the power outlet is safety;
8) When moving the treadmill, lifting up the bottom of rear cover so that the machine can be moved easily on front
wheels.
9) If the entire machine has to be hauled up, 4-5 adults should do it carefully to avoid injury or accident.
10) Remove all packing materials from all body and parts; do not discard it if possible.
11) Ensure the place where treadmill will be located exist enough space.
12) All bolts must be tightened after testing.
13) Please find out below tools and accessories from the package before assemble the treadmill.
No.
Part description
Image
QTY
1
Interactive console assembly
1
2
Console bridge assembly
1
3
Right upright post
1
4
Left upright post
1
5
Flat washer, white
14
6
Washer, star
16
7
Flat washer, black
2
8
Dome screw(White),M8*15L
14
9
M8*95L(Black)
2

Commercial Treadmill
5/ 15
4.2.Installation
STEP 1 Installing the left upright post- connect the two electrical connectors
NOTE
Ensure the two electrical connectors at the
bottom of the left upright post are well-connected
before moving to the next step
STEP 2 Installing the left upright post- secure the left upright post
TOOL
5
Flat washer, white
6
Washer, star
8
Dome screw, M8*15L
Hex wrench-6mm
STEP 3 Installing the right upright post- secure the right upright post
NOTE
Insert the display wire through the upright post and
ensure the wire does not fall inside the post.

www.haswell-fitness.com
6/ 15
STEP 4 Installing the right upright post- secure the right upright post
TOOL
5
Flat washer, white
6
Washer, star
8
Dome screw, M8*15L
Hex wrench-6mm
STEP 5 Installing the console bridge- connect the two electrical connectors
NOTE
Ensure you push any excess wires inside the left upright
post.
STEP 6 Installing the console bridge- connect the TV wire connector
NOTE
Ensure the electrical connector of TV wire at the top of
the right upright post is well-connected before moving to
the next step.

Commercial Treadmill
7/ 15
STEP 7 Installing the console bridge- fix the TV wire connector
NOTE
When connecting the TV wire, ensure to twist lock the
connector, then push the jacket to cover the connector
STEP 8 Installing the console bridge- position the bridge on the top of the upright post
NOTE
Ensure to push any excess wires inside the right and left
upright post.
STEP 9 Installing the console bridge- secure the left side of the console bridge
TOOL
5
Flat washer, white
6
Washer, star
8
Dome screw, M8*15L
Hex wrench-6mm

www.haswell-fitness.com
8/ 15
STEP 10 Installing the console bridge- secure the right side of the console bridge
TOOL
5
Flat washer, white
6
Washer, star
8
Dome screw, M8*15L
Hex wrench-6mm
STEP11 Installing the 550Te Entertainment console- connect the electrical connectors
NOTE
1. Ensure the two electrical connectors and the connector
of TV wire at the bottom of the console are well-connected
before moving to the next step.
2. When connecting the TV wire, ensure to twist lock the
connector, then push the jacket to cover the connector.
Please refer to STEP 7.
STEP 12 Installing the 550Te Entertainment console- secure the console
TOOL
6
Washer, star
7
Flat washer, black
9
M8*95L(Black)
Hex wrench-6mm

Commercial Treadmill
9/ 15
5. Operation
5.1.Main Interface
5.2.Manual Operation Interface
You will see manual operation interface if press Start button in the main interface,
Under the manual operation interface users could changes parameters according to their own health,
1) Slope on the left,
2) Speed on the right,
Two ways to change the parameter by touch the screen
1) Touch the direct key like 1% from the left, or 2km/h from the right of screen to adjust the speed and slope
2) Press + or –buttons to change the parameter.
When the treadmill boot, or the
treadmill stops and back to the
main interface. Main interface
can enter the system under any
sub- interface.

www.haswell-fitness.com
10 / 15
When users finish exercise, user can press the STOP button, and then you will get below interface
Press the CONFIRM will go back the main interface
5.3.Multimedia Interface
You will see below interface if press Multimedia button in the main interface,
1) How to see TV or use video input?
Connect data input cables from data supplier like digital set top box; DVD Player to theAV ports which on the left side
of motor cover.
2) How to play Music, Movie and Picture?
Prior to play medial, users should insert an USB-Disk in which exists multi-media content, press above buttons you
will see the interface like below image shows.
Press as to back to multi-media interface.

Commercial Treadmill
11 / 15
5.4.Target Interface
You will see below interface if press Target button in the main interface,
1) Press key jump to next parameter after input the weight value;
2) Press CONFIRM button to enter next interface to setting time, and "distance" and "calories" like below image shows.
Press Start button to lauch target mode running..

www.haswell-fitness.com
12 / 15
5.5.Programs Interface.
You will see below interface if press Program button in the main interface,
1) There are 24 programs for customers to select.
2) One movement cycle time is 30 minutes as default; user can add and reduce the time by press + or - button.
3) After press "START" button, system will run according to the parameters set by the user.
5.6.System Set Interface
1) Two languages available; Chinese and English.
2) Brightness level adjustment 1-5.
3) Touch screen calibration, after calibrate the touch screen after the offset touch function can be normal use.
4) Time & date setting.

Commercial Treadmill
13 / 15
5.7.Shortcut Panel
1) Quick Start: Initiate the motor to begin at 0.1 km/h and 0% elevation.
2) Incline Button: Use the incline arrow button to change the elevation. Each press of the button represents 0.5%
Increment.
3) Decline Button: Use the decline arrow button to change the elevation. Each press of the button represents 0.5%
decrease in elevation.
Attention: press Incline & decline Button at the same time, device will check the elevator motor automatically.
4) Stick shift: To adjust T-302 series treadmill speed, move the speed control bar upward or downward. Each motion
represents 0.1 km/h change of speed.
5) Stop / Pause: Press this key once to pause the workout. Press this key again to display workout information and exit
the workout program. The pause time is set for 3 minutes. The display will count down from 3 Minutes. When the
STOP button is pressed, it will go to pause mode. If not resumed from “Pause”, the treadmill will go back to
Homepage.
6) 2 mph / 3 km/h Button: During a workout, press this button to change the speed to the present value which suit to
walk immediately.
7) 4 mph / 6 km/h Button: During a workout, press this button to change the speed to the present value which suit to jog
immediately.
8) 6 mph / 9 km/h Button: During a workout, press this button to change the speed to the present value which suit to run
immediately.
Attention, press this key and hold on no less than 5s, will turn off / on the Bluetooth which designed to connect
Bluetooth earphone, you need to pairing earphone with treadmill after turn on the Bluetooth icon.
Bluetooth of Treadmill turn off, did not connect earphone
Bluetooth of Treadmill turn on, have not connect earphone, please pairing.
Bluetooth of Treadmill turn on, earphone connected

www.haswell-fitness.com
14 / 15
6. Maintenance
Keep clean will prolong service life treadmill, therefore clean the running belt and running deck regularly is encouraged, soft cloth
with soapy water could be adopt to clean the belt but do not pour water to flushing or the motor and other electronics parts
properly be damaged.
6.1. Lubrication of Running Belt and Running Deck
Lubricant for running deck and running belt is not necessary; because of the belt within a wax layer which will ensure
the movement moving smooth.
6.2. Judge Friction of Running Belt and Running Deck
Forget to clean or lubricants reduce probably increase the friction of the running belts and the running deck, even to
damage the motor and control panels. High friction usually reflect as below
1) Belt is hard to move when power off.
2) Belt stop moving at once press the EMERGENCY STOP BUTTON when user running on belt.
3) Motor, control panel been damaged, the circuit breakers is broken.
6.3. Running Belt Position Adjustment
The running belts position has been tested and adjusted before shipping, whereas it will be found lean after running
sometimes, probably due to
1) Horizontal body is not stable; please adjust the bolt under treadmill.
2) The user likes to run at one side but not at the middle of belt;
3) Uneven force;
Artificial causes could be fixed easily by no-load running in a few minutes, but user should take hex screw to screw the
bolt.
Problems
Left Regulator
Right Regulator
Deviation to left
rotate clockwise
rotate counterclockwise
Deviation to Right
rotate counterclockwise
rotate clockwise
Running belt with a deviation does not belong to the warranty scope, generally maintenance by the user. Deviation will
seriously damage the running belt, must check in time, immediately correct.
6.4. Running Belt Tension Adjustment
1) Tighten: screw the in a clockwise direction 180degree by 180degree with Hexagonal screwdriver.
2) Loosen: screw the in a counterclockwise direction 180degree by 180degree with Hexagonal screwdriver.
As images shows
6.5. Motor Belts Adjustment
The position of motor belts has been tested and adjusted before shipping, whereas it is will be found loosen after working
certain hours, open the motor cover then screw the bolt according 180 by 180 degree upon the particular circumstances.

Commercial Treadmill
15 / 15
7. Error code
Error Code
Means
Remarks
ERROR 00
trouble-free
01-08 are parameters related with frequency converter and motor,
Only two reasons will cause those code
The input power is not suitable or frequency converter got problem.
ERROR 01
Non-meaning
ERROR 02
Accelerate the over current
ERROR 03
Slow down over current
ERROR 04
Constant speed over current
ERROR 05
Accelerate the overvoltage
ERROR 06
Deceleration overvoltage
ERROR 07
Constant speed over voltage
ERROR 08
Non-meaning
ERROR 09
Voltage too low
Current voltage < 180 V will show ERROR 09
ERROR 10
The inverter overload
ERROR 11
Motor overload
ERROR 12
input wiring phase not right
Check the wiring
ERROR 14
Frequency converter too hot
The inverter is fan rotation is normal
ERROR 15
External error
ERROR 16
Communication abnormal
The failure of the most common module and inverter cable is normal.
ERROR 19
Machine self-learning fault
8. Quality Warranty
Exemption Clause
Any service due to one of the following shall be charged even within the warranty period.
1) Malfunction caused by infiltrated External impurities (water, drink, coffee, toys etc.)
2) Malfunction or breakage caused by putting or dropping heavy object onto the product
3) Damage or distortion of exterior by organic solvent such as thinner and benzene
4) Malfunction caused by using other parts not supplied by us.
5) Malfunction caused by using excessive voltage.
6) Malfunction caused by using two-pin plugin which does not exist grounding wire.
7) Loss of parts or damage caused by disassembling attempted by the customer.
8) Malfunction caused by repair or modification by the person(s) not employed by us.
9) Malfunction caused by force majeure (by lightening, fire, storm, flood, gas, sea water, earthquake, etc.)
10) Malfunction cause by not following the “Safety Precautions” in the user’s manual
11) Other malfunction caused by customer’s improper operation.
Quotation Warranty Period as follow
Items
To China mainland Customers
To abroad Customers
Start Date
from the date client get products
from the date of B/L issued
Motor
36 months
38 months
Elevator Motor
12 months
14 months
Fragile Pieces
12 months
14 months
Frequency
12 months
14 months
Main Chipboard
12 months
14 months
Others Components (Belt etc.)
12 months
14 months
Shipping Cost from Customer to Supplier
On Supplier
On Customer
Shipping Cost from Supplier to Customer
On Supplier
On Customer
It will be helpful if customers offer photos / video or other proofs to us
Once found any problem.
Generally speaking broken parts should be sent back to us before we offer new replacement to customers.
~~~Thanks~~~
This manual suits for next models
2
Table of contents
Other Haswell Fitness Treadmill manuals

