MediaShop iWalk M17848 User manual

Gebrauchsanleitung
M17848, M17849, M17896, M17895_Manual_iWalk_20190826_CP.indd 1 26.08.19 12:21

Gebrauchsanleitung........................... 06
Instructions for Use............................ 10
Mode d’emploi...................................... 13
Manuale di utilizzazione................... 17
Gebruiksaanwijzing............................ 21
Használati utasítás.............................. 24
Návod k použití .................................... 28
Návod na použitie ............................... 32
Instrucţiuni de utilizare ..................... 35
Instrukcja obsługi................................ 39
Kullanım kılavuzu ................................ 43
2
M17848, M17849, M17896, M17895_Manual_iWalk_20190826_CP.indd 2 26.08.19 12:21

DE
1. Griffstützen
2. Handgriffe
3. Computer mit Kontrollanzeige
4. Befestigungsknopf
5. Verschlussbolzen
6. Räder
7. Laufband
8. Spannschrauben
EN
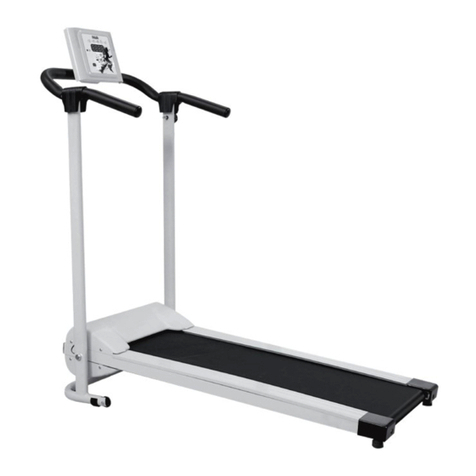
1. Handholds
2. Handles
3. Computer with control display
4. Fastening button
5. Locking bolt
6. Wheels
7. Treadmill
8. Turnbuckles
FR
1. Bras de support
2. Poignées
3. Console avec affichage de contrôle
4. Bouton de fixation
5. Boulon de verrouillage
6. Roues
7. Tapis de course
8. Vis de serrage
IT
1. Manubri
2. Maniglie
3. Computer con display di controllo
4. Manopola di fissaggio
5. Bullone di bloccaggio
6. Ruote
7. Tapis roulant
8. Viti di serraggio
NL
1. Greepsteun
2. Handgrepen
3. Computer met bedieningsdisplay
4. Bevestigingsknop
5. Vergrendelingsbout
6. Wielen
7. Loopband
8. Klemschroeven
HU
1. fogantyúk
2. kézi fogantyúk
3. számítógép vezérlő kijelzővel
4. rögzítő gomb
5. reteszelőcsavarok
6. kerekek
7. futópad
8. rögzítőcsavarok
CZ
1. podpora rukojeti
2. rukojeti
3. počítač s kontrolním zobrazením
4. upevňovací knoflík
5. blokovací čep
6. kola
7. běžecký pás
8. upínací šrouby
SK
1. Rukoväte
2. Držadlá
3. Počítač s riadiacim displejom
4. Pripevňovací gombík
5. Blokovací skrutka
6. Kola
7. Bežecký pás
8. Upínacie skrutky
RO
1. Reazeme mâner
2. Mânere
3. Computer cu afișaj de control
4. Buton de fixare
5. Șurub de blocare
6. Roți
7. Bandă de alergare
8. Şuruburi de fixaren
PL
1. Słupki uchwytów
2. Uchwyty
3. Komputer z wyświetlaczem sterowania
4. Pokrętło mocujące
5. Sworzeń zamykający
6. Koła
7. Bieżnia
8. Śruby naprężające
TR
1. Tutamak destekleri
2. El tutamakları
3. Kontrol ekranlı bilgisayar
4. Sabitleme parçası
5. Kilitleme cıvataları
6. Tekerlekler
7. Koşu bandı
8. Sıkma vidaları
1
2
3
4
5
6
7
8
Abbildung 1 | Illustration
1 | Figure 1 | Figura 1 |
Afbeelding 1 | 1. ábra |
Obrázek 1 | Obrázok 1 |
Figura 1 | Rys. 1 | Resim 1 |
3
M17848, M17849, M17896, M17895_Manual_iWalk_20190826_CP.indd 3 26.08.19 12:21

DE
A. 1x Sicherungsbolzen
B. 1x Befestigungsknopf
C. 4x M8 Schrauben
D. 2x Plastik- Abdeckung
E. 1x Computerfixierung
F. 1x Notfallknopf
G. 1x 3.5mm Kabel für Musik
H. 1x Inbusschlüssel
I. 1x Schmieröl
EN
A. 1x Safety bolts
B. 1x Fastening button
C. 4x M8 screws
D. 2x Plastic cover
E. 1x Computer specification
F. 1x Emergency button
G. 1x 3.5mm cable for music
H. 1x Allen key
I. 1x Lubricating oil
FR
A. 1x Boulon de sécurité
B. 1x Bouton de fixation
C. 4x Vis M8
D. 2x Cache plastique
E. 1x Fixation de la console
F. 1x Bouton d‘urgence
G. 1x Câble 3,5 mm pour la musique
H. 1x Clé Allen
I. 1x Huile lubrifiante
IT
A. 1x Bullone di sicurezza
B. 1x Manopola di fissaggio
C. 4x Viti M8
D. 2x Coperture di plastica
E. 1x Fissaggio del computer
F. 1x Pulsante di emergenza
G. 1x Cavo da 3,5 mm per la musica
H. 1x Chiave di Allen
I. 1x Olio lubrificante
NL
A. 1x Veiligheidsbout
B. 1x Bevestigingsknop
C. 4x M8-schroeven
D. 2x Plastic hoes
E. 1x Computerfixatie
F. 1x Noodknop
G. 1x 3,5 mm kabel voor muziek
H. 1x Inbussleutel
I. 1x Smeerolie
HU
A. 1x Biztonsági csavarok
B. 1x felerősítő gomb
C. 4x M8 csavarok
D. 2x Műanyag burkolat
E. 1x számítógépes rögzítés
F. 1x vészleállító gomb
G. 1x 3,5 mm-es kábel a zene számára
H. 1x Imbuszkulcsok
I. 1x kenőolaj
CZ
A. 1x bezpečnostní čep
B. 1x upevňovací knoflík
C. 4x M8 šrouby
D. 2x Plastový kryt
E. 1x fixace počítače
F. 1x nouzové tlačítko
G. 1x 3.5mm kabel pro hudbu
H. 1x imbusový klíč
I. 1x mazací olej
SK
A. 1x Bezpečnostná skrutka
B. 1x Montážne tlačidlo
C. 4x M8 skrutky
D. 2x Plastový kryt
E. 1x Fixácia počítača
F. 1x Núdzové tlačidlo
G. 1x 3,5 mm kábel pre hudbu
H. 1x Imbusový kľúč
I. 1x Mazací olej
RO
A. 1x Bolţuri de siguranță
B. 1x Buton de fixare
C. 4x Şuruburi M8
D. 2x Acoperire din material plastic
E. 1x Fixarea calculatorului
F. 1x Buton de urgență
G. 1x Cablu de 3,5 mm pentru muzică
H. 1x Cheie Inbus
I. 1x Ulei de lubrifiere
PL
A. 1x Sworzeń zabezpieczający
B. 1x Pokrętło mocujące
C. 4x Śruby M8
D. 2x Plastikowa pokrywa
E. 1x Mocowanie komputera
F. 1x Przycisk awaryjny
G. 1x Kabel 3,5 mm do odtwarzania muzyki
H. 1x Klucz imbusowy
I. 1x Olej smarowy
TR
A. 1x Emniyet cıvataları
B. 1x Sabitleme parçası
C. 4x M8 vidaları
D. 2x Plastik kapaklar
E. 1x Bilgisayar tespit vidası
F. 1x Acil durum düğmesi
G. 1x 3,5 mm‘lik müzik kablosu
H. 1x Alyen anahtarı
I. 1x I Gres yağı
Abbildung 2 | Illustration 2 | Figure 2 | Figura 2 |
Afbeelding 2 | 2. ábra | Obrázek 2 | Obrázok 2 | Figura 2
| Rys. 2 | Resim 2 |
4
M17848, M17849, M17896, M17895_Manual_iWalk_20190826_CP.indd 4 26.08.19 12:21

Abbildung 3 | Illustration 3 | Figure
3 | Figura 3 | Afbeelding 3 | 3. ábra |
Obrázek 3 | Obrázok 3 | Figura 3 |
Rys. 3 | Resim 3 |
Abbildung 4 | Illustration 4 |
Figure 4 | Figura 4 | Afbeelding 4
| 4. ábra | Obrázek 4 | Obrázok 4
| Figura 4 | Rys. 4 | Resim 4 |
Abbildung 5 | Illustration 5 | Figure
5 | Figura 5 | Afbeelding 5 | 5. ábra
| Obrázek 5 | Obrázok 5 | Figura 5 |
Rys. 5 | Resim 5 |
Abbildung 6 | Illustration 6 | Figure
6 | Figura 6 | Afbeelding 6 | 6. ábra
| Obrázek 6 | Obrázok 6 | Figura 6 |
Rys. 6 | Resim 6 |
Abbildung 7 | Illustration 7 | Figure
7 | Figura 7 | Afbeelding 7 | 7. ábra
| Obrázek 7 | Obrázok 7 | Figura 7 |
Rys. 7 | Resim 7 |
5
M17848, M17849, M17896, M17895_Manual_iWalk_20190826_CP.indd 5 26.08.19 12:21

DE
SICHERHEITSHINWEISE
Lesen Sie die gesamte Gebrauchsanweisung, bevor Sie mit dem Aufbau
beginnen und das Gerät in Betrieb nehmen. Bitte beachten Sie folgende
Sicherheitshinweise:
• Konsultieren Sie Ihren Arzt, bevor Sie mit dem Training beginnen.
• Sollten Sie beim Trainieren unter Schwindel, Übelkeit oder Brustschmerzen
leiden, brechen Sie umgehend das Training ab und konsultieren Sie sofort Ihren
Arzt.
• Das Laufband ist nicht für den Gebrauch durch Personen mit einem Gewicht
über 110 kg geeignet. Das Gerät darf NICHT von mehreren Personen gleichzeitig
benutzt werden!
• Dieses Gerät kann von Kindern ab 8 Jahren sowie von Personen mit reduzierten
physischen, sensorischen oder mentalen Fähigkeiten oder Mangel an Erfahrung
und/oder Wissen benutzt werden, wenn sie beaufsichtigt oder bezüglich
des sicheren Gebrauchs des Gerätes unterwiesen wurden und die daraus
resultierenden Gefahren verstanden haben. Kinder dürfen nicht mit dem
Gerät spielen. Reinigung und Benutzer-Wartung dürfen nicht durch Kinder
durchgeführt werden, es sei denn, sie sind älter als 8 Jahre und beaufsichtigt.
Kinder jünger als 8 Jahre sind vom Gerät und der Anschlussleitung fernzuhalten.
• Halten Sie Haustiere vom Gerät fern.
• Kontrollieren Sie das Gerät vor jedem Gebrauch und stellen Sie sicher, dass alle
Schrauben fixiert und alle Riegel gut eingerastet sind.
• Stellen Sie sicher, dass Hebel oder weitere Einstellungs-Mechanismen nicht Ihre
Bewegungsfreiheit während des Gebrauchs beeinträchtigen.
• Halten Sie Hände und Füße von allen beweglichen Teilen
fern.
• Stellen Sie sicher, dass vom Gerät jederzeit ohne jegliche
Einschränkungen abgestiegen werden kann.
• Führen Sie niemals Objekte in Öffnungen am Gerät ein.
• Lassen Sie beim Verwenden des iWalk 2m Abstand an
allen Seiten des Geräts, damit genügend Freifläche für
das Absteigen gegeben ist und damit Kinder, Zuschauer und Haustiere weit
genug entfernt sind.
• Stellen Sie sicher, dass Sie über genügend Platz für den Aufbau und den
Gebrauch verfügen.
• Verwenden Sie das Laufband NIEMALS auf einem dicken Teppich, da dies
verhindern kann, dass der Motor entsprechend belüftet wird.
• Dieses Laufband ist ausschließlich für den Heimgebrauch geeignet.
• Das Laufband sollte ausschließlich für den Gebrauch eingeschalten werden. Ein
2m
6
M17848, M17849, M17896, M17895_Manual_iWalk_20190826_CP.indd 6 26.08.19 12:21

zusammengeklapptes Laufband darf NICHT eingeschalten werden.
• Das Laufband erst zusammenklappen, wenn das Band vollständig zum Stillstand
gekommen ist.
• Machen Sie vor und nach jedem Training Dehnungsübungen.
• Nehmen Sie vor, während und nach dem Training genügend Flüssigkeit
(vorzugsweise Wasser) zu sich.
• Tragen Sie beim Trainieren auf dem Laufband NIEMALS weite Kleidungsstücke,
da sich diese im Gerät verfangen und zu Unfällen führen können. Tragen Sie
Sportbekleidung.
• Steigen Sie NIEMALS auf das Laufband, wenn Sie es in Betrieb nehmen. Zum
Aufsteigen setzen Sie Ihre Füße vorerst auf die seitliche Laufbandabdeckung
und beginnen Sie mit dem Training erst, wenn das Laufband bereits in
Bewegung ist.
• Beginnen Sie ihr Training NIEMALS mit hohem Tempo.
• Personen mit körperlichen Einschränkungen oder ältere Personen MÜSSEN vor
dem Gebrauch einen Arzt konsultieren.
• Verwenden Sie das Gerät NICHT wenn Sie einen Herzschrittmacher oder ein
anderes kardiologisches Gerät haben.
• Schwangere müssen vor dem Gebrauch ihren Arzt konsultieren.
• Tauschen Sie beschädigte Teile umgehend aus und verwenden Sie das Gerät
erst wieder, wenn es vollständig repariert ist.
• Verwenden Sie das Laufband NICHT wenn das Stromkabel beschädigt ist.
• Trennen Sie das Laufband vom Stromnetz, wenn es nicht in Verwendung ist.
• Lagern Sie das Laufband an einem sauberen und trockenen Ort.
• Es ist unbedingt erforderlich, den Notfallknopf am magnetischen Teil des
Computers zu befestigen, da das Gerät sonst nicht startet. Die Klemme
an der Schnur des Notfallknopfes ist während des Trainings IMMER an
der Kleidung zu befestigen. Dies dient dazu, das Laufband im Notfall zum
Stillstand zu bringen.
• Die Lauffläche des Bandes beträgt 120x40 cm.
• Die Geräuschemission unter Belastung ist höher als ohne Last.
MONTAGE (Abb. 3)
Ihr Laufband ist bereits vormontiert, folgen Sie nun den kommenden Schritten, um mit
dem Training zu starten:
1. Platzieren Sie das Laufband auf einer freien, ebenen Fläche und entfernen Sie alle Verpackungsteile.
2. Bringen Sie die Haupt-Griffstützen in eine aufrechte Position und fixieren Sie diese mit den
Sicherungsbolzen (A) (drehen Sie den Knauf im Uhrzeigersinn).
3. Platzieren Sie den Befestigungsknopf (B). Dieser hält die Hauptstange in Position.
4. Fixieren Sie mit Hilfe des Inbusschlüssels (H) und der Schrauben (C) die Griffe an den Haupt-Stützen.
Decken Sie die Schrauben mit den Plastik-Abdeckungen (D) ab.
5. Fixieren Sie den Computer mittig mit der Computerfixierung (E).
6. Platzieren Sie den Notfallknopf (F) am magnetischen Teil des Computers.
7
M17848, M17849, M17896, M17895_Manual_iWalk_20190826_CP.indd 7 26.08.19 12:21

REINIGUNG UND SCHMIERUNG DES LAUFBANDES
Um die Innenseite des Bandes zu reinigen oder zu schmieren, müssen Sie das Band lockern. Dann fahren Sie
mit Ihrer Hand und einem Tuch unter das Band, um etwaigen angesammelten Schmutz zu entfernen und geben
Sie einen Tropfen Schmieröl an jede der Seiten (oben, unten und in der Mitte). Sobald Sie mit der Reinigung/
Schmierung fertig sind, setzen Sie das Band wieder zusammen. Ihr Gerät ist mit einer Werkseinstellung
versehen, eventuell bedarf es einer individuellen Anpassung, v.a. in den ersten Wochen. Die Änderungen bei
der Spannung gehören zu den normalen Gebrauchserscheinungen.
Drehen Sie auf beiden Seiten die
Spannschrauben nach links, um das Band
zu lockern.
Drehen Sie auf beiden Seiten die
Spannschrauben nach rechts, um das Band
mehr zu spannen.
HINWEISE
• Tragen Sie stets saubere Sportschuhe, um eine Verunreinigung des Bandes zu verhindern.
• Verwenden Sie ein feuchtes Tuch, um die Außenseite des Bandes zu reinigen.
• Klappen Sie das Laufband zusammen und wischen oder saugen Sie die Oberflächen ab. Somit vermeiden Sie, dass
Staub in das Gerät eindringt und zu Fehlfunktionen führt.
• Bevor Sie das Gerät reinigen/ warten, stellen Sie sicher, dass es ausgeschaltet und vom Strom getrennt ist.
• Verwenden Sie keine Lösungsmittel zur Reinigung des Gerätes.
• Hartnäckige, ölige, schmierige Flecken oder anderen Schmutz entfernen Sie mit einem milden Reinigungsmittel und
einem Baumwolltuch von Ihrem Laufband. Entfernen Sie abschließend, mit einem trockenen Tuch überschüssiges
Reinigungsmittel.
• Verwenden Sie am Bedienfeld keinerlei Flüssigkeiten oder Reinigungsmittel, ausschließlich ein trockenes Tuch.
• Tauchen Sie keinen der Teile des Gerätes in flüssige Reinigungsmittel.
BEDIENUNGS DES COMPUTERS ABB. 4:
Die Anzeige bietet Ihnen eine Auswahl an Funktionen, die den optimalen Gebrauch des Gerätes und der
Programme ermöglichen.
On/ Off: Ein- und Ausschalten des Gerätes.
Mode/Betriebsart: Programmauswahl, Zeiteinstellung Datenanzeige am Bildschirm während Sie
trainieren: Geschwindigkeit, Zeit, Distanz und Kalorienverbrauch
Geschwindigkeit +/ -: Hier können Sie die Geschwindigkeit des Laufbandes einstellen. Der
Geschwindigkeitsbereich liegt zwischen 1.0 und 10 km/h.
Explorer: dient zur Feststellung der bereits zurückgelegten Zeit, der Distanz und des erzielten
Kalorienverbrauchs.
LED Geschwindigkeits-Anzeige: Zeigt die erreichte Trainingsgeschwindigkeit an.
LED Zeit-Anzeige: Zeigt die bereits verstrichene Trainingszeit an.
LED Distanz-Anzeige: Zeigt die zurückgelegte Trainingsstrecke an.
LED Kalorien-Anzeige: Zeigt die verbrauchten Kalorien an.
Musik-Funktion: 3.5 mm Audiokabel – Audio-Eingang.
WICHTIG: Um eine sichere Handhabung zu gewährleisten, verwenden Sie einen geerdeten Stromkreis. Eine
Erdung reduziert die Gefahr eines elektrischen Schlages. Das Gerät muss an einen geerdeten Stromanschluss
angeschlossen werden, der den jeweiligen lokalen Sicherheitsvorgaben und -standards entspricht. Sobald Sie
das Gerät an den Strom anschließen, leuchten die LEDs auf und Sie hören 5x ein Piepen. Dies zeigt an, dass
sich das Gerät im Standby-Modus befindet. Am Display wird folgendes angezeigt: “= = =”.
8
M17848, M17849, M17896, M17895_Manual_iWalk_20190826_CP.indd 8 26.08.19 12:21

PROBLEMBEHEBUNG:
Problem Möglicher Grund Lösung
Das Gerät lässt sich nicht
einschalten/ läuft nicht.
Das Gerät ist nicht an den Strom
angeschlossen.
Schließen Sie das Gerät an die
Stromversorgung an.
Das Gerät lässt sich nicht
einschalten/ läuft nicht.
Das Gerät ist ausgeschalten Betätigen Sie den ON/ OFF Knopf.
Das Gerät lässt sich nicht
einschalten/ läuft nicht.
Die Stromspannung ist zu gering Warten Sie, bis die
Stromversorgung wieder richtig
funktioniert.
Das Gerät lässt sich nicht
einschalten/ läuft nicht. Der Notfallknopf ist nicht
befestigt. Befestigen Sie den Notfallknopf
am magnetischen Teil des
Computers.
ZUSAMMENKLAPPEN DES LAUFBANDES: ABB.57
1. Drehen Sie den Sicherungsbolzen gegen den Uhrzeigersinn.
2. Heben Sie den unteren Teil des Geräts an.
3. Ziehen Sie den Befestigungsknopf heraus und platzieren Sie ihn im Loch der Hauptstützen.
4. Nun können Sie Ihr Laufband schieben, indem Sie die Griffe mit beiden Händen festhalten und absenken,
sodass die Räder den Boden berühren.
INBETRIEBNAHME:
1. Schließen Sie das Kabel an die Stromversorgung an.
2. Drücken Sie den Knopf am Boden/ Sockel des Laufbandes. Dieser leuchtet dann auf.
3. Das Bedienfeld zeigt 0 an.
4. Wählen Sie eines der vorgegebenen Programme wie im Punkt VORGEGEBENE PROGRAMME beschrieben,
oder das manuelle Training wie im Punkt MANUELES TRAINING beschrieben aus.
MUSIK FUNKTION:
Schließen Sie das 3.5 mm Audiokabel mit einem Ende am Audio-Eingang des Bedienfelds und mit dem
anderen an Ihrem Musikgerät (Smartphone, MP3 Player, CD-Player, etc.) an. So können Sie während des
Trainings Musik genießen!
Technische Daten:
220V – 240V ~, 50/60Hz 735W
Baujahr: 2019
Anwenderklasse: HB (H = Heimbereich, B = mittlere Genauigkeit)
Maximales Benutzergewicht: 120kg
Klasse: EN ISO 20957-1
Dieses Produkt entspricht den Europäischen Richtlinien.
Nur zur Verwendung in Innenräumen.
Entsorgen Sie das Produkt am Ende seiner Lebensdauer deshalb nicht mit dem normalen Hausmüll. Bringen Sie es zu einer
Sammelstelle zum Recycling von elektrischen und elektronischen Geräten. Dies wird durch dieses Symbol auf dem Produkt, in der
Bedienungsanleitung und auf der Verpackung angegeben. Informieren Sie sich über Sammelstellen, die von Ihrem Händler oder
der lokalen Behörde betrieben werden. Die Wiederverwertung und das Recycling von Altgeräten ist ein wichtiger Beitrag zum
Schutz unserer Umwelt.
Hergestellt in China
9
M17848, M17849, M17896, M17895_Manual_iWalk_20190826_CP.indd 9 26.08.19 12:21

EN
SAFETY INSTRUCTIONS
Read the entire user manual before you start assembling the device and put
it into operation. Please note the following safety instructions:
• Consult your doctor prior to exercise.
• If you experience dizziness, nausea or chest pain while exercising, stop
exercising straightaway and consult your doctor immediately.
• The treadmill is not suitable for use by persons weighing more than 110 kg. The
device is NOT to be used by several people at the same time!
• This device may be used by children from 8 years of age, or by persons with
reduced physical, sensory or mental capabilities or lack of experience and / or
knowledge, if they have been supervised or instructed in the safe use of the
device and have understood the hazards arising therefrom. Children are not
allowed to play with the machine. Cleaning and user maintenance must not be
performed by children unless they are over 8 years old and supervised. Children
younger than 8 years are to be kept away from the machine and the connecting
cable.
• Keep pets away from the machine.
• Check the device before each use and make sure that all screws are fixed and
that all latches are firmly engaged.
• Make sure that levers or other adjustment mechanisms do not affect your
freedom of movement during use.
• Keep hands and feet away from all moving parts.
• Make sure that the unit can be dismounted at any time
without any restrictions.
• Never insert objects in openings on the device.
• When using the iWalk, keep a distance of 2m clear
on each side of the device to allow enough space to
dismount and so that children, spectators and pets are
kept far enough away.
• Make sure you have enough space for set up and use.
• NEVER use the treadmill on a thick carpet, as this may prevent the motor from
being adequately ventilated.
• This treadmill is for home use only.
• The treadmill should only be switched on for use. A folded treadmill must NOT
be switched on.
• Only fold the treadmill when the belt has come to a complete stop.
• Perform stretching exercises before and after each workout.
• Take enough fluid (preferably water) before, during and after exercise.
• NEVER wear loose clothing while exercising on the treadmill as these may catch
2m
10
M17848, M17849, M17896, M17895_Manual_iWalk_20190826_CP.indd 10 26.08.19 12:21

in the unit and cause an accident. Wear sportswear.
• NEVER climb onto the treadmill when you put it into operation. To mount, put
your feet temporarily on the treadmill covers to each side, and start exercising
only when the treadmill is already moving.
• NEVER start your training at high speed.
• Persons with physical disabilities or elderly persons MUST consult a doctor
before use.
• DO NOT use the device if you have a pacemaker or other cardiac device.
• Pregnant women should consult their doctor before use.
• Immediately replace damaged parts and do not use the device until it is
completely repaired.
• DO NOT use the treadmill if the power cord is damaged.
• Disconnect the treadmill from the mains when not in use.
• Store the treadmill in a clean and dry place.
• It is essential to attach the emergency button to the magnetic part of the
computer, otherwise the unit will not start. ALWAYS attach the clamp of
the emergency button cord to your clothing during training. This serves
to bring the treadmill to a standstill in an emergency.
• The tread of the belt is 120x40 cm.
• The noise emission under load is higher than without load.
ASSEMBLY (Fig. 3)
Your treadmill is already preassembled, now follow the steps in order to begin exercising:
1. Place the treadmill on a flat, level surface and remove all packaging.
2. Bring the main handle posts into an upright position and secure them with the locking bolts (A) (turn the
knob clockwise).
3. Place the fixing knob (B). This holds the main bar in position.
4. Use the Allen key (H) and screws (C) to secure the handles to the main posts. Connect the cable of the
computer and cover the screws with the plastic covers (D).
5. Secure the computer in the center with the computer fixing (E).
6. Place the emergency button (F) on the magnetic part of the computer.
CLEANING AND LUBRICATION OF THE TREADMILL
To clean or lubricate the inside of the belt, you must loosen the belt. Then slide your hand and a cloth under
the belt to remove any accumulated dirt and add a drop of lubricating oil to each side (top, bottom and center).
Once you are done with the cleaning / lubrication, reassemble the belt. Your device is equipped with a factory
setting, it may require an individual adjustment, especially in the first few weeks. The changes in tension are a
normal occurence.
Turn the tension screws to the left on both
sides to loosen the band.
Turn the tension screws to the right on both
sides to tighten the band.
11
M17848, M17849, M17896, M17895_Manual_iWalk_20190826_CP.indd 11 26.08.19 12:21

SUGGESTIONS
• Always wear clean sports shoes to prevent contamination of the belt.
• Use a damp cloth to clean the outside of the belt.
• Fold the treadmill together and wipe or vacuum the surfaces. This will prevent dust from entering the unit and causing it
to malfunction.
• Before cleaning / servicing the unit, make sure it is switched off and disconnected from the power supply.
• Do not use solvents to clean the device.
• Remove stubborn, oily, greasy stains or other dirt from your treadmill with a mild detergent and cotton cloth. Finally,
remove excess detergent with a dry cloth.
• Do not use any liquids or cleaning agents on the control panel, only a dry cloth.
• Do not immerse any of the parts of the device in liquid detergents.
OPERATING THE COMPUTER FIG. 4:
The display offers you a selection of functions that allow optimal use of the device and the programs.
On / Off: Turning the device on and off.
Mode: Program Selection, Timing Data display on screen while you‘re training: speed, time, distance, and
calories burned
Speed +/ -: Allows you to set the treadmill speed. The speed range is between 1.0 and 10 km/h.
Explorer: is used to determine the amount of time already traveled, distance, and calories burned.
LED Speed Indicator: Indicates the speed of your workout.
LED Time Display: Indicates the elapsed training time.
LED Distance Display: Displays the distance covered.
LED Calorie Indicator: Shows calories burned.
Music feature: 3.5mm audio cable - audio input.
IMPORTANT: For safe handling, use a grounded circuit. Grounding reduces the risk of electric shock. The
equipment must be connected to a grounded electrical outlet that complies with local safety guidelines and
standards. As soon as you connect the device to the power, the LEDs light up and you hear 5 beeps. This
indicates that the device is in standby mode. The display shows: „= = =“.
TROUBLE SHOOTING:
Problem Possible reason Solution
The device does not turn on / does
not work.
The device is not connected to the
power.
Connect the device to the power
supply.
The device does not turn on / does
not work.
The device is switched off Press the ON / OFF button.
The device does not turn on / does
not work.
The voltage is too low. Wait for the power to work
properly again.
The device does not turn on /
does not work. The emergency button is not
attached. Attach the emergency button
to the magnetic part of the
computer.
HOW TO FOLD THE TREADMILL: FIG.57
1. Turn the locking bolt counter clockwise.
2. Lift the lower part of the device.
3. Pull out the fixing knob and place it in the hole of the main supports.
4. Now you can slide your treadmill by holding the handles with both hands and lowering so that the wheels
touch the ground.
12
M17848, M17849, M17896, M17895_Manual_iWalk_20190826_CP.indd 12 26.08.19 12:21

START-UP:
1. Connect the cable to the power supply.
2. Press the button on the bottom / base of the treadmill. This lights up then.
3. The control panel displays 0.
4. Select one of the pre-defined programs as described in the item PROGRAMS, or manual training as
described in MANUAL TRAINING.
MUSIC FUNCTION:
Connect the 3.5mm audio cable to one end of the audio input on the Control panel and the other one on your
music device (smartphone, MP3 player, CD player, etc.). You can enjoy music while exercising!
Technical specifications:
220V - 240V ~, 50/60Hz 735W
Year of construction: 2019
User class: HB (H = home area, B = medium accuracy)
Maximum user weight: 120kg
Class: EN ISO 20957-1
This product complies with the European directives.
For indoor use only.
Do not dispose this product at the end of its service life through normal domestic waste. It has to be disposed through a collection
agency that recycles electric and electronic devices. This is pointed out by the symbol on the product, in the instruction manual,
and on the packaging. Please inquire about local collection agencies that may be operated by your distributor or your municipal
administration. By recycling, making use of the materials, or other forms of recycling old units you are making an important
contribution to protecting our environment.
Made in China
FR
CONSIGNES DE SÉCURITÉ
Lisez le manuel d‘utilisation en entier avant de commencer l‘assemblage et
de mettre l‘appareil en service. Veuillez prendre note des consignes de
sécurité suivantes :
• Consultez votre médecin avant de commencer l‘entraînement.
• Si vous ressentez des étourdissements, des nausées ou des douleurs
thoraciques pendant l‘entraînement, cessez immédiatement l‘exercice et
consultez immédiatement votre médecin.
• Le tapis de course ne convient pas aux personnes pesant plus de 110 kg.
L‘appareil ne peut PAS être utilisé par plusieurs personnes en même temps !
• Cet appareil peut être utilisé par des enfants dès 8 ans ou par des personnes
ayant des capacités physiques, sensorielles ou mentales réduites ou manquant
d‘expérience et/ou de connaissances, s‘ils ont été informés ou sont supervisés
pour une utilisation sûre de l‘appareil et ont compris les dangers qui en
découlent. Les enfants ne sont pas autorisés à jouer avec l‘appareil. Le nettoyage
13
M17848, M17849, M17896, M17895_Manual_iWalk_20190826_CP.indd 13 26.08.19 12:21

et la maintenance par l‘utilisateur ne doivent pas être effectués par des enfants
à moins qu‘ils aient plus de 8 ans et qu‘ils soient surveillés. Les enfants de moins
de 8 ans doivent être tenus à l‘écart de l‘appareil et du câble de connexion.
• Tenez les animaux domestiques éloignés de l‘appareil.
• Vérifiez l‘appareil avant chaque utilisation et assurez-vous que toutes les vis sont
bien fixées et que tous les loquets sont fermement engagés.
• Assurez-vous que les leviers ou autres mécanismes de réglage n‘affectent pas
votre liberté de mouvement pendant l‘utilisation.
• Gardez les mains et les pieds éloignés de toutes les pièces mobiles.
• Assurez-vous que l‘appareil peut être démonté à tout moment sans aucune
restriction.
• N‘insérez jamais d‘objets dans les ouvertures de l‘appareil.
• Lorsque vous utilisez l‘iWalk, laissez 2 m d‘espace tout
autour de l‘appareil afin de faciliter la descente de celui-
ci et de garder les enfants, les spectateurs et les animaux
domestiques suffisamment éloignés.
• Assurez-vous d‘avoir suffisamment d‘espace pour
l‘installation et l‘utilisation.
• N‘utilisez JAMAIS le tapis de course sur un tapis épais,
car cela pourrait empêcher le moteur de bien ventiler.
• Ce tapis de course est destiné à un usage domestique uniquement.
• Le tapis de course ne doit être allumé que pendant son utilisation. Un tapis de
course plié NE DOIT JAMAIS être allumé.
• Ne pliez le tapis de course que lorsque le tapis est complètement arrêté.
• Faites des exercices d‘étirement avant et après chaque entraînement.
• Buvez suffisamment (de préférence de l‘eau) avant, pendant et après
l‘entraînement.
• Ne portez JAMAIS de vêtements amples lorsque vous vous entraînez sur le tapis
de course, car ils pourraient se coincer dans l‘appareil et provoquer un accident.
Portez des vêtements de sport.
• Ne montez JAMAIS sur le tapis de course lorsque vous le mettez en marche.
Pour démarrer, posez tout d‘abord vos pieds sur les bords du tapis et
commencez à vous entraîner uniquement lorsque le tapis de course est déjà en
mouvement.
• NE commencez JAMAIS votre entraînement à haute vitesse.
• Les personnes ayant un handicap physique ou les personnes âgées DOIVENT
consulter un médecin avant toute utilisation.
• N‘utilisez PAS l‘appareil si vous portez un pacemaker ou tout autre appareil
cardiaque.
• Les femmes enceintes doivent consulter leur médecin avant utilisation.
• Remplacez immédiatement toute pièce endommagée et n‘utilisez pas l‘appareil
2m
14
M17848, M17849, M17896, M17895_Manual_iWalk_20190826_CP.indd 14 26.08.19 12:21

avant qu‘il ne soit complètement réparé.
• N‘utilisez PAS le tapis de course si le cordon d‘alimentation est endommagé.
• Débranchez le tapis de course du secteur lorsqu‘il n‘est pas utilisé.
• Rangez le tapis de course dans un endroit propre et sec.
• Il est essentiel d‘attacher le bouton d‘urgence à la partie magnétique de
la console, sinon l‘appareil ne démarrera pas. Pendant l‘entraînement,
attachez TOUJOURS la pince reliée au cordon du bouton d‘urgence à
vos vêtements. Cela permet d‘immobiliser le tapis de course en cas
d‘urgence.
• La surface du tapis est de 120x40 cm.
• L‘émission de bruit avec charge est plus élevée que sans charge.
ASSEMBLAGE (Fig. 3)
Votre tapis de course est déjà pré-assemblé, respectez les étapes suivantes afin de pouvoir commencer votre
entraînement :
1. Placez le tapis de course sur une surface plane et horizontale et retirez tous les emballages.
2. Mettez les bras de support en position verticale et fixez-les à l‘aide des boulons de sécurité (A) (tournez la
poignée dans le sens des aiguilles d‘une montre).
3. Placez le bouton de fixation (B). Cela permet de maintenir la barre principale.
4. Utilisez la clé Allen (H) et les vis (C) pour fixer les poignées aux bras de support principaux. Couvrez les vis
avec les caches en plastique (D).
5. Fixez la console au centre avec la fixation de la console (E).
6. Placez le bouton d‘urgence (F) sur la partie magnétique de la console.
NETTOYAGE ET LUBRIFICATION DU TAPIS DE COURSE
Pour nettoyer ou lubrifier l‘intérieur du tapis, vous devez détendre le tapis. Ensuite, faites glisser votre main
et un chiffon sous le tapis pour enlever toute la saleté accumulée et ajoutez une goutte d‘huile lubrifiante de
chaque côté (haut, bas et centre). Une fois que vous avez terminé le nettoyage/la lubrification, retendez le
tapis. Votre appareil est livré avec un réglage d‘usine et peut nécessiter un réglage individuel, surtout dans les
premières semaines. Les variations de tension sont des phénomènes de fonctionnement normal.
Tournez les vis de serrage des deux côtés
vers la gauche pour détendre le tapis.
Tournez les vis de serrage des deux côtés vers
la droite pour tendre davantage le tapis.
NOTES
• Portez toujours des chaussures de sport propres pour éviter de salir le tapis.
• Utilisez un chiffon humide pour nettoyer la surface du tapis.
• Repliez le tapis de course et essuyez ou aspirez les surfaces. Ceci empêchera la poussière de pénétrer dans l‘appareil et
de provoquer un dysfonctionnement.
• Avant de nettoyer/entretenir l‘appareil, assurez-vous qu‘il est éteint et débranché de l‘alimentation électrique.
• N‘utilisez pas de solvants pour nettoyer l‘appareil.
• Enlevez les taches tenaces, huileuses et graisseuses ou toute autre saleté sur votre tapis de course avec un détergent
doux et un chiffon en coton. Enfin, retirez l‘excès de détergent avec un chiffon sec.
• N‘utilisez aucun liquide ou produit de nettoyage sur l‘écran de la console, uniquement un chiffon sec.
• Ne plongez aucune des pièces de l‘appareil dans des détergents liquides.
15
M17848, M17849, M17896, M17895_Manual_iWalk_20190826_CP.indd 15 26.08.19 12:21

UTILISATION DE LA CONSOLE FIG. 4 :
L‘écran vous propose une sélection de fonctions qui permettent une utilisation optimale de l‘appareil et des
programmes.
On/Off : Mise sous et hors tension.
Mode : Sélection du programme, affichage des données de pendant votre entraînement : vitesse, durée,
distance et nombre de calories brûlées
Vitesse +/- : Vous permet de régler la vitesse du tapis de course. La plage de vitesse est comprise entre
1,0 et 10 km/h.
Explorateur : Permet de déterminer le temps écoulé, la distance parcourue et les calories brûlées.
Indicateur LED de vitesse : Affiche votre vitesse d‘entraînement.
Indicateur LED de temps : Affiche le temps d‘entraînement écoulé.
Indicateur LED de distance : Affiche la distance parcourue.
Indicateur LED de calories : Affiche les calories brûlées.
Fonction musique : Câble audio 3,5 mm - entrée audio.
IMPORTANT : Pour une utilisation en toute sécurité, utilisez un circuit électrique relié à la terre. La mise à la
terre réduit le risque de choc électrique. L‘équipement doit être branché sur une prise électrique mise à la terre
conforme aux normes et standards de sécurité locaux. Dès que vous branchez l‘appareil sur l‘alimentation, les
LED s‘allument et vous entendez 5 bips. Ceci indique que l‘appareil est en mode veille. L‘affichage indique :
„= = =“.
RÉSOLUTION DE PROBLÈMES :
Problème Raison possible Solution
L'appareil ne s'allume pas/ne
fonctionne pas.
L'appareil n'est pas connecté à
l'alimentation.
Connectez l'appareil à
l'alimentation électrique.
L'appareil ne s'allume pas/ne
fonctionne pas.
L'appareil est éteint Appuyez sur le bouton ON/OFF.
L'appareil ne s'allume pas/ne
fonctionne pas.
La tension est trop faible. Attendez que l'alimentation
fonctionne à nouveau
correctement
L‘appareil ne s‘allume pas/ne
fonctionne pas. Le bouton d‘urgence n‘est pas
attaché. Attachez le bouton d‘urgence
à la partie magnétique de la
console.
COMMENT PLIER LE TAPIS DE COURSE : FIG. 57
1. Tournez le boulon de sécurité dans le sens antihoraire.
2. Soulevez la partie inférieure de l‘appareil.
3. Retirez le bouton de fixation et placez-le dans le trou de la structure principale.
4. Vous pouvez désormais faire glisser votre tapis de course en tenant les poignées avec les deux mains et en
les abaissant, afin que les roues touchent le sol.
MISE EN MARCHE :
1. Connectez le câble à l‘alimentation électrique.
2. Appuyez sur le bouton situé sur le bas/la base du tapis de course. Le bouton s‘allume alors.
3. L‘écran affiche 0.
4. Sélectionnez l‘un des programmes prédéfinis comme décrit dans la rubrique PROGRAMMES ou
l‘entraînement personnalisé comme décrit dans ENTRAÎNEMENT PERSONNALISÉ.
FONCTION MUSIQUE :
Connectez une extrémité du câble audio 3,5 mm à l‘entrée audio située sur la console et l‘autre sur votre
appareil de musique (smartphone, lecteur MP3, lecteur CD, etc.). Vous pouvez ainsi écouter de la musique
pendant votre entraînement !
16
M17848, M17849, M17896, M17895_Manual_iWalk_20190826_CP.indd 16 26.08.19 12:21

Informations techniques :
220V – 240V ~, 50/60Hz 735W
Année de construction : 2019
Classe d‘utilisateur : HB (H = zone d‘origine, B = précision moyenne)
Poids maximum de l‘utilisateur : 120 kg
Classe : EN ISO 20957-1
Ce produit satisfait aux normes européennes.
Uniquement pour utilisation dans des pièces intérieures
Ne jetez pas le produit aux déchets ménagers à la fin de sa durée de vie. Apportez-le à un point de collecte pour le recyclage des
appareils électriques et électroniques. Cela est indiqué par le symbole présent sur le produit, le mode d’emploi et l’emballage.
Informez-vous des points de collecte mis à disposition par votre commerçant ou l’autorité locale. La réutilisation et le recyclage
des appareils usagés sont une contribution importante à la protection de notre environnement.
Fabriqué en Chine
IT
AVVISI DI SICUREZZA
Leggere l‘intero manuale dell‘utente prima di iniziare il montaggio e mettere
in funzione il dispositivo. Si prega di seguire le seguenti istruzioni di
sicurezza:
• Consultare il proprio medico curante prima di iniziare l‘allenamento.
• In caso di capogiri, nausea o dolore toracico durante l‘allenamento, interrompere
immediatamente l‘allenamento e consultare subito il medico.
• Il tapis roulant non è adatto all‘uso da parte di persone con un peso
superiore a 110 kg. Il dispositivo NON può essere utilizzato da più persone
contemporaneamente!
• Questo dispositivo può essere utilizzato da bambini di età pari o superiore a
8 anni, o da persone con ridotte capacità fisiche, sensoriali o mentali o che
non hanno le necessarie esperienze e / o conoscenze solo sotto supervisione
o solo se istruiti sull‘uso sicuro del dispositivo e ne hanno compreso i rischi
derivanti. I bambini non sono autorizzati a giocare con il dispositivo. La pulizia
e la manutenzione di competenza dell‘utente non devono essere eseguite dai
bambini a meno che non abbiano più di 8 anni e siano sotto supervisione. I
bambini con meno di 8 anni devono essere tenuti lontani dal dispositivo e dal
cavo di collegamento.
• Tenere gli animali domestici lontani dal dispositivo.
• Controllare il dispositivo prima di ogni utilizzo, assicurarsi che tutte le viti siano
fissate e che tutti i fermi siano ben innestati.
• Assicurarsi che le leve o altri meccanismi di regolazione non influiscano sulla
libertà di movimento durante l‘uso.
17
M17848, M17849, M17896, M17895_Manual_iWalk_20190826_CP.indd 17 26.08.19 12:21

• Tenere mani e piedi lontani da tutte le parti mobili.
• Assicurarsi che l‘unità possa essere smontata in qualsiasi momento senza
restrizioni.
• Non inserire mai oggetti nelle aperture sul dispositivo.
• Quando si utilizza iWalk, lasciare libera una distanza di
2 m su tutti i lati del dispositivo in modo da avere spazio
sufficiente per poter scendere e per tenere bambini,
spettatori e animali domestici abbastanza lontano.
• Assicurarsi di avere abbastanza spazio per l‘installazione
e l‘uso.
• Non utilizzare MAI il tapis roulant su un tappeto spesso, in quanto ciò potrebbe
impedire l‘adeguata ventilazione del motore.
• Questo tapis roulant è solo per uso domestico.
• Il tapis roulant deve essere acceso solo per l‘uso. Un tapis roulant piegato NON
deve essere acceso.
• Sollevare il tapis roulant solo quando il nastro si è fermato completamente.
• Eseguire degli esercizi di stretching prima e dopo ogni allenamento.
• Assumere liquidi a sufficienza (preferibilmente acqua) prima, durante e dopo
l‘allenamento.
• Non indossare MAI indumenti larghi mentre ci si allena sul tapis roulant
perché potrebbero impigliarsi nel dispositivo e causare un incidente. Indossare
abbigliamento sportivo.
• Non salire MAI sul tapis roulant quando lo si sta accedendo. Per iniziare, mettere
prima i piedi sul copertura laterale del tapis roulant e iniziare a allenarsi solo
quando il tapis roulant è già in movimento.
• Non iniziare MAI l‘allenamento ad alta velocità.
• Le persone con disabilità fisiche o le persone anziane DEVONO consultare un
medico prima dell‘uso.
• NON usare il dispositivo se si indossa un pacemaker o un altro dispositivo
cardiaco.
• Le donne incinte devono consultare il proprio medico prima dell‘uso.
• Sostituire immediatamente le parti danneggiate e non utilizzare il dispositivo fino
a quando non viene completamente riparato.
• NON usare il tapis roulant se il cavo di alimentazione è danneggiato. In questo
caso, contattare un negozio specializzato.
• Scollegare il tapis roulant dalla rete elettrica quando non in uso.
• Conservare il tapis roulant in un luogo pulito e asciutto.
• È essenziale collegare il pulsante di emergenza alla parte magnetica
del computer, altrimenti il dispositivo non si avvia. Fissare SEMPRE
il morsetto al cavo del pulsante di emergenza agli abiti durante
l‘allenamento. Questo serve a fermare il tapis roulant in caso di
emergenza.
2m
18
M17848, M17849, M17896, M17895_Manual_iWalk_20190826_CP.indd 18 26.08.19 12:21

• l superficie di scorrimento del nastro è di 120x40 cm.
• L‘emissione di rumore sotto carico è superiore a quella senza carico.
MONTAGGIO (FIG. 3)
Il tapis roulant è già premontato, basta seguire i passaggi percominciare l‘allenamento:
1. Posizionare il tapis roulant su una superficie libera, piatta e orizzontale e rimuovere tutti gli imballaggi.
2. Portare i manubri principali in posizione verticale e fissarli con i bulloni di bloccaggio (A) (ruotare la
manopola in senso orario).
3. Posizionare la manopola di fissaggio (B) che mantiene la barra principale in posizione.
4. Utilizzare la chiave esagonale (H) e le viti (C) per fissare le maniglie ai montanti principali. Coprire le viti
con le coperture di plastica (D).
5. Fissare il computer al centro con il fissaggio del computer (E).
6. Posizionare il pulsante di emergenza (F) sulla parte magnetica del computer.
PULIZIA E LUBRIFICAZIONE DEL TAPIS ROULANT
Per pulire o lubrificare l‘interno del nastro, allentare il nastro. Quindi far scorrere la mano e un panno sotto
il nastro per rimuovere lo sporco accumulato e aggiungere una goccia di olio lubrificante su ciascun lato
(superiore, inferiore e centrale). Una volta terminata la pulizia / lubrificazione, rimontare il nastro. Il dispositivo
è impostato di fabbrica e potrebbe richiedere una regolazione individuale, soprattutto nelle prime settimane. I
cambiamenti di tensione sono normali.
Ruotare le viti di serraggio verso sinistra
su entrambi i lati per allentare il nastro.
Ruotare le viti di serraggio verso destra su
entrambi i lati per stringere maggiormente il
nastro.
NOTE
• Indossare sempre scarpe sportive pulite per evitare di sporcare il tapis roulant.
• Usare un panno umido per pulire l‘esterno del nastro.
• Piegare il tapis roulant e pulire o aspirare le superfici. Ciò eviterà l‘ingresso di polvere nel dispositivo causandone il
malfunzionamento.
• Prima di pulire / riparare il dispositivo, assicurarsi che sia spento e scollegato dall‘alimentazione.
• Non usare solventi per pulire il dispositivo.
• Rimuovere le macchie ostinate, oleose, untuose o altro sporco dal tapis roulant con un detergente delicato e un panno di
cotone. Infine, rimuovere il detergente in eccesso con un panno asciutto.
• Non utilizzare liquidi o detergenti sul pannello di controllo, ma solo un panno asciutto.
• Non immergere nessuna parte del dispositivo in detergenti liquidi.
FUNZIONAMENTO DEL COMPUTER FIG. 4:
Il display offre una selezione di funzioni che consentono un utilizzo ottimale del dispositivo e dei programmi.
On / Off: Accensione e spegnimento.
Modalità: Selezione del programma, visualizzazione dei dati di temporizzazione sullo schermo durante
l‘allenamento: velocità, tempo, distanza e calorie bruciate.
Velocità +/ -: Consente di impostare la velocità del tapis roulant. La gamma di velocità è compresa tra
1,0 e 10 km / h.
Explorer: viene utilizzato per determinare la quantità di tempo già trascorso, la distanza e le calorie bruciate.
Indicatore di velocità LED: indica la velocità dell‘allenamento.
Display orario LED: indica il tempo di allenamento trascorso.
Display LED: Visualizza la distanza percorsa.
Indicatore di calorie a LED: mostra le calorie bruciate.
Funzione musicale: cavo audio da 3,5 mm - ingresso audio.
19
M17848, M17849, M17896, M17895_Manual_iWalk_20190826_CP.indd 19 26.08.19 12:21

IMPORTANTE: per garantire un uso sicuro, utilizzare un circuito con messa a terra. La messa a terra riduce
il rischio di scosse elettriche. Il dispositivo deve essere collegato a una presa elettrica dotata di messa
a terra conforme alle normative e agli standard di sicurezza locali. Non appena si collega il dispositivo
all‘alimentazione, i LED si accendono e si sentono 5 bip. Ciò indica che il dispositivo è in modalità standby. Il
display mostra: „= = =“.
RISOLUZIONE DEI PROBLEMI:
Problema Possibile causa Soluzione
Il dispositivo non si accende / non
funziona.
Il dispositivo non è collegato
all'alimentazione.
Collegare il dispositivo
all'alimentazione.
Il dispositivo non si accende / non
funziona.
Il dispositivo è spento Premere il pulsante ON / OFF.
Il dispositivo non si accende / non
funziona.
La tensione è troppo bassa. Attendere che la corrente funzioni
di nuovo correttamente.
Il dispositivo non si accende /
non funziona. Il pulsante di emergenza non è
collegato. Attaccare il pulsante di
emergenza alla parte
magnetica del computer.
COME PIEGARE IL TAPIS ROULANT: FIG.57
1. Ruotare il bullone di sicurezza in senso antiorario.
2. Sollevare la parte inferiore del dispositivo.
3. Estrarre la manopola di fissaggio e posizionarla nel foro dei supporti principali.
4. Ora puoi far scorrere il tapis roulant tenendo le maniglie con entrambe le mani e abbassando in modo che
le ruote tocchino il suolo.
MESSA IN FUNZIONE:
1. Collegare il cavo all‘alimentazione.
2. Premere il pulsante nella parte inferiore / base del tapis roulant che si accenderà.
3. Il pannello di controllo visualizza 0.
4. Selezionare uno dei programmi predefiniti come descritto nella voce PROGRAMMI o l‘allenamento
manuale come descritto in TRAINING MANUALE.
FUNZIONE MUSIC:
Collegare il cavo audio da 3,5 mm a un‘estremità dell‘ingresso audio sul pannello di controllo e l‘altro sul
dispositivo musicale (smartphone, lettore MP3, Lettore CD, ecc.). Così puoi goderti la musica mentre ti alleni!
Dati tecnici:
220 V - 240 V ~, 50/60 Hz 735W
Anno di costruzione: 2019
Classe di applicazione: HB (H = home area, B = media precisione)
Peso massimo utente: 120 kg
Classe: EN ISO 20957-1
Questo prodotto è conforme alle normative europee.
Solo per uso interno
Al termine della sua durata della vita, il prodotto non deve essere smaltito con i normali rifiuti domestici. Si prega di portarlo in un
centro di raccolta per il riciclaggio di apparecchiature elettriche ed elettroniche. Tale procedura è segnalata anche da questo
simbolo presente sul prodotto, nelle istruzioni per l’uso e sulla confezione dello stesso. Si prega di informarsi sui centri di raccolta
gestiti dal proprio rivenditore o dalle autorità locali. La riutilizzazione e il riciclaggio di vecchi apparecchi costituiscono un
contributo importante per la tutela dell’ambiente.
Fabbricato in Cina
20
M17848, M17849, M17896, M17895_Manual_iWalk_20190826_CP.indd 20 26.08.19 12:21
This manual suits for next models
3
Table of contents
Languages:
Other MediaShop Treadmill manuals
