Hautespot HauteSHOT microNVR video processing platform User manual

P.O. Box 4016, San Luis Obispo, California 93403
Phone: (800) 541-5589 (805) 541-WISP (9477) (310) 598-WISP (9477)
Fax: (805) 456-3829 Email: sales@hautespot.net Web: www.hautespot.net
Users Guide for HauteSHOT
microNVR video processing platform

User Guide for HauteSHOT microNVRv1_8.docxPage 2 of 30 2/15/2013
Contents
Contents..................................................................................................................................2
microNVR Quick Start..............................................................................................................3
Introduction..............................................................................................................................6
Components and Required Hardware ......................................................................................7
Basic Startup...........................................................................................................................8
Stand-Alone Computing Device...............................................................................................8
Alternate Headless Connection................................................................................................9
Configuring Wireless Access..................................................................................................11
Third Party Application Support..............................................................................................11
Live Streaming using Windows Media Push...........................................................................21
HauteSpot HauteROUTER OS...............................................................................................22
Comparison of SSD to HDD Drives in microNVR....................................................................23
Electrical Specifications and Connector Pins..........................................................................24
Audio Out ..............................................................................................................................25
Mini-USB...............................................................................................................................25
SDIO Memory Slot.................................................................................................................25
Video (HDMI/DVI)..................................................................................................................26
Audio Out SPDIF...................................................................................................................26
Audio In (analog) ...................................................................................................................27
SATA Drive Interface.............................................................................................................27
10/100/1000 RJ 45 Ethernet ..................................................................................................28
Mini Serial Connector.............................................................................................................28
LED Indicator Lights...............................................................................................................28
System and Processor...........................................................................................................28
Federal Communications Commission Statement ..................................................................30

User Guide for HauteSHOT microNVRv1_8.docxPage 3 of 30 2/15/2013
microNVR Quick Start
Cabling and Powering on your microNVR
IMPORTANT: The microNVR DOES NOT SUPPORT Power Over Ethernet (POE). Only use
the provided 12VDC power supply. You will damage your microNVR if you feed power over
the Ethernet ports. This damage is NOT COVERED BY WARRANTY.
The microNVR has two setup options:
1. microNVR as a Stand-Alone Computing Device
a. Attach a USB keyboard and mouse to the USB ports on the rear of the device.
b. Attach the included antenna to the RPSMA antenna port on the rear of the
device.
c. Attach a HDMI or DVI monitor to the rear of the device. When using a DVI
monitor you will need to use the provided HDMI to DVI adapter.
d. Attach the power supply and the device will immediately power on.
2. microNVR as a Headless Computing Device
a. Attach the included antenna to the RPSMA antenna port on the rear of the
device.
b. Attach an Ethernet cross over cable between Ethernet port 2 of the microNVR
and your PC, or use an Ethernet switch.
c. Attach the power supply and the device will immediately power on.
d. The microNVR will provide a DHCP address to your computer.
e. Log onto the microNVR using Windows Remote Desktop to address
192.168.168.1 and use user and password “hautespot”.
f. This will present you with the MS Windows XP Professional desktop. The default
user is “hautespot” with password of “hautespot”.
Configuration
The microNVR is running as a Windows 7 Professional SP1 pc with several special modifications.
It is not, by default, routing.
Ethernet port 1 is configured as the public network interface. It uses DHCP to request an IP
address and configuration from an upstream router.
Ethernet port 2 is configured as the private network with an IP address of 192.168.168.1.
Ethernet port 2 is where you connect your camera, Ethernet switch or other network equipment.
DHCP services for Ethernet Port 2 are provided by the DHCPd32.exe application which runs as a
service. It can be found under Network Applications start menu program group. The local network
is 192.168.168.1 and the microNVR will serve out addresses from 192.168.168.100 to
192.168.168.200.
Wireless port 1 is configured as a Client which uses DHCP to connect and as a Virtual Access
Point . The Virtual Access Point uses the native Windows Internet Connection Sharing or ICS
which runs against Ethernet Port 1. The default SSID is micronvr and the default WPA2 key is
1234567890. The interface uses 802.11b/g/n on 2.4GHz. ICS automatically controls DHCP
addresses on this port. The default address of the microNVR for wireless is 192.168.123.1 and
DHCP will give out 192.168.123.2-192.168.123.254 to clients.
Administration
Before using your microNVR you should become familiar with its operation by downloading the
user manual from the HauteSpot Networks website at www.hautespot.net. You will need to create

User Guide for HauteSHOT microNVRv1_8.docxPage 4 of 30 2/15/2013
a user account for yourself on the web site, providing the serial number of your device and the
date and place of purchase.
Once logged into the web site, navigate to the HauteSHOT products download page by clicking
Download, located under the Support tab, to retrieve the manual. You should also navigate to the
HauteWRAP products manual and software pages to download and install the HauteSpot
Networks Wireless Tools utility, the HauteSpot Networks Network Manager utility, and the
complete HauteWRAP user manual, which includes all of the details of using the routing functions
of your device.
Third Party Software
The microNVR comes with a variety of third party “trialware” which are installed on the Windows
version of the product in the D: (Storage) drive. These software packages must be purchased and
licensed through their respective manufacturers. Support for these packages and documentation
may be found on their respective web sites. The microNVR user manual provides basic
information on starting these products as services on the device. HauteSpot Networks does not
support these products and makes no warranty claims regarding their suitability for use.
Once you have installed whatever software from the D: drive, it is advisable to delete all other
sample data from the drive in order to free up space for data storage. Of course this is up to you.
If you would like to retain all of the installations, there is no other reason not to other than space.
For more information, see page 31 or visit the HauteSpot Networks web site at
www.hautespot.net.
Embedded Operating System Boot Disk Protection
Your microNVR runs a hybrid Windows 7 Professional SP1 operating system which provides the
best of both a full desktop system and the disk write protection of an embedded operating
system.
Like any version of Windows 7 Professional, you can install applications, create data files, and
make the system function in any way you require. However, in order to protect the boot partition
from disk corruption due to improper power shutdown, the boot partition is write once, read many.
All read/write activity is done to the D: Drive. We have moved some of the default file locations
from Drive C: to Drive D: so that write activity to Drive C: is minimized.
What this means is that when your microNVR boots up it reads the boot partition from your disk
drive. The operating system creates a RAM disk that acts as a buffer between your boot partition
and only temporarily stores your changes such as registry entries, boot file modifications, system
boot file changes, etc. This RAM drive will be erased if power is lost or the system is restarted.
HOWEVER, you can write your RAM drive to the boot partition, making your changes permanent
by clicking on the “WRITE TO DRIVE C:”icon on your desktop. This will write out all temporary
changes from the RAM drive to your hard disk so they are there when you reboot.
After any of the following activities, you should click the WRITE TO DRIVE C:
After installing a new program
After uninstalling a program
After making any changes to the Operating System
Adding, deleting or changing users or user permissions
Changing the startup of services
Basically, if you are not sure you should click the WRITE TO DRIVE C: after any major activity
where you want that configuration to survive a power reset.

User Guide for HauteSHOT microNVRv1_8.docxPage 5 of 30 2/15/2013
Default settings for microNVR
Windows Administrative User:
hautespot
Windows Admin Password:
hautespot
Local Network (Ether2):
192.168.168.1
* Local Network Gateway:
192.168.168.1
* Local Network DNS Server:
192.168.168.1
Local Network Subnet Mask:
/24 or 255.255.255.0
Local Network DHCP Range:
192.168.168.100-192.168.168.200
VNC Password:
hautespot
Wireless Mode:
Station with Virtual Access Point
* Wireless SSID:
microNVR
* WPA2 AES Pre-shared Key:
1234567890
Wireless Band:
2.4GHz
* Wireless Center Channel:
Channel 1 (2412MHz)
Wireless Standard:
802.11b/g/n
Virtual Router Address
192.168.123.1

User Guide for HauteSHOT microNVRv1_8.docxPage 6 of 30 2/15/2013
Introduction
The HauteSHOT microNVR is a Windows 7 Professional SP1 or Linux platform for running Video
Management Services that come preconfigured as a wireless access point.
This is a highly customized product which optimizes the software and operating system
specifically for the hardware platform. While the version of Windows 7 Professional is the full
desktop professional version with Service Pack 1 installed, it is not designed to be updated or
modified using Microsoft Windows Update. Updating the operating system may cause damage to
drivers, the Virtual Router or other system level components.
HauteSpot Networks has taken great care to provide the latest system drivers, .NET v4, and
related components in the system. Should you require updating the operating system, please
contact HauteSpot Networks first.
Applications and device drivers supporting devices such as USB modems or cameras can be
safely installed.
In order to optimize system performance, no virus, ad-ware or other security monitoring software
is installed on the system. Such tools require significant processor overhead and slow
performance. Please carefully scan all installation packages on another computer before
installing them on the microNVR.
User Guide for HauteSHOT microNVRv1_8.docxPage 7 of 30 2/15/2013
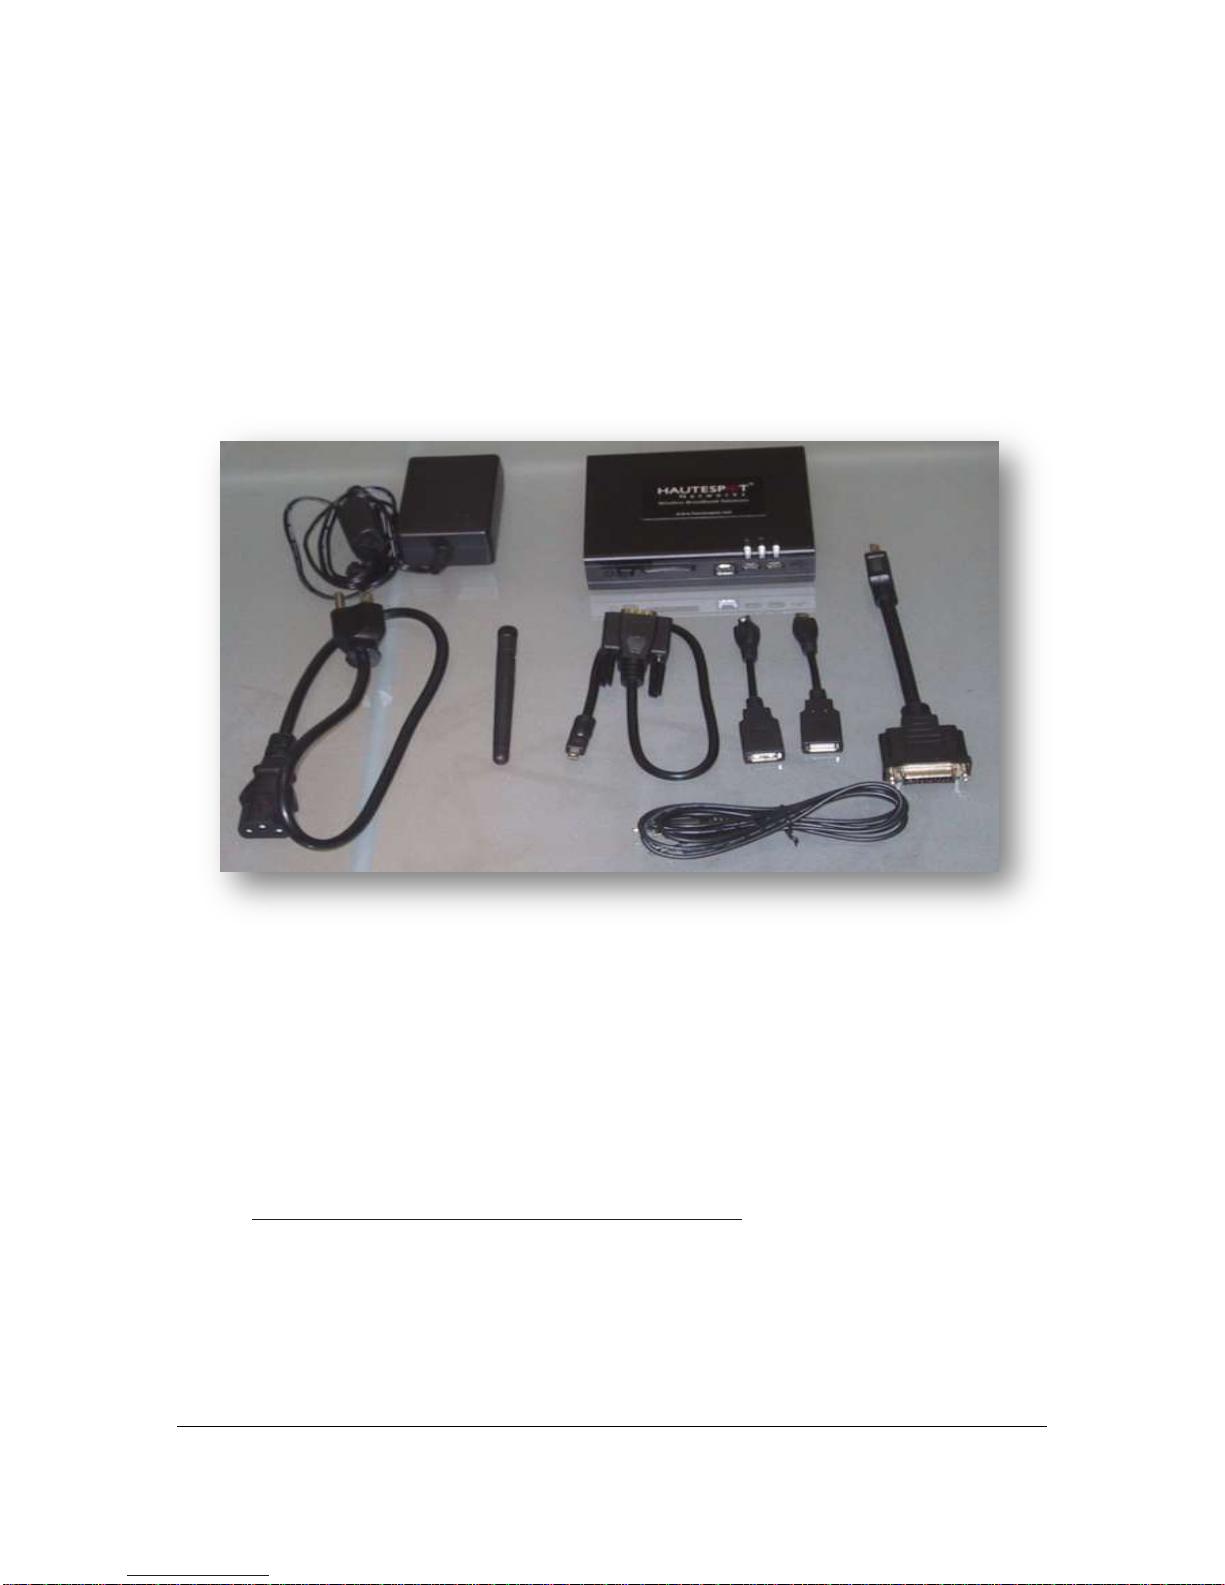
Components and Required Hardware
In order to set up the system you will need:
1. The HauteSHOT microNVR hardware box which includes:
a. The HauteSHOT microNVR processor platform
b. 12 VDC power supply
c. AC cord with North American or localized standard plug
d. HDMI to DVI adapter
e. 2.3mm to RCA cable
f. 2 mini-USB to USB-A type adapters
g. Mini-serial to DB-9 RS-232 cable
h. Wireless Antenna
2. A display with DVI or HDMI input
3. A DVI or HDMI cable
4. USB Keyboard
5. USB Mouse
Alternatively, if you desire to run the system headless, then you will need:
1. A MS Windows PC with 10/100/1000 Ethernet or 802.11b/g/n wireless network adapter
2. An installed copy of HauteSpot Networks Wireless Tools for Windows (may be installed
on Linux using WINE or on Macintosh using a MS Windows emulator). This may be
downloaded from the HauteSpot Networks Web site at
http://www.hautespot.net/index.php/support/user-profile.
You will need to first create a user account for yourself and then go back to the download
section under HauteWRAP software.

User Guide for HauteSHOT microNVRv1_8.docxPage 8 of 30 2/15/2013
Basic Startup
Stand-Alone Computing Device
1.Connect antenna to the RPSMA WLAN connector on the rear of the unit.
2.Attach your monitor to the DVI port on the rear of the unit.
3.Attach your USB mouse to one of the two USB ports on the rear of the unit.
4.Attach your USB keyboard to one of the two USB ports on the rear of the unit.
5.Attach power to the power port on the rear of the unit.
As soon as power is applied, the unit will power on. This is a normal feature. The unit will turn
itself on once power is applied after any power loss.
By default the unit will automatically log in to MS Windows, the VMS host of the machine, as the
administrative user “admin”.
At power on, the system runs at 1920x1280 pixels or 1080p. It is recommended to leave the
system at this resolution.
You will be presented with the Windows console of the system once the system fully boots. If you
are asked for a user id or password during boot, you can use the default administrator id of
“hautespot” and a password of “hautespot”.

User Guide for HauteSHOT microNVRv1_8.docxPage 9 of 30 2/15/2013
Alternate Headless Connection
The microNVR comes preconfigured to run Windows Remote Desktop, which is a remote desktop
application. If you want to run your system without an attached keyboard, mouse and monitor,
you can still manage the system using a standard personal computer.
1. Under Windows Start Menu, find the Windows Remote Desktop Connection item
2. Supply power to the microNVR and attach your PC to the Eth2 port with a crossover cable.
Make sure that you get a valid DHCP address from the microNVR, and then open the RDP
application. Log in with user id 192.168.168.1, with user and password “hautespot”. This will get
you to the desktop of the system.

User Guide for HauteSHOT microNVRv1_8.docxPage 10 of 30 2/15/2013
Ethernet Port Use
Eth1 is your private network address. This port should be attached to your broadband connection
(DSL modem, cable modem, etc.).
Eth2 is the port you would connect to your IP cameras, an Ethernet switch, or LAN to which your
cameras or other devices are attached. It is bridged with WLAN1 into the private network of Eth1.
The following are the default settings for the system:
VMS Host Administrative User:
hautespot
VMS Host Admin Password:
hautespot
VMS Host Display User:
hautespot
VMS Host Display User Password:
hautespot
VMS Host IP Address:
192.168.168.1
Local Network:
192.168.168.0/24
Local Network Gateway:
192.168.168.1
Local Network DNS Server:
192.168.168.1
Local Network Subnet Mask:
/24 or 255.255.255.0
Local Network DHCP Range:
192.168.168.100-192.168.168.200
VNC Password:
hautespot
Wireless Mode:
Client Mode with Virtual Access Point
Wireless SSID:
microNVR
WPA2 AES Preshared Key:
1234567890
Wireless Band:
2.4GHz
Wireless Center Channel:
Channel 1 (2412MHz)
Wireless Standard:
802.11b/g/n
VAP Network
192.168.123.0/24
VAP IP Address
192.168.123.1
VAP Network Gateway
192.168.123.1
VAP Subnet Mask
/24 or 255.255.255.0
VAP Network DHCP Range:
192.168.123.2-192.168.123.254

User Guide for HauteSHOT microNVRv1_8.docxPage 11 of 30 2/15/2013
Configuring Wireless Access
The wireless interface is controlled through windows networking. Refer to information on using
Windows Wireless Client for more information.
The Virtual Access Point is started automatically by a command script which can be found in the
Startup Menu Item of the Windows Start button. If you do not want to use the VAP, delete this
item from the Startup Menu Item and go into Network Sharing Connections and disable the VAP
interface. You can reconnect it later by copying the VAP start item into startup and renabling the
interface
Third Party Application Support
The microNVR comes with a variety of third party “trialware”installation packages that are located
on the D:\ drive partition. You may install your choice of these programs as needed. These
programs should be installed and configured to write to the D:\ drive partition, as the C:\ drive
partition is reserved for system files only.
These software packages must be purchased and licensed through their respective
manufacturers. Support for these packages and documentation may be found on their respective
web sites. This user manual provides basic information on starting these products as services on
the device. HauteSpot Networks does not support these products and makes no warranty claims
regarding their suitability for use.
Installation Packages Available located at D:\3rd Party Surveillance Software:
Arecont
AV100_Software
Avigilon
AvigilonCameraInstallationTool
AvigilonControlCenterClient
AvigilonControlCenterGateway
AvigilonControlCenterPlayer
AvigilonControlCenterServer-
AXIS
AMC_Embedded_msi.msi
AXISCameraManagementSetup.exe
AXISCameraStationSetup.exe
AxisMatroskaSplitterSetupPackage.zip
AXISMobileMonitorSetup.msi
AxisVideoCaptureDriverSetup.msi
IPUtility
Basler
Basler_IP-Camera_Control.zip
BIP_Finder
IPCam_Reset_Tool.zip
Blue Iris
BlueIris.exe

User Guide for HauteSHOT microNVRv1_8.docxPage 12 of 30 2/15/2013
Canon
vbsetup
viewer
ClearPix
ClearPixCameraInstallationTool
ClearPixVMSPlayer-
VMSClient-
VMSGateway-
VMSServer-
Exacq
exacqVision.exe
IQInVision
IQaccess
iqeyectrl.zip
iqfinder_installer.msi
IQmanager
iqstream.exe
netstream.zip
Milestone
MilestoneXProtectSmartClient.exe
Mobotix
MX_system_
MX_system_
MxEasy
OnSSI
NetDVMS
Panasonic
EasyIpSetup
i_pro_ConfigSoftware
IPSetup.zip
viewersoftware
Sony
Media_File_Player
Real_Shot_Manager_Advanced
Toshiba
CF_Installer
Vivotek
iw2.zip
shepherd.zip
st2403.zip
st3402_en.zip
st7501.zip
User Guide for HauteSHOT microNVRv1_8.docxPage 13 of 30 2/15/2013
For more information, visit the HauteSpot Networks web site at www.hautespot.net
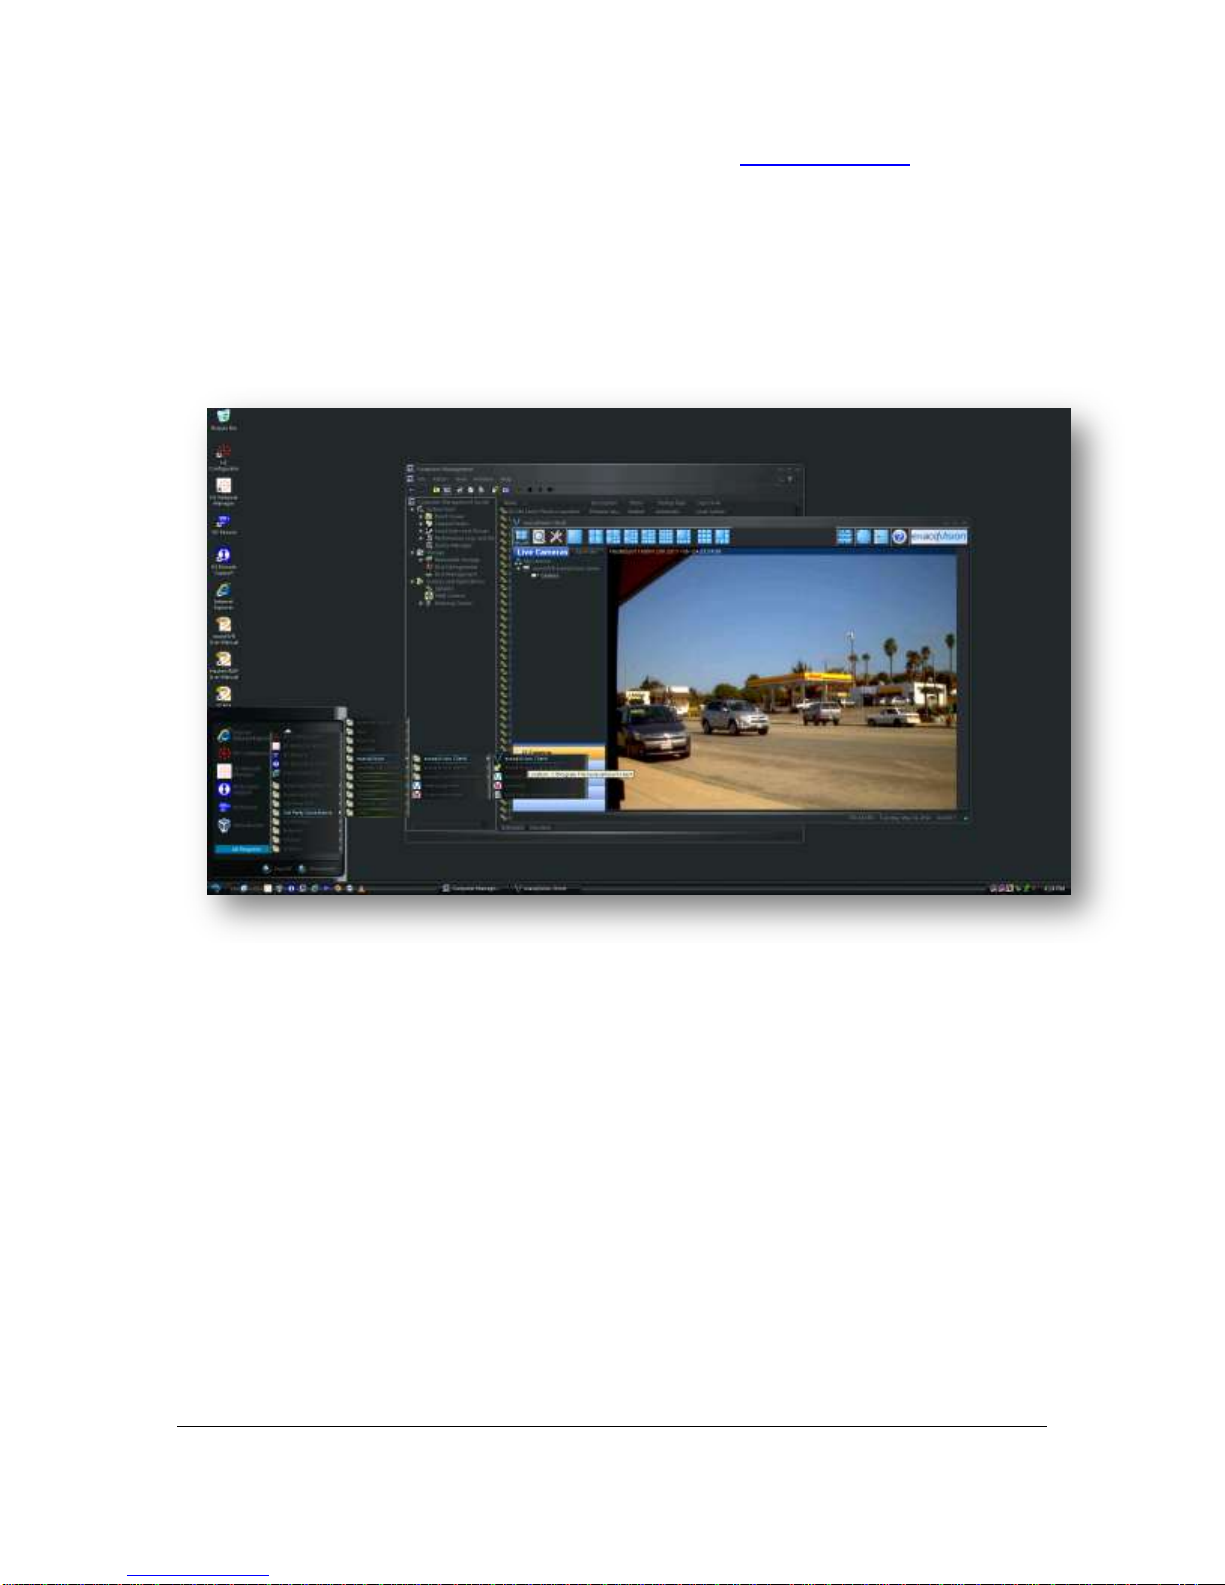
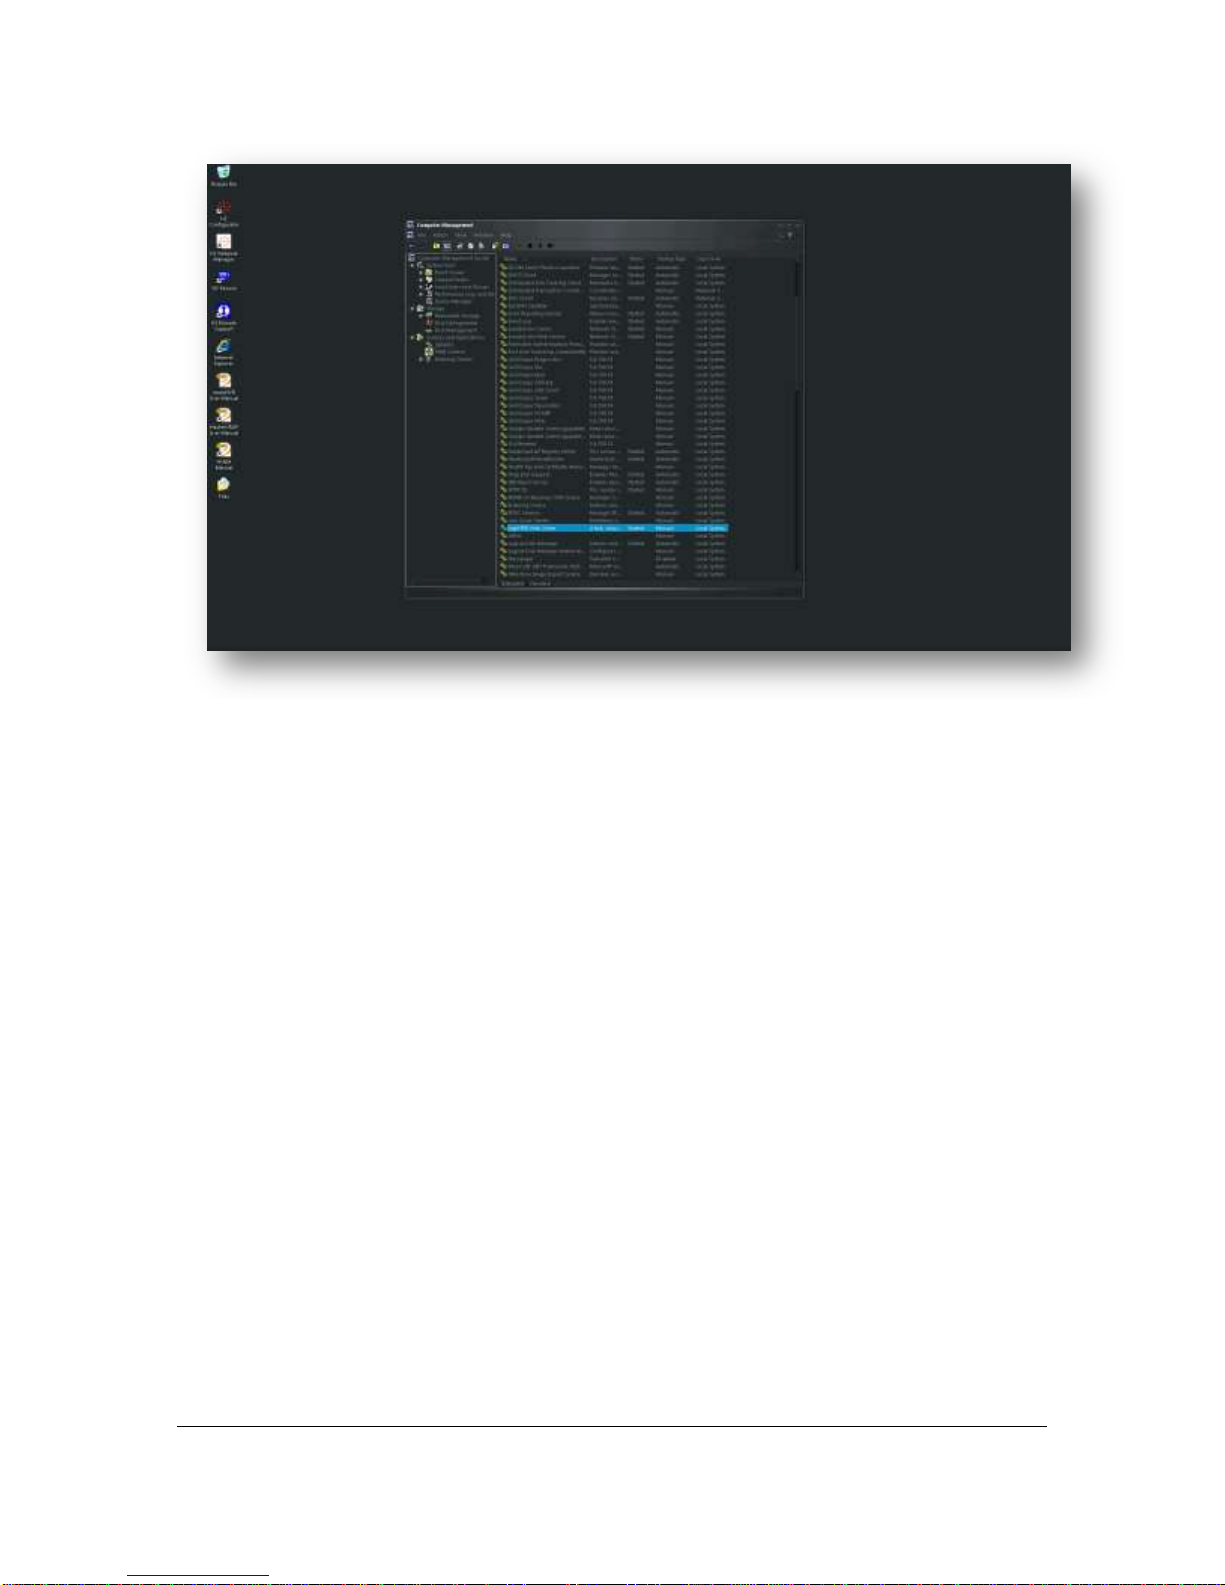
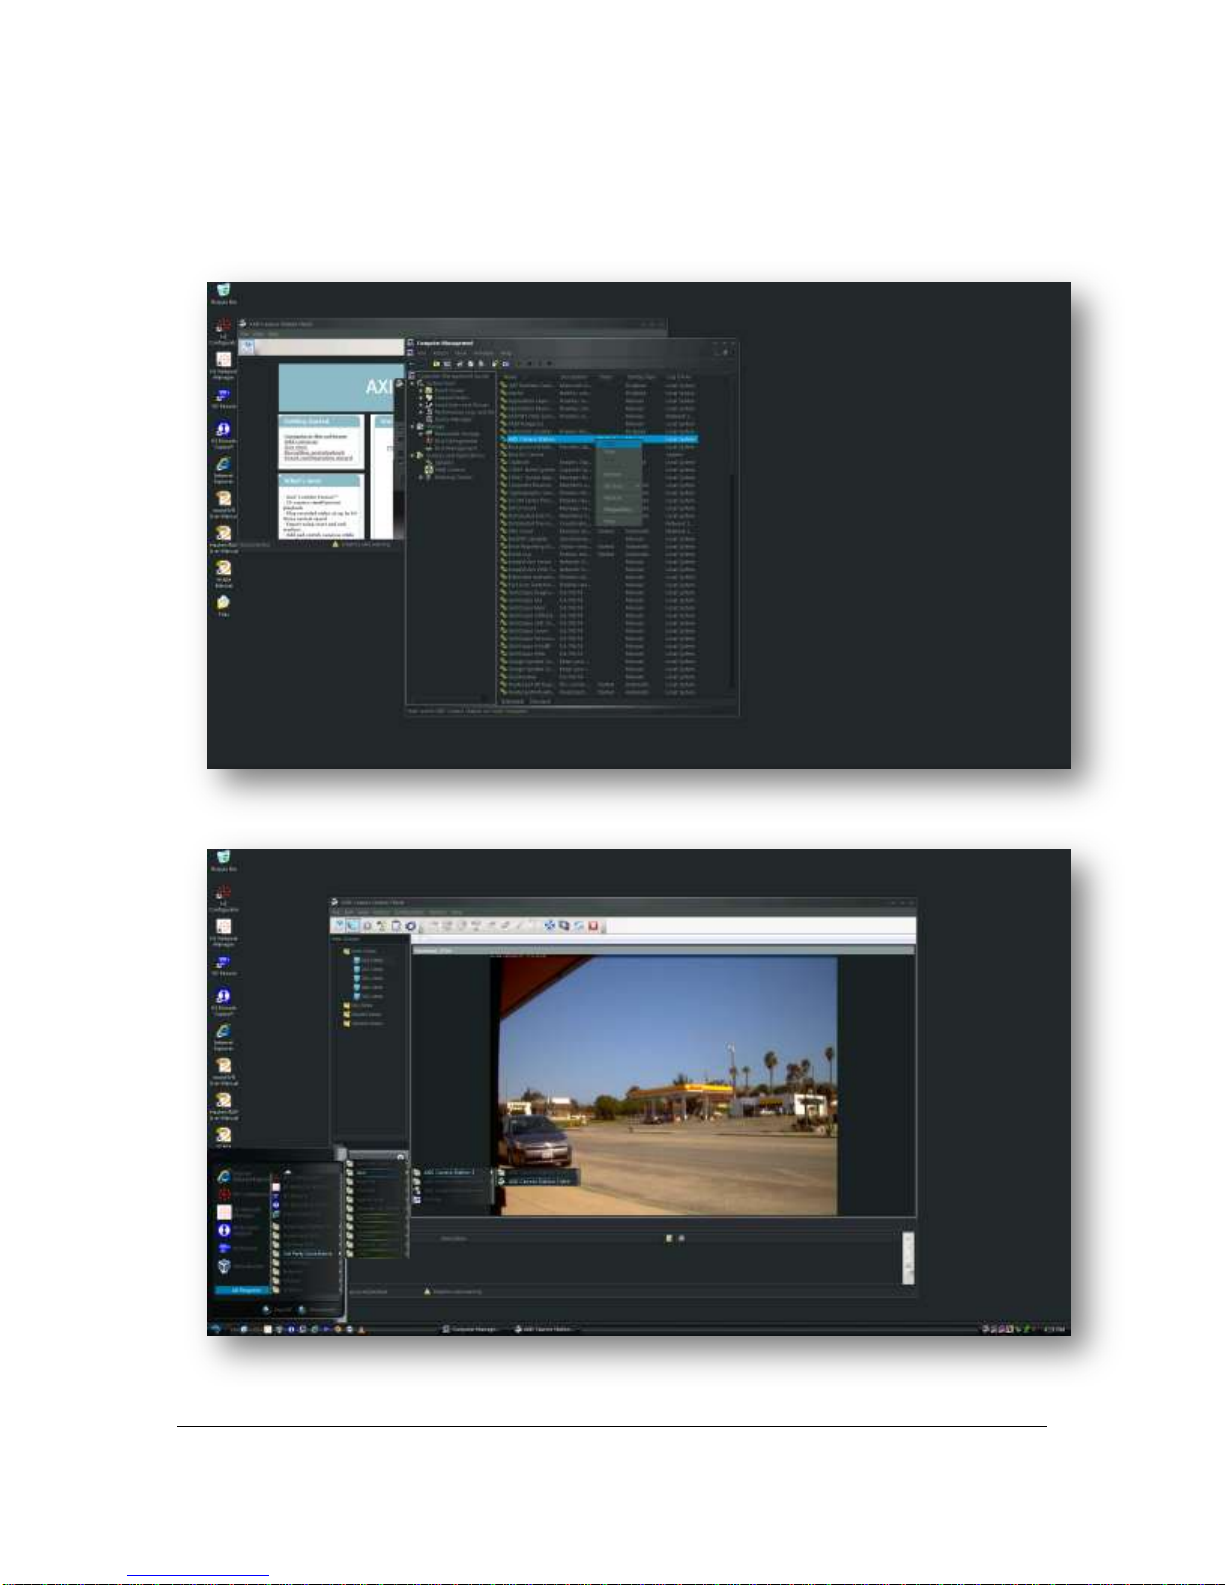
exacqVision server, client and web server –This is a complete installation, with a trial
license for one camera. To run the server, simply open the Computer Management utility,
and go to Services, find the exacq server, exacq web server and Light HTTPD server
services. Right click on each and change their startup state to automatic. Then start each
service.
You will need to purchase an additional license for any additional cameras you wish to
use.
In order to auto start the exacqVision software on the microNVR so that it will run at system
boot, you will need to enable three services using the Computer Management console
services: exacqVisionServer, exacqVisionWebServer, and exacqVisionLightHTTPDServer.
User Guide for HauteSHOT microNVRv1_8.docxPage 14 of 30 2/15/2013
User Guide for HauteSHOT microNVRv1_8.docxPage 15 of 30 2/15/2013
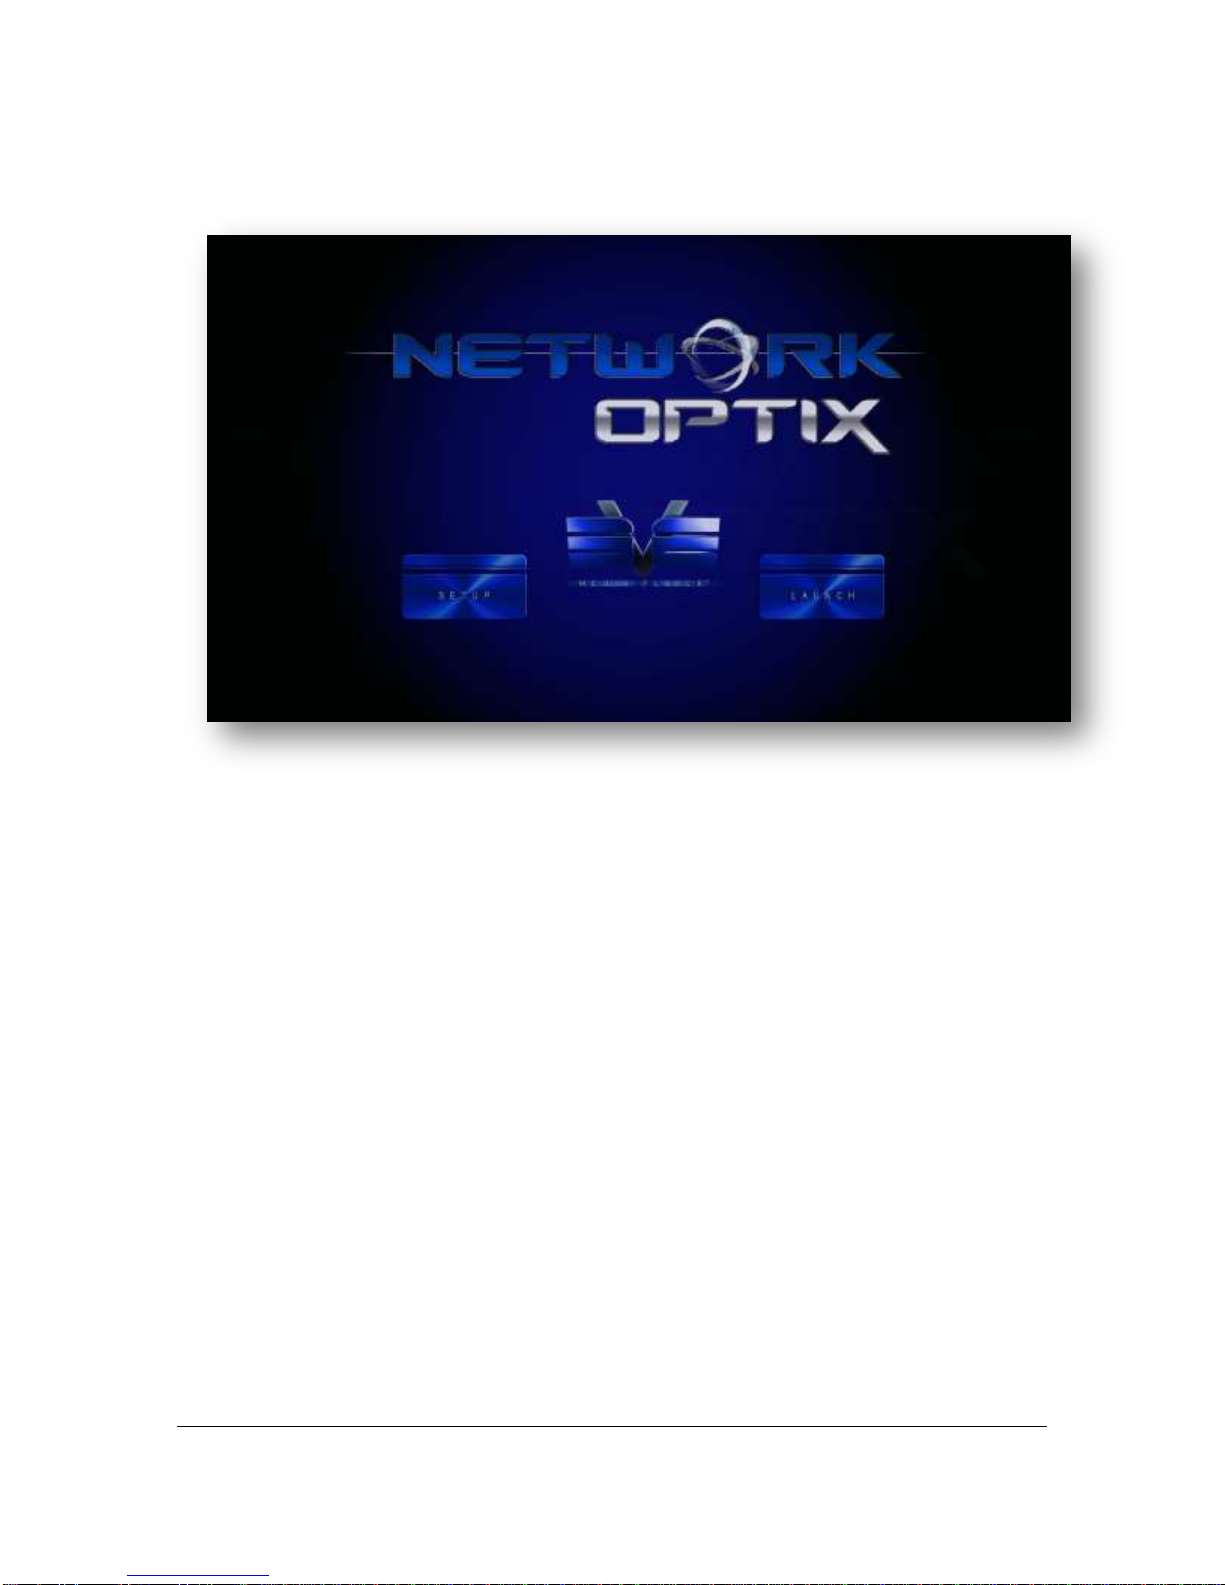
Network Optix software –This is free video client management software for
demonstration purposes.

User Guide for HauteSHOT microNVRv1_8.docxPage 16 of 30 2/15/2013
Blue Iris –This is a complete video management system. Again, you can automatically
start the server using the Services menu in Computer Management. You will need to
purchase a user license agreement if you wish to use this software. It will run in
evaluation mode for 15 days
User Guide for HauteSHOT microNVRv1_8.docxPage 17 of 30 2/15/2013
Axis Camera Station –Axis Camera Station is free to use, but will only support Axis
cameras. Again, there is a service in Computer Management which will automatically
start the VMS software.

User Guide for HauteSHOT microNVRv1_8.docxPage 18 of 30 2/15/2013
MileStone Systems Xprotect Go –This VMS supports up to four cameras without
additional licenses. After this, a license needs to be purchased. In all cases the software
should be registered with MileStone Systems. There are several services in Computer
Management that need to be started. All of these services are prefixed with the
MilesStone name.
Sony RealShot Manager –This VMS works exclusively with Sony brand cameras.
There are several services in Computer Management that need to be set for auto run in
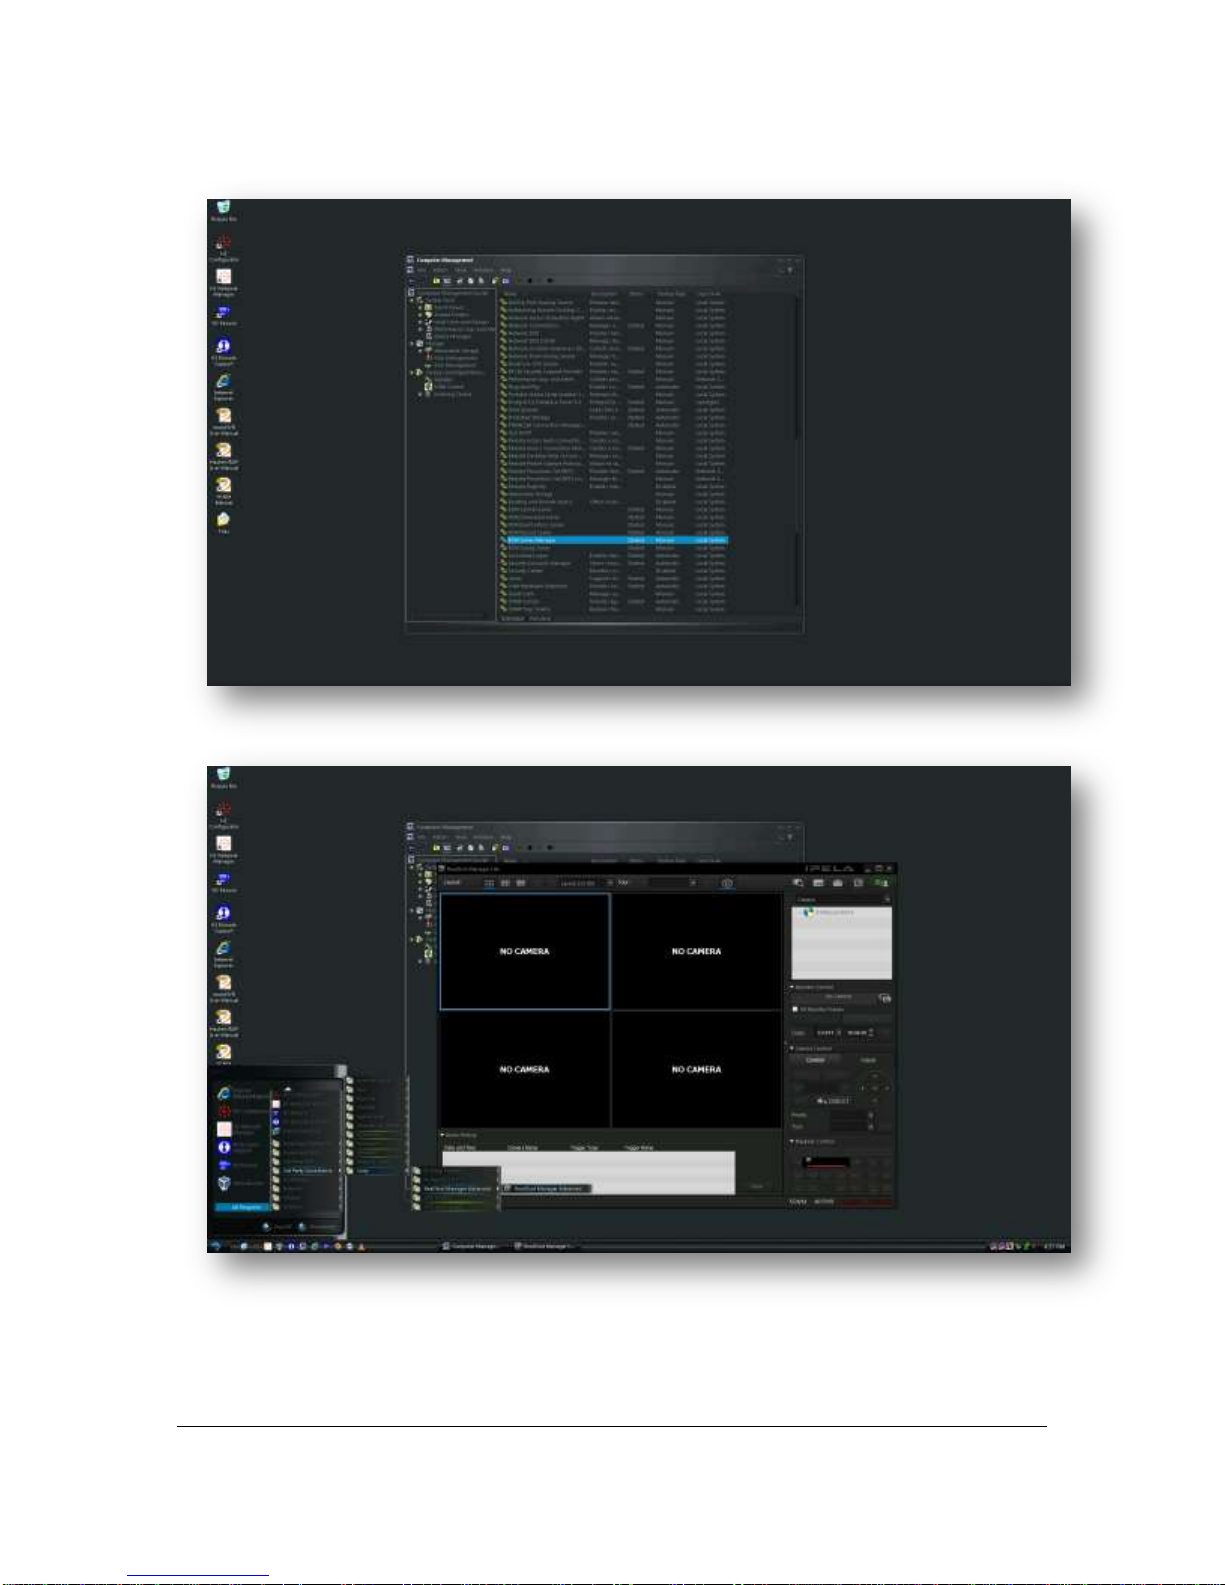
User Guide for HauteSHOT microNVRv1_8.docxPage 19 of 30 2/15/2013
order for the system to come up on boot. All are prefixed with the name Sony.
User Guide for HauteSHOT microNVRv1_8.docxPage 20 of 30 2/15/2013
Microsoft Media Encoder –This is free video encoder software. It can be set to run
automatically as a service.
Microsoft Expression Encoder 4 –This is a free video encoder for Silverlight
environments.
Adobe Flash Media Encoder –This is a free video encoder which renders in flash
format for push to a variety of web streaming services.
LiveStream ProCaster –This is a free video encoder which renders in streaming format
for the LiveStream service.
Real Networks Helix Encoder –A free encoder for use with Real Networks systems.
WireShark –Network Packet Analyzer which can be used to diagnose system issues.
HauteSpot Networks does not provide support for these applications. You will
need to refer to the software manufacturer for service and support of these
products.
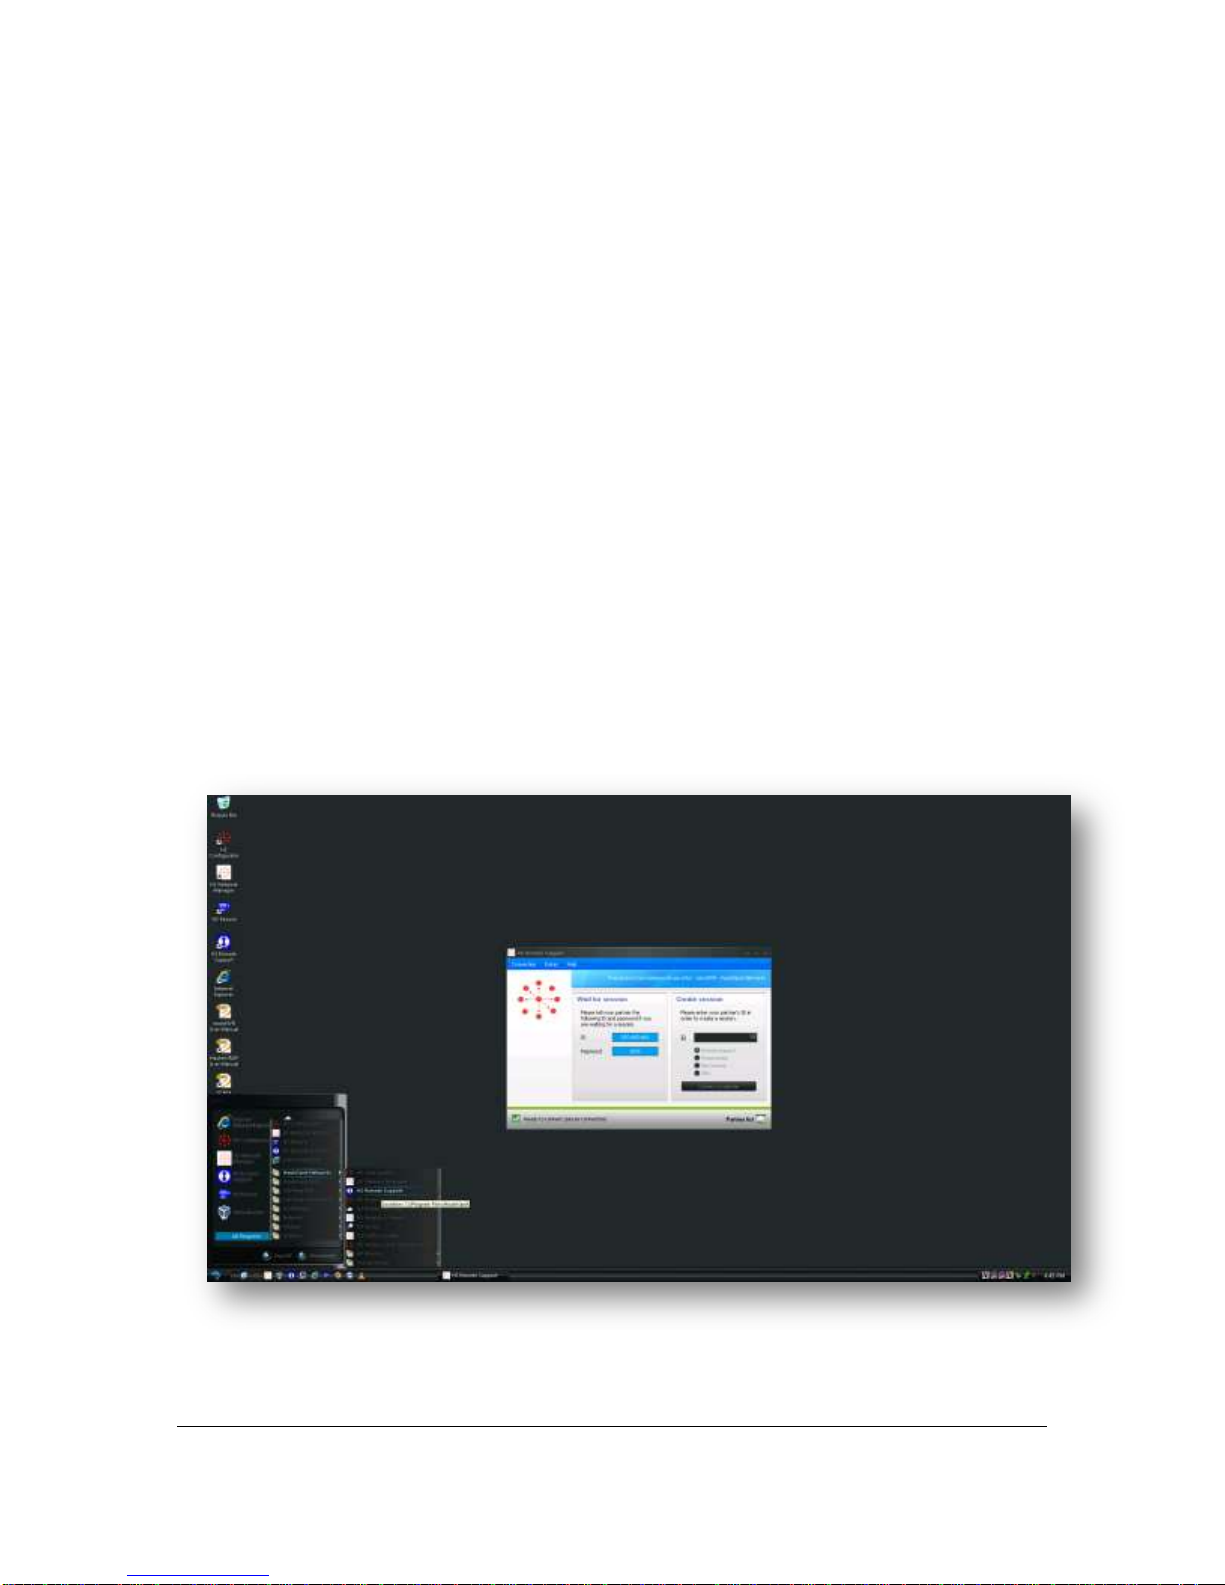
HauteSpot Remote Support –This tool allows HauteSpot Networks Technical Support
engineers to remotely access your microNVR, provided that it is connected to the
Internet. Simply launch the application from the start menu under the HauteSpot
Networks program group. Call technical support and give them the session ID and
access code. We can then log directly into your system for troubleshooting. This feature
is not used unless you affirmatively start the application.
This manual suits for next models
1
Table of contents
Popular Media Converter manuals by other brands


Lynx
Lynx C AD 3321 D Reference manual

Pinnacle Systems
Pinnacle Systems Dazzle Digital Video Creator 90 quick start guide

AxelTech
AxelTech Falcon Series user manual

Extron electronics
Extron electronics Scan Converter VSC 500 Specifications

Dometic
Dometic SMP 301 installation manual

YATO
YATO YT-23860 manual


