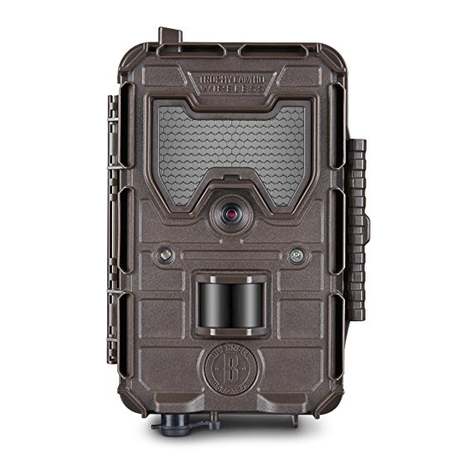
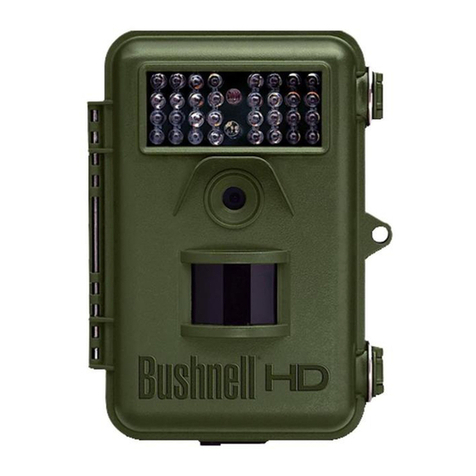
Hawke 46102 User manual

14MP NATURE CAMERA

2
CONTENTS
English..............................................
Deutsch.................................................
Français..................................................
Español...................................................
Italiano....................................................
Pg. 3-18
Pg. 19-36
Pg. 37-52
Pg. 53-68
Pg. 69-84

3
COMPONENTS
1. 48 IR LED Illuminator (covert)
2. Detection Indicator
3. Day Camera / Night Camera
4. PIR Sensor (motion detector)
5. Light Sensor
6. Microphone
7. Camera Tripod Socket
8. DC-IN Jack
9. Temperature Sensor
10.USB Port
11.SD Card Slot
12.2 Inch Color LCD Screen
13.“PHOTO”/“BOTH”/“VIDEO” Switch
14.“H”/“M”/“L” PIR Sensitivity Switch
15.“ON”/“OFF” Power Switch
16.Arrow Buttons
17.“SETUP” Button
18.“OK” Button
18
13
14
15
17
2 5
3 3
1
4
16
12
8 7
1110
96

4
B.
A.
QUICK START
1. Insert SD card and 8x AA batteries.
2. Push the power switch into the “ON” position.
3. The main menu will be displayed on screen.
4. Use the arrow buttons to highlight the SETTINGS menu and press “OK”.
5. Navigate through the menu using the up, down, left and right arrow buttons.
6. Press the “OK” button to select the highlighted option. Make changes to its setting using the
arrow buttons. Press “OK” to conrm and save the setting.
7. Once all settings have been conrmed press the “SETUP” button to return to the main menu
screen.
8. The camera has three capture modes: “PHOTO”, “BOTH” and “VIDEO”.These are selected
using the switch below the camera’s display screen.When the switch is in the “BOTH” position
the camera will take a still image at the start of every video recording.
9. The camera has three PIR sensitivity (motion detection) settings: “H” (high), “M” (medium) and
“L” (low).The PIR switch is located under the display screen. If you want the camera to detect
long distance targets or small animals, use the “H” (high) sensitivity setting.
10.Use the arrow buttons to highlight CAMERA and press “OK”.The display will turn off and the
camera is ready to capture photos/videos.
11.Place the camera in the desired location with a clear view of the intended target.
• Ensure the power switch is in the “OFF” position when not in use.

5
• Provided the batteries still have power and have not been removed, the setup conguration will
be stored for the next time you use the camera. Simply select CAMERA at the main menu to
turn the display screen off and start photo/video capture.
SETTING UP
BATTERY INSTALLATION
Ensure the power switch is in the “OFF” position when installing or removing batteries.The
camera is designed to operate with 8x AA non-rechargeable batteries. 1.5V alkaline batteries are
recommended. Ensure the voltage and polarity (+/-) are correct before installing batteries (icons
depict battery loading direction inside the camera). Incorrect voltage or polarity (+/-) could damage
the camera.
BATTERY STATUS
Certain camera functions will stop working as the batteries lose power.The battery indicator will
ash twice during the night and go into sleep mode when there is not enough power to support
the IR ash (the camera will resume normal operation during the day). As the power decreases
further, the battery indicator will ash 10 times and the camera will turn off. The batteries need to
be replaced.
SD CARD INSTALLATION
The maximum capacity for the camera’s SD card is 32GB. Ensure the camera’s power switch is in

6
the “OFF” position when installing or removing the SD card. Insert the SD card and fully depress
until it clicks (an icon depicts SD card loading direction inside the camera).To remove the SD card,
depress until it clicks and is ejected.
The SD card must be clean (no images from other sources). If you are using the SD card from
another camera, please make sure to format the SD card prior to using in the camera.
CAMERA MODE
The camera has three capture modes:“PHOTO”, “BOTH” and “VIDEO”.These are selected using
the switch below the camera’s display screen.When the switch is in the “BOTH” position the
camera will take a still image at the start of every video recording.
PIR SENSITIVITY (MOTION DETECTION)
The camera has three PIR sensitivity settings: “H” (high), “M” (medium) and “L” (low).The PIR
switch is located under the display screen. If you want the camera to detect long distance targets
or small animals, use the “H” (high) sensitivity setting.
MOUNTING THE CAMERA
The camera should be mounted approximately 1.2 to 1.5 meters off the ground with the camera
pointed at a slight downward angle.Avoid mounting the camera facing east or west as the rising
and setting sun can produce overexposed images. Ensure the camera lens and PIR sensor (motion
detector) are not blocked by any branches or debris.

7
Insert the strap through the slots on the rear of the camera.Wrap the strap around the mounting
surface. Secure the strap and tighten the buckle. Ensure the camera clasp is closed to obtain proper
weather resistance.
CAMERA COVERAGE
Mount the camera in the location it will be used. Open the camera and select PREVIEW at the
main menu. Close the camera.After 30 seconds a red light on the front of the camera will blink
when you enter the coverage area.Adjust the camera’s position as needed. Press the “SETUP”
button to return to the main menu.
VIEW MEDIA ON COMPUTER
Push the power switch into the “ON” position. Connect the camera to your computer with the
USB lead supplied, your computer will recognize the camera as mass storage.The camera’s display
will turn off while connected.You can now view, move or delete the media on the camera’s SD
card. Ensure the power switch is in the “OFF” position before disconnecting the camera from your
computer.
VIEW MEDIA USING CARD READER
Depress the SD card and remove it from the camera. Insert the SD card into a card reader (not
supplied).You can now view, move or delete the media on the SD card.

8
MAIN MENU: CAMERA
Select CAMERA from the main menu screen.The screen will turn off and start capturing photos/
videos as per your settings. CAMERA – Press “OK” to conrm.
MAIN MENU: PLAYBACK
Select PLAYBACK from the main menu screen.You can now review or delete photos and videos.
PLAYBACK – Use the left and right arrows to move between media – Press the up arrow to bring
up the Delete This File? option – Use the left and right arrows to move from No to Yes – Press
“OK” to conrm. Press “SETUP” to return to the main menu.
MAIN MENU: PREVIEW
Select PREVIEW from the main menu screen. You can now see the camera’s eld of view and
capture photos and videos manually. PREVIEW – Press “OK” to capture photo or video – Press
“OK” or “SETUP” to stop video capture. Press “SETUP” to return to the main menu.
The “PHOTO”/“BOTH”/“VIDEO” switch must be in the desired position before entering
PREVIEW.

9
MAIN MENU: SETTINGS
SETTINGS: BASIC
Set Date
Setting the date before use will ensure the correct month, day and year are recorded on the image.
SETTINGS – Basic (default) – Set Date – Use the left and right arrows to move between 00
(month), 00 (day) and 0000 (year) – Use the up and down arrows to edit the selected number –
Press “OK” to conrm.
Set Time
Setting the time before use will ensure the correct time is recorded on the image or video.
SETTINGS – Basic (default) – Set Time – Use the left and right arrows to move between 00
(hours) and 00 (minutes) – Use the up and down arrows to edit the selected number – Press
“OK” to conrm.
Delay Time
Camera delay is used to set the amount of time that the camera will sleep between taking images
after the PIR has triggered.This setting ranges from 1 second to 10 minutes.The default delay is
5 seconds. SETTINGS – Basic (default) – Set Delay – Use the left and right arrows to move
between 00 Min (minutes) and 00 Sec (seconds) – Use the up and down arrows to edit the
selected number – Press “OK” to conrm.

10
Working Mode
Working mode is used to set the camera’s activation to PIR (motion detection), time-lapse or a
combination of both. PIR:The camera works on PIR activation. Time Lapse:The camera takes an
image at certain intervals of time.The interval time ranges from 1 minute to 24 hours. Both:The
camera uses both PIR and time-lapse modes. SETTINGS – Basic (default) – Working Mode – Use
the left and right arrows to move between PIR, Time Lapse and Both – Press “OK” to conrm.
If you select Time Lapse or Both, you can set the time lapse interval using the TL Interval setting
in the Advance menu (can be set from 1 minute to 24 hours).
SETTINGS: PHOTO
Day Photo Size
Sets the image quality for photos captured in daylight from 5MP, 8MP or 14MP. SETTINGS –
Photo – Day Photo Size – Use the left and right arrows to move between 5MP, 8MP and 14MP
– Press “OK” to conrm.
Day Photo Num (Burst)
Captures a burst of images every time the camera is triggered. SETTINGS – Photo – Day Photo
Num – Use the up and down arrows to move from 1P (1 image) to 10P (10 images) – Press “OK”
to conrm.

11
Night Photo Size
Sets the image quality for photos captured at night from 3MP, 5MP or 8MP. SETTINGS – Photo –
Night Photo Size – Use the left and right arrows to move between 3MP, 5MP and 8MP – Press
“OK” to conrm.
Night Photo Num (Burst)
Captures a burst of images every time the camera is triggered. SETTINGS – Photo – Night
Photo Num – Use the up and down arrows to move from 1P (1 image) to 3P (3 images) – Press
“OK” to conrm.
SETTINGS:VIDEO
Day Video Size
Sets the quality for videos captured in daylight from 720P to 1080P. SETTINGS – Video – Day
Video Size – Use the left and right arrows to move between 720p and 1080p – Press “OK” to
conrm.
Day Video Time (Length)
Sets the length for videos captured in daylight from 5 to 60 seconds. SETTINGS – Video – Day
Video Time – Use the up and down arrows to move from 5to 60 seconds – Press “OK” to
conrm.

12
NightVideo Size
Sets the quality for videos captured at night from 720P to 1080P. SETTINGS – Video – Night
Video Size – Use the left and right arrows to move between 720p and 1080p – Press “OK” to
conrm.
Night Video Time (Length)
Sets the length for videos captured at night from 5 to 30 seconds. SETTINGS – Video – Night
Video Time – Use the up and down arrows to move from 5 to 30 seconds – Press “OK” to
conrm.
SETTINGS:ADVANCE
Duty Time
Sets the camera to work during a specic time of the day. This will affect all three working modes
(PIR (motion detection), Time Lapse and Both).The default duty time is 24 hours per day (from
00:00 to 00:00). SETTINGS – Advance – Duty Time – Use the left and right arrows to move
between start and nish times – Use the up and down arrows to edit the selected number – Press
“OK” to conrm.
TL Interval
Sets the interval time if you have selected Time Lapse or Both in the Working Mode setting. Can
be set from 1 minute to 24 hours. SETTINGS – Advance – TL Interval – Use the left and right

13
arrows to move between Hours and Minutes – Use the up and down arrows to edit the selected
number – Press “OK” to conrm.
Car Plate
Captures car license plates when still or moving. Note:The “PHOTO”/“VIDEO”/“BOTH” mode
button on the camera must be on “PHOTO” mode.The camera has several shutter speed levels.
Choose between 1/60s, 1/125s, 1/250s, 1/500 and 1/1000s. 1/1000s is the fastest shutter speed,
intended for fast moving cars.You can also select “OFF” to close this function. SETTINGS –
Advance – Car Plate – Use the left, right, up and down arrows to move between OFF, 1/60s,
1/125s, 1/250s, 1/500s and 1/1000s – Press “OK” to conrm.
IR Flash
Sets the brightness of the infrared ash. There are three options: Full Light, 2/3 Light and 1/3 Light.
Choose Full Light to get the brightest image or to reach far targets. Select 2/3 Light or 1/3 Light to
save battery or for targets closer to the camera. SETTINGS – Advance – IR Flash – Use the left
and right arrows to move between Full Light, 2/3 Light and 1/3 Light – Press “OK” to conrm.
SETTINGS: SYSTEM
Camera ID
Sets the name of the camera, which is stored on each photo and video.The Camera ID is six
characters long and can be set from A-Z, 0-9. SETTINGS – System – Camera ID – Use the left

14
and right arrows to move between the characters – Use the up and down arrows to edit the
selected character – Press “OK” to conrm.
Format SD Card
Deletes all photos and videos on the memory card. Displays the remaining space on the SD card.
SETTINGS – System – Format SD Card – Use the left and right arrows to move from Cancel
to Format – Press “OK” to conrm.
FirmwareVersion
Updates the camera’s rmware. Displays the current rmware version. This feature is for developer
use only and will only be required if updated rmware is available. SETTINGS – System –
Firmware Version – Use the left and right arrows to move from Cancel to Update – Press “OK”
to conrm. If updated rmware has been saved on the SD card, the camera will update once the
Update option is selected.
Default Setting
Resets the camera to default factory settings. SETTINGS – System – Default Setting – Use the
left and right arrows to move from Cancel to Default – Press “OK” to conrm.
Press “SETUP” to return to the main menu.

15
SPECIFICATION
Product Name....................................................................14MP Nature Camera
Model Number....................................................................46102
Image Sensor Type.............................................................1/2.5 and 1/3 Inch CMOS
Megapixels...........................................................................14MP
Lens Aperture.....................................................................Day: F3.0 / Night: F2.4
Camera Lens Sight Angle..................................................52 Degrees
Trigger Speed......................................................................<0.3 Seconds
IR Flash.................................................................................Invisible Covert
Number of IR LEDs...........................................................48 LEDs
IR Filter.................................................................................Fully Automatic IR Filter
Display...................................................................................2 Inch Color LCD
PIR Distance Adjustor.......................................................High / Medium / Low
Max NightVision Lighting Distance...............................20 Meters / 66 Feet
Time Delay..........................................................................1 Second - 10 Minutes
Time Lapse Mode..............................................................1 Minute - 24 Hours
Duty Time............................................................................00H00M - 00H00M
Multi-shot.............................................................................Day: 1 - 10 Images / Night: 1 - 3 Images
Selectable Image Resolution.............................................Day: 5MP, 8MP, 14MP / Night: 3MP, 5MP, 8MP
Video Resolution................................................................HD (720P), Full HD (1080P)
Video Length.......................................................................Day: 5 - 60 Seconds / Night: 5 - 30 Seconds

16
Audio.....................................................................................Yes
Photo Stamp........................................................................Camera ID, Date,Time,Temperature, Moon phase
Menu Languages..................................................................English
Extra power.........................................................................DC-IN 12Volts 1500mA (1.5A) minimum current
Power Supply......................................................................12V, 8x AA Cell batteries.
Dimension...........................................................................146 x 117 x 75mm / 5.7 x 4.6 x 3in
Camera Tripod Socket.......................................................Yes
Weatherproof......................................................................Yes
TROUBLESHOOTING/FAQ
Visit www.hawkeoptics.com/faq for more information.
HAWKE TWO YEAR WARRANTY
Subject to the limitations noted below, Hawke guarantees this product to be free of defects in
materials and workmanship for two years. If your Hawke product is found to have defects in
materials or workmanship, we will repair or, if repair is not possible, replace the product with an
equivalent.
The warranty does not cover failure caused by abuse or excessive wear and tear even within the
warranty period.

17
Please note your proof of purchase should accompany any warranty claim.You can register your
purchase with us now at www.hawkeoptics.com/registration
For full warranty details or to make a claim please see www.hawkeoptics.com/warranty

18

19
BAUTEILE
1. Leuchte mit 48 IR-LEDs (verborgen)
2. Erkennungsanzeige
3. Nachtsichtkamera / Tagessichtkamera
4. PIR-Sensor (Bewegungsmelder)
5. Lichtsensor
6. Mikrofon
7. Kamerastativgewinde
8. Gleichstromeingangsbuchse
9. Temperatursensor
10.USB-Port
11.SD-Karten-Steckplatz
12.2-Zoll-LCD-Farbbildschirm
13.Schalter für „PHOTO” (FOTO)/„BOTH”(BEIDES) /„VIDEO”
14.PIR-Empndlichkeitseinstellung „H“/„M“/„L“
15.„ON“(EIN)-/„OFF“(AUS)-Schalter
16.Pfeiltasten
17.„Setup“(Einrichtungs)-Taste
18.„OK“-Taste
18
13
14
15
17
2 5
3 3
1
4
16
12
8 7
1110
96

20
SCHNELLSTARTANLEITUNG
1. Setzen Sie die SD-Karte und 8 AA-Batterien ein.
2. Schieben Sie den „Power“-Schalter in die „ON”-Stellung.
3. Auf dem Bildschirm wird das Hauptmenü angezeigt.
4. Drücken Sie auf die Pfeiltasten, um das „SETTINGS“(EINSTELLUNGS)-Menü hervorzuheben und
drücken Sie „OK“.
5. Navigieren Sie mit den „AUFWÄRTS“-, „ABWÄRTS“-, „LINKS“- und „RECHTS“-Pfeiltasten
durch das Menü.
6. Drücken der Taste „OK“ wählt die aktuelle markierte Option aus. Ändern Sie die Einstellungen
durch Drücken der Pfeiltasten. Drücken Sie „OK“, um die Einstellungen zu bestätigen und zu
speichern.
7. Sobald alle Einstellungen bestätigt sind, drücken Sie die Taste „SETUP“ (EINRICHTUNG), um
zum Hauptmenübildschirm zurückzukehren.
8. Die Kamera verfügt über drei Aufnahmemodi: „PHOTO“ (FOTO), „BOTH” (BEIDES) und
„VIDEO”. Diese werden mithilfe des Schalters unter dem Display-Bildschirm der Kamera
ausgewählt. Bendet sich der Schalter in der Position „BOTH” (BEIDES), nimmt die Kamera beim
Start jeder Videoaufnahme ein Standbild auf.
9. Die Kamera verfügt über drei PIR-Empndlichkeits-(Bewegungserkennungs)-Einstellungen: „H“
(high/hoch), „M“ (medium/mittel) und „L“ (low/niedrig). Der PIR-Schalter bendet sich unter
dem Display-Bildschirm.Wenn Sie die Kamera für weiter entfernte Ziele oder kleineTiere
verwenden möchten, dann verwenden Sie die Empndlichkeitseinstellung „H“ (hoch).
This manual suits for next models
1
Table of contents
Languages:
Other Hawke Scouting Camera manuals
