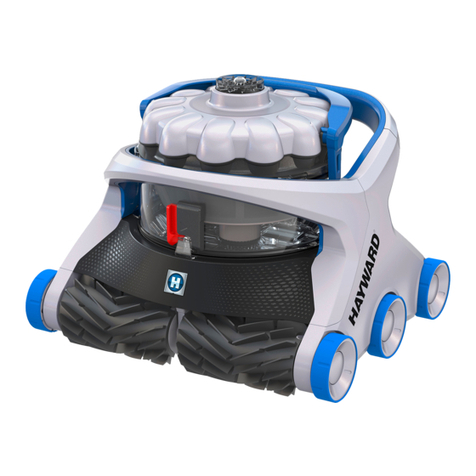
Hayward AquaVac 500 User manual

ISRC3411U1 - Rev A
1
HAYWARD only warranties the quality, performance and safety of its products when assembled with genuine
Hayward manufactured parts. Use of non-genuine Hayward manufactured parts will void all warranty.
AquaVac® 500 Series
Owner’s Manual
IMPORTANT SAFETY INSTRUCTIONS
Basic safety precautions should always be followed, including the following: Failure to follow
instructions can cause severe injury and/or death.
This is the safety-alert symbol. When you see this symbol on your equipment or in this manual, look
for one of the following signal words and be alert to the potential for personal injury.
WARNING warns about hazards that could cause serious personal injury, death or major property
damage and if ignored presents a potential hazard.
CAUTION warns about hazards that will or can cause minor or moderate personal injury and/or
property damage and if ignored presents a potential hazard. It can also make consumers aware of
actions that are unpredictable and unsafe.
The NOTICE label indicates special instructions that are important but not related to hazards.
Hayward Pool Products
620 Division Street, Elizabeth, NJ
07207 Phone: (908) 351.5400
www.hayward.com
Contents
Warnings .......................... 23
Information ....................... 4
Operating Instructions .......... 7
Maintenance ......................13
Troubleshooting ..................17
Warranty Registration........... 23
SAVE THIS OWNER'S MANUAL

HAYWARD only warranties the quality, performance and safety of its products when assembled with genuine 2
Hayward manufactured parts. Use of non-genuine Hayward manufactured parts will void all warranty.
WARNING – READ AND FOLLOW ALL INSTRUCTIONS in this owner’s manual and on the
equipment. Failure to follow instructions can cause severe injury and/or death.
WARNING – Suction Entrapment Hazard.
Suction in suction outlets and/or suction outlet covers which are, damaged, broken, cracked, missing, or unsecured can
cause severe injury and/or death due to the following entrapment hazards:
Hair Entrapment- Hair can become entangled in suction outlet cover.
Limb Entrapment- A limb inserted into an opening of a suction outlet sump or suction outlet cover that is damaged,
broken, cracked, missing, or not securely attached can result in a mechanical bind or swelling of the limb.
Body Suction Entrapment- A negative pressure applied to a large portion of the body or limbs can result in an entrapment.
Evisceration/ Disembowelment - A negative pressure applied directly to the intestines through an unprotected suction
outlet sump or suction outlet cover which is, damaged, broken, cracked, missing, or unsecured can result in evisceration/
disembowelment.
Mechanical Entrapment- There is potential for jewelry, swimsuit, hair decorations, finger, toe or knuckle to be caught in an
opening of a suction outlet cover resulting in mechanical entrapment.
WARNING –Risk of Electric Shock. All electrical wiring MUST be in conformance with applicable local codes,
regulations, and the National Electric Code (NEC). Hazardous voltage can shock, burn, and cause death or serious property
damage. To reduce the risk of electric shock, do NOT use an extension cord to connect unit to electric supply. Provide a
properly located electrical receptacle. Before working on any electrical equipment, turn off power supply to the equipment.
WARNING –To reduce the risk of electric shock replace damaged wiring immediately. Do not bury cord.
Locate cord to prevent abuse from lawn mowers, hedge trimmers and other equipment.
WARNING –Do NOT ground to a gas supply line.
WARNING –To avoid dangerous or fatal electrical shock, turn OFF power to all electrical equipment before
making electrical connections.
WARNING –Risk of Electric Shock. Connect only to a branch circuit protected by a ground-fault circuit-
interrupter (GFCI). Contact a qualified electrician if you cannot verify that the circuit is protected by a GFCI.
WARNING –Risk of Electric Shock. The power supply must be connected only to a supply circuit that is protected
by a ground-fault circuit-interrupter (GFCI). This GFCI should be tested on a routine basis. To test the GFCI, push the test
button. The GFCI should interrupt power. Push reset button. Power should be restored. If the GFCI fails to operate in this
manner, the GFCI is defective. If the GFCI interrupts power to the power supply without the test button being pushed, a
ground current may be flowing, indicating the possibility of an electrical shock. Do not use this Power supply. Disconnect
the power supply and have the problem corrected by a qualified service representative before using.
WARNING –Ensure that children do not attempt to access cleaner while it is operating.
Closely supervise children at all times.
CONTINUED

3
SAVE THESE INSTRUCTIONS
BE CERTAIN THE POWER SUPPLY IS ONLY PLUGGED into a grounded electrical
outlet equipped with an approved and properly operating ground fault circuit interrupter
(GFCI).
ALWAYS PUT THE CLEANER INTO THE WATER BEFORE connecting it to the GFCI protected electrical
outlet.
DO NOT USE AN EXTENSION CORD. THIS COULD CREATE A SAFETY HAZARD AND/OR
DAMAGE YOUR CLEANER.
DO NOT HANDLE CLEANER WHILE IT IS PLUGGED INTO THE ELECTRICAL OUTLET.
NEVER ALLOW PLUG TO ENTER THE POOL.
DO NOT OPERATE THE CLEANER OUT OF WATER. THIS WILL DAMAGE THE MOTOR SEAL
AND VOID THE WARRANTY.
DO NOT DRAG THE CLEANER OUT OF THE POOL AGAINST THE SIDE WALL. THIS COULD
DAMAGE UNIT AND/OR YOUR POOL WALL.
DO NOT BURY CORD. DO NOT OPERATE CLEANER WITH DAMAGED CORD. REPLACE
DAMAGED CORDS IMMEDIATELY.
WARNING - TO REDUCE THE RISK OF INJURY; DO NOT PERMIT CHILDREN TO USE
THIS PRODUCT.
If the supply cord is damaged it must be replaced by the manufacturer, service agent, or
similarly qualified persons in order to avoid a hazard.
While the cleaner has been made to operate as safely as possible, we suggest you exercise
reasonable care in the handling of the cleaner and inspect the electrical cord frequently for damage or
wear, as with any other electrical appliance. After use, remove the unit and rinse with fresh water and
remove any twists that may be present in the cord. Store the cleaner and power supply in a shaded
area.
HAYWARD only warranties the quality, performance and safety of its products when assembled with genuine
Hayward manufactured parts. Use of non-genuine Hayward manufactured parts will void all warranty.
To maximize the life of the cleaner, remove it from the pool when not in use and store in a shaded
area.
ALWAYS REMOVE THE CLEANER COMPLETELY FROM THE POOL PRIOR TO ENTERING THE
POOL.

4
CONSUMER INFORMATION AND SAFETY
DANGER
Risk of electrical shock or electrocution
The electrical supply to this product must be installed in accordance with all
applicable local codes and ordinances (see page 23). Improper installation will create
an electrical hazard which could result in death or serious injury to pool users or others
due to electrical shock, and may also cause damage to property.
WARNING Do not play with cleaner or cable or apply to body. Can trap or tear hair or body parts.
Cable can trip or entangle swimmers, which could result in drowning.
CAUTION
Before installing the cleaner, understand cleaner coverage. The cleaner was not designed
to automatically clean steps or to work under a solar cover. It was also not designed to do
initial cleanup for a new pool installation.
OPERATING THE CLEANER
WARNING
A Ground Fault Circuit Interrupter (GFCI –USA) must be installed to protect your electrical
outlet and to prevent any possible electric shock. Failure to do so could create an
electrical hazard which could result in death or serious injury to pool users or others due to
electrical shock and may also cause damage to property.
CAUTION
DO NOT switch the pool cleaner to “ON” if it is not immersed in the water. Operating the
cleaner out of the water may cause severe damage and will result in loss of warranty.
Always remember to unplug the cleaner from the power supply before removing the
cleaner from the pool.
WARNING It is mandatory to allow a safety distance between the power supply and the pool as
required by the current installation standard (11.5 feet minimum or 3.5 meters).
WARNING Always stay out of the pool while cleaner is in operation or in the pool.
Do not use an extension cord to connect to the power supply.
WARNING
CAUTION Power supply heat sink surface may be hot.
HAYWARD only warranties the quality, performance and safety of its products when assembled with genuine
Hayward manufactured parts. Use of non-genuine Hayward manufactured parts will void all warranty.
Keep the power supply control in shaded area. The power supply control is equipped
with an automatic shut off to prevent over heating if operated in direct sunlight.

5
Dear Hayward Robotic Cleaner Owner:
Thank you for choosing Hayward. In order to achieve optimal performance, please read and follow
these steps:
1.
Cleaner filter cartridges should be thoroughly cleaned after each use or as often as needed to ensure
cleaner's optimal performance. (see the Maintenance section for filter cleaning instructions)
2.
Before using your cleaner and especially when opening the pool for the first time remove larger
items such as toys, large leaves, or other debris from the pool that may diminish the cleaner's
performance. Clean filter frequently when pool is excessively dirty.
3.
For the first use, run cleaner for the full cycle (3 hours) to ensure a clean pool and give you a full
understanding of the cleaner's capabilities. Subsequent cleaning may only require the quick clean
cycle - 90 minutes (if so equipped).
4.
In the Quick Clean Cycle the cleaner may periodically go to the wall but not necessarily climb to the
vertical position. This is a normal part of the programmed cycle.
5.
Cleaner may stop in the middle of the pool and reverse during cleaning cycle. This is a normal part of
the programmed cycle.
6.
DO NOT start cleaner out of the water. The unit
will automatically shut off, but it is best to unplug
the power cord when unit completes cleaning.
7.
Only plug into a GFCI (Ground Fault Circuit Interrupter) protected 120 (+/-10%) volts AC outlet.
8.
Place the cleaner power supply so that it is at a minimum distance of 11.5 feet (3.5 meters) from the
pool edge. The length of the standard cleaner cable is 60 feet (18.29 meters).
9.
Depending on the size and shape of your pool the entire length of the floating cable may not be
necessary. The floating cable should reach from the cleaner power supply to the furthest point in the
pool, plus the depth at the deep end of the pool. To reduce cable tangling any excess cable should be
coiled and placed next to the power supply.
WARNING - READ THESE IMPORTANT
OPERATING TIPS BEFORE USING YOUR UNIT!
HAYWARD only warranties the quality, performance and safety of its products when assembled with genuine
Hayward manufactured parts. Use of non-genuine Hayward manufactured parts will void all warranty.
Always keep the power supply out of direct sunlight and in a shaded area.
10.

What is in the Carton
Robotic Pool Cleaner with Filter Elements
Cord with swivel
Power Supply Control (Keep in shaded area out of direct sunlight)
Caddy Cart (May be sold separately)
HAYWARD only warranties the quality, performance and safety of its products when assembled with genuine
Hayward manufactured parts. Use of non-genuine Hayward manufactured parts will void all warranty. 6

7
HAYWARD only warranties the quality, performance and safety of its products when assembled with genuine
Hayward manufactured parts. Use of non-genuine Hayward manufactured parts will void all warranty.
Caddy Cart Assembly
GENERAL OPERATING INSTRUCTIONS
Take a moment to get familiar with the cleaner.
Remove the cleaner by placing the carton down and
removing it from the box as shown. Models with a
caddy cart the cleaner and the Power Supply Control
should be mounted on the cart.
1. 2. Insert Lower Hook using 2 self-tapping screws
3. Insert Upper Hook using 2 self-tapping screws 4. Remove plastic caps from axel. Lay cart on side, slide
one wheel onto axel.
Using a small hammer,
gently tap axel cap
onto axel.
Turn cart over and
install remaining
wheel and cap.
5. Mount cleaner & power supply

8
1. Select the nearest GFCI (Ground Fault Circuit Interrupter) protected 120 (+/-10%) volt AC outlet. DO NOT
PLUG THE POWER SUPPLY INTO THE POWER OUTLET YET.
2. Place the cleaner power supply so that it is at a minimum distance of 11.5 feet (3.5 meters) from the
pool edge. The length of the standard cleaner cable is 60 feet (18.29 meters).
3. Stretch out the floating cable along the pool deck in the sun to remove any twisting the cord has
from storage and measure out the approximate amount of cleaner cord needed for pool coverage.
4. Connect the floating cable to
the power supply. Use only
the original Power Supply
Control manufactured by
Hayward.
5.Place the cleaner in the pool. It will slowly sink to the bottom of the pool as the air inside is released.
Notice: To reduce risk of injury and prevent damage to the cleaner during the start up
sequence the cleaner has been equipped with an out of water sensor. Should the cleaner sense
that it is not in the water it will power itself down. To reset the cycle switch off the power supply
for 10 seconds and restart.
HAYWARD only warranties the quality, performance and safety of its products when assembled with genuine
Hayward manufactured parts. Use of non-genuine Hayward manufactured parts will void all warranty.

9
7.
HAYWARD only warranties the quality, performance and safety of its products when assembled with genuine
Hayward manufactured parts. Use of non-genuine Hayward manufactured parts will void all warranty.
HAYWARD only warranties the quality, performance and safety of its products when assembled with genuine
Hayward manufactured parts. Use of non-genuine Hayward manufactured parts will void all warranty.
The power indicators should be slowly pulsing. This
means that the power supply is in standby mode.
To turn on the power supply, press the power button. While
the indicator lights are quickly pulsing select the desired
cleaning schedule.
8.
a.Press the schedule button to select the desired schedule mode.
i. 1X = Single Cleaning Cycle. The cleaning cycle does not repeat
ii. 24h = Daily Cleaning. The robotic cleaner will turn on once
every 24 hours to perform the selected cleaning cycle. There
is a limit of 7 consecutive cleaning cycles in this mode.
iii. 48h = Every other day Cleaning. The robotic cleaner will
turn on once every 48 hours to perform the selected
cleaning cycle. There is a limit of 4 consecutive cleaning
cycles in this mode.
iv. 72h = Every third day Cleaning. The robotic cleaner will
turn on once every 72 hours to perform the selected
cleaning cycle.
Plug the power supply cord into the GFCI protected
electrical outlet.
6.
NOTE: This schedule must be reset / selected WEEKLY.
This is to prevent damage to the cleaner if left unattended.

Note: A cleaning cycle and schedule can be stopped by pressing the power button.
HAYWARD only warranties the quality, performance and safety of its products when assembled with genuine
Hayward manufactured parts. Use of non-genuine Hayward manufactured parts will void all warranty.
HAYWARD only warranties the quality, performance and safety of its products when assembled with genuine
Hayward manufactured parts. Use of non-genuine Hayward manufactured parts will void all warranty.
HAYWARD only warranties the quality, performance and safety of its products when assembled with genuine
Hayward manufactured parts. Use of non-genuine Hayward manufactured parts will void all warranty.
HAYWARD only warranties the quality, performance and safety of its products when assembled with genuine
Hayward manufactured parts. Use of non-genuine Hayward manufactured parts will void all warranty.
10
The robotic cleaner will automatically start the selected cleaning cycle when no buttons
on the power supply have been pressed for 10 seconds. The power indicators,
selected cleaning cycle mode indicators, and selected cleaning schedule indicator will
light up continuously during the cleaning cycle.
9.
When the robotic cleaner has completed the cleaning cycle, the power supply
will do one of the following:
a. Enter standby mode. This happens if there are no more cleaning cycles
remaining in the schedule.
10.
b. Enter schedule standby mode. This means that the power supply is in
between cleanings for the indicated schedule. The power indicators, selected
cleaning cycle and cleaning schedule indicators will slowly pulse. The robotic
cleaner will automatically turn on and start the selected cleaning cycle per
the selected schedule.
Unplug the power supply prior to
removing the robotic cleaner from the
pool.
11.
Power Failure Feature
If the power fails during a cleaning cycle or in between scheduled cleanings, the
power supply will automatically start a new cleaning cycle when power is restored.
Note: A new cleaning cycle will not be started if there was less than one whole
cleaning cycle remaining in the selected schedule.
CAUTION: The power failure feature cannot distinguish a power failure from
an unplugged power supply. This may cause the cleaner to initiate a cleaning cycle
automatically when the power supply is plugged in.
If the supply cord is damaged it must be replaced by the manufacturer, service agent, or similarly
qualified persons in order to avoid a hazard.
All electrical connections must be done by a qualified electrician according to
local electrical standard (see page 23).

11
HAYWARD only warranties the quality, performance and safety of its products when assembled with genuine
Hayward manufactured parts. Use of non-genuine Hayward manufactured parts will void all warranty.
Keep the Power Supply Control Out of Direct Sunlight. Store the Cleaner and Power Supply in a
shaded area.
Remove the cleaner from the pool, empty the filter bucket and clean filters after each use. Keeping the
cleaner permanently in the pool may result in additional service requirements. (see maintenance section for
cleaning instructions)
Optimum operating water temperature range for the cleaner is 50ºF - 100ºF (10ºC - 35ºC).
DO NOT ENTER THE SWIMMING POOL WHEN THE CLEANER IS OPERATING OR IN THE POOL.
CAUTION: When removing cleaner from the pool do NOT reel it around your arm. The cleaner is heavy
and may cause someone to lose their balance and fall into the pool. To avoid falling into the pool, gently
reel the cable in hand-over-hand from the shallow end of the pool by gently pulling the cable until the
cleaner reaches the surface. Then lift it out of the water using the handle, NOT the cable.
To better protect the cleaner from damage, it will sense when being asked to turn on when not safely in
water, or leaves the water during operation.op
Out of Water Sensor
Out of Water Start Up
Out of water during operation refers to the cleaner leaving or being removed from the water while in normal
operation cycle. If the cleaner senses that it is no longer in the water, the unit will attempt to
re-enter the water by reversing its current direction. If the cleaner is not submerged within ninety (90) seconds
of leaving the water the unit will power itself down. To reset the cycle, switch off the power supply for 10
seconds and restart.
Out of Water Operation
Out of water at start up means that the cleaner has been powered on before the cleaner has been placed
in the water. If the cleaner senses that it is not in the water the unit will power itself down. To reset the
cycle, switch off the power supply for 10 seconds and restart.

12
1.
Power Supply
2.
On/Off Switch
3.
Floating Cable
4.
Handle
5.
Filter Cartridge
6.
Filter Bucket
7.
Filter Door
8.
Dome Assembly
9. Side Panel
10.
Wheel
11.
Float
12.
Sealed Motor Unit
13.
Wheel Brush and Tube 14.
Drive Track
HAYWARD only warranties the quality, performance and safety of its products when assembled with genuine
Hayward manufactured parts. Use of non-genuine Hayward manufactured parts will void all warranty.
15.
Cord Swivel

13
MAINTENANCE
Clean the filter cartridge after each use:
1. Open the cleaner by pressing the lid button and lifting up the dome cover.
2. Remove the easy access filter bucket assembly by lifting it up out of the cleaner with both hands
from each side.
3. Flip the bucket assembly over to remove the debris and then rinse with a garden hose to remove
small particles.
4. Filter cartridges do not need to be removed to clean.
HAYWARD only warranties the quality, performance and safety of its products when assembled with genuine
Hayward manufactured parts. Use of non-genuine Hayward manufactured parts will void all warranty.

14
5. For deep cleaning remove the filter cartridges:
a. Unsnap and lift up both filter door latches.
b. Pull out the filter cartridges. Using a garden hose with a spray nozzle, wash the filter elements
to remove debris. Hold the filter elements as shown to allow the debris to fall out. The cleaner
your filter is the more effective the cleaner will be.
If filter elements are clogged with oils you can purchase filter cartridge cleaner from your
Hayward retail dealer
d.Wash the entire filter bucket assembly.
e.Place the filter cartridges back into the filter bucket assembly with the center frame
reinforcements facing inward.
f.Snap the filter door latches into place.
HAYWARD only warranties the quality, performance and safety of its products when assembled with genuine
Hayward manufactured parts. Use of non-genuine Hayward manufactured parts will void all warranty.
c.

15
6. Return the filter bucket assembly into the cleaner using the diagram shown to determine the front
and back.
7. Close the dome and press the lid button to snap dome into place.
Periodic Cleaning of Moving Parts
WARNING: Disconnect the power supply from electrical outlet before cleaning moving parts.
Inspect the venturi to ensure that no debris or hair has clogged the impeller.
The impeller can be cleaned by spraying it with a garden hose.
Spray water using a garden hose around the float to remove any sand or debris.
Remove any debris that has accumulated between the tracks and wheels.
Storage
When unit is out of the water, store the cleaner in a dry, shady location at temperatures between
40F - 115F (4°C-46°C).
Cable Care
With continued use, the cable may become coiled (like a telephone cord). To correct this, stretching
the cord out in the sun, the sun's heat will reduce cord twisting.
IMPORTANT: The cable should be checked periodically for any external damage.
HAYWARD only warranties the quality, performance and safety of its products when assembled with genuine
Hayward manufactured parts. Use of non-genuine Hayward manufactured parts will void all warranty.

16
IMPORTANT TIPS
Do not drop or throw the cleaner into pool. Place cleaner away from the pool wall but do not throw the
cleaner in the pool.
Cleaning the filter cartridges after every use maximizes the unit's performance.
Replace worn brushes or foam rollers.
To avoid clogging the cleaner's filter elements, be sure all chemical powders are fully dissolved
before operating the cleaner.
In a pool with high calcium content, more frequent cleaning of the filter cartridges is recommended.
Save the original carton for extended storage or shipping requirements should your cleaner require
service by a Hayward Authorized Service Center.
The sealed Motor Unit and the Power Supply contain no user-serviceable parts. Opening them will
automatically VOID your warranty.
Remove items such as thermometer, toys and the like from the pool before operating the unit. Such
items can jam the cleaner and cause damage to the unit and/or your pool.
The filter bucket is designed to be cleaned with the filters installed for normal clean up. For deep
cleaning, the user can remove each filter cartridge and clean separately.
During the normal operating cycle of the cleaner, the handle side of the unit will rise from the pool
bottom to allow the unit to clear obstacles, such as elevated main drains and stair steps.
For cleaners used in areas that have a lot of sand the cleaner may need to be rinsed with water at all
flapper (filter debris container's flapper is at intake port) areas, and may need rinsing at the dome push
button to allow free operation.
HAYWARD only warranties the quality, performance and safety of its products when assembled with genuine
Hayward manufactured parts. Use of non-genuine Hayward manufactured parts will void all warranty.

All power supply
indicators flash,
cleaner does not
operate
A problem was detected with the power supply. The
flash pattern identifies the type of problem.
*1 flash every 3 seconds: Overcurrent Detection: This may
happen if debris becomes lodged in the impeller or drivetrain of the
cleaner. A damaged cleaner cable is also a potential cause of this
issue. This fault can be cleared by unplugging the power supply
from the utility power for at least 1 minute.
*2 flashes every 3 seconds: Over Temperature Detection. The
failure will automatically reset and a cleaning cycle will commence
when the power supply cools down. Place the power supply upright
with the heatsink away from a wall or surface. Keep the power
supply out of direct sunlight.
*3 flashes every 3 seconds: Unplug the power supply from the
utility power. Wait at least 1 minute to reset the fault. Make sure
the cleaner cord is not plugged into the power supply. Plug the
power supply power cord into the electrical outlet. Set the power
supply to start a cleaning cycle. If this fault repeats, the problem is
with the power supply. Otherwise, there is a problem with the
cleaner or the cleaner cord.
17
HAYWARD only warranties the quality, performance and safety of its products when assembled with genuine
Hayward manufactured parts. Use of non-genuine Hayward manufactured parts will void all warranty.
Cleaner does
not operate.
It may take up to 1 minute from the start of a cleaning
cycle for the cleaner to begin moving. Make sure that a
cleaning cycle has been initiated.
Make sure that the power supply is plugged into a
functioning GFCI outlet. Reset GFCI if necessary. Note:
Repeated GFCI trips may indicate a faulty GFCI or non-
repairable failure of the power supply. In such case,
discontinue use of the power supply.
Make sure that the service circuit breaker or fuse have
not tripped.
No Power, power
supply indicators
do not light
Symptom Possible Solutions
Warning: Do not attempt to repair the power supply. There are no user serviceable parts.
Troubleshooting - Power Supply:

18
TROUBLESHOOTING - Cleaner
If the cleaner fails to pick up fine or heavy debris:
It may be clogged. Clean the filter. A filter cleaning solution can be purchased from your
Hayward retail dealer to remove excessive dirt and/or sand.
If the cleaner starts working momentarily but then stops working:
Impeller may be clogged or jammed with debris,
check and clean if necessary following the
instructions in the maintenance section.
Cleaner performs by both timing and a pool wall detection sensor, whichever comes first.
There are 3 intake ports located at bottom
of filter bucket and near the brush roller,
check for debris and clean if necessary.
Cleaner may get stuck if a high main drain is installed in the pool. Cleaner may remain lodged on the
drain for a short period of time, but will eventually free itself by virtue of the cleaner's embedded
program.
Cleaner performance: Confusion may exist over the perception of how the cleaner operates at
different times during each cycle. It is important to judge the performance of the cleaner by
observing improved pool cleanliness after the cleaner has run a complete cleaning cycle.
If a cleaner has poor coverage of the pool in one cycle or only covers a small area, check the filter and
clean if necessary and make sure the unit is not getting caught on drains, in-floor cleaning heads or
toys. The user may try starting the cleaner in different locations to find the optimum cleaning location.
If debris falls from cleaner while removing from pool, it may be caused by filter overload, increase
frequency of filter cleaning. Assure that there is no large debris blocking any of the three intakes. Large
debris must be removed from the pool before using machine. If drain flaps are out of place or stuck by
sand or leaves in the open position, the flaps can be snapped back into place, after cleaning the area.
If the flotation cord gets twisted which can be caused by the cleaner getting stuck on large objects such
as rocks, toys or main drains, it can be straightened by laying the flotation cord at full length (if possible)
in the sun; heat from the sun will help reduce the cord twisting.
If a high level of debris is visible through the dome windows (if so equipped), remove cleaner quickly
from the water to reduce the chance of the debris escaping the filter bucket and reentering the pool.
HAYWARD only warranties the quality, performance and safety of its products when assembled with genuine
Hayward manufactured parts. Use of non-genuine Hayward manufactured parts will void all warranty.
Brush roller or drive tracks may be stuck, check for debris and clean if necessary.

19
Weight (w/o cable) 26.75 lb (12.13 Kg)
Cable Length, 60 ft (18.29 m)
Materials
High Impact ABS - Metal Parts of Non-Ferrous Stainless Steel
Waterproof Sealing Triple Redundant Radial Shaft Seals & O-ring
Motor Housing Sealed, Watertight, High Impact Polypropylene
Overload Protection Electronic Overload Monitoring with auto-shutoff
Filter
Type Removable, Re-Usable, Pleated Element Cartridge
Media Pleated Cellulose/Polyester Blend
Cleaning Routine Control
Type Adaptive Seek Control Logic (ASCL®) Microprocessor
Cleaning Cycle Full Cycle
3 hours
Drive System Direct Drive w/Polyurethane Drive Track & Acetal/Stainless Steel Bearing
System
Power Supply
Input Primary Voltage
Output Secondary Voltage
Rated Output Current
Weight 9.75 lbs (4.42 Kg)
Shipping
Carton Dimensions (mm) w/Caddy
Length Width Height
24 in (620 mm) 17 in (440 mm) 30 in (752 mm)
Shipping Weight with Caddy 52 lb (23.6 Kg)
HAYWARD only warranties the quality, performance and safety of its products when assembled with genuine
Hayward manufactured parts. Use of non-genuine Hayward manufactured parts will void all warranty.
Operating Water Temperature
Range
50° - 100° F
10° - 35° C
120 VAC +/- 10% 60Hz
3.5 A
30 VDC
Carton Dimensions x-Caddy 21 in (492 mm) 21 in (492 mm) 26 in (657 mm)
Shipping Weight x-Caddy 40 ib. (18.4 Kg)

1
2
6
3
2
4
7
5
3
8
9
10
42
43
11
12
13
14
15
16
17
19
18
20
21
22
23
24
25
27
26
28
30 31
29
32
33
34
35 36 37
40
38 39
41
HAYWARD only warranties the quality, performance and safety of its products when assembled with genuine 20
Hayward manufactured parts. Use of non-genuine Hayward manufactured parts will void all warranty.
Other manuals for AquaVac 500
3
Table of contents
Languages:
Other Hayward Vacuum Cleaner manuals

Hayward
Hayward TigerShark User manual

Hayward
Hayward RC34 series User manual

Hayward
Hayward AquaVac 6 Series User manual

Hayward
Hayward TigerShark User manual

Hayward
Hayward Aquashark Series User manual

Hayward
Hayward RC361248 User manual

Hayward
Hayward SharkVAC XL User manual

Hayward
Hayward SharkVAC XL Pilot User manual

Hayward
Hayward RC34 series User manual

Hayward
Hayward AquaVac 6 Series User manual