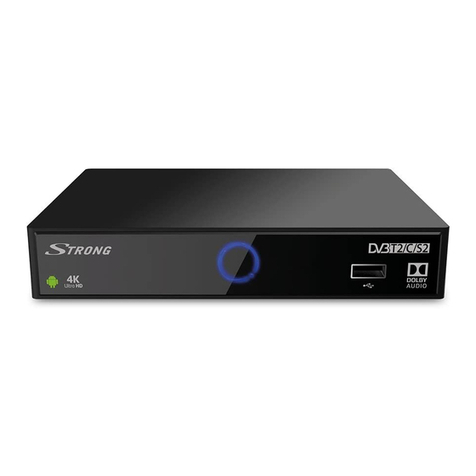
healing HHH640 User manual

0

1

2
CONTENTS
Introduction and Features 4
Safety Instructions 5
Connectors 6
Remote Control Unit Key Layout 7
Remote Control Unit Key Functions 8
Remote Control - Battery Care / Preparation / Distance / Tips 9
Installation – HDMI Output Plug / AV lead for CVBS Composite 10
Start Up 11
Time Zone 11
Manual Scan 12
Up/Down Channel Change / Numeric Input Channel Change 13
Volume Adjustment / Volume Mute 13
TV or Radio Selection 13
INFO Key 13
EPG – Electronic Program Guide 14
Closed Captions 14
Installation Menu 15
My Box Menu 16
TV Set Up Menu 17
Password Menu 19
Navi Key Functions 21
Fav Key 24
Recording Functions – Formatting Your USB Storage Device 26
Recording Functions – Instant Record 27
Recording Functions – Timer Record 28
Recording Functions – Playback / Fast Forward & Rewind 29
Recording Functions – Manage Files / Time Shift 30
Recording Functions – USB Storage Device Capacity 32
Multimedia Functions – Photo Files / Music Files / Movie Files 32
Troubleshooting 36
Specifications 37

3

4
INTRODUCTION
Thank you for choosing a healing HHH640 ‘micro’ high definition digital
television receiver.
This sophisticated receiver has a host of exciting features and will enable
you to receive and enjoy high definition and standard definition digital
terrestrial TV channels that are available in your location - including
freeview channels.
The units USB recorder will enable you to record your favorite programs,
Time Shift live TV and playback various media files
For a complete listing of our digital television terrestrial receivers please
view our website: www.healingdigital.com
HHH640 FEATURES
Excellent High Definition & Standard Definition ‘Wide Horizon’ picture
quality
Receives all 'freeview' Channels
USB Record and TimeShift live TV
Flexible Media Player – Plays a host of media files – Photo, Music,
Movies
Resolutions 1080i, 720p, 520p and 576i
HDMI Output Plug for direct screen connection
Rotating HDMI Plug assists total receiver concealment
IR Receiver Extender enables unit to be concealed
Composite CVBS Video/Audio Output included
Electronic Program Guide (EPG) with 8th day cross over
Centre Cut option displays aspect of 16:9 on 4:3 screens
Closed Captions subtitles
Parental Lock
Signal Strength and Quality bars colour coded
Games, Calender, Calculator Function
Low Energy Consumption – MEPS compliant
Saves program parameters at Power Fail
Attractive On Screen Display structure

5
SAFETY INSTRUCTIONS
Operating and Safety instructions should be read prior to connecting and
operating the unit.
Please adhere to all Safety Instructions listed in this operating manual.
DO NOT INSTALL YOUR RECEIVER:-
In a closed or poorly ventilated cabinet
Directly on top or under any other equipment.
DO NOT EXPOSE THIS RECEIVER OR ITS ACCESSORIES:
To water or intense moisture
To direct sunlight
To any equipment that generates heat
To intense vibration
To any magnetic objects such as loudspeakers, transformers etc.
Never open the cover: High voltage electrical hazards make it
extremely dangerous to touch the inside of the receiver. Note: Your
warranty will be void if the receiver panel/s has been opened.
If the receiver is not to be used for an extended period, unplug the
receiver power cord from the wall power socket.
When installing the receiver and connecting AV and cables, initially
disconnect the unit from mains power.
Do not operate the unit if the power lead is damaged.
Protect the power cord from being walked on or pinched
Clean the Receiver and its panels only with a dry cloth.
Only use attachments/accessories specified by the manufacturer

6
CONNECTORS
HDMI OUTPUT PLUG – Combined Video & Audio
RF IN: Television antenna input
RF OUT: Loop through to pass the antenna signal to another receiver.
IR: Connection for the supplied Infrared Remote Extender
DC5V: Connection for the supplied Power Pack.
USB: USB-2 host connection for storage devices including Memory
Sticks and Hard Disk Drives for Recording, TimeShift, Media file
playback and firmware upgrade.
A/V: Connection for the supplied 3.5mm plug to RCA AV lead
(if HDMI plug connection is not used)

7
REMOTE CONTROL UNIT KEY LAYOUT

8
REMOTE CONTROL UNIT KEY FUNCTIONS
STANDBY: Press to Operate your receiver or place it in Standby mode.
INFO: First press shows the Basic Information bar on screen.
Second press shows the Detail program Info panel.
Third press shows Program Info with signal Strength & Quality.
AUDIO: Press to enter Audio Setting menu.
TV/RADIO: Switches between TV and Radio channels.
MUTE: Enables or Disables sound, returning to previous level.
Mute is also disabled by pressing Pressing the <Vol+/->keys.
PLAY: Press to Play a file from storage, or resume Play from pause.
PAUSE: Pause or resume play from a USB storage device.
REC: Records tuned program to connected USB storage device.
NAVI: Enter Navigation menu bar, a short cut to various functions.
STOP: Stops Recording or Playback of files to USB storage device.
USB: Enters Recorded file list for connected USB storage device.
MENU: Enter main Menu.
RETURN/EXIT: Leave a Menu or function.
CH+: Channel select Up.
CH- : Channel select Down.
VOL+: Sound Volume level up or increase.
VOL-: Sound Volume level down or decrease.
PAGE UP: Move up page list.
PAGE DOWN: Move down page list.
0 – 9: Select Channel or enter number values from a menu mode.
FAV: Press to select channels from Favourites list.
EPG: Selects Electronic Program Guide and EPG Record functions.
TEXT: Enter or exit Teletext menu (Teletext generally not available).
SUBTITLE: Acceses menu to turn Closed Captions (Subtitles) On or Off.
◄◄ REV: Fast Rewind through recordings – 8 speeds up to 32x.
►► FWD: Fast Forward through recordings – 8 speeds up to 32x.
Coloured keys: Red, Green, Yellow and Blue,
provide a variety of functional shortcuts.

9
REMOTE CONTROL BATTERY CARE
To ensure long life from your Remote Control Unit:-
1. Check that the polarity indicators of batteries and the remote control
terminals correspond.
2. Do not mix new and old or different types of batteries together.
3. Never leave old or exhausted batteries in the remote control.
4. If storing your receiver for an extended period, remove the RCU batteries.
5. Only rechargeable cells (NiMh etc) should be recharged, and on a
purpose built charger.
6. Do not attempt to disassemble or short circuit the batteries.
7. Do not expose the batteries to heat sources.
8. In the event of electrolyte fluid does leak from a battery inside the remote
control, wipe away with a damp cloth and insert new batteries.
9. Damage caused by leaking batteries is not covered by warranty.
PREPARING THE REMOTE CONTROL FOR USE
Load fresh batteries for your remote control unit to operate reliably.
1. Open the battery compartment lid on the back of the RCU.
2. Insert the batteries, negative terminals first. Take care that the battery
polarity markings correspond with those of the remote control.
3. Close the battery compartment lid, checking that it locks in place.
4. Your RCU should now be ready for use.
REMOTE CONTROL OPERATING DISTANCE & ANGLE
With an uninterrupted view of your receivers
Front panel IR window, point the RCU towards
your receiver and press any key.
1. Distance: The remote control should work up to
7 meters from the front of your receiver…
2. Angle: and about + or – 30 degrees from directly
facing the receiver (see drawing).
USEFUL REMOTE CONTROL TIPS
1. For prolonged receiver life, intervals of continuous switching action
should be kept to less than one minute.
2. Should receiver stop responding to RCU commands or freeze up,
disconnect the batteries and or power for 10 seconds and restart.
3. Daylight and some electric light can compromise the distance over which
a RCU is effective. You can solve this by re-adjusting receiver position
and room lighting as necessary.

10
INSTALLATION
Connecting the HHH640 - Video and Audio
HDMI OUTPUT PLUG
The HDMI Output Plug of the HHH640 provides Video and Audio.
. Set your TV Video mode to HDMI via your TV Video Source.
.Connect the HHH640 with the units HDMI Output plug to the HDMI Input
connector of your television.
. Connect the antenna lead to the RF IN connector socket of the HHH640.
. Connect the supplied Infrared Remote Extender to the IR connector
socket of the HHH640 and position the IR to enable clear uninterrupted
remote control signal.
. Connect the supplied Power Pack to the DC5V connector socket of the
HHH640 and to mains power.
A/V Output Connection
If a HDMI Input connector is not available on your TV, you can make
connection by the A/V connector on the HHH640 to your TV’s RCA Video
and Audio Input connectors.
Set your TV Video mode to Composite (CVBS) via your TV Video Source.
. Connect the supplied RCA AV lead (3.5mm plug) to A/V connector socket
of the HHH640.
. Connect the 3 RCA connectors of the supplied AV lead to the RCA Video
connector of your TV and the left and right RCA audio connectors of your
TV.
Yellow Connector = Video
White Connector = Left Audio
Red Connector = Right Audio
. Connect the antenna lead to the RF IN connector socket of the HHH640.
. Connect the supplied Infrared Remote Extender to the IR connector
socket of the HHH640 and position the IR to enable clear uninterrupted
remote control signal.
. Connect the supplied Power Pack to the DC5V connector socket of the
HHH640 and to mains power.

11
START UP
Once you have made your video connection to the HHH640 and to your TV,
connected the antenna, IR Extender and Power Pack, please action the
following Start Up procedure:-
. Power On the HHHH640 and a healing
banner will be displayed for a few
seconds and - - - will appear in the units
orange LED display.
. INSTALLATION page will now display
with AUTO SCAN highlighted.
. Push the OK key on the remote control,
Auto Scan will commence.
. The receiver will scan and then save
the TV & Radio channels in your
location and this will take a few
minutes.
. Once all channels have been scanned,
the receiver will automatically revert to
normal TV viewing.
TIME ZONE (For your Location)
It is important to set up your STATE so
that the Time signal automatically
generated by the broadcaster is properly
corrected for your location.
VIC is the default in the unit. To select
your State, please action the following:-
. Press the Menu key on the remote
control and SET UP & MORE page will
display.
. Press the Up/Down arrow keys on the
remote control and select SET UP.
. Press the Left/Right arrow keys on the
remote control to locate SET UP in the
middle of the screen.
. Press the OK key on the remote control
and SET UP page will be displayed.
. You will note 7 menu symbols at the top
of the page.

12
. Use the Left/Right arrow keys on the remote control and select MY BOX.
. Push OK key on remote control and the seven MY BOX parameters will
list.
. Press the Up/Down arrow keys on the remote control and select TIME
ZONE.
. Press the Left/Right arrow keys on the remote control and set your State.
. Press Return/Exit button on the remote control to return to normal TV
viewing.
With installation complete, the unit will function normally.
The following pages describe operational details
and other function parameters that can also be chosen.
Manual Scan
The automatic scan that you actioned at first installation of the unit finds the
available channels in your location.
You can also manually search individual channels from within the
INSTALLATION Menu.
. To select the INSTALLATION Menu, press the Menu key on the remote
control.
. Press the Up/Down arrow keys on the remote control and select SET UP.
. Press the Left/Right arrow keys on the remote control to locate SET UP in
the middle of the screen.
. Press the OK key on the remote control and SET UP page will be
displayed.
. You will note 7 menu symbols at the top of the page.
. Select INSTALLATION. Press the Down arrow key on the remote control
and then the Right arrow key to select MANUAL SCAN.
. Press OK key on the remote control and Manual Scan banner will be
displayed.
. You can choose to scan by Channel number or by centre Frequency.
. To scan by Channel, press the Down arrow key on the remote control and
select the Channel No bar.
. Press the Left/Right arrow keys on the remote control and select a channel
number.
. To scan by Frequency, press the Down arrow key on the remote control
and select the Frequency bar.
. Input the TV channel Frequency number that you want to scan by using
the number keys on the remote control.
. Press the OK key on the remote control and the receiver will scan the
Channel or Frequency you have specified.
. Once the scan has finished, the receiver will save channels found and
return to normal TV viewing.

13
Up/Down Channel Change
Press the Up/Down arrow keys on the remote control to select a channel to
view.
Numeric Input Channel Change
Press the number keys on the remote control to select a channel to view.
Volume Adjustment
Volume Increase: Press the Right arrow key on the remote control.
Volume Decrease: Press the Left arrow key on the remote control.
Volume Mute
To suspend the audio, press the Mute key on the remote control.
TV or Radio Selection
Press the TV/Radio Key on the remote control to change between TV and
Radio Channels.
INFO Key
By pressing the INFO key on the remote control, you can access TV
program information which includes channel number, program title and
program duration.
. Press Once: to see Channel number, Channel name and Program
duration.
. Press Twice: to see Program details.
. Press Three Times: to see Program
Information including channel Signal
Strength and Quality %.

14
EPG – Electronic Program Guide
EPG is a chronological listing of broadcasters programming schedules over
an extended period (normally 7 days plus) which includes detailed program
descriptions.
. Press the EPG button on the remote
control and TV Guide page will be
displayed.
. Press the UP/Down key to highlight a
channel and you will note the channel
program names for that day are listed
on the right.
. Press the Right arrow key to highlight
program names.
. Press the Up/Down arrow key to
highlight any program.
. With the program name highlighted, press the OK key to see program
information details.
. You will note ‘Today’ is highlighted. To view an upcoming day’s list of
programs, press the Left/Right arrow keys and day can be selected
accordingly.
Closed Captions
Closed Captions is a method of displaying SubTitles on the TV screen, of
particular assistance to the hearing impaired.
You can choose to set Closed Captions to be operating at all times (when
broadcast) by setting up Closed Captions in the Installation Menu.
. Press the Menu key on the remote control and SET UP & MORE page will
be displayed.
. Press the Up/Down arrow keys on the remote control and select SET UP.
. Press the Left/Right arrow keys on the remote control to locate SET UP in
the middle of the screen.
. Press the OK key on the remote control
and SET UP page will be
displayed and you will note 7 menu
symbols at the top of the page.
. Press the Left/Right arrow keys on the
remote control and select
INSTALLATION.
. Push OK key on remote control and
seven INSTALLATION parameters
will be listed.

15
. Press the Up/Down arrow keys on the remote control and select
SUBTITLE LANGUAGE.
. Press the Return/Exit key 3 times to return to normal TV viewing. Closed
Captions will now display at all times when broadcast.
Closed Captions – By Subtitle Key
If you decide not to set up Closed Captions in the Installation menu; you can
choose to turn On closed captions for each particular channel by actioning
the following:
. Press the Subtitle key on the remote control and subtitle banner will
display.
. Press the Left/Right arrow key to select TTX SUBTITLE.
. Press the Up/Down arrow key and select eng.
. Press the OK button on the remote control.
If closed captions are being broadcast they will now be displayed.
Note: If you select Closed Captions by Subtitle Key, Cc’s must be activated
Channel by Channel.
Note: ‘Temporary’ Closed Captions can also be enabled via the NAVI key
explained In NAVI KEY Functions.
INSTALLATION Menu
In the INSTALLATION sub menu, seven parameters can be set: Antenna
Power / Country Setting (default Australia) / OSD Language / Audio
Language / Subtitle Language / LCN / Auto Switch.
. To select the INSTALLATION Menu, press the Menu key on the remote
control.
. Press the Up/Down arrow keys on the remote control and select SET UP.
. Press the Left/Right arrow keys on the remote control to locate SET UP in
the middle of the screen
. Press the OK key on the remote control and SET UP page will be
displayed.
. You will note 7 menu symbols at the top of the page.
. Use the Left/Right arrow keys on the remote control and select
INSTALLATION.
. Push OK key on remote control and the seven INSTALLATION
parameters will be listed.
. To select each parameter, press the Up/Down arrow keys on the remote
control.
Note: Once you have set a parameter, you can return to normal TV viewing
by pressing the Return/Exit key on the remote control 3 times.

16
Antenna Power:
The default setting is Off. If you have a 5Volt DC ‘active’ antenna, press the
Left/Right arrow key and select ‘Yes’.
Country Setting:
Australia is set as default.
OSD Language:
The On Screen Display default is English. Handle carefully as this option
presents the possibility of getting lost in an unfamiliar language!
Audio Language
English is set as default and is usually the only language option broadcast
in Australia.
Subtitle Language
Used to display Closed Captions. Closed Captions is a method of displaying
text on the TV channel to assist the hearing impaired.
. Off is set as a default.
. To turn On Closed Captions, press the Left/Right arrow key and select
English.
. Push the Return/Exit key 3 times to return to TV viewing.
. Closed Captions will now be displayed on all programs that broadcast
Closed Captions.
LCN (Logical Channel Numbering)
On is set as a default. If you do not want channels listed in logical channel
number sequence, press Left/Right arrow key and select OFF.
Auto Switch OFF
You can choose to set the unit to automatically turn Off after a designated
time period:
The selections are: Off (default) / 3 hours / 4 hours / 5 hours.
MY BOX Menu
In the MY BOX sub menu, 7 parameters can be set:
Power On At – TV is set as default, do not alter this setting / OSD Style –
Blue is set as default / GMT Usage – On is set as default / Time Zone ( VIC
is set as default) / Set Date / Set Time / Summer Time.
. To select the My Box Menu, Press the Menu key on the remote control
and SET UP & MORE page will be displayed.
. Press the Up/Down arrow keys on the remote control to select SET UP.
. Press the Left/Right arrow keys on the remote control to locate SET UP in
the middle of the screen.
. You will note 7 menu symbols at the top of the page.
. Use the Left/Right arrow keys on the remote control and select MY BOX.
. Push OK button on remote control and the seven MY BOX parameters will
be listed.

17
Note: Once you have set a parameter, you can return to normal TV viewing
by pressing the Return/Exit Key on the remote control 3 times.
Power On
TV is set as default, do not alter this setting.
OSD Style
All On Screen Displays are set as Blue default. If you wish to have OSD in
Green, press Left/Right arrow keys and select Green.
GMT Usage
The default setting is OFF. Time follows a GMT or UTC reference
generated by the broadcaster.
Time Zone
Selects an offset from GMT or UTC by State. VIC is set as default. To
change to location, press the Left/Right arrow keys.
Set Date
Detected from broadcast automatically.
Set Time
Detected from broadcast automatically.
Summer Time
Provides an additional offset from GMT or UTC as required in some states
in the Summer months. The default setting is OFF which matches the
Winter months. To account for Daylight Saving time, set Summer Time to
ON by actioning the following:-
. Press the Up/Down arrow keys and
select GMT Usage.
. Press the Left/Right arrow keys to
select GMT Usage ON.
. Press the Up/Down arrow keys and
select Summer Time.
. Press the Left/Right arrow keys and
select ON.
. Press the Up/Down arrow keys and
select GMT Usage OFF.
Note: To change summer time to OFF,
select GMT usage ON, then select Sumer
Time OFF, then select GMT Usage Off.
TV SETUP Menu
In the TV SET Up sub menu, 8 parameters can be set:
Sleep Time Off / TV Format / TV Mode / OSD Transparency / Banner
Display Time / Video Output / TV Resolution / Digital Audio Output
. To select the TV SETUP Menu, Press the Menu key on the remote control.

18
. Press the Up/Down arrow keys on the remote control to select SET UP.
. Press the Left/Right arrow keys on the
remote control to locate SET UP in
the middle of the screen.
. You will note 7 symbols at the top of the
page.
. Use the Left/Right arrow keys on the
remote control and select TV SETUP.
. Push OK button on remote control and
the 8 TV SETUP parameters will be
listed.
Note: Once you have set a parameter, you can return to normal TV viewing
by pressing the Return/Exit Key on the remote control 3 times.
Sleep Time Off
You can choose to set the unit to automatically turn Off after designated
Minute selections:
The minute selections are: Off (default) / 15 / 30 / 45 / 60 / 90 /120.
Press the Left/Right arrow keys to make your selection.
TV Screen Format
You can select the screen format to best match your display screen.
16:9, 16:9 fit, 4:3 LB, 4:3 Centre Cut.
Press the Left/Right arrow keys to make your selection.
TV Mode
The TV mode default is set to PAL; do not alter this selection.
ODS Transparency
You can set the Transparency of On Screen Displays.
The options are: 1, 2, 3, 4, 5, 6 (default), 7 or 8.
Press the Left/Right arrow keys to change selection.
Banner Display Time
You can set the amount of time each information page is displayed in
seconds.
The seconds options are: 1, 3 (default), 5, 10, 30, always.
Press the Left/Right arrow key to make your selection.
Video Output
You will not need to make any adjustment.
. If you connect the HHH640 to the TV by the receivers HDMI output plug,
the HHH640 Video Output menu will automatically list as HDMI.
. If you connect the HHH640 to the TV by Receivers A/V connector socket,
the HHH640 Video Output menu will automatically list as RCA (CVBS).

19
TV Resolution
Enables selection of Video Resolution type.
Optimal video resolution depends on which video output that you have
connected from the HHT650 and the TV displays capability:
. HDMI- You can select: 1080i, Auto, 720P
. RCA (CVBS) In this Composite output video resolution 576i is the default
and cannot be altered.
. YCbCr (YUV) – In this Component output video resolutions are 1080i,
720p, 576p, 576i.
Digital Audio Output
Incorporated with the HDMI output connector.
PASSWORD MENU
In the PASSWORD menu, 4 parameters can be set:
Menu Lock / Channel Lock / Censorship Lock / Password Lock
. To select the PASSWORD Menu, Press the Menu key on the remote
control.
. Press the Up/Down arrow keys on the remote control to select SET UP.
. Press the Left/Right arrow keys on the remote control to locate SET UP in
the middle of the screen.
. You will note 7 symbols at the top of the page.
. Use the Left/Right arrow keys on the remote control and select
PASSWORD.
. Push OK button on remote control and the 4 PASSWORD parameters will
be listed: Menu Lock / Channel Lock Off / Censorship Lock / Change
Password.
Note: Once you have set a parameter, you can return to normal TV viewing
by pressing the Return/Exit Key on the remote control 3 times.
Menu Lock
The default setting is Off, however to avoid inadvertent changes to the main
menu function parameters that you have set up, you can choose to lock the
main menu items: The Menus that will be locked are: Installation / My Box /
Password / Set Default / Device Remove.
. To set Menu Lock ON, in the PASSWORD menu page press the Up/Down
arrow keys on the remote control and select Menu Lock.
. Press the Left/Right arrow key on the remote control and select ON.
. Press the Return/Exit key on the remote control 3 times to return to normal
TV viewing.
Table of contents
Other healing TV Receiver manuals

