health sense BP-1303 User manual

Health
Sense
Owner's
Manual
Arm-typeFullyAutomatic
BloodPressure Monitor
Model
BP-1303
Arm
Type

Contents
Safety
Notice
02
Unit
Illustration
04
ImportantTestingGuidelines
07
Quick
Start
08
UnitOperation
09
BatteryInstallation
09
System
Settings
10
Applying
theArm
Cuff
12
Testing
13
Power
Off16
MemoryCheck
17
MemoryDeletion
18
'Low
BatteryIndicator
19
Troubleshooting
20
BloodPressureInformation
21
Blood
Pressure
Q A 23
Maintenance
24
Specifications
26
Warranty
,28

Safety Notice
Thank
youfor
purchasing
the
BP-1303
BloodPressureMonitor.
The
BP-1303
Blood
PressureMonitoruses
the
oscillmetricmethod
of
bloodpressuremeasurement
to
measure
the
systolic,diastolic
and
pulserate
ofan
adult.
Pleaseread
this
manualthoroughlybeforeusing
the
unit.
Please
retain
this manual
for
future
reference.
For
specific
information
aboutyourbloodpressure,
please
CONSULTYOUR DOCTOR.
To
avoid
risk
and
damage
follow
all
warning
precautions.
Operate
unit
only
as
intended.
Read
all
instructionsprior
to
use.
WARNINGSIGNS
AND
SYMBOLSUSED
A
O
Q
*
Caution
Mandatory
Prohibited
Type
B
AppliedPart
SafetyNotice
/K
Caution
Individualswithseriouscirculationproblems
may
experience discomfort.
Consult
yourphysicianprior
to
use.
Contactyourphysician
if
testresultsregularlyindicateabnormal readings.
Do not
attempt
to
self-treat thesesymptomswithoutconsultingyour
physicianfirst.
Product
is
designed
forits
intended
use
only.
Donot
misuse
inany
way.
Product
isnot
intended
for
infants
or
individuals
who
cannot express
their
intentions.
Do
not
.disassemble
or
attempt
to
repair.
Do
notuse
cell
phonesnear
the
unit
as
they
may
cause incorrect
readings.
o
Q
Battery Precautions
Do notmixnewandold
batteries simultaneously.
Replacebatteries
when
Low
Battery
Indicator
"
fx\
appears
on
screen.
Be
surebatterypolarity
is
correct.
Do notmix
batterytypes. Long-lifealkalinebatteries
are
recommended.
Removebatteries
from
devicewhen
notin
operation
for
morethan
3
months.
Dispose
batteries
properly; observe local
laws
and
regulations.

Unit
illustration
Monitor
Unit
Sattery
cover
-"ON/OFF
"Button
"
SET
"Button
"
+
"
Button
Button
UnitIllustration
Arm
Cuff
Air
Tube
Display
Groups
-
Low
Battery
Indicator
"T^O
Time-
Date-
55000
"OOOT
mmHg
kPa
1000
00.0
NO
Systolic
Blood
Pressure
-
Diastotic
Blood
Pressure
-Pulse
Rate

Unit
Illustration
Contents
Health
Sense
Owner's
Manual
Owner's
Manual
MonitorUnit
StorageCase
Arm
Cuff
4
AA
Batteries
Medical
AC
Adapter(DC6.0
V,
1000mA)
(recommended,
not
provided)
Important
Testing
Guidelines
1.
Avoideating,exercising,
and
bathing
f o r30
minutesprior
to
testing.
2.
Sitina
calmenvironment
f o rat
least
5
minutesprior
to
testing.
3.
Donotuse
cellphones
and
otherdevices,whichgeneratestrongelectrical
or
electromagneticfields,near
the
device,
as
they
may
causeincorrectreadings.
4.
Avoidspeaking
or
movingb o d yparts
while
testing.
5.
Whiletesting,avoidstrongelectromagneticinterferences u c h
as
microwaveovens
and
cellphones.
6.
Wait
3
minutes
or
longerbefore re-testing.
7. Tryto
measureyourbloodpressure
atthe
sametimeeach
dayfor
consistency.
8.
Testcomparisonsshouldonly
be
madewhenmonitor
is
used
onthe
samearm,
inthe
same
position,
andatthe
sametime
of
day.
9.
This bloodpressuremonitor
isnot
recommended
for
peoplewithsevere arrhythmia.
Quick
Start
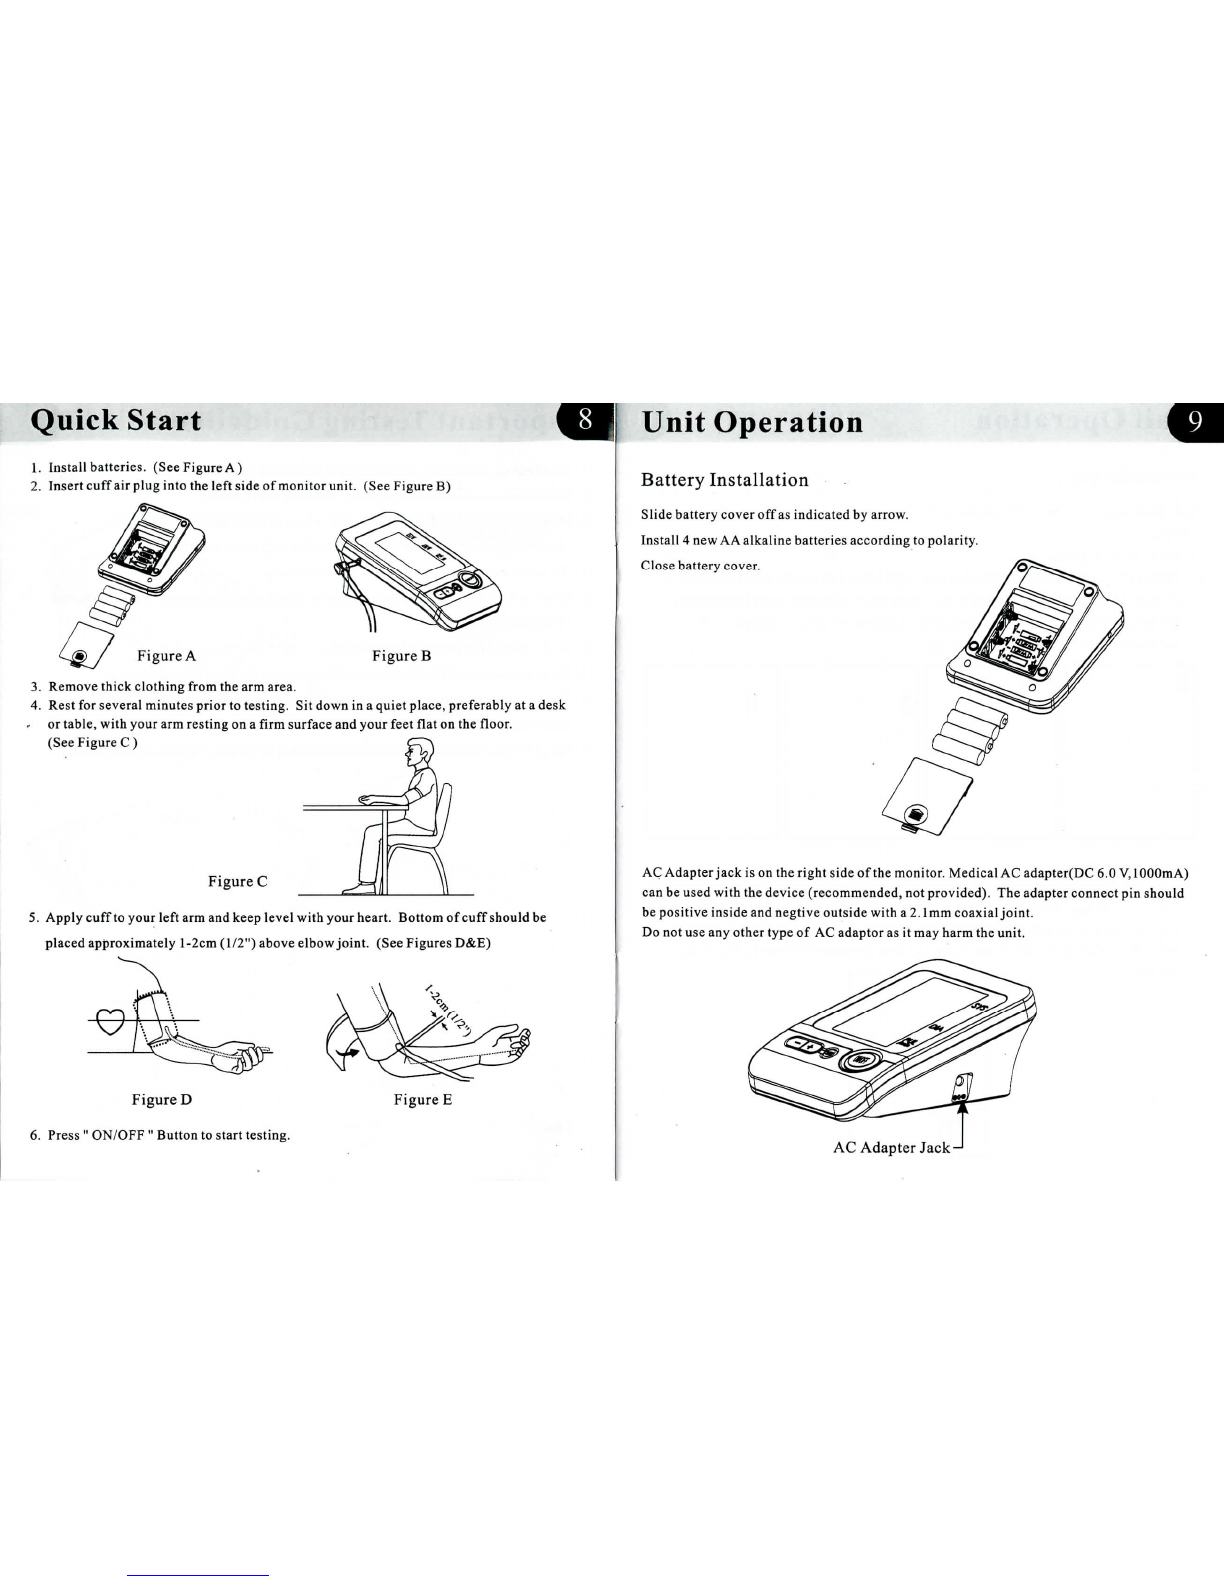
1.
Install
batteries.(SeeFigure
A)
2.
Insertcuff
air
pluginto
the
left
side
of
monitorunit.(See
Figure
B)
Figure
A
Figure
B
3.
Removethickclothingf r o m
thearm
area.
4.
Rest
for
severalminutes prior
to
testing.
Sit
down
ina
quietplace,preferably
a ta
desk
or
table,withyour
arm
resting
ona
firmsurface
and
yourfeetflat
onthefloor.
(See
Figure
C )
Figure
C
5.
Applycuff
to
your
left
armand
keeplevelwithyo urheart. Bottom
of
cuffshould
be
placedapproximately
l-2cm
(1/2")
aboveelbowjoint.(See FiguresD&E)
Figure
D
6.
Press
"
ON/OFF
"
Button
to
starttesting.
Figure
E
Unit
Operation
Battery
Installation
Slide
batterycover
offas
indicated
by
arrow.
Install
4 newAA
alkalinebatteriesaccording
to
polarity.
Closebatterycover.
AC
Adapter
jack
isonthe
right
side
ofthe
monitor.
Medical
A C
adapter(DC
6.0V,
1000mA)
can
be
usedwith
the
device(recommended,
n o t
provided).
The
adapterconnect
pin
should
be
positive
inside
and
negtiveoutsidew i t h
a
2.1mm
coaxial
joint.
Do notuseany
othertype
ofAC
adaptor
asitma y
harm
the
unit.
AC
Adapter
Jack-

UnitOperation
System
Settings
Unit Operation
With
poweroff,press"SET"button
to
activateSystemSettings.
The
MemoryGroupicon
flashes.
1.
SelectMemoryGroup
While
inthe
SystemSettingmode,
you may
accumulate
test resultsinto
4
different
groups.Thisallowsmultipleusers
to
saveindividualt e s tresults
( u pto30
memories
per
group.)
Press
"
+
"
o r
" - "
button
to
choose
a
groupsetting.Testresultswill
automatically
store
in
each
selected
group.
2.
Time/Date
Setting
Press
"SET" buttonagain
tosetthe
Time/Datemode.
Setthe
month
first
by
adjusting
the
"
+
"
or
"
-
"
button. Press"SET
"
buttonagain
to
confirmcurrentmonth. Continue
setting
the
day,hour,
and
minute
inthe
samefashion. Everytime
the
"
SET
"
button
is
pressed,
it
wil llock
in
yourselection
and
continue
in
succession(month,day,hour,
minute.)
3.
SavedSettings
While
inany
settingmode,
press
"
ON/OFF
"
button
to
turn
the
unitoff.
All
information
will
be
saved.
Note:
If
unit
is
left
onandnotinusefor3
minutes,
it
will
automatically
save
all
information
and
shutoff.

Unit
Operation
Applying
theArm
Cuff
1.
Firmlyinsert
air
plugintoopening located
on
leftside
of
monitor
unit.
2.
Withstickynylonsectionfacingoutward,insert
endof
cuffunderneathmetalring
of
cuff.
3.
Fastencuffabout
1-2cm
(1/2")above
the
elbowjoint.
For
bestresults
apply
cuff
to
bare
armand
keeplevelwithheartwhiletesting.
Note:
Do not
insert
air
plugintoopening located
on
rightside
of
monitor unit.
This
opening
is
designed
foran
optional
power
supply
only.
Unit
Operation
Testing
!.
Power
On
Press
and
hold
"
ON/OFF
"
button
until
a
beepsounds.
TheLCD
screenwillappear
forone
second
as
unit
performs
a
quick
diagnosis.
A
longtone
indicates
device
is
ready
for
testing.
Note:
Unit
will
not
function
if
residual
air
from
previous
testing
is
present
in
cuff.
The
LCD
willflash
"
^
"
until
pressure
is
stabilized.
UnitOperation
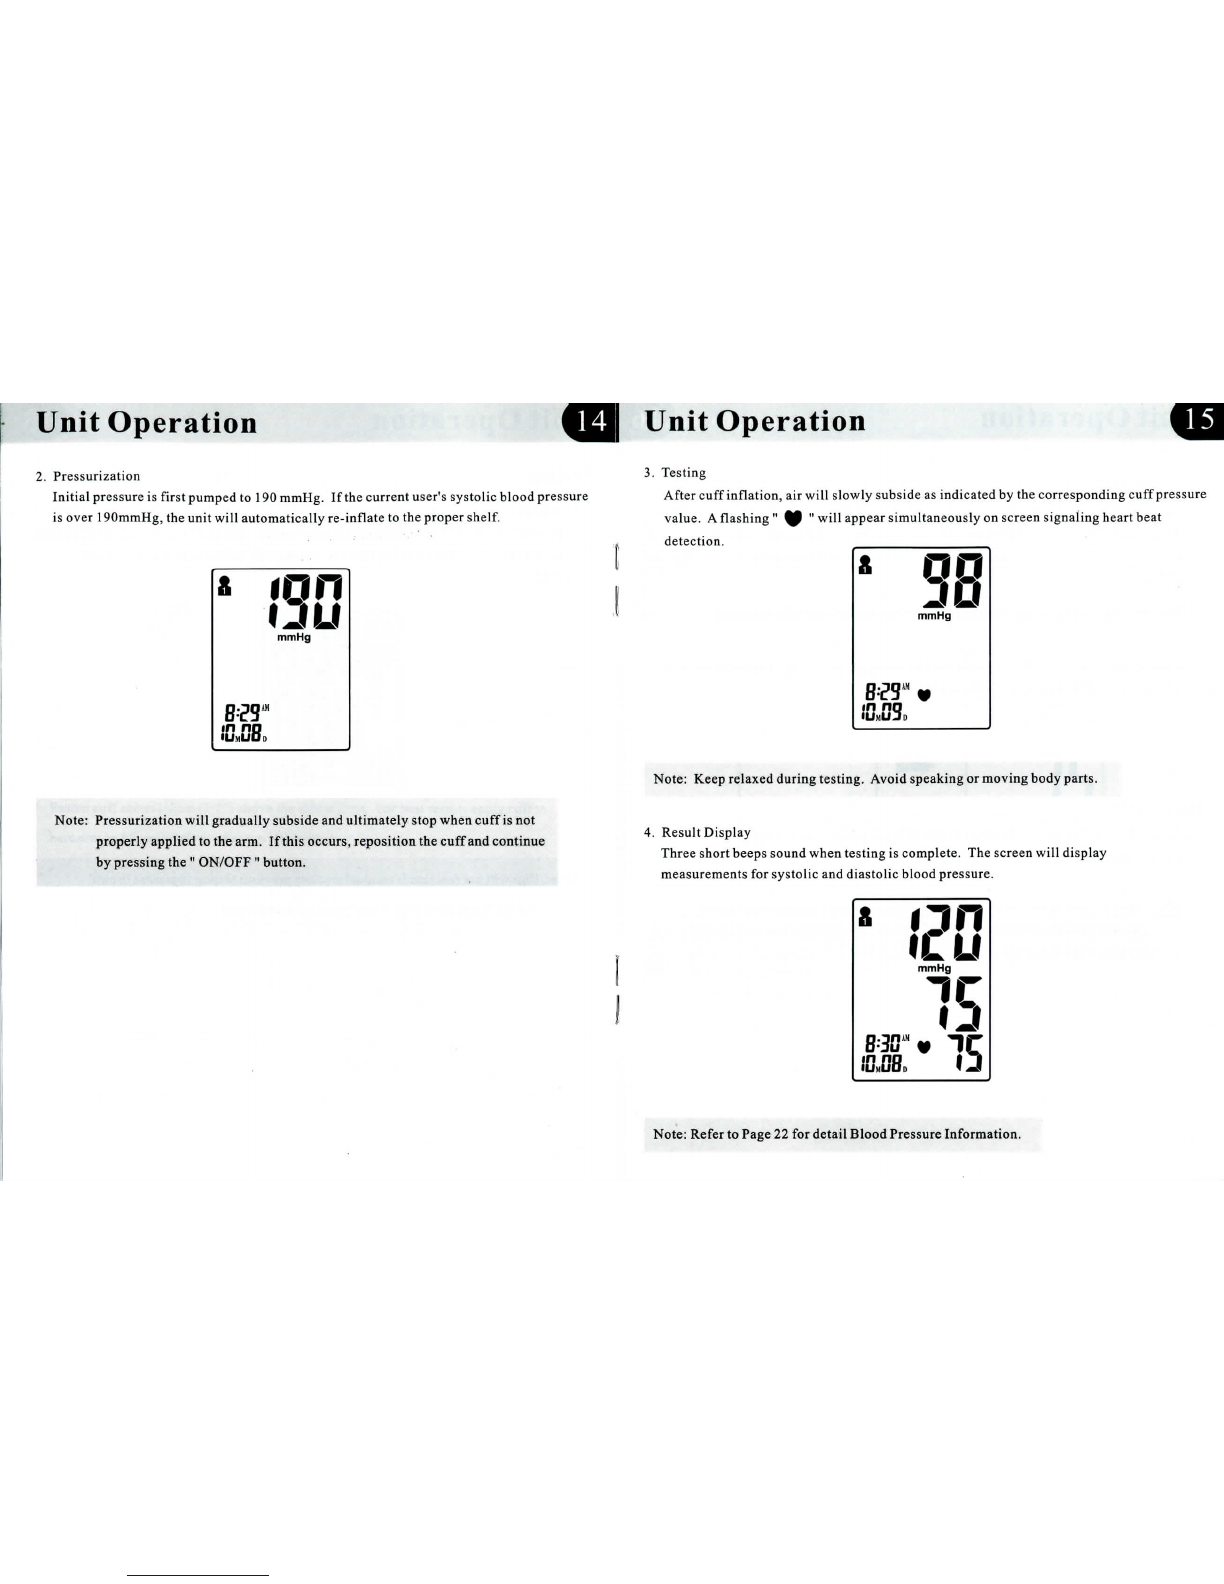
2.
Pressurization
Initial
pressure
is
first
pumped
to
190
mmHg.
Ifthe
currentuser'ssystolicbloodpressure
is
over
190mmHg,
the
unit
w i l l
automaticallyre-inflate
t othe
propershelf.
Note:
Pressurizationwillgraduallysubside
and
ultimatelystopwhencuff
isnot
properly applied
tothe
arm.
If
this occurs,reposition
the
cuff
and
continue
by
pressing
the
"
ON/OFF
"
button.
UnitOperation
3.
Testing
After
cuffinflation,
air
will
slowlysubside
as
indicated
b ythe
correspondingcuffpressure
value.
A
flashing"
^
"
wil l
appear
simultaneously
on
screensignalingheartbeat
detection.
Note:Keeprelaxed
during
testing. Avoidspeaking
or
movingbody parts.
4.
ResultDisplay
Threeshortbeepssoundwhentesting
is
complete.
The
screenwilldisplay
measurements
for
systolic
and
diastolic
blood pressure.
il
Blood Pressure Information.

Unit
Operation
Unit
Operation
5.
Deleting/Storing
Test
Results
User
may
delete
theircurrenttest
result
dueto
unfavorable
testing
conditions
o rforany
other
reason.
To
delete
the
last
test
result,
press
the
"SET"button
after
result
i s
displayed.
If
result
isnot
deleted,
it
w i l l
automatically
store
by
date
within
the
previously
configured
Memory
Group.
Note:
Be
sure
the
appropriateMemoryGroupselection
is
madeprior
to
testing.
MemoryCheck
With
poweroff,
youmay
checkpasttestresults
by
using
the
"
+ " or
"
-
"
buttons.
The
*
mostrecentt est
result
canbe
viewed
b y
pressing
and
holding
t h e
"
+
"
button.
The
oldest
test
result
in
memory
ca nbe
viewed
by
pressing
a n d
holding
the
"
- "
button.
Upon
activating
testresults,
y o ucan
press
the
"
+
"
or
"
- "
buttons
to
scroll
through
all
*
test
results
stored
in
memory.
If
the
number
of
tests
surpasses
the
allotted
30
memories
per
group,
the
mostrecenttests
will
appear
first,
thus
eliminating
the
oldest
readings.
Power
Off
Press
"
ON/OFF
"
button
inany
mode
to
turn
off
device.Unitautomaticallyturns
off
after
3
minutes
of
inactivity.
SafetyPrecaution:
If
pressure
in arm
cuffbecomes
too
extremewhile testing,
press
the
"
ON/OFF
"
button
to
turnpoweroff.
The
cuff
pressure
will rapidly
dissipate
once
the
unit
is
off.
Note: Previoustestresultswillonly
be
displayed
from
the
mostrecentlyusedmemory
group.
To
checkprevious
test
results
in
other
memory groups,
you
must
first
select
the
desired group
and
thenturnmonitoroff.
(See"SelectMemoryGroup"
on
Page10.)
Unit Operation
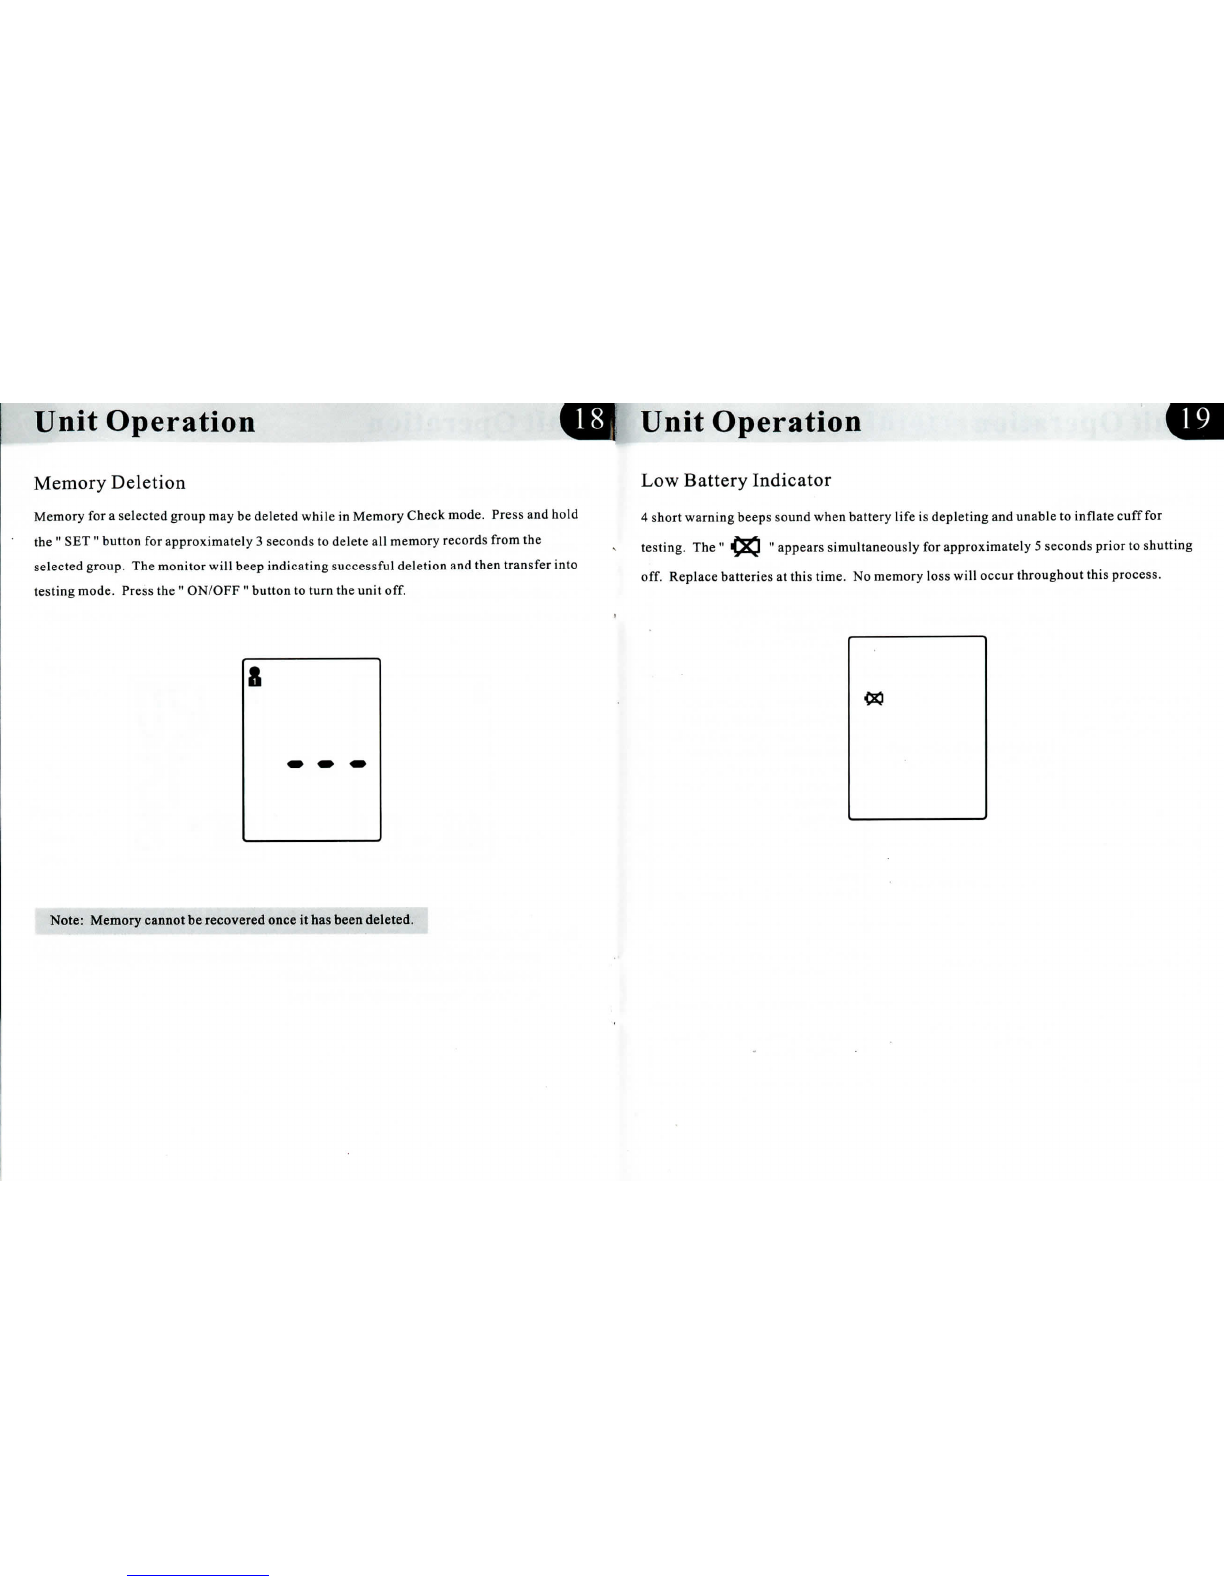
Memory
Deletion
Memory
fora
selected group
maybe
deletedwhile
in
MemoryCheckmode. Press
and
hold
the
"
SET
"
button
for
approximately
3
seconds
to
delete
all
memoryrecords
from
the
selected
group.
The
monitorw i l lb e e pindicatingsuccessful
deletion
and
thentransferinto
testing
mode. Press
the
"
ON/OFF
"
button
to
turn
the
unit
off.
Unit Operation
Low
BatteryIndicator
4
shortwarning
beeps
soundwhenbattery
life
is
depleting
an d
unable
to
inflatecuff
for
testing.
The"
O<J
"
appearssimultaneously
for
approximately
5
secondsprior
to
shutting
off.
Replacebatteries
at
this
time.
No
memory
loss
will
occur
throughout
this
process.
Note:
Memory
cannot
be
recovered
once
ithas
been
deleted.

Unit
Operation
Blood
Pressure
Information
Troubleshooting
Problem
Blood pressure
results
arenot
within
typical range
"
Err
"displayed
Possible
Cause
Cuff
istoo
tight
ornot
properlypositioned
on
thearm
Inaccuratetestresults
dueto
body
movement
or
monitor
movement
Cufffails
to
inflateproperly
Improper
operation
Pressurization
is
over
300mmHg
Solution
Firmlyrepositioncuff
approximately
1
-2cm")
above
the
elbowjoint
(See
Page
12)
Sitina
relaxedpositionw ith
arm
placednearheart. Avoid
speaking
or
moving
body
parts
while
testing.
Make
sure
the
monitor
unit
is
placed
ina
stationary
positionthroughout
the
testingperiod.
(See
Page
7)
Make
sure
hose
is
properly
fastened
to
cuff
and
monitor
unit
Read
usermanual carefully
and
re-test
properly.
Read
usermanualcarefully
and
re-test
properly.
Blood Pressure
Blood
pressure
isthe
force
of
blood pushingagainst
the
walls
of
arteries,
It
is
typically
measured
in
millimeters
o f
mercury
(mmHg.)
Systolicbloodpressure
isthe
maximum
force
exertedagainstbloodvesselwallseachtime
the
heartbeats. Diastolicblood
pressure
isthe
force exerted
on
blood
vessels
when
the
heart
is
resting between beats.
An
individual's
bloodpressure
frequently
changes
throughout
the
course
ofa
day.
Excitement
and
tension
c a n
causebloodpressure
to
rise,
while
drinkingalcohol
and
bathing
can
lowerbloodpressure. Certainhormoneslikeadrenaline (whichyour
body
releases
under
stress)
can
cause
blood
vessels
to
constrict, leading
toa
rise
in
blood pressure.
If
these
measuringnumbers
become
too
high,
it
means
the
heart
is
working
harder
than
it
should.
Upper
curve:
systolic blood
pressure
Lower
curve: diastolic
blood
pressure
Time
of
day
Example:
fluctuation
within
a day
(male,
35
yearsold)

BloodPressure InformationBloodPressure
Q A
HealthReminder
Hypertension
isa
dangerous
disease
that
can
affect
the
quality
of
life.
It can
lead
to a lotof
problemsincludingheartfailure,kidneyfailure,
and
cerebral
hemorrhaging.
By
maintaining
a
healthy
lifestyle
and
visitingy o u rphysician
o na
regularbasis,
hypertension
and
relativediseases
are
mucheasier
to
controlwhendiagnosed
in
their
early stages.
Systolic
(mmHg)
80 8590
110
Diastolic
(mmHg)
Note:
Donotbe
alarmed
ifan
abnormal
reading
occurs.
A
better
indication
ofan
individual's
blood
pressure
occurs
after
2-3
readings
are
taken
atthe
same
time
each
day
over
an
extended
period
of
time.
Consult
your
physican
if
test
results
remain
abnormal.
Q;
What
isthe
difference
betweenmeasuringbloodpressure
at
home
orata
professional
healthcareclinic?
A!
Bloodpressure readingstaken
at
home
arenow
seen
to
give
a
more
accurateaccount
a s
they
betterreflectyour
daily
life.
Readings
c a nbe
elevatedwhentaken
ina
clinical
o r
medical
environment.This
is
known
as
WhiteCoatHypertension
andmaybe
caused
by
feeling
anxious
or
nervous.
Note:
Abnormaltest
results
maybe
caused
by:
1.
Impropercuff placement
Make
sure
cuff
is
snug-not
too
tight
ortoo
loose.
Make
sure
bottom
ofthe
cuff
is
approximately
l-2cm
(1/2")
above
the
elbow
joint.
2.
Improper
body position
Make
sure
to
keep
your
body
inan
upright position.
3.
Feeling anxious
or
nervous
Take
2-3
deepbreaths,wait
a few
minutes
and
resume
testing.
Q
!
Whatcauses different readings?
AI
Bloodpressurevariesthroughout
the
course
ofa
day.Manyfactorsincludingdiet,
stress,
cuff
placement,
etc.
may
affect
an
individual's
blood
pressure.
Q:
Should
I
apply
the
cuff
to
the
left
or
right
arm?
What
isthe
difference?
A!
Either
armca nbe
usedwhentesting,however, whencomparingresults,
the
same
arm
should
be
used. Testing
on
your
left
armmay
providemoreaccurateresults
asitis
located
closer
to
your
heart.
QI
What
isthe
besttime
ofdayfor
testing?
A:
Morningtime
orany
time
you
feelrelaxed
and
stress
free.
Maintenance
Maintenance
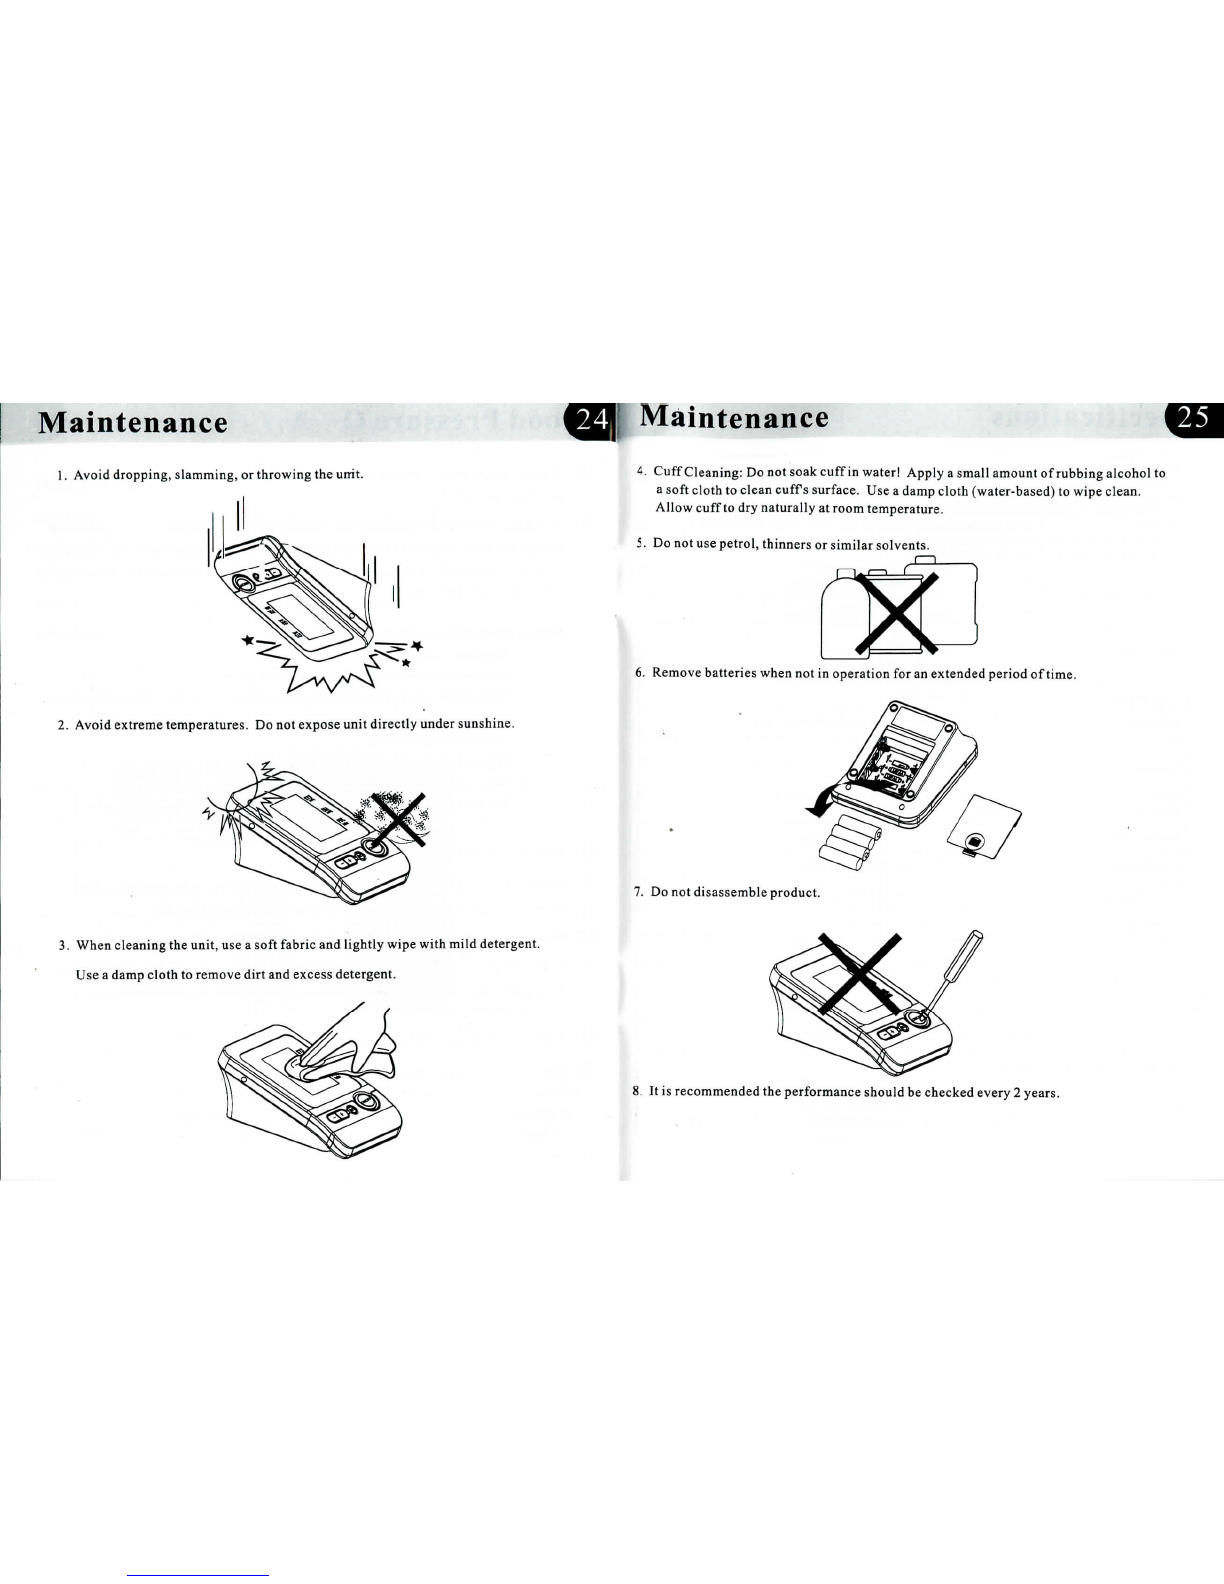
1.
Avoiddropping,slamming,
o r
throwing
the
unit.
2.
Avoidextremetemperatures.
Donot
expose
unitdirectlyunder sunshine.
3.
When
cleaning
the
unit,
usea
softfabric
and
lightly
wipewithmild detergent.
Usea
dampcloth
to
removedirt
and
excess detergent.
4.
Cuff
Cleaning:
Donot
soak
cuff
in
water! Apply
a
small
amount
of
rubbing
alcohol
to
a
soft
cloth
to
clean
cuffs
surface.
Usea
dampcloth(water-based)
to
wipeclean.
Allowcuff
todry
naturally
a t
room temperature.
5. Donotuse
petrol,thinners
or
similarsolvents.
6.
Removebatterieswhen
notin
operation
foran
extendedperiod
of
time.
7. Donot
disassembleproduct.
8. Itis
recommended
the
performanceshould
b e
checkedevery
2
years.

Specifications
Specifications
Product
Description
Model
Display
Measurement
Method
Measurement
Range
Measurement
Accuracy
Pressurization
Memory
Function
Power
Source
Battery
Life
Unit
Weight
Unit
Dimensions
Cuff
Circumference
Operating
Environment
Storage
Environment
Classification:
Arm-type
Fully
Automatic
Digital
Blood
Pressure
Monitor
BP-1303
LCD
Digital
Display Size:62.7mm
x
46.4mm(2.47"
x l
.83")
Oscillometric
Method
Pressure
Pulse
Pressure
Pulse
OmmHg~300mmHg
30
to180
Beats/Minute
±
3mmHg
±5%
Automatic
Pressurization
120
M e m o r i e s
in
Four
Gro up s
with
Date
and
T i m e
Low
Battery
Detection
Automatic
Power-Off
4AA
batteries
Approximately
2
months
at3
tests
perday
Approx.395g
(13.95oz.)(excludingbattery)
Approx.110
x
155
x
70mm
(4.
3 3 "
x
6.10"
x
2.
7 6 "
)(LxWxH)
22.0cm
~
36.0
cm
(8.6"
-
14.2")
Temperature
Humidity
Pressure
Temperature:
Humidity
Pressure
5°C~40°C(41°F~104T)
<85%
RH
Atmospheric
Pressure
-lOt-fiSt
CUT-niT)
<95%
RH
525mmHg
~
795mmHg
Internal
Powered
Equipment,
T y p e
B
^
,
C u f f
isthe
Applied
Part
Thisdevicecomplieswith
the
previsions
ofEC
directive93/42/EEC (MedicalDevice
Directive.)
Itis
designed
according
tothe
European
Standard
EN1060,
Noninvasive
sphygmomanometers
Part
1:
GeneralRequirements
and
Part
3:
Supplementary
requirements
for
electromechanical
bloodpressuremeasuringsystems.
Correct
Disposal
of
ThisProduct
(Waste Electrical
&
ElectronicEquipment)
Thismarkingshown
onthe
productindicatesthat
it
should
notbe
disposedwithother
householdwaste
attheendofits
life.
To
preventpotentialh a r m
tothe
environment
orto
human
health,pleaseseparatethisproduct
from
othertypes
of
wastes
and
recycle
it
responsibly.
Whendisposingt h i stype
of
product,contact
the
retailer
whereproduct
was
purchased
or
contact
your
local
government
office
for
details
regarding
how
this
item
can
be
disposed
inan
environmentallysaferecycling center.
Businessusersshouldcontacttheirsupplier
and
check
the
terms
and
conditions
ofthe
purchasing
agreement.Thisproductshould
no tbe
mixed
w i t h
othercommercialwastes
for
disposal.
This
product
is
free
of
hazardous
materials.

Warranty
We
warrantthisproduct
tobe
freefrom
manufacturing
defects
fora
period
of2
yearsfrom
the
originaldate
of
consumer
purchase.
We
gladlyoffer
a
freeexchange
and
lifetimerepair
dueto
manufacturing
defects.
Please
contact
local
retailer
for
details.

Distributed
by:
Home
Aide
Diagnostics,Inc
1072
S.
Powerline
RD
Deerfield
Beach,FL33442
Tel:
1-800-915-0116
Table of contents


