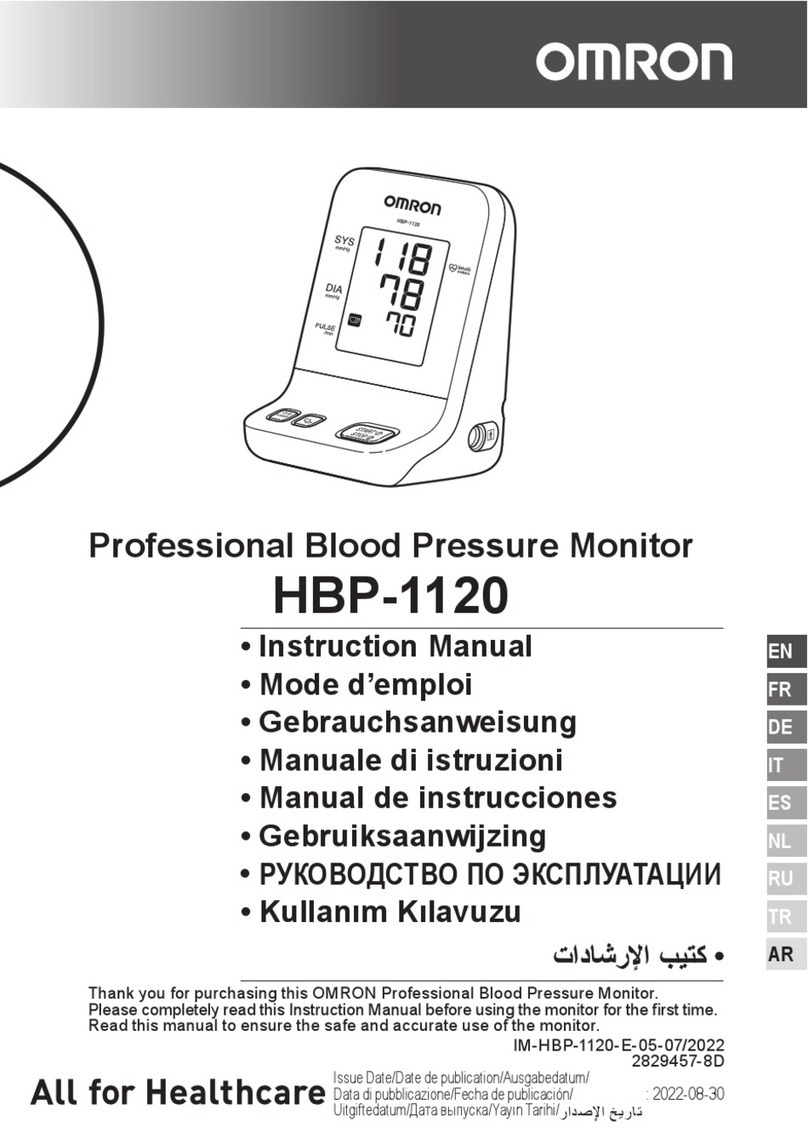
Omron HBP-1100 User manual

Thank you for purchasing this OMRON Professional Blood
Pressure Monitor.
Please completely read this Instruction Manual before using the
monitor for the first time.
Read this manual to ensure the safe and accurate use of the
monitor.
Professional Blood Pressure Monitor
HBP-1100
Instruction Manual
5339134-0 A

Exemptions
OMRON will not bear any responsibilities on the following
matters.
1. When a problem or damage occurs caused by the maintenance and/
or repair conducted by a person other than OMRON or the dealer
speci¿ed by OMRON
2. The problem or damage of OMRON product caused by the product
of other manufacturer not delivered by OMRON
3. The problem and damage caused by the maintenance and/or repair
using the repair parts not speci¿ed by OMRON
4. The problem and damage caused by the results not observing
the Notes on Safety or the operational method mentioned in this
Instruction Manual
5. Under the circumstances not within the operating conditions of
this monitor including the power source or the setting environment
mentioned in this Instruction Manual
6. The problem and damage caused by the result(s) of remodeling or
improper repair of this product
7. The problem and damage caused by act of god such as ¿re,
earthquake, Àood, or lightning
1. The contents of this Instruction Manual may be changed without prior
notice.
2. We have thoroughly reviewed the contents of this Instruction Manual.
However, if an inadequate description or error is found, please let us
know.
3. It is prohibited to copy a part of or the entire Instruction Manual
without getting OMRON's permission. Unless this Instruction Manual
is used by an individual (company), it cannot be used without getting
OMRON's permission from the standpoint of the Copyright Law.

1
Table of Contents
Introduction
Intended Use...................................................................................... 2
Features of the Monitor...................................................................... 2
Notes on Safety.................................................................................. 3
Using the Monitor
Components of the Monitor.............................................................. 10
Features / Functions of Monitor........................................................11
Installing the Batteries...................................................................... 13
Connecting the AC Adapter............................................................. 13
Cuff Selection and Connection........................................................ 14
Applying the Cuff to the Patient....................................................... 15
Zero indicator function ..................................................................... 17
Non-Invasive Blood Pressure (NIBP) Measurement
Measurement in normal mode......................................................... 18
Measurement in auscultation mode................................................. 20
Stopping the Measurement.............................................................. 21
Non-Invasive Pressure Measurement Principles ............................ 22
Maintenance
Maintenance Inspection and Safety Management..........................23
Monitor Maintenance........................................................................23
Accessory Care................................................................................ 23
Managing Supplies...........................................................................23
Check before Use............................................................................. 24
Checking pressure accuracy ........................................................... 25
Troubleshooting................................................................................26
List of Error Codes...........................................................................29
Disposal............................................................................................ 31
Speci¿cations
Speci¿cations................................................................................... 32
Manufacturer's Declaration..............................................................36
Optional Accessories
Optional Medical Accessories ......................................................... 40

2
Introduction
Intended Use
Medical Purpose
This instrument is a digital monitor intended for use in measuring blood
pressure and pulse rate in adult and pediatric patient population with arm
circumference ranging from 12 cm to 50 cm (from 5 inches to 20 inches).
Intended User
This instrument should be used by a medical professional.
Patient Population
This instrument is intended for use on adults and children of age 3-years
and older.
Environment
The instrument is designed for use in physicians' of¿ces, hospitals, clinics
and other medical facilities.
Measurement Parameter
ŶNon-Invasive Blood Pressure
ŶPulse rate
Precautions for Use
Warnings and cautions described in the instruction manual should be
observed at all times.
Features of the Monitor
The blood pressure accuracy of the HBP-1100 is clinically proven. Easy
to use, the HBP-1100 is intended for use by medical professionals.
ŶZero indicator function (page 17): Before each measurement, this
monitor indicates that "zero calibration" was successful.
ŶAuscultation mode
Ŷ5 cuffs available - (XL: 42 to 50 cm, L: 32 to 42 cm, M: 22 to 32 cm, S:
17 to 22 cm, SS: 12 to 18 cm)
ŶThis monitor and cuff can be cleaned with a soft cloth moistened with
alcohol.
ŶCompact, can be stored in a drawer
ŶMotion stop function: When body movement is detected, this monitor
stops deÀation for 5 seconds.
ŶIrregular pulse icon: Helps identify changes in heart rate, rhythm, and
pulse that may be caused by heart disease or other serious health
problems.

3
Notes on Safety
The warning signs and symbol examples indicated below are intended to
ensure safe use of the monitor and prevent damage and injury to you and
others. The signs and symbols are explained below.
Safety Symbols used in this Instruction Manual
Warning Indicates the matters in which death or severe bodily
damage may arise as a result of incorrect handling.
Caution Indicates the matters in which bodily harm or material
damage may arise as a result of incorrect handling.
General Information
Note:
Indicates general information to keep in mind when using the monitor
and other useful information.
Setup
Warning
• Do not use the cuff or AC adapter to lift the monitor, it can also cause
the monitor to malfunction.
• If the monitor has broken down, contact your local OMRON representative.
• Do not use in combination with a hyperbaric oxygen therapy instrument,
or in an environment where combustible gas may be generated.
• Do not use in combination with magnetic resonance imaging (MRI)
equipment. If MRI is to be performed, remove cuff connected to the
monitor from the patient.
• Do not use with a de¿brillator.
• Do not install the monitor in the following locations:
- Locations subject to vibration such as ambulances and emergency
helicopters.
- A location where there is gas or Àame.
- A location where there is water or steam.
- A location where chemicals are stored.
• Do not use at extremely high temperature, high humidity, or high
altitude. Use only within the required ambient conditions.
• Do not subject the monitor to intense shock.
• Do not place heavy objects on the AC adapter cable, or allow the
monitor to sit on the cord.
• Clinical testing has not been conducted on newborn infants and
pregnant women. Do not use on newborn infants and pregnant women.
• Do not plug in or unplug the AC adapter with wet hands.

4
Caution
• Do not install the monitor in the following locations:
- Locations with dust, salt, or sulfur.
- Locations directly exposed to sunlight for extended periods of time (in
particular, do not leave in direct sunlight or near a source of ultraviolet light
for extended periods, as ultraviolet light will cause deterioration of the LCD).
- Locations subject to vibration or shock.
- Near heaters.
• Do not use the monitor near large equipment that uses a switching relay
for power ON/OFF.
Before use / during use
Warning
• The monitor complies with the EMC standard (IEC60601-1-2). As
such, it can be used simultaneously with multiple medical instruments.
However, if instruments that generate noise such as an electric scalpel
or a microwave therapy instrument are near the monitor, check the
operation of the monitor during and after use of these instruments.
• If an error occurs or a measurement result is questionable, check the
vital signs of the patient by auscultation or palpation. Avoid relying
solely on the measurement results of the monitor when judging the
patient's condition.
• Only trained healthcare providers should use this monitor. Do not allow
patients to operate this monitor.
• Properly connect the connectors and AC adapter cable.
• Do not place objects or liquids on top of this monitor.
• Check the following before using the monitor:
- Make sure the AC adapter cable is not damaged (wires are not
exposed or broken), and the connections are ¿rm.
•
For the AC adapter connected to the monitor, supplies, and optional
instruments, use only the standard accessories or OMRON-speci¿ed
products.
• Do not use in a location with moisture, or a location where water may
splash on the monitor.
This monitor is intended for use in a physician's of¿ce.
• Do not use the monitor if it emits smoke, an abnormal odor, or abnormal
noise.
• Do not bring cellular telephones or transceivers into the room where the
monitor is installed or being used.
• Do not connect multiple monitors to the same patient.
• Do not connect the monitor to a power outlet that is controlled by a wall
switch.

5
Caution
• Before using the monitor, verify that none of the following apply to the
patient:
- Poor peripheral circulation, noticeably low blood pressure, or low body
temperature (there will be low blood Àow to the measurement position)
- The patient uses an arti¿cial heart and lung (there will be no pulse)
- An SpO2sensor and the cuff are attached to the same arm
- The patient has an aneurysm
- The patient has frequent arrhythmia
- Body motions such as convulsions, arterial pulsations, or trembling
(cardiac massage in progress, minute continuous vibrations,
rheumatism, etc.)
• Before use, visually inspect the monitor to make sure there are no
deformations due to falling, and that there is no dirt or moisture on the
monitor.
• When the monitor has not been used for an extended period of time,
always verify that it operates normally and safely before use.
• Do not use in a location where the monitor may easily fall. In the event
that the monitor falls, verify that it operates normally and safely.

6
Cleaning
Warning
• When cleaning the monitor, turn off the power and disconnect the AC
adapter from the monitor.
• After cleaning the monitor, make sure it is completely dry before
connecting to a power outlet.
• Do not spray, pour, or spill liquids into or onto the monitor, accessories,
connectors, buttons, or openings in the housing.
Caution
• Do not use thinner, benzene, or other solvents to clean the monitor.
• Do not sterilize by autoclave or gas sterilization (EOG, formaldehyde
gas, high-concentration ozone, etc.).
• If using an antiseptic solution for cleaning, follow the instructions of the
manufacturer.
• Clean the monitor regularly.
Maintenance and inspection
Warning
• To use the monitor safely and correctly, always inspect the monitor
when starting work.
• Unauthorized modi¿cation is prohibited by law. Do not attempt to
disassemble or modify the monitor.

7
Dry cell battery
Warning
• If battery Àuid comes in contact with the eye, immediately Àush
with copious amounts of water. Do not rub. Seek medical attention
immediately.
• Do not throw into Àame, disassemble, or heat.
• Always disconnect the AC adapter from the monitor before removing or
installing a battery.
• If the monitor will not be used for a month or longer, remove the battery
from the monitor and store.
• Do not attempt to disassemble or modify the battery.
• Do not apply pressure to and deform the battery. Do not throw, pound,
drop, bend, or hit the battery.
• The battery has positive/negative polarity. Do not insert batteries with
their polarities reversed.
• Do not connect the positive and negative terminals of the battery with a
wire or other metal object.
• Do not use the AC adapter and battery at the same time.
Caution
• If battery Àuid comes in contact with skin or clothing, rinse immediately
with water.
• Do not use new and old batteries together, or use different types of
batteries together.
Non-Invasive Blood Pressure (NIBP) measurement
Warning
• If a cuff is used on a patient with an infection, treat the cuff as medical
waste, or sterilize before reuse.
• If frequently performing NIBP measurement using a cuff over an extended
period of time, periodically check the patient's circulation. In addition,
wrap the cuff as indicated in the cautionary points in this manual.
• Do not connect the NIBP cuff or cuff joint to a luer lock adapter.
• Do not bend cuff tube during inÀation and deÀation, particularly after a
change of body position.
• Do not wrap the cuff on the following parts:
- An upper arm on which intravenous drip or a blood transfusion is
being performed.
- An upper arm on which SpO2sensor, IBP catheter, or other instrument
is attached.
- An upper arm with a shunt for hemodialysis.
• If measuring blood pressure with the cuff wrapped on the arm on
the side of the body where a mastectomy was performed, check the
patient's condition.

8
Caution
• NIBP measurement should be performed on the upper arm.
• During NIBP, stop excessive body movement by the patient and
minimize trembling.
• If a doctor has indicated that the patient has hemorrhagic diathesis or
hypercoagulability, check the condition of the arm after measurement.
• Use the appropriate cuff size to ensure correct measurements. If too
large a cuff is used, the measured blood pressure value tends to be
lower than the actual blood pressure. If too small a cuff is used, the
measured blood pressure value tends to be higher.
• Before and during measurement, verify that none of the following apply
to the patient:
- The part where the cuff is wrapped is at a different height than the
heart.
(A difference of 10 cm (4 inches) in height may cause a variation in the
blood pressure value of up to 7 or 8 mmHg.)
- Body movement or conversing during measurement.
- Cuff wrapped over thick clothing.
- Pressure on the arm due to a rolled up sleeve.
• In the case of a cuff for adults, the cuff should be wrapped to a tightness
that allows two ¿ngers to be inserted in between the cuff and the arm.
• The accuracy of a Àashing measurement value that is out of the
measurement range cannot be guaranteed. Always check the patient's
condition before deciding what steps to take.
• Do not use the cuff if it is damaged or has holes.
• Only an OMRON GS CUFF can be used with this monitor. The use of
any other cuff may result in incorrect measurement.

9
Note:
Setup
• Read and understand the manual for each optional accessory. This
manual does not contain cautionary information for optional accessory.
• Exercise caution with the cables and arrange so that the patient does
not become entangled or bound.
Before use / during use
• Check the following after turning on the power:
- No smoke, abnormal odor, or abnormal noise is emitted.
- Press each button and verify that it operates.
- For functions that cause icons to light or Àash, verify that the icons
light or Àash.
- Measurement can be performed normally, and measurement error is
within the tolerance value.
• If the screen is not displayed normally, do not use the monitor.
• When recycling or disposing of parts (including batteries) of the monitor,
follow local government rules and regulations.
Cleaning
• For cleaning, see page 23.
Non-Invasive Blood Pressure (NIBP) measurement
• If the patient has acute inÀammation, a pyogenic ailment, or an external
wound at the location where the cuff is to be wrapped, follow the
instructions of the doctor.
• Non-Invasive Blood Pressure measurement (NIBP) is performed by
compressing the upper arm.Some people may experience intense
pain, or transient spotting caused by subcutaneous hemorrhaging
(bruising) may appear. The spotting will disappear with time; however,
it may be appropriate to inform patients for whom this may be a
concern that spotting sometimes occurs, and if necessary, refrain from
measurement.
• To measure correctly, it is recommended that the patient relax and not
talk during measurement.
• To measure correctly, it is recommended that the patient rest quietly for
5 minutes before measurement.

10
Using the Monitor
Components of the Monitor
Before using the monitor, make sure that no accessories are missing
and that the monitor and accessories are not damaged. If an accessory
is missing or there is damage, please contact your local OMRON
representative.
Main unit
Standard Medical Accessories
AC adapter GS CUFF M Instruction
Manual
(This paper)
Caution
• Only an OMRON GS CUFF can be used with this monitor. The use of
any other cuff may result in incorrect measurement.

11
Features / Functions of Monitor
Front and bottom of monitor
34
2
16
5
1[Power ON/OFF]
button Turns the power ON/OFF.
2[Auscultation] button Press to enter auscultation mode.
(page 20).
3[START/STOP] button Press to start blood pressure
measurement.While the cuff is
inÀating, hold down to continuously
inÀate (page 18).
4 NIBP connector Connects the cuff tube.
5PowerconnectorConnectstheACadapter.
6Batterycover
Open to install or replace the
batteries.
Other symbols
Symbol Description Symbol Description
Type BF Caution
Class 2
Internal powered
equipment

12
LCD Display
3
2
1
7
5
4
6
8
1 SYS Displays systolic blood pressure.
2 DIA Displays diastolic blood pressure.
3 PULSE Displays the pulse rate.
4Irregular pulse
wave icon
Lights in the measurement result display
if the pulse wave interval was irregular
or there was body movement during
measurement.
5Auscultation icon Lights when "Auscultation Mode" is ON.
6Pulse
synchronization
icon Flashes in synchronization with the pulse
during measurement.
7Battery
replacement icon* When this icon lights, an E40 error also
appears. Replace the batteries. (page 13)
8Zero indicator
icon
Lights when "zero calibration" is being
performed prior to blood pressure
measurement. When calibration ¿nishes,
appears.
* Only when the batteries are installed.

13
Installing the Batteries
Warning
• If battery Àuid comes in contact with the eye, immediately Àush
with copious amounts of water. Do not rub. Seek medical attention
immediately.
• Do not throw into Àame, disassemble, or heat.
• Do not attempt to disassemble or modify the battery.
• Do not use the AC adapter and battery at the same time.
Caution
• If battery Àuid comes into contact with the skin or clothes, immediately
rinse with water.
1. Make sure the AC adapter has been
disconnected.
2. Remove the battery cover from the
bottom of the monitor.
3. Insert the batteries in the correct
orientation.
4. Replace the battery cover.
Battery replacement icon
When this icon lights, an E40 error also appears. Replace the
batteries.
Connecting the AC Adapter
AC power
Verify that the power outlet supplies the speci¿ed voltage and frequency
(100 - 240 V AC, 50/60 Hz).
Connect the AC adapter to the power connector on the monitor and
the power outlet.
2
1
2
1

14
Cuff Selection and Connection
Warning
• Treat a cuff used on a patient with an infection as medical waste, or
suf¿ciently sterilize the cuff before reuse.
Caution
• Do not use the cuff if it is damaged or has holes.
• Use the appropriate cuff size to ensure correct measurements. If too
large a cuff is used, the measured blood pressure value tends to be
lower than the actual blood pressure. If too small a cuff is used, the
measured blood pressure value tends to be higher.
• Only an OMRON GS CUFF can be used with this monitor. The use of
any other cuff may result in incorrect measurement.
Note:
• Make sure that the connectors are tightly connected.
Selecting the cuff
Measure the circumference of the patient's arm and select the cuff
size that is appropriate for the circumference.
It is important to use the correct sized cuff for a patient in order to get
an accurate reading.
Select the cuff that is suitable for the patient from the cuffs below.
Cuff name Arm circumference
(cm) (inch)
GS CUFF XL* 42 - 50 17 - 20
GS CUFF L* 32 - 42 13 - 17
GS CUFF M 22 - 32 9 - 13
GS CUFF S* 17 - 22 7 - 9
GS CUFF SS* 12 - 18 5 - 7
*Available as an optional accessory.
Connecting the cuff
Connect the cuff tube to the NIBP connector
on the monitor and turn clockwise to lock.

15
Applying the Cuff to the Patient
The monitor can be used on either
the right or left arm.
Wrap the cuff on a bare arm or over
thin clothing. Thick clothing or a
rolled up sleeve will cause
inaccurate blood pressure
measurements.
1. Make sure the cuff tube is not bent.
The cuff tube should be on the peripheral side.
2. Wrap the cuff so that the INDEX ARTERY " " is directly over the
brachial artery.
The brachial artery is on the inner side of the patient's upper arm.
Make sure that the INDEX ARTERY " " is within the range. If outside
the range, there will be greater error in the blood
pressure value. In this case, use the appropriate cuff size.
* Attach the cuff so that the bottom edge is 1 to 2 cm from the inner
side of the elbow joint.
* The cuff should be wrapped to a tightness that roughly allows two
¿ngers to be inserted under the cuff.
3. During measurement, keep the brachial artery on which the cuff
is wrapped at the same height as the right atrium of the heart.
1 to 2 cm
1. 2. 3.
1 to 2 cm
1. 2. 3.

16
Caution
• Make sure the cuff is wrapped in the correct arm position and is at the
same height as the heart.
NOTE:
• If measurement is dif¿cult due to arrhythmia, use a different blood
pressure measurement method.
• If the patient has acute inÀammation, a pyogenic ailment, or an
external wound at the location where the cuff is to be wrapped, follow
the instructions of the doctor.
• Non-Invasive Blood Pressure (NIBP) measurement is performed by
compressing the upper arm. Some people may experience intense
pain, or transient spotting caused by subcutaneous hemorrhaging may
appear. The spotting will disappear over time, however, if it is possible
that this will disturb the patient, try the following technique:
- Wrap a thin towel or cloth (one layer) under the cuff.If the towel or
cloth is too thick, there will be insuf¿cient cuff compression and the
blood pressure value will measure high.
• If the patient moves or the cuff is touched, this may be falsely detected
as a pulse and over-inÀation will occur.
• Do not inÀate the cuff when it is not wrapped on the upper arm. This
may damage the cuff.

17
Zero indicator function
Before each measurement, this monitor indicates that "zero calibration"
was successful.
ŶWhen the power is turned on
The entire indicator blinks and then "zero calibration" starts. When
completed, appears.
ŶWhen the power is already on
When measurement is started, "zero calibration" takes place from the
ready screen (which shows "0"). When completed, appears.

18
Non-Invasive Blood Pressure (NIBP) Measurement
Measurement in normal mode
1. Press the [START/STOP] button.
Blood pressure measurement is performed once.
2. The measurement results are displayed.
If a measurement value is outside the corresponding range below, the
value will Àash.
SYS: 59 mmHg or less, or 251 mmHg or higher.
DIA: 39 mmHg or less, or 201 mmHg or higher.
PULSE: 39 bpm or less, or 201 bpm or higher.
ŶNormal measurement ŶMeasurement error / failure
Manual inÀation in normal mode
If the cuff is not suf¿ciently inÀated, it can be inÀated manually.
During inÀation, hold down the [START/STOP] button to inÀate
continuously.
"-" appears below the value to indicate that manual inÀation is in
progress.
Other manuals for HBP-1100
3
Table of contents
Other Omron Blood Pressure Monitor manuals
Omron
Omron Silver BP5250 User manual

Omron
Omron HEM-608 User manual

Omron
Omron M6 Comfort User manual

Omron
Omron HEM-18 User manual

Omron
Omron BP9300T User manual

Omron
Omron i-C10 User manual

Omron
Omron M2 Classic User manual

Omron
Omron 5 Series User manual

Omron
Omron R2 User manual

Omron
Omron HEM-9000AI User manual

Omron
Omron Intelli Sense BP760CAN User manual

Omron
Omron HEM-7113 User manual

Omron
Omron MX 3 Plus User manual

Omron
Omron BP652 User manual

Omron
Omron HEM-9200T User manual

Omron
Omron M2 Compact User manual

Omron
Omron HEM--670IT User manual

Omron
Omron M6 Comfort User manual
Omron
Omron HEM-7600T User manual

Omron
Omron M24 User manual