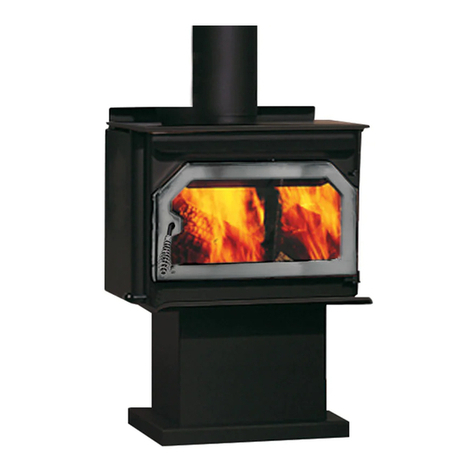
Hearthstone Quality Home Heating Products, Inc ® Green Mountain Insert 90 (Model 8460)
CODES
When you install your Green Mountain Insert 90
woodstove, it is imperative that you adhere to all
Federal and local codes. Obtain these codes from
either of the following sources:
American National Standards Institute, Inc. (ANSI)
1430 Broadway
New York, NY 10018
www.ansi.org
National Fire Protection Association, Inc. (NFPA)
Battery March Park
Quincy, MA 02269
www.nfpa.org
SAFETY INFORMATION
Read and understand this Owner's Manual
thoroughly before installing and using this stove.
Make sure to install your stove:
According to the manufacturer's
recommendations
In accordance with all applicable codes
With the proper sized chimney
When using your stove, follow these safety
precautions:
Never modify this stove in any way.
Never burn kiln dried, painted or treated wood in
this stove.
DO NOT BURN GARBAGE. Never burn garbage
or trash, colored or glossy paper, solvents,
plywood, artificial logs, cardboard, or driftwood, in
this stove.
Never burn coal in this stove.
DO NOT BURN FLAMMABLE FLUIDS.
DO NOT USE CHEMICALS OR FLUIDS TO
START THE FIRE. Never use gasoline,
kerosene, charcoal lighter fluid, or other
flammable fluids to start or invigorate the fire.
These fuels will cause dangerous burning
conditions in the stove. Keep all such materials
away from the stove.
Never use a wood grate or other device to
elevate the fire.
Never allow logs in the firebox to hit the glass
when the door is closed.
Never slam the door or use the door to force
wood in to the stove.
Never over-fire your stove.
Never put articles of clothing or candles on a hot
stove.
Never connect the stove to a flue used by another
appliance.
Other safety guidelines:
Keep all combustible items such as furniture,
drapes, clothing, and other items, at least 36"
(0.92 m) from the stove (See page 9)
Install a smoke detector, preferably in an area
away from your wood stove.
Keep a fire extinguisher handy. We recommend
the type rated "A B C."
Dispose of ashes properly.
Keep children and pets away from the stove when
it is burning; they could be seriously injured by
touching a hot stove.
Clean your chimney system as needed.
Outside combustion air may be required if:
1. This solid-fuel-fired appliance does not
draw steadily, smoke rollout occurs, fuel
burns poorly, or back-drafts occur whether
or not there is combustion present.
2. Existing fuel-fired equipment in the house,
such as fireplaces or other heating
appliances, smell, do not operate properly,
suffer smoke roll-out when opened, or
back-draft whether or not there is
combustion present.
3. Opening a window slightly on a calm
(windless) day alleviates any of the above
symptoms.
4. The house is equipped with a well-sealed
vapor barrier and tight-fitting windows
and/or has any powered devices that
exhaust house air.
5. There is excessive condensation on
windows in the winter.
6. A ventilation system is installed in the
house.
If these or other indications suggest that infiltration air
is inadequate, additional combustion air should be
provided from the outdoors. Outside combustion air
can be provided to the appliance by using the optional
outside air kit #94-53600

