Owner’s Manual BHD-G Portable Dehumidier Heat Controller, Inc.
7
7
OPERATING THE UNIT
Whenusingtheunit
Whenfirstusingthedehumidifier,operatetheunit
continuously24hours.
Thisunitisdesignedtooperatewithaworking
environmentbetween5 Cand35 C.
Iftheunithasbeenswitchedoffandneedstobe
switchedonagainquickly,allowapproximately
threeminutesforthecorrectoperationtoresume.
Donotconnectthedehumidifiertoamultiplesocket
outlet,whichisalsobeingusedforotherelectrical
appliances.
Selectasuitablelocation,makingsureyouhaveeasy
accesstoanelectricaloutlet.
Plugtheunitintoaelectricalsocket-outletwithearth
connection.
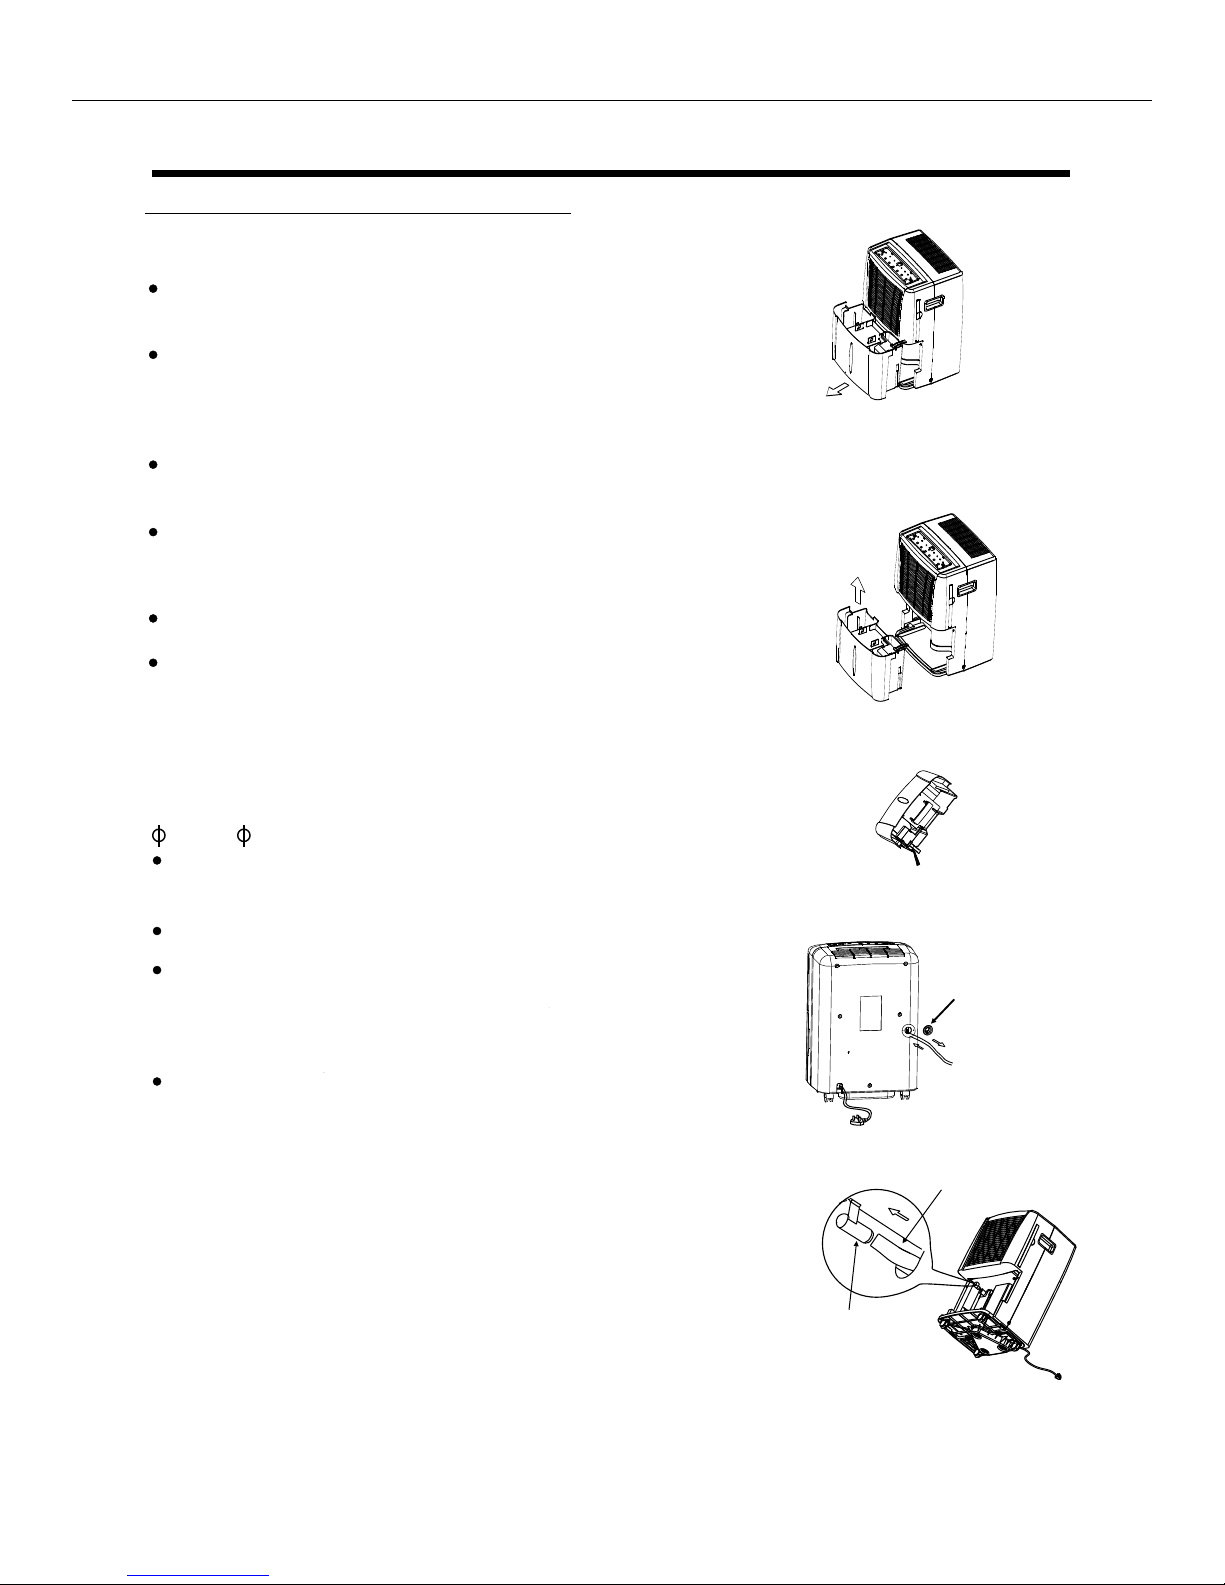
MakesuretheWaterbucketiscorrectlyfittedotherwise
theunitwillnotoperateproperly.
O O
Casters(Atfourpointsonthebottomofunit)
Casterscanmovefreely.
Donotforcecasterstomoveovercarpet,
normovetheunitwithwaterinthebucket.
(Theunitmaytipoverandspillwater.)
A dehumidifieroperatinginabasementwillhavelittleornoeffectindryinganadjacentenclosed
storagearea,suchasacloset,unlessthereisadequatecirculationofairinandoutofthearea.
Airoutletgrille
Airintake
grille
20cmormore
20cmormore 20cmormore
20cmormore
40cmor
more
Donotuseoutdoors.
Thisdehumidiferisintendedforindoorresidential
applicationsonly. Thisdehumidifiershouldnotbeused
forcommercialorindustrialapplications.
Placethedehumidifieronasmooth,levelfloorstrong
enoughtosupporttheunitwithafullbucketofwater.
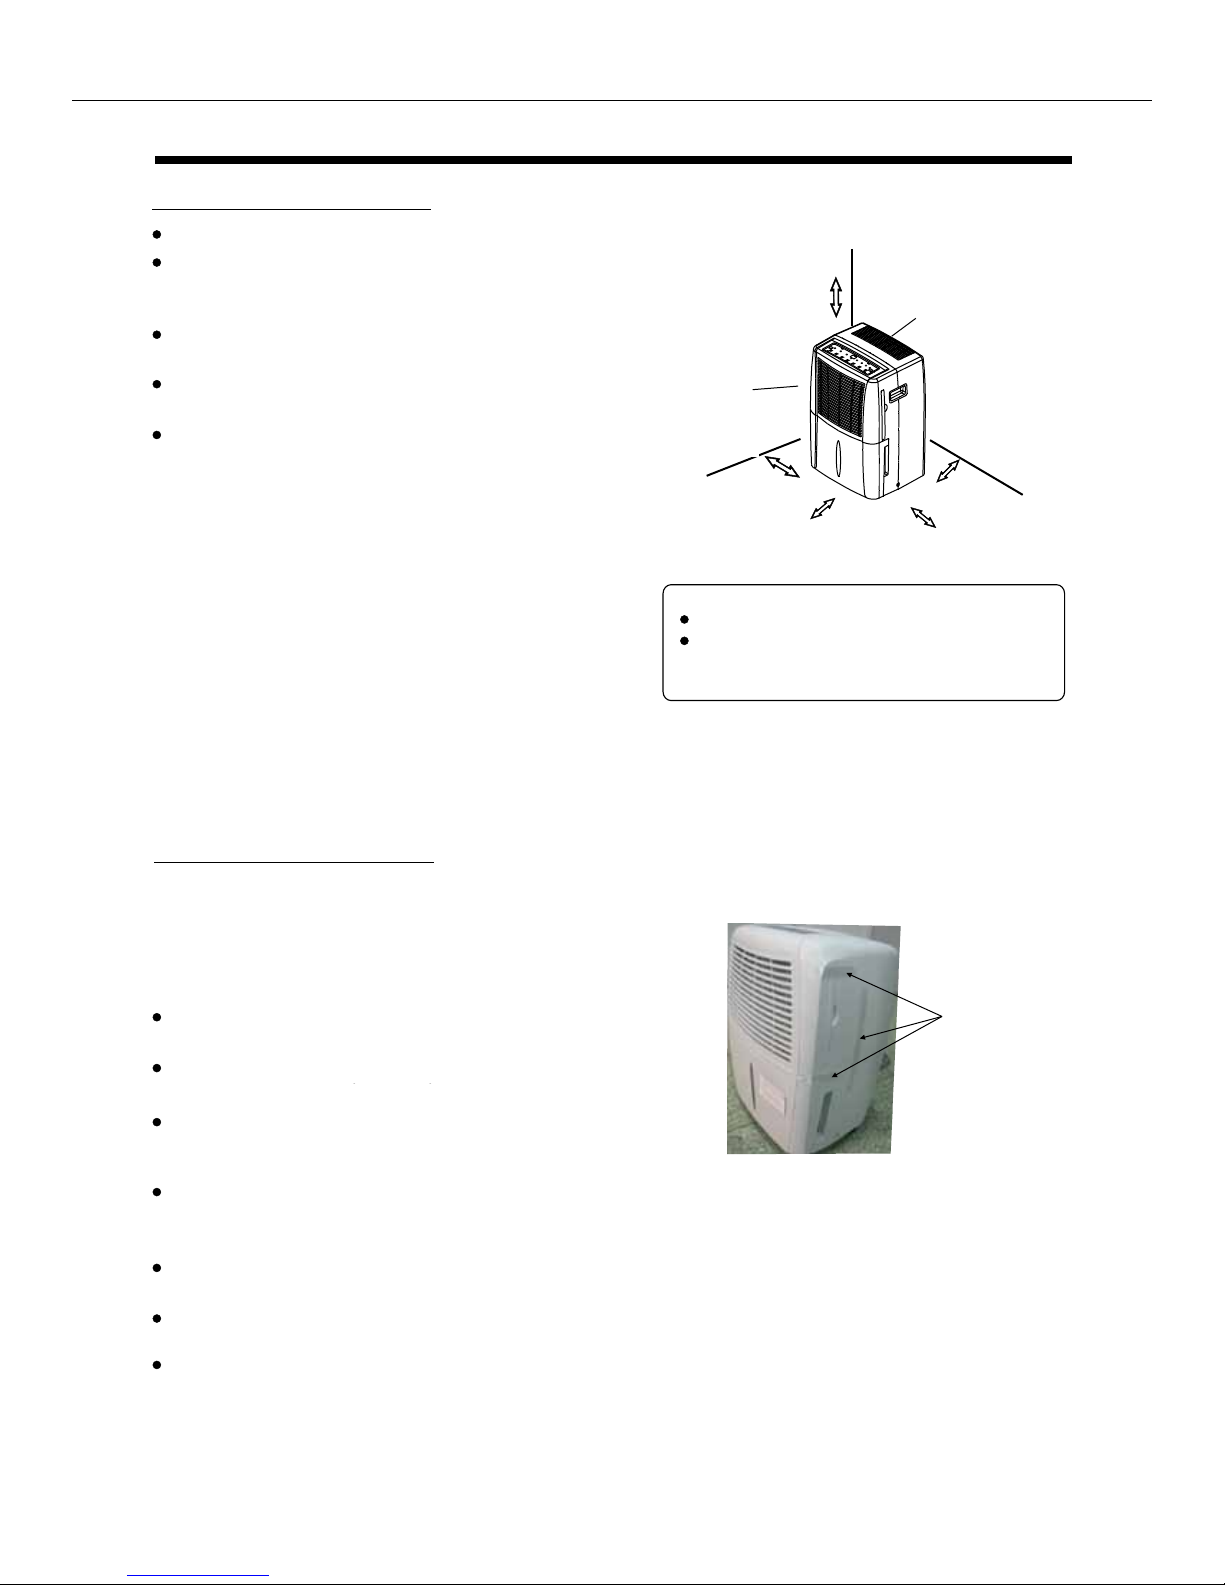
Allowatleast20cmofairspaceonallsidesoftheunit
forgoodaircirculation.
Placetheunitinanareawherethetemperaturewillnot
fallbelow5C(41F). Thecoilscanbecomecoveredwith
frostattemperaturesbelow5C(41F),whichmayreduce
performance.
Placetheunitawayfromtheclothesdryer,heaterorradiator.
Usetheunittopreventmoisturedamageanywherebooks
orvaluablesarestored.
Usethedehumidifierinabasementtohelpprevent
moisturedamage.
Thedehumidifiermustbeoperatedinanenclosed
areatobemosteffective.
Closealldoors,windowsandotheroutsideopenings
totheroom.
Fig.4a
Whenremovingthedehumidifierfromits
packaging,youwillfindplasticadhesivetapepasted
onseveralplacesoftheunit(seeFig.4b).Itisfor
transportationpurposeonly,justremovethembefore
youusingthedehumidifier.
NOTE:
Fig.4b
Adhesivetape
41°F (5°C).
41°F (5°C).
16in.
(40cm)
or more
8in. (20cm) or more
8in. (20cm) or more
8in. (20cm) or more
Allow at least 8in. (20cm) of air space on all sides of the unit
8in. (20cm) or more
OPERATING THE UNIT
Whenusingtheunit
Whenfirstusingthedehumidifier,operatetheunit
continuously24hours.
Thisunitisdesignedtooperatewithaworking
environmentbetween5 Cand35 C.
Iftheunithasbeenswitchedoffandneedstobe
switchedonagainquickly,allowapproximately
threeminutesforthecorrectoperationtoresume.
Donotconnectthedehumidifiertoamultiplesocket
outlet,whichisalsobeingusedforotherelectrical
appliances.
Selectasuitablelocation,makingsureyouhaveeasy
accesstoanelectricaloutlet.
Plugtheunitintoaelectricalsocket-outletwithearth
connection.
MakesuretheWaterbucketiscorrectlyfittedotherwise
theunitwillnotoperateproperly.
O O
Casters(Atfourpointsonthebottomofunit)
Casterscanmovefreely.
Donotforcecasterstomoveovercarpet,
normovetheunitwithwaterinthebucket.
(Theunitmaytipoverandspillwater.)
A dehumidifieroperatinginabasementwillhavelittleornoeffectindryinganadjacentenclosed
storagearea,suchasacloset,unlessthereisadequatecirculationofairinandoutofthearea.
Airoutletgrille
Airintake
grille
20cmormore
20cmormore 20cmormore
20cmormore
40cmor
more
Positioningtheunit
Donotuseoutdoors.
Thisdehumidiferisintendedforindoorresidential
applicationsonly. Thisdehumidifiershouldnotbeused
forcommercialorindustrialapplications.
Placethedehumidifieronasmooth,levelfloorstrong
enoughtosupporttheunitwithafullbucketofwater.
Allowatleast20cmofairspaceonallsidesoftheunit
forgoodaircirculation.
Placetheunitinanareawherethetemperaturewillnot
fallbelow5C(41F). Thecoilscanbecomecoveredwith
frostattemperaturesbelow5C(41F),whichmayreduce
performance.
Placetheunitawayfromtheclothesdryer,heaterorradiator.
Usetheunittopreventmoisturedamageanywherebooks
orvaluablesarestored.
Usethedehumidifierinabasementtohelpprevent
moisturedamage.
Thedehumidifiermustbeoperatedinanenclosed
areatobemosteffective.
Closealldoors,windowsandotheroutsideopenings
totheroom.
Fig.4a
Whenremovingthedehumidifierfromits
packaging,youwillfindplasticadhesivetapepasted
onseveralplacesoftheunit(seeFig.4b).Itisfor
transportationpurposeonly,justremovethembefore
youusingthedehumidifier.
NOTE:
Fig.4b
Adhesivetape
Keep unit away from heat sources, such as clothes dryer,
heater or radiator.
Use the unit to prevent moisture damage anywhere books or
valuables are stored.
Use the dehumidier in a basement to help prevent moisture
damage. NOTE: A dehumidier operating in a basement will
have little or no effect in drying and adjacent enclosed storage
area, such as a closet, unless there is adequate circulation of
air in and out of those additional areas.
The dehumidifer must be operated in an enclosed area to be
most effective.
Close all doors, windows and other outside openings to the
room.
•
•
•
•
•
Whenusingtheunit
Whenfirstusingthedehumidifier,operatetheunit
continuously24hours.
Thisunitisdesignedtooperatewithaworking
environmentbetween5 Cand35 C.
Iftheunithasbeenswitchedoffandneedstobe
switchedonagainquickly,allowapproximately
threeminutesforthecorrectoperationtoresume.
Donotconnectthedehumidifiertoamultiplesocket
outlet,whichisalsobeingusedforotherelectrical
appliances.
Selectasuitablelocation,makingsureyouhaveeasy
accesstoanelectricaloutlet.
Plugtheunitintoaelectricalsocket-outletwithearth
connection.
MakesuretheWaterbucketiscorrectlyfittedotherwise
theunitwillnotoperateproperly.
O O
Casters(Atfourpointsonthebottomofunit)
Casterscanmovefreely.
Donotforcecasterstomoveovercarpet,
normovetheunitwithwaterinthebucket.
(Theunitmaytipoverandspillwater.)
A dehumidifieroperatinginabasementwillhavelittleornoeffectindryinganadjacentenclosed
storagearea,suchasacloset,unlessthereisadequatecirculationofairinandoutofthearea.
Airoutletgrille
Airintake
grille
20cmormore
20cmormore 20cmormore
20cmormore
40cmor
more
Positioningtheunit
Donotuseoutdoors.
Thisdehumidiferisintendedforindoorresidential
applicationsonly. Thisdehumidifiershouldnotbeused
forcommercialorindustrialapplications.
Placethedehumidifieronasmooth,levelfloorstrong
enoughtosupporttheunitwithafullbucketofwater.
Allowatleast20cmofairspaceonallsidesoftheunit
forgoodaircirculation.
Placetheunitinanareawherethetemperaturewillnot
fallbelow5C(41F). Thecoilscanbecomecoveredwith
frostattemperaturesbelow5C(41F),whichmayreduce
performance.
Placetheunitawayfromtheclothesdryer,heaterorradiator.
Usetheunittopreventmoisturedamageanywherebooks
orvaluablesarestored.
Usethedehumidifierinabasementtohelpprevent
moisturedamage.
Thedehumidifiermustbeoperatedinanenclosed
areatobemosteffective.
Closealldoors,windowsandotheroutsideopenings
totheroom.
Fig.4a
Whenremovingthedehumidifierfromits
packaging,youwillfindplasticadhesivetapepasted
onseveralplacesoftheunit(seeFig.4b).Itisfor
transportationpurposeonly,justremovethembefore
youusingthedehumidifier.
NOTE:
Fig.4b
Adhesivetape
41°F and 95°F (5°C - 35°C).
NOTE: When removing the dehumidier from its
packaging, you will nd tape pasted on several
places of the unit (see Fig. 4b). It is for transportation
purposes only, just remove tape before using the unit.
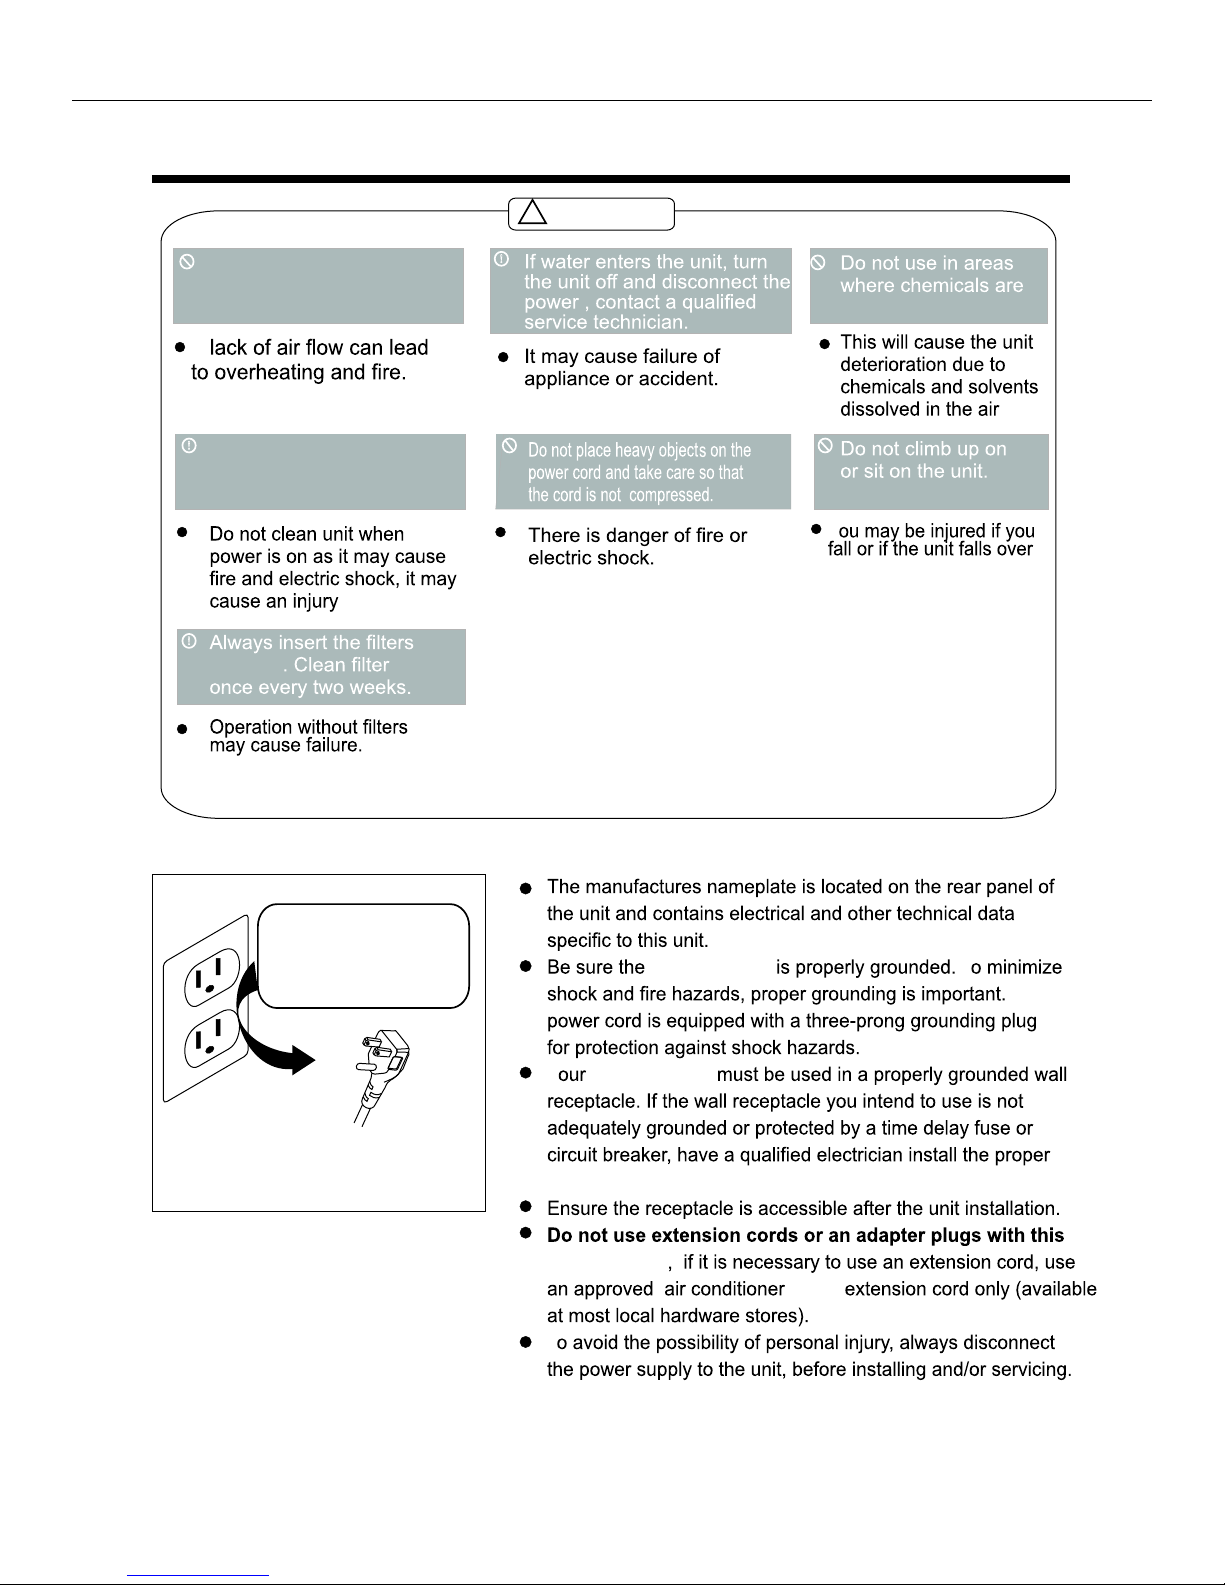
a ground
installed otherwise
www.sylvane.com 1-800-934-9194