8
Limitations
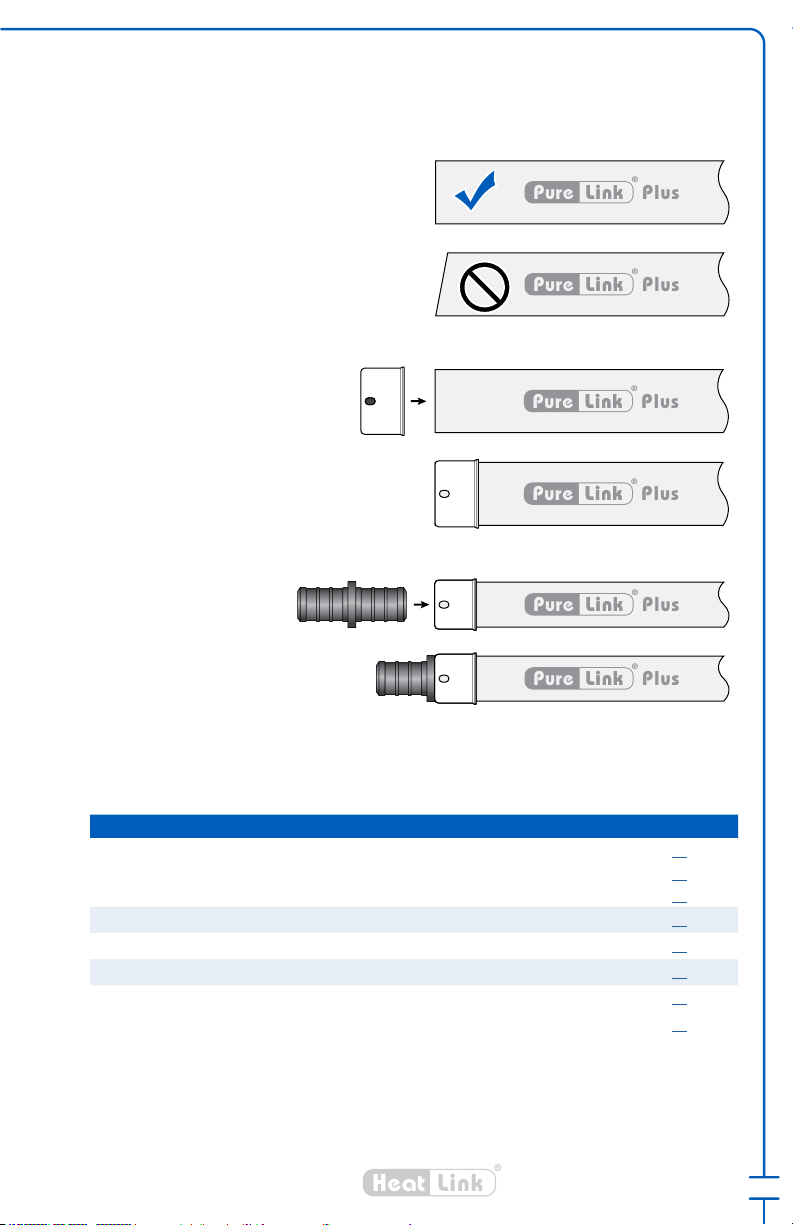
Limitations on PureLink® PEX Tubing
{{Do Not
{{Do Not permanently expose to UV light.
{{Do Not
polyethylene.
{{Do Not use above ratings.
{{Do Not install within 6" (15 cm) of any gas appliance vent piping, or within 12" (30 cm) of
page 10.
{{Do Not solder pipe connections within 16" (40 cm) of any PureLink® tubing in the same
water line.
{{Do Not allow to come into contact with spray foam. (Ensure PEX is sleeved, or use Pipe-
{{Do Not allow contact with low molecular weight petroleum products such as fuels or
solvents or oil based paints.
{{Cannot Be used for LP or Natural Gas.
{{Cannot Be used for an electrical ground.
{{Do Not allow contact with termiticides or pesticides.
{{Do Not
{{Do Not install in contaminated soil.
{{Do Not allow pests, insects, or rodents to come in contact with PEX tubing.
{{Do Not install in contaminated environments.
Limitations on HPP Fittings & Multiport Tees
{{Do Not
{{Do Not use above ratings.
{{Do Not
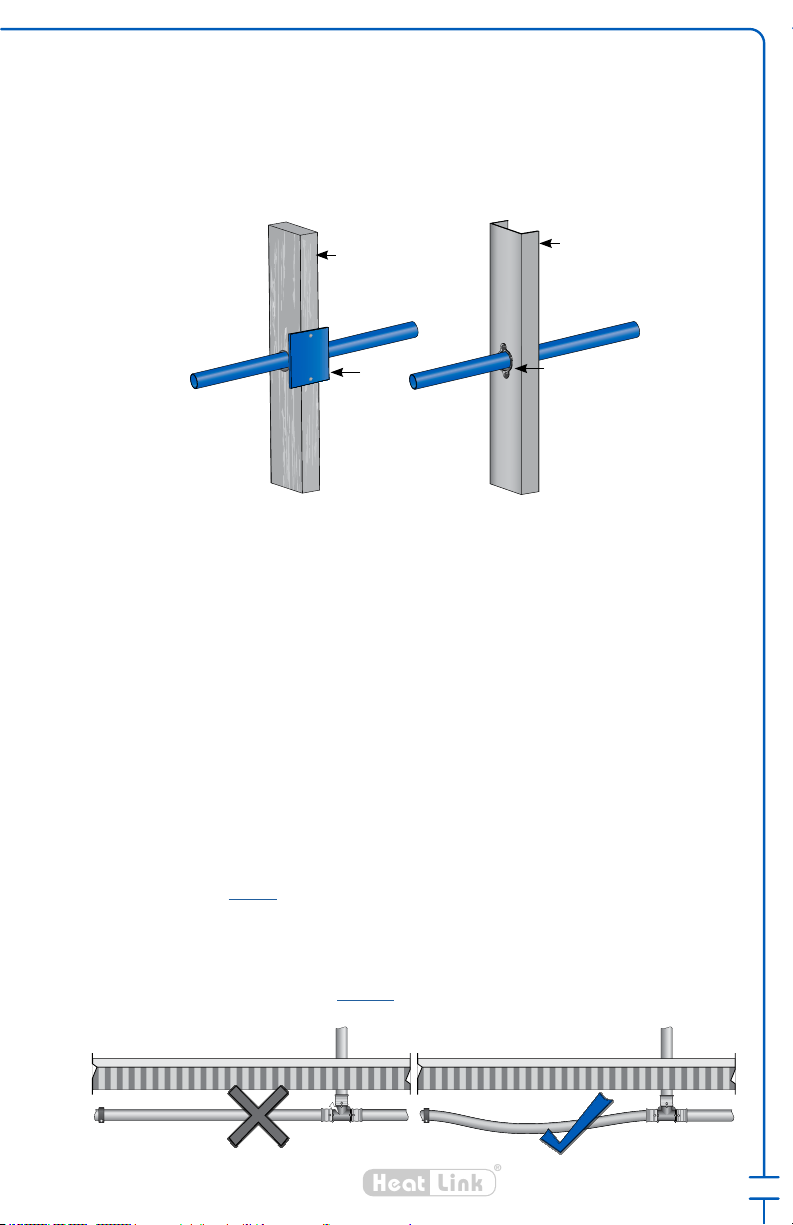
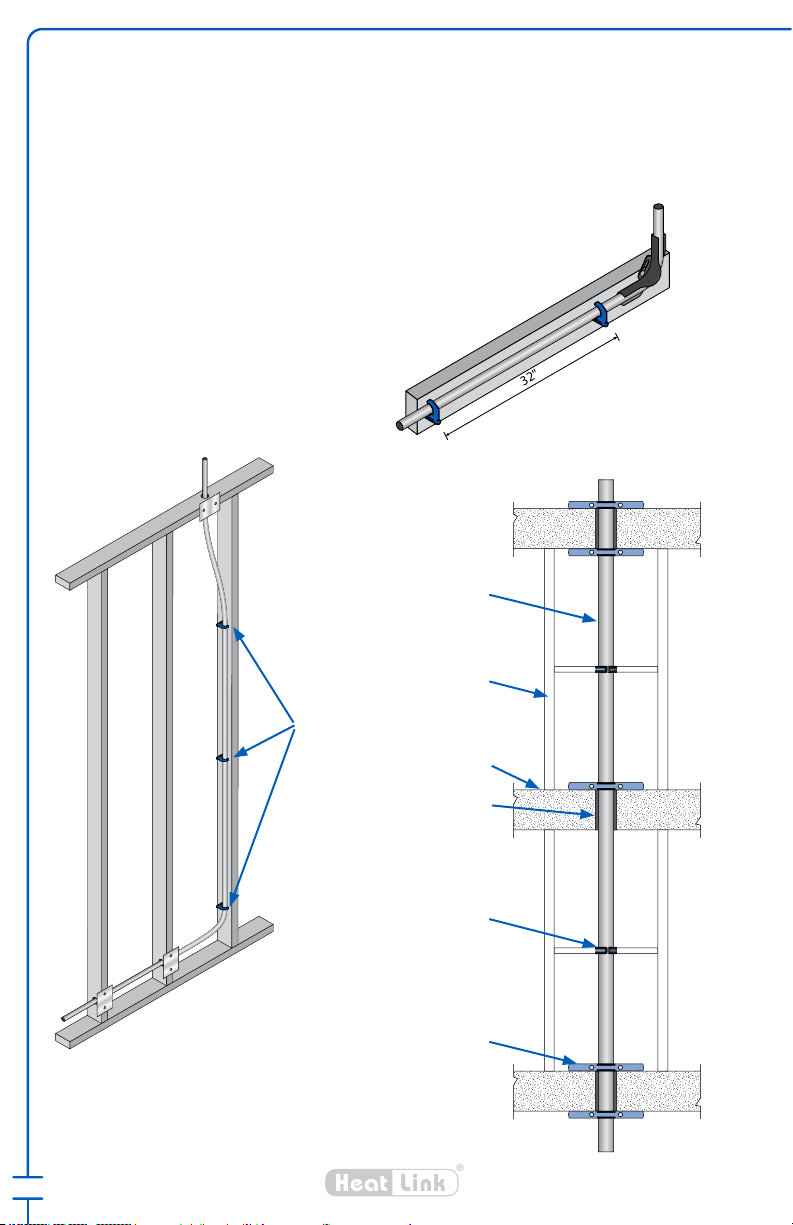
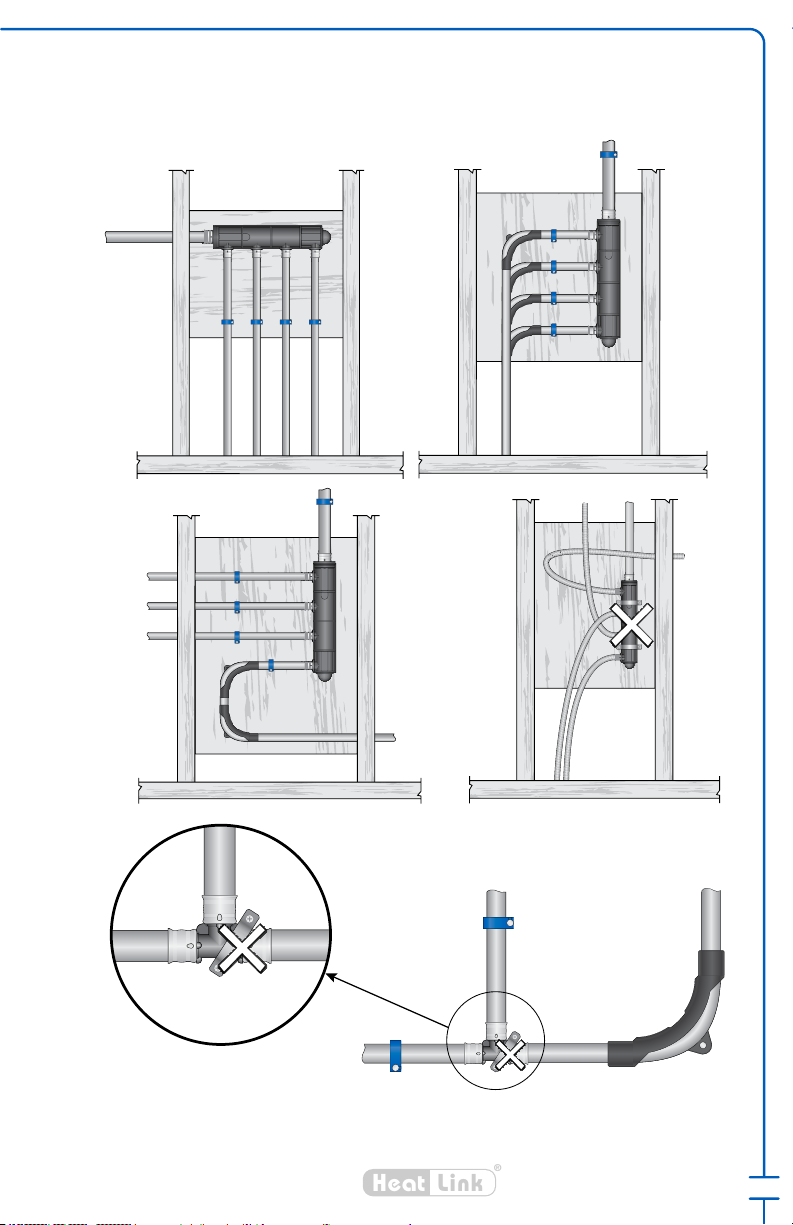
{{Do Not expose to excessive stress due to PEX expansion/contraction or bending force.
{{Do not
the same water line.
{{Do Not
oil based paints, solvents, or spray foams. See also INFO 24 - Material Properties of
Polysulfone (L2324
{{Do Not allow contact with termiticides or pesticides.
{{Do Not install in contaminated environments.
Limitations on NL Brass Fittings and SS Sleeves
{{Do Not install in corrosive environments (for more information consult the Copper
Development Association or Nickel Institute).
Important Notice!
Like most plastic material, crosslinked polyethylene is subject to ultraviolet (UV) deterioration