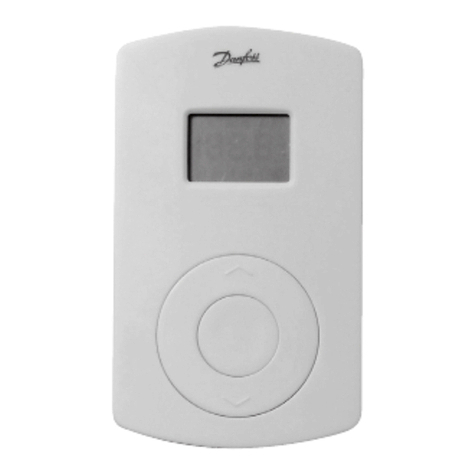
HeatMat UFSTAT10 User manual

1
UFSTAT10 Digital Floor Heating Thermostat
The Heat Mat UFSTAT10 Digital Thermostat is designed for floor heating systems
produced in accordance with EN60730-1, EN60730-2-9 and EN50082-1. The
thermostat is equipped with a matrix dot display making it very easy to understand
and operate.
Technical data:
Supply voltage
100~240VAC 50/60Hz
Maximum load
16A
Operating temperature
0~50°C
Storage temperature
-10~60°C
Temperature range, room
sensor
5~35°C
Temperature range, floor
sensor
5~40°C
Control modes
Floor sensor, room sensor or room sensor
with floor sensor as a limiter
IP class
IP21
Terminals
Max. 2.5 mm2
Floor sensor with 3.5m cable
NTC, 100K / 25°C
Dimensions
82 mm x 82 mm x 56mm
Colour
Polar white (RAL 9010)
First time settings:
The first time you switch on the thermostat, the screen shows the product version
number.
This thermostat offers two modes of operation; a manual mode where the
thermostat functions as a simple manual temperature on/off controller, and a fully
programmable automatic mode with a number of events throughout the day that
can have different target temperatures.
When the thermostat is first turned on or after a factory reset the thermostat will
default to manual mode, and the up and down arrows can be used to set the target
floor temperature.

2
If you wish to program the thermostat to operate in auto mode press the menu
button and then select Auto. By following the menu prompts you can set the time,
day of the week and control mode.
•Select the time using the up and down buttons and confirm by selecting OK.
•Set the hour and press the OK button. Then set the minute and press OK.
•Set the day of the week and confirm the settings with the OK button.
•Select the total power of your heating system to the nearest 0.1kW. If you do
not know the total power of your heating system this value can be left as the
default, the only aspect it affects is the energy monitor readout.
•After setting the time and date you will need to select which sensors the
thermostat is using. To do this press the menu button and then scroll
through until you find the Sensor Setting menu option and press OK. Select
the control method you desire. If the thermostat is in the room being heated
select Room and Floor. If the thermostat is outside of the room being heated
select Only Floor. Use Only Room if the thermostat is controlling some other
form of heating system.
The thermostat is now ready to use and your underfloor heating will operate in
accordance with the pre-programmed Event schedule.

3
men
u
Press
Menu
Operating table:
Auto Main Window Menu start
Menu end
Appearance reference:
Display interface
“To return to Main Window, go
to EXIT and press OK”

4
General operation:
When the thermostat is powered up, the version number will be displayed. If you
hold the menu button for 3 seconds, the thermostat will turn off, all the settings,
including time and date will be saved. To turn the thermostat back on press the
menu button again.
Operation mode:
Auto mode
Select Auto if you want the temperature to be controlled automatically via the 4-
Event schedule.
Hold/Manual mode:
Select Hold/Manual to cancel the programmed Event schedule (e.g. during
holidays) and to set the required temperature manually. For example, you may want
to adjust the temperature to 5°C for frost protection while you are away. To exit out
of the manual mode and return to the program mode select Menu, then the Auto
option and confirm the requested information to return to the program mode.
Temp menu on the main screen:
By pressing the Temp button you are able to alter the target temperature of all
'Wake' and 'Return' events in the program settings or alternatively all 'Leave' and
'Sleep' events. This streamlines updating the programed schedules if you want to
make changes across the board.
To make changes press the Temp button and then select if you want to change all
'Wake' and 'Return' events or all 'Leave' and 'Sleep' events. Press OK and the
thermostat will show the current target temperature of those events. Raise or lower
this temperature to your desired level and then press OK to update the heating
schedule with this new temperature.
Navigation buttons

5
To access the Settings menu press the Menu button and then use the right and left
arrows to select the menu you wish to access.
Event schedule - pre-programmed heating events:
You can set the thermostat up with different pre-programmed events to match your
requirements.
Select menu, use the right-hand arrow to scroll to event schedule, confirm with ok.
Scroll up or down depending on how many events you wish to program.
There are three options to choose from (1, 2 or 7 events).
1 : All days of the week with the same two event settings.
2 events - wake, sleep (for all days)
2:Monday to Friday with the same events setting, Saturday and Sunday with the
same setting:
Typically used if you work from Monday to Friday
4 events - wake, leave, return and sleep for Monday to Friday
2 events - wake, sleep for Saturday and Sunday
7:allows you to choose individual programs for each day of the week.
There are 4 events - wake, leave, return and sleep for each day.

6
Program setting:
Press the OK button to activate the Program setting.
Choose the days you wish to set using the up or down button.
Now select the time and temperature for each daily event in the program.
Press OK and set the start time for the event concerned. Confirm with OK.
Set the temperature for this event and confirm with OK.
If you are controlling the heating on floor temperature a normal target temperature
for a warm floor is between 27oC and 32oC – please be aware that some floor
coverings have a maximum limit that the underfloor heating should be allowed to
heat them to.
Please be aware that you may need to alter the standard factory settings on the
thermostat, as they may not meet your requirements.
After setting the required events, select Exit in the menu to return to the initial
display.

7
These are the icons for events programming:
Wake, Leave, Return, Sleep)
Factory settings / Pre-set schedule
7 days
Wake
Leave
Return
Sleep
Time
Temp.
Time
Temp.
Time
Temp.
Time
Temp.
4 events
6:30
22°C
7:30
19°C
17:00
22°C
23:00
18°C
Monday to
Friday
Wake
Leave
Return
Sleep
Time
Temp.
Time
Temp.
Time
Temp.
Time
Temp.
4 events
6:30
22°C
7:30
19°C
17:00
22°C
23:00
18°C
Saturday
& Sunday
Wake
Sleep
Time
Temp.
Time
Temp.
2 events
6:30
22°C
23:00
18°C
7 days
Wake
Sleep
Time
Temp.
Time
Temp.
2 events
6:30
22°C
23:00
18°C

8
Time and day:
Press OK and set the time in hours and minutes. The day will then be displayed.
Set the day and confirm with OK.
Calibration:
If the actual temperature measured by the thermostat does not correspond to the
true temperature you can adjust the thermostat by offsetting the temperature.
Press OK and enter the value of the true temperature. Confirm with OK.
Range -4°C~4°C, Default 0°C.
Adaptive function:
This function allows the room to be bought up to a desired temperature for when
you wake up in the morning or come home from work – with this function enabled if
you set a target temperature of 22oC for 7am the room will already be heated to
22oC by that time. The thermostat will adapt according to your lifestyle and heating
habits and outside temperatures. After just a few days the adaptive function will
automatically know when the heating needs be turned on. To enable Adaptive
function Press OK and set the function to on. Confirm with OK.

9
Sensor Setting:
Set the method you want to use to control your heating system.
There are 3 options:
Only floor:
The thermostat only regulates floor temperature. A floor sensor must be connected.
Only room:
The thermostat only regulates room temperature – this method should not be used
with underfloor heating unless there is an alternative way to limit the floor
temperature.
Room and floor:
The thermostat regulates room temperature with min. and max. floor temperature
limits. A floor sensor must be connected.
Press OK and select the required heating system.
Limitation:
This allows you to specify a temperature range within which the thermostat can be
set. It is then only possible to set a temperature in this range when the thermostat
is operating in auto, comfort and manual mode. This avoids anyone overriding the
system and maintains energy efficiency.
Press OK to highlight Max temperature. Use the up or down buttons to select the
desired maximum temperature. Press OK and select the minimum desired
temperature. Confirm the settings with OK.
The ranges are as follows:
Temperature Max: 20~40°C, Default 35°C, Min 5~20°C, Default 5°C
Floor protection Max: 15~27°C, Default 27°C, Floor protection Min 5~10°C,
Default 5°C

10
Floor protection Max/Min: only works at Room/limit mode
Factory reset:
This function allows all the thermostat settings to be reset and revert back to the
original manufacturer’s programming. Your personal settings will be erased.
Press YES and choose Reset in the menu.
Press NO and cancel the factory reset.
Child lock:
This function allows you to lock the thermostat settings if you do not want them to
be altered or erased by anyone else.
Press OK and select YES or NO to set up the child lock. Confirm with OK.
The child lock can be unlocked by pressing the two side buttons simultaneously for
3 seconds.

11
Energy monitor:
If the load is correctly set the energy monitor can be used to confirm how much
energy the underfloor heating system has used on each day of the week or for the
last full week. You can also input the load of the system in this menu.
Open window:
When the Open Window function is activated, a rapid temperature drop in the room
(as you would expect if a door or window was left open in cold conditions) will shut
off the heating for 30 minutes.
Error alert:
If a fault or an error occurs, the thermostat will display an error code as follows:
Wiring diagram:
E1:
Internal sensor – defective
or short-circuited
E2:
Internal sensor – defective
or short-circuited

12
Heat Mat Underfloor Heating
For more information visit: www.heatmat.co.uk
Or call us on 01444 247020
Other HeatMat Thermostat manuals
Popular Thermostat manuals by other brands
Siemens
Siemens RDD100 Series operating instructions
Carrier
Carrier A07051 installation instructions
Uponor
Uponor SetPoint 521 Installation and operation manual
Trane
Trane TCONT402AN32DA Installer's guide
York
York Hx 3 S1-THXU280 User's information manual
Honeywell
Honeywell RTHL2510 series Quick installation guide
