Heidolph Hei-TORQUE Value Series User manual

Leading Safety Standards Superior Ease of Use Reduced Cost of Ownership
Overhead Stirrers Hei-TORQUE Value and Hei-TORQUE Precision
Operating manual must be read before initial start-up.
Please follow the safety instructions provided.
Please keep for future reference.
Laborrührer Hei-TORQUE Value und Hei-TORQUE Precision
Betriebsanleitung vor Erstinbetriebnahme unbedingt lesen.
Sicherheitshinweise beachten.
Für künftige Verwendung aufbewahren.
Operating Manual Page 2
Original-Betriebsanleitung Seite 56
Powerful
Stirring

Contents
Inhaltsverzeichnis
About this Document 4
Version and variants ...........................................................................................4
About this manual ..............................................................................................4
Symbols and keywords........................................................................................5
Safety Instructions 6
General safety instructions...................................................................................6
EU Declaration of Conformity.........................................................................6
Intended use...............................................................................................6
Installation / electrical safety .......................................................................7
Qualications of employees...........................................................................7
Obligations of the operator ..................................................................................7
Installation site ...........................................................................................7
Modications to the device............................................................................8
Employee safety..........................................................................................8
Safety during use ...............................................................................................9
Disposal ............................................................................................................9
Device Description 10
Device overview ...............................................................................................10
Hei-TORQUE Value overall view....................................................................10
Hei-TORQUE Value control panel ..................................................................10
Hei-TORQUE Precision overall view ...............................................................11
Hei-TORQUE Precision control panel .............................................................11
Start-Up 12
Setting up device .............................................................................................12
Connecting/disconnecting the power supply cable .................................................12
Switching the device on and o ..........................................................................13
How to do the Settings......................................................................................14
Control knob .............................................................................................14
Control keys .............................................................................................15
Hei-TORQUE Precision: Additional functions..........................................................16
Symbols used............................................................................................16
Menu navigation ........................................................................................17
Settings ...................................................................................................18
Safety settings ..........................................................................................19
Editing the prole ......................................................................................21
Favorites ..................................................................................................23
Operation 25
Setting the gear stage.......................................................................................25
Setting the speed .............................................................................................26
Switching rotation on/o ...................................................................................27
Operating Manual

Contents
Rotation Hei-TORQUE Precision: Additional functions .............................................29
Safety settings ..........................................................................................29
Setting the rotation time ............................................................................29
Starting rotation via favorites......................................................................29
Setting the rotation start time .....................................................................31
Displaying the progression graph ................................................................32
Calibrating the torque ................................................................................33
Quick chuck.....................................................................................................34
Installing and removing impellers ................................................................34
Interface .........................................................................................................36
Connecting and linking interfaces.................................................................36
Interface commands ..................................................................................39
Cleaning and Maintenance 40
Cleaning..........................................................................................................40
Maintenance ....................................................................................................41
Troubleshooting 42
Malfunctions and troubleshooting........................................................................42
Assembly 44
Electrical connection .........................................................................................44
Support rod and quick chuck..............................................................................45
Mounting the support rod............................................................................45
Mounting the quick chuck ...........................................................................45
Shaft guard .....................................................................................................46
Dismantling and Storage 47
Dismantling, transportation and storage ..............................................................47
Dismantling ..............................................................................................47
Transportation and storage .........................................................................47
Accessories and Spare Parts 48
Scope of delivery..............................................................................................48
Accessories......................................................................................................48
Attachments 49
Technical data ..................................................................................................49
Recommended speed .................................................................................50
Performance range.....................................................................................50
Service 50
Contact / Technical Service ................................................................................51
Warranty.........................................................................................................52
Conrmation of condition...................................................................................53

About this Document
4
About this Document
Copyright
This operating manual is protected by copyright and is exclusively intended for the
internal use of the purchaser.
Handing over this operating manual to third parties, reproducing it in any type or form
– in part or in full – and utilizing and/or communicating its contents is prohibited without
prior written approval from the manufacturer.
Any violations will result in an obligation to provide compensation for damages. Other
claims remain unaected.
Version and variants
Version
This manual describes the function, operation and maintenance of Hei-TORQUE stirrers.
Version Alteration date
1.5 08/2019
Variants
The device is available in dierent variants. Certain features or functions are only
available in specic product variants. These variants are described in this operating
manual.
About this manual
This operating manual is an integral part of the device described here.
➜Carefully read through this operating manual and observe all of the
safety instructions and warnings notices.
➜Ensure that every user has carefully read the operating manual
before using the device for the rst time.
➜Store this operating manual so that it is accessible to all users at
all times.
➜Pass the operating manual on to any subsequent owner.
The current version of this operating manual can also be found at:
https://heidolph-instruments.com/en/service/downloads/operation-
manuals# Overhead stirrers (Hei-TORQUE)
In addition, also observe the local regulations at the installation site.

5
About this Document
Symbols and keywords
Standardized symbols and signal words are used in this operating manual to warn against
any dangers and provide important instructions. These instructions must be strictly
observed to avoid accidents and damage.
The following terms and basic symbols are used:
Symbol Additional signal words / explanation
Warning
signs The yellow triangle indicates hazardous situations. It is used in
combination with the following signal words:
DANGER:
Indicates a hazardous situation which, if not avoided, will result in
serious injury or death.
WARNING:
Indicates a hazardous situation which, if not avoided, may result in
serious injury or death.
CAUTION:
Indicates a hazardous situation which, if not avoided, may result in
property damage and minor or moderate injury.
Prohibitory
signs Prohibited:
The red circle indicates a situation that should be avoided under all
circumstances and which, if not avoided, may result in serious injury
or death.
Mandatory
signs Must be observed:
The blue circle indicates important information. Please observe this
information to avoid any property damage.
Other symbols used:
Symbol Description
➜Handling instruction, action required
✓Result of action
▪
▪
▪
List of information
a.
b.
c.
List of variants

Safety Instructions
6
Safety Instructions
General safety instructions
EU Declaration of Conformity
This device complies with the following EC-Directives*:
▪2006/42/EC Machinery Directive
▪2014/30/EU Electromagnetic Compatibility Directive
*Also see the attachment “EU Declaration of Conformity”.
The device has been manufactured according to state-of-the-art technology and in
compliance with recognized safety regulations. However, risks may still arise during
installation, operation and maintenance.
➜Please ensure that the operating manual is available at all times.
The device may only be used under the following conditions:
➜Only operate the device if it is in a technically perfect condition.
➜Only operate the device if you are properly aware of the risks and required safety
measures.
➜Only operate the device in accordance with the instructions given in this operating
manual.
➜If any information is ambiguous or missing, ask your superior or contact the
manufacturer.
➜Do not operate anything on the device without authorization.
➜Only use the device in accordance with its intended use.
Intended use
The device may only be operated by authorized personnel.
The device is suitable for the
following uses:
▪Stirring
▪Mixing
▪Be- and Degassing
▪Emulsifying
▪Suspending
The device may be operated
in research laboratories,
other laboratories and
production facilities in the
following sectors:
▪Chemistry
▪Pharmacy
▪Biology
▪Environmental analytics
▪Basic research
▪Similar research laboratories
Uninteded use/Reasonable foreseeable misuse
Any use which deviates from the device‘s intended use is considered to be improper. The
manufacturer is not liable for damage that occurs as a result. The risk is borne by the
operator alone.
When used in medical and food sectors the operator alone is responsible for compliance
with the applicable regulations and standards.

7
Safety Instructions
Installation / electrical safety
▪The device may only be connected up if the available power supply voltage corres-
ponds to the information stated on the rating plate for the device.
▪The power supply connection must be easily accessibly at all times.
▪An RCD circuit breaker (residual current circuit breaker) must be tted to the
electrical system in the building so that the device is disconnected from the power
circuit in the event of a fault.
▪Repairs may only be performed by electricians authorised by Heidolph Instruments.
▪Never operate the device with a damaged power cord.
▪Always turn the device OFF and disconnect the power cord before carrying out any
maintenance or repair work.
Qualications of employees
▪The device may only be operated by trained personnel.
▪The device may only be operated by persons who have been instructed and super-
vised in its proper use by trained specialist personnel.
▪The device may only be operated by specialist personnel who are above the legal
minimum age.
▪Other persons may only work on the device under the constant supervision of experi-
enced and trained specialist personnel.
▪This operating manual must be read and understood by all persons working with the
device.
▪Personnel must receive safety training that ensures responsible and safe working
practices.
Obligations of the operator
Installation site
▪The device must be installed in a suitable location.
▪The device must be installed on a rm and stable surface.
▪Ensure that the device and all of its components are easily accessible at all times.
▪Maintain a sucient safety clearance to, in particular, any moving and/or hot
equipment components.
▪It is not permitted to place or store any objects such as accessories, tools or
chemicals within this clearance area during operation.
▪All screw connections must be securely tightened.
▪It is not permitted to operate the device near to highly ammable or explosive
substances.
▪Operate the device in conjunction with an extractor hood, if working with potential
harmful media (see DIN EN 14175 and DIN 12924).

Safety Instructions
8
▪The device is designed for indoor use only and under the following ambient conditions:
Ambient temperature 5 - 31 °C at 80 % relative humidity
32 - 40 °C decreasing linearly to a
maximum 50 % relative humidity
Installation altitude 0 - 2,000 m above sea level
Contamination level 2
Overvoltage category II
Permissible supply deviations ± 10 %
▪If the device is operated in corrosive atmospheres, the service life of the device will
decrease based on the concentration, duration and frequency of the exposure to the
corrosive atmosphere e.g. concentrated hydrochloric acid (HCI).
Modications to the device
▪It is not permitted to make any unauthorised modications or changes to the device.
▪Do not attach or install any parts that have not been approved by the manufacturer.
▪Unauthorized modications or changes will void the EC Declaration of Conformity for
the device and operation of the device will no longer be permitted.
▪The manufacturer is not liable for any damage, dangers or injuries that result from
unauthorized modications and changes or due to the non-observance of the instruc-
tions in this manual.
Employee safety
➜Ensure that the device is only operated by qualied specialist personnel and trained
employees.
➜Observe the following instructions to avoid any personal injuries and property
damage:
- Laboratory regulations
- Accident prevention regulations
- Hazardous Substance Act
- Other generally accepted occupational health and safety regulations
- Local regulations

9
Safety Instructions
Safety during use
➜Wear the appropriate clothing when working on the device (protective clothing,
protective glasses and, if necessary, safety gloves).
➜Do not use the device in potentially explosive areas. The device is not protected
against explosion. There is no explosion or ATEX protection available.
➜Do not carry out work with naked ames in the vicinity of the device (risk of
explosion).
➜Do not operate or assemble devices in the vicinity which are emission or radiation
sources (electromagnetic waves) for the frequency range (3*1011 Hz to 3*1015 Hz).
➜Do not operate or assemble appliances in the vicinity of the device which constitute
emission or radiation sources for ionizing radiation or in the ultrasonic range.
➜Do not operate the device where adiabatic compression or shock waves might occur
(shock wave combustion).
➜Do not use materials which pose a potential risk of uncontrolled energy release which
might result in pressure increase (exothermic reaction; spontaneous combustion of
dusts).
➜Only use impellers approved by Heidolph Instruments.
➜Install all cables without kinks and outside the operating and danger zone.
➜Avoid putting pressure on the display when you are not operating the device.
➜Do not spill liquids over the device or any parts of it.
➜Remove any accidentally spilled liquids immediatly.
➜Eliminate errors immediately.
➜Do not use abrasive material to clean the glass surface. Only wipe with damp cloth.
➜Always switch the device OFF after use.
Disposal
➜Check the device components for hazardous substances and
solvents.
➜Clean all components before disposal.
➜Dispose of the device in accordance with the relevant national
regulations.
➜Dispose of the packaging material in accordance with the
appropriate national regulations.
Caution:
Possible damage to the environment
The device is equipped with a lithium button cell termed CR2032
by IEC-2. According to the european battery directive batteries
must be disposed o separately.
In case of disposal ensure, the waste diposal plant is either
member of the common redemption system for batteries or has
installed an individual redemption system according to the Battery
Directive 2013/56/EU.

Device Description
10
Device Description
Device overview
Hei-TORQUE Value overall view
Slider:
switch rotation On/O
Control knob:
Speed adjustment
Display
Gear stage setting
(only Hei-TORQUE Value 400)
Quick chuck
ON/OFF switch
Hei-TORQUE Value control panel
Torque performance
Set rotation speed
Actual rotation speed
Gear stage
(only Hei-TORQUE Value 400)
Speed range (only
Hei-TORQUE Value 400)

Device Description
11
Hei-TORQUE Precision overall view
Slider:
switch rotation On/O
Control knob:
Speed and time adjustment
Display
Hei-TORQUE Precision 400:
Control key gear
Hei-TORQUE Precision 100/200:
Control key graphical display
Quick chuck
ON/OFF switch
Control keys
Hei-TORQUE Precision control panel
Position indicator:
Change between
time and speed
Set
Actual
Gear stage
(only Hei-TORQUE
Precision 400)
Torque calibration
Set
Elapsed
Submenu
Torque
Time
Speed
Timer

Start-Up
12
Start-Up
Setting up device
Before start-up the device has to be mounted by aid of the support rod either to a stand
or to a wall grid (see chapter “Assembly, Support rod and quick chuck”, section “Mounting
the support rod”).
Warning:
Risk of device slipping
Due to vibrations during operation the device may start moving over
the surface and may fall o, if mounted to a stand.
The surface must be smooth and clean and should be completely level.
Warning:
Possible detachment of the device!
Due to vibrations during operation the clamping screws may loosen,
which tighten the device to the stand or to the wall grid.
Tighten the clamping screws carefully. Check the safe xing in regular
intervalls.
Connecting/disconnecting the power
supply cable
Connecting the power supply cable
The device is supplied with a three-pole
power supply cable which features a
safety clip to hold the female connector in
position.
Female
connector
Power supply
cable
Safety
clip
✓The device is switched o.
➜Connect the female connector of the
power supply cable to the device
connector.
✓The female connector is securely
engaged when a click is heard.
➜Insert the male connector of the
power supply cable into the mains
socket-outlet. Device connector

Start-Up
13
Disconnecting the power supply cable
➜Disconnect the power supply cable from the mains socket-outlet.
➜Press the safety clip to disengage and to disconnect the female connector of the
power supply cable from the device connector.
Switching the device on and o
Switching on the device
➜Press the ON/OFF switch.
✓The ON/OFF switch remains engaged.
✓The display switches on.
✓A short animation is shown.
Hei-TORQUE Precision:
✓The main menu opens.
Switching o the device
➜Press the ON/OFF switch.
✓The ON/OFF switch disengages.
✓The display switches o. ON/OFF switch
Start-Up
14
How to do the Settings
Control knob
Hei-TORQUE Value
The speed is adjusted using a rotary knob.
➜Turn the control knob clockwise
✓to increase the speed.
➜Turn control knob counterclockwise.
✓to decrease the speed.
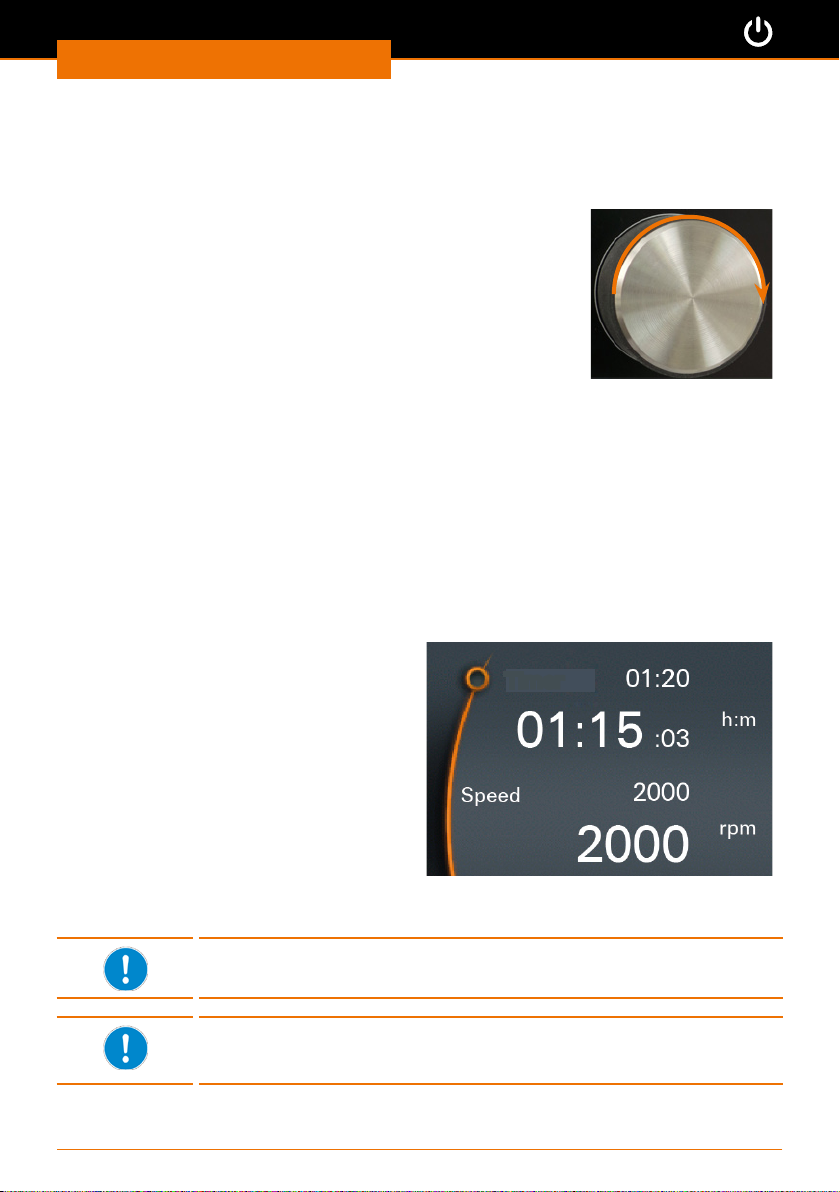
Hei-TORQUE Precision
The rotary knob is used to call up, change and save all settings.
▪To call up and change the settings: Turn the control knob
▪To select and conrm settings: Push the control knob
✓“Speed” is selected in the main menu by default and the value displayed in orange
gures.
➜Turn the control knob clockwise or counterclockwise to increase or decrease the
speed.
➜Push the control knob to exit speed setting.
➜Turn the control knob clockwise within
3 seconds.
✓The indicator jumps to “Timer”.
➜Push the control knob to conrm your
selection.
✓Setting changes from white to orange
for approx. 2 seconds.
➜While the gures are orange turn
the control knob clockwise or
counterclockwise to increase or
decrease the setting.
➜Push the control knob to conrm.
Timer
✓Without conrmation, the setting will be saved automatically after approx. 2 seconds.
The settings can only be changed while the gures are displayed in
orange.
The control knob sound can be switched o and on. (See chapter
“Start-Up, Hei-TORQUE Precision: Additional functions”, “Settings”
section.)

Start-Up
15
Control keys
Hei-TORQUE Value 400
On the Hei-TORQUE Value 400, the gear
stage is set using the touch-sensitive
control panel.
➜Touch the control panel to set the gear
stage.
✓The control panel will display the
current gear setting.
Control key
gear stage
Hei-TORQUE Precision
The Hei-TORQUE Precision has several touch-sensitive control keys.
The functions specied above the keys
indicate what each key applies to.
✓In the main menu there are three
adjacent touch-sensitive keys.
Hei-TORQUE Precision 400:
✓ “Range I or II” is displayed. Control keys
Hei-TORQUE Precision 100/200
✓“Graph” is displayed.
➜Touch one of the control keys.
✓The function specied above the panel
applies.
Control keys
✓In the submenu there are two adjacent
touch-sensitive keys.
✓The “Back” key takes you back to
the previous step.
✓The “Home” key takes you back to
the main menu.
Control keys

Start-Up
16
Hei-TORQUE Precision: Additional functions
Symbols used
Symbol Name Function
Home Back to main menu
Back Back to previous menu
Save Save setting or prole
lRamp jump Rotation speed jumps to
predened setting immediately
l
Ramp slope Rotation speed increases or decreases
to predened setting gradually
Correct Deletes last input
Delete Deletes template
Continuous
operation
Activates repeated operation of a prole
Activate ▪Activates single operation of a prole
▪Activates input
Deactivate ▪Deactivates the prole
▪Deactivates input
Prole cycle Prole cycle active:
Adjustment of time or speed not possible
Continuous
operation
Continuous operation active:
Adjustment of time or speed not possible
Start time Start time active
Direction Clockwise rotation
PC control Only available when using interface and PC
(see separate instruction manual)

Start-Up
17
Menu navigation
Switching to a submenu
➜Touch the “Menu” key.
Control key “Menu”
✓The rst submenu opens.
➜Turn the control knob clockwise or
counterclockwise.
✓The position indicator jumps to a menu
item.
✓The color of the selected menu item
changes from white to orange.
Graph
Favorites
Edit Prole
Setup
Start Time
Safety
➜Push the control knob.
➜The selected menu is displayed. Time
Language
Sound
Direction
Quiting the submenu
➜Touch the “Back” key
✓This will take you back to the previous
menu.
➜Touch the “Home” key
✓This will take you back to the main
menu.

Start-Up
18
Settings
All basic settings for daily use are set using the “Settings” menu.
Setting the language
➜Open the “Settings” submenu.
➜Select the “Language” menu item and
choose your desired language.
➜Push the control knob to conrm your
selection.
Time
Language
Sound
English
German
Setting the time
➜Select the “Time” menu item.
➜Push the control knob to adjust time.
➜Turn the control knob to change the
time.
➜Push the control knob to complete
setting.
➜Push the control knob again to conrm
and save your selection by pressing
“OK”.
Time
Language
Sound
08:30
OK
Setting the sound
➜Select the “Sound” menu item.
➜Select “Sound on” or “Sound o”.
➜Push the control knob to conrm.
✓The setting will be displayed for a few
seconds.
Language
Sound
Sound on
Setting the direction (only applicable to Hei-TORQUE Precision 100 and 200)
➜Select the “Direction” menu item.
➜Select “Left” or “Right”.
➜Push the control knob to conrm.
✓The setting will be displayed for a few
seconds.
✓If “Clockwise” is activated, an
additional icon will be displayed in
the upper right corner.
Sound
Direction
Direction: anti-clockwise

Start-Up
19
Safety settings
Use the “Safety settings” menu to individually adjust all settings required by the nature
of your sample to ensure personal safety.
Setting the acceleration
Switching rotation on may result in
splashing at high acceleration.
The default setting is medium
acceleration.
➜Select the “Acceleration” menu item.
Acceleration
Speed limit
Torque limit
✓The current setting is marked with an
asterisk.
➜Select the required setting.
➜Push the control knob to conrm.
Fast
Medium *
Slow
✓The selected setting is displayed briey
for conrmation.
➜Press “Back” to exit the
“Acceleration” menu.
Acceleration: medium
Setting a speed limit
Some samples may only be exposed to low rotation speed. In this menu you can restrict
the speed to avoid accidental changes.
The default setting is the maximum
possible speed.
➜Select the “Speed limit” menu item.
➜Set the required maximum speed in
rpm.
➜Push the control knob to conrm.
Speed limit [rpm]
2000
OK
✓A conrmation is displayed briey.
➜Press “Back” to exit the menu.
✓The speed cannot be set to higher than
this speed limit, regardless of the gear
stage selected.
Limit saved!

Start-Up
20
Setting the torque limit
Fragile impellers might not withstand a load above a certain torque. This setting allows
you to limit the torque accordingly.
➜Select the “Torque limit” menu item.
➜Push the control knob to conrm “OFF”
or the last setting.
Torque limit [Ncm]
OFF
OK
➜Set the required maximum torque in
Ncm using the control knob.
➜Push the control knob to exit setting.
➜Push the control knob again to conrm
by pressing “OK” and save the setting.
Torque limit [Ncm]
290.5
OK
✓A conrmation is displayed briey.
➜Press “Back” to exit the menu.
✓If the torque limit is exceeded, the
device will shut down automatically.
Limit saved!
The safety settings are saved and are not lost by switching o the
device.
This manual suits for next models
7
Table of contents
Languages:
Other Heidolph Power Tools manuals

Popular Power Tools manuals by other brands

Scheppach
Scheppach HP800 Original instruction manual

Albert Roller
Albert Roller Disc 100 operating instructions

Nugsmasher
Nugsmasher NugSmasher X owner's manual

BGS technic
BGS technic 3282 instruction manual

National Flooring Equipment
National Flooring Equipment 6700 OPERATING & SERVICE MANUAL

Cheng Kang
Cheng Kang CWL1803 instruction manual


