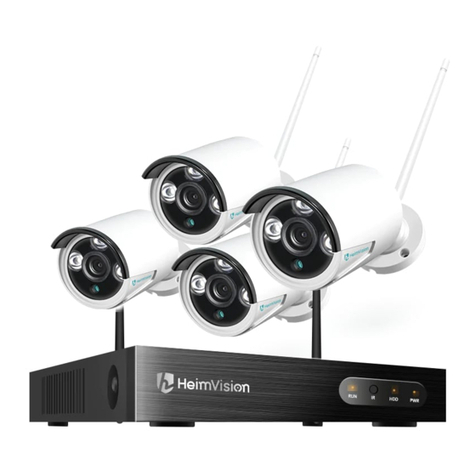
HeimVision HM243 User manual

Network Video Recorder
System
HM243
User Manual • Uživatelský manuál •
Užívateľský manuál • Használati utasítás •
Benutzerhandbuch

2
Dear customer,
Thank you for purchasing our product. Please read the following instructions carefully
before first use and keep this user manual for future reference. Pay particular attention
to the safety instructions. If you have any questions or comments about the device,
please contact the customer line.
✉www.alza.co.uk/kontakt
✆+44 (0)203 514 4411
Importer
Alza.cz a.s., Jankovcova 1522/53, Holešovice, 170 00 Praha 7, www.alza.cz

3
SAFETY CAUTIONS
•Please keep the NVR away from liquid in case of short-circuit.
•Please use the product in an open space and do not block the air vents.
•For your safety, please use the original power supply provided.
•If the NVR starts or works abnormally, please unplug the power adapter and clean
the dust on the mainboard in the NVR device, then restart the NVR.
•Please obey the regulations and policies in your country and area when installing
the product.
ABBREVIATIONS OF TERMS
NVR: Network Video Recorder
HDD: Hard Disk Drive
SATA: Serial ATA, a common hardware interface employed by our NVR.
EseeCloud: A software designed for this product.
FAT32: A file system of your USB Drive.

4
PACKAGE LIST
NVR x1 IP Camera x4 5dB Antenna x4
(Hard Disk Drive (for IP Camera)
not included)
Ethernet Cable x1 DC 12V/2A DC 12V/1A
Power Adapter x1 Power Adapter x4
(for NVR) (for IP Camera)
USB Mouse x1 Screw x4 Screw package x4
(for HDD) (for IP cameras)
Quick Guide x1

5
PRODUCT OVERVIEW
Antenna
HD Output
Ethernet Port
USB Port
DC-In
LED
Installation Hole
Stand
Night Vision Sensor Antenna Ethernet Port DC-In

6
HARD DISK DRIVE INSTALLATION AND SYSTEM
CONNECTIONS
Hard Disk Drive Installation
Notice:
•To record video and play the recorded video, the installation of the Hard Disk Drive
is a must. Otherwise, you can only watch the live picture.
•A Hard Disk Drive is not included in this NVR System.
•This NVR system works with a 3.5” SATA HDD. The HDD should be formatted if it’s
installed.
Step 1:
Loosen the screws on the back of
the NVR and then remove the
cover.
Step 2:
Connect the power cables and
data cables to the corresponding
ports of your HDD.
Step 3:
Fasten the cover and HDD with
the four screws.
Step 4:
Fasten the cover on the back of
the NVR with the two screws.

7
System Connections
Do not fix the IP Camera with the screws before you can see the image on the
screen and know the ideal position to install it.
1. Unwind the antennas of the NVR;
2. Install and tighten the antennas on the IP cameras;
3. Plug the power adapter (12V/2A) into the NVR and the socket;
4. Plug the power adapter (12V/2A) into the IP Camera and the socket;

8
OPERATE NVR SYSTEM
Live Picture
Plug the NVR and cameras in and wait for 2-3 minutes. The live pictures from the
cameras will be displayed on the screen. Then you can connect the mouse to the NVR
and start operating the NVR system.
Notes:
•The default Username for the NVR system is admin, and the default Password is
empty (no need to enter anything);
•This NVR system can be only connected to the network by Ethernet cable currently;
•To protect your privacy, please set the password at your earliest convenience. Right
click the mouse on the main interface, then go to System setup > System Admin >
User > Set password to set a password;
Hard Disk Drive Formatting
Install the HDD first, then right click the mouse on the main interface and go to System
Setup > General Setup > HDD Setup to check its status. If it’s not Formatted, select the
right HDD, then click Format.

9
Video Recording
Right click the mouse on the main interface, then select System Setup > Record Setup >
Record Plan to set the record mode. The default record mode of the NVR is 24/7 all time
record.
Notice: Click Reset before you change the record mode.
Scheduled Record
After reset, select Channel and click Time to start scheduled record setup. Left click
the mouse and then select the day and hour you plan for recording. The area selected
will turn Red and click Apply to save the setting. The system will start recording at a
specific time on a daily/weekly schedule.
Motion Record
After reset, select Channel and click Motion to start motion record setup. Left click
the mouse and then select the day and hour you plan for recording. The area selected
will turn to Green and click Apply to save the setting. The system will start recording
when the camera detects any motion.
Tips:
•Changing the setting from 24/7 recording to motion recording helps to prolong your
HDD storage time.
•External device is required for Alarm record and this NVR does not support it.

10
Video Playback
Right click the mouse on the main interface, then select Video Playback to play the
recorded videos. Select the date with green color, Channel and Record Mode (⑥), then
click Search to list all the filtered videos.
1. Display the timeline by Day/Hour 4. Pause/Play/Fast Forward
2. Video Recording Time 5. Filtered Videos List
3. Area for Video Playing 6. Filters
Option 1: Select one video file from the Filtered Videos List (⑤), then click Play or File
Playback to play the selected video.
Option 2: Left click the mouse on the Red/Green (Red for Scheduled Record and Green
for Motion Record) part of the timeline. The videos recorded from 4 channels can be
played at the same time.
Video Backup
Option 1:
Insert a USB drive (up to 64GB and FAT32 format only), then select Video Playback to
enter the interface below.
Option 2:
Right click the mouse on the main interface then select Video Playback to enter the
interface below.

11
Step 1:
Select Channel, Record mode and Search Time, then click Search to display the filtered
videos list.
Step 2:
Select the videos and click Backup, the videos will be downloaded to your USB drive.
Network Setup
Connecting the NVR to a router with the ethernet cable is a must if you want to remotely
view the videos from a mobile device or a PC. You can check Cloud ID, IP address and
Web port here.
•Click Show QR Code, you can see the QR code and Cloud ID here.
•Make sure the Network status is Healthy Network;
•Web port may vary on different NVR systems.

12
Other Functions on the Menu Bar
Right click the mouse to show the main Menu bar as shown below, right click again to
hide it.
Split screen:
Select it to change the channel displayed on the screen
or divide the screen into four/six/eight channels.
Video Manage:
Select it to add IP cameras by Match Code, to manage IP
cameras and channels, etc.
System setup:
It includes General setup, Record setup, Network setup
and System Admin.
•General setup: change Language, set up the Time,
change Display Resolution and check HDD
information, etc.
•Record setup: set up the record mode for each
channel.
•Network setup: check the IP address, Cloud ID, etc.

13
•Channel setup: change the name of the camera, check the Bitrate, etc.
•System Admin: check the system version, update the system, User and password
setup, make a factory reset and check the system log, etc.
Color adjust:
Select it to adjust the brightness, contrast and sharpness of each channel.
PTZ Control: Select to pan/tilt/zoom, this NVR does not support the function.
Setup Wizard:
Show the QR code to download the app and show the Cloud ID.
Fast network:
Configure the network.
Exit System:
Log out, reboot and shut down the system, etc.
OPERATE NVR SYSTEM FROM ESEECLOUD ON PC
Notice:
•https://www.heimvision.com/download/Cameras is the link for downloading
EseeCloud or you can contact our HeimVision service team to get the installation
link.
•Your Cloud ID can be found in Network Setup.
•Please make sure that your NVR is Internet connected through the ethernet cable,
and the status of your network is Healthy Network.
EseeCloud Login
Step 1:
Double click EseeCloud_Setup.exe to install and then run the software.
Step 2:
Log in to EseeCloud Client with the default User Name (admin) and password (empty,
namely enter nothing) if you did not set any password.

14
Step 3:
Click +Add (on the upper right corner) to add device.
Step 4:
•Click Cloud ID (on the left side);
•Input your Cloud ID number, user name (admin) and password (skip it if you
didn’t set one);
•Select NVR in the Type box and input 4in the box of Number of Channels;
•Click Finish.
Step 5:
Click to connect your NVR system and show the live picture of the channels.

15
Tip:
The Device list is displayed with the Graphic structure. If it’s displayed with a Tree
structure, please double click on the device name to connect the system.
Video Playback and Backup
Step 1:
Click (on the bottom menu bar), then click Confirm in the pop-up window to enter
the interface of Video Playback.
Step 2:
Select Channel, Record type and Date to filter the videos, click Retrieval to display the
recorded videos, then click on the colored timeline to see the recorded videos.

16
Step 3:
Click Download (on the lower right corner) to enter the interface of Download
Resources.
Step 4:
Click to download the video one by one or click Batch Download to download all the
videos together to your computer.

17
Step 5:
Click to exit from the video playback interface and get back to the live video
interface.
Other Functions of the Bottom Menu
Device management( ): To add/delete NVR devices; to modify the device information.
User Parameter( ): To select language; to change the storage paths of Screenshots
and videos; to set time zone.
Record( ): To record live videos on your computer.
Screenshot( ): To capture a screenshot of the live videos and save it on your
computer.
Disconnect all( ): To disconnect the NVR device.
Screen Number( ): To change the channel numbers showing in the screen.
More function( ): To change the password; to check the user logs; to check system
messages.

18
OPERATE NVR SYSTEM ON A MOBILE DEVICE
Notice:
•Your Cloud ID can be found in Network Setup.
•Please make sure that your NVR is Internet connected through the ethernet cable,
and the status of your network is Healthy Network.
•Please make sure the NVR System and the mobile device are connected to the same
network the first time.
App Installation
Search and download HeimKits to your mobile device from App Store/Google Play or
scan the QR codes below to download.
iOS System: Android System:
iOS 8.0 or later Android 4.4 and up
NVR System Adding
Install and open HeimKits App, then follow the steps below to add the NVR system.
Step 1:
Register an account with your email address and log in to HeimKits, then tap in the
center or on the upper right corner to continue.

19
Step 2:
Tap Kit to start adding your NVR system, then the App will scan the NVR system nearby
automatically.
Step 3:
Tap on the correct NVR after scanning. Then input the required information (e.g.
enter the password if you set one; if not, skip it.) Then tap on Complete to enter
the main interface.

20
Step 4:
Tap on the picture to enter the live interface, then you can capture a screenshot, record
the live videos on your mobile device and play the record videos from your NVR system.
Tips:
•If the NVR is not added automatically, please tap add manually to add it.
•This device does not support Intercom and PTZ function.
Table of contents
Languages:
Other HeimVision Network Hardware manuals
