Heinzelmann CHEF-X HMCX02 User manual

1
INSTRUCTION MANUAL
HMCX02
Ver202206

2
1. Safety instructions
This appliance is for indoor use
only.
The appliance must only be used
for the purpose it was intended
and designed.
The manufacturer is not liable for
any damage caused by incorrect
operation and improper use.
Do not attempt to override the lid
lock mechanism.
The Spatula is only used for
moving the food out of the bowl.
Don't use it while the blade is
running.
After chopping hard ingredients
such as ice, nuts, chocolate, etc..,
ALWAYS check that blades are
still screwed perfectly and tightly.
Thank you for your trust!
Congratulations on the purchase of your new
“Heinzelmann CHEF-X” Thermo Mixer.
For a safe handling of the product and to get to
know the entire scope of product:
Thoroughly read these instruction manual prior
to initial use.
Follow the safety instructions.
The appliance should only be used as
described in these instruction manual.
Keep these instruction manual for reference.
We wish you a lot of joy with your new Thermo
Mixer “Heinzelmann CHEF-X”!
Instructions for safe operation
The appliance must be
disconnected from the main plug
if left unattended or it is not in
use, and prior to assembly,
disassembly, cleaning.
For the turbo function, be very
careful that hot ingredients in the
blender bowl could be ejected
and may cause scalding always
close lid cap.
After being switched off or pause
is activated, the blade assembly
and the mixer attachment will
continue to rotate for a while. You
must wait until all parts have
come to a standstill before
unlocking the blender bowl and
opening the lid.
If the power cable of this
appliance should become
damaged, it must be replaced by
the manufacturer, the
manufacturer's customer service
department or a similarly
qualified specialist.
Symbol on your appliance
The material of this appliance is food safe.
Pls follow guidance within this
instruction manual to operate the
machine, otherwise you will be risk in
loss of the product warranty.
Please always check for updated Instruction
Manual at www.heinzelmannpro.com/en/manual
Never insert your hands or a
kitchen utensil in the Feeding Tube|
25
To guard against accidental
dropping of the mixing blade set,
be careful when dismounting it.
Be careful if hot liquid is poured
into the kitchen machine as it can
be ejected out of the appliance
due to a sudden steaming
This appliance is intended to be
used in staff kitchen areas and
other working residential type
environments.
After cleaning the blender bowl, the
connector of the blender bowl
must be dried before the appliance
is used again
The blender bowl is only be used
with the base unit of the machine
provided by manufacturer
Warning: Do not spill the liquid to
the connector of blender
The blender bowl is subject to
residual heat after the use of
heating function

3
Prior to replacement of parts or
attachments which move when in
operation, the appliance must be
switched off and disconnected.
Turn off the appliance before
pulling the plug out of the socket.
Never attempt to open the casing
of the appliance yourself.
Do not insert any objects in the
casing of the appliance.
Never use accessories other than
those recommended by the
manufacturer. Failure to do so
could pose a safety risk to the user
and could damage the appliance.
Only use original parts and
accessories.
Appliances can be used by
persons with reduced physical,
sensory or mental capabilities or
lack of experience and knowledge
if they have been given supervision
or instruction concerning use of the
appliance in a safe way and if they
understand the hazards involved.
This appliance shall not be used by
children. Children shall not play
with the appliance.
Keep the appliance and its cord
out of reach of children.
Never leave the appliance
unattended during use.
Never carry the appliance by the
cord.
Please take note of the chapter on
cleaning (see “ |9. Cleaning”)
DANGER! Risk of electric shock due to
moisture
The base unit, the power cable and
the main plug must not be
immersed in water or other liquids.
Never hold the appliance under
running water.
Protect the base unit against
moisture, water drips and splashes.
If the appliance falls into water,
disconnect the main plug
immediately. Only then is it safe to
retrieve the appliance. Do not use
until the appliance has been
checked by a certified technician.
Should liquids enter the base unit,
pull out the mains plug
immediately. Have the appliance
checked by a certified technician
before reusing.
Never touch the appliance or the
plug with wet or damp hands.
DANGER! Risk of electric shock
Only plug the main plug into the
wall socket after the appliance
has been completely assembled.
Only connect the main plug to a
properly installed and easily
accessible grounded wall socket
whose voltage and frequency
corresponds to the specifications
on the rating plate. The wall
socket must continue to be easily
accessible after the appliance is
plugged in, in case of emergency
the appliance can be unplugged
immediately.
Ensure that the power cable
cannot be damaged by sharp or
hot objects.
Do not place the appliance on a
heating object (gasoline, electric,
charcoal cooker, etc.) Keep the
appliance away from any hot
surfaces and open flames. Always
operate and place the appliance
on a horizontal, stable, clean,
heat-resistant, and dry surface.
Do not place the appliance at the
edge of the counter or table side
to avoid accidents. Also to ensure
the surface where the appliance
is placed on is capable of
supporting the overall weight of
the appliance with food inside.
Do not wrap the power cable
around the appliance.
Even after it has been switched
off, the appliance has not been
completely disconnected. In order
to fully disconnect it, pull out the
power plug.
Ensure that the power cable never
develops into a trip hazard, and
that nobody can get caught in or
stand on it.
Do not use the appliance near
explosive or flammable materials.
When using the appliance, ensure
that the power cable cannot be
trapped or crushed.
When removing the main plug
from the wall socket, always pull
the plug and never the cord.

4
FIRE HAZARD
Do not place the appliance on a
heating object (gasoline,
electric, charcoal cooker, etc.)
Keep the appliance away from
any hot surfaces and open
flames. Always operate and
place the appliance on a
horizontal, stable, clean, heat-
resistant and dry surface.
Disconnect the main plug from the
wall socket …
… if there is a fault,
… while you do not use the
Heinzelmann CHEF-X,
… before you assemble or
disassemble the Heinzelmann
CHEF-X
… before you clean the
Heinzelmann CHEF-X and
… during thunderstorms.
Do not use the appliance if there is
visible damage to the appliance or
the power cable.
To avoid any risk, do not make
modifications to the product.
Do not attempt to repair the
appliance yourself. In case of
malfunctions, repairs are to be
conducted by qualified personnel
only.
Failure to follow these instructions
could cause a risk to live.
DANGER! Risk of injury from cutting
Please remember that the blades
of the blade assembly are very
sharp:
Never touch the blades with your
bare hands, to avoid cuts.
When washing manually, the water
should be sufficiently clear so that
you can see the blade assembly
easily to avoid injuries caused by
the very sharp blades.
When emptying the blender bowl,
ensure not to touch the blades of
the blade assembly.
When removing and inserting the
blade assembly ensure not to
touch the blades.
The appliance must never be
operated without the blender bowl.
Never reach into the rotating
blades. Do not touch rotating parts
with spoons or similar utensils.
Keep long hair or loose clothing
away from rotating parts as well.
Please note that the blades keep
spinning for a short time after
switching the appliance off. This
applies in particular at high
rotation speeds. Do not reach into
the pot until the blades come to a
DANGER! Risk of injury through
burning
The surfaces of the appliance
might become very hot during
operation.
Only transport the appliance
when it has cooled down.
Wait for the appliance to cool
down before cleaning or storing.
Danger of burn by released
steam when the lid will be lifted
from the blender bowl.
Never remove or open the lid
while the appliance is operating.
The steam may come out and
cause burns.
WARNING ! Risk of material
damage
Place the appliance
exclusively on a level, dry,
non-slip and waterproof
surface, so that it can neither
fall nor slip off.
Never place the appliance
on a hot surface, e.g. hot
plate.
The whisk must only be used
with speed settings 1 to 4.
The button TURBO must not
be used when using the
whisk.
Use the blender bowl with
the lid in place, otherwise
liquid might be ejected.
If there is still food in the
blender bowl, do not change
the position of the appliance.

5
Never overfill the blender bowl
or the contents might be
ejected. Overflowing liquid
would flow onto the surface.
You should therefore place
the appliance on a
waterproof surface.
Ensure that during steaming, there
is never too much or too little
water in the appliance.
Do not operate the appliance
when it is empty, as this causes
the motor to overheat and may
result in damaging.
Only use the original accessories.
Do not use any astringent or
abrasive cleaning agents.
The appliance is equipped with
non-slip synthetic feet. As furniture
is coated with a wide array of
varnishes and synthetics, and is
also treated with different care
products, it cannot be fully ruled
out that some of these materials
contain ingredients that could
attack and soften the non-slip
plastic bases. If necessary, place a
non-slip mat under the appliance

6
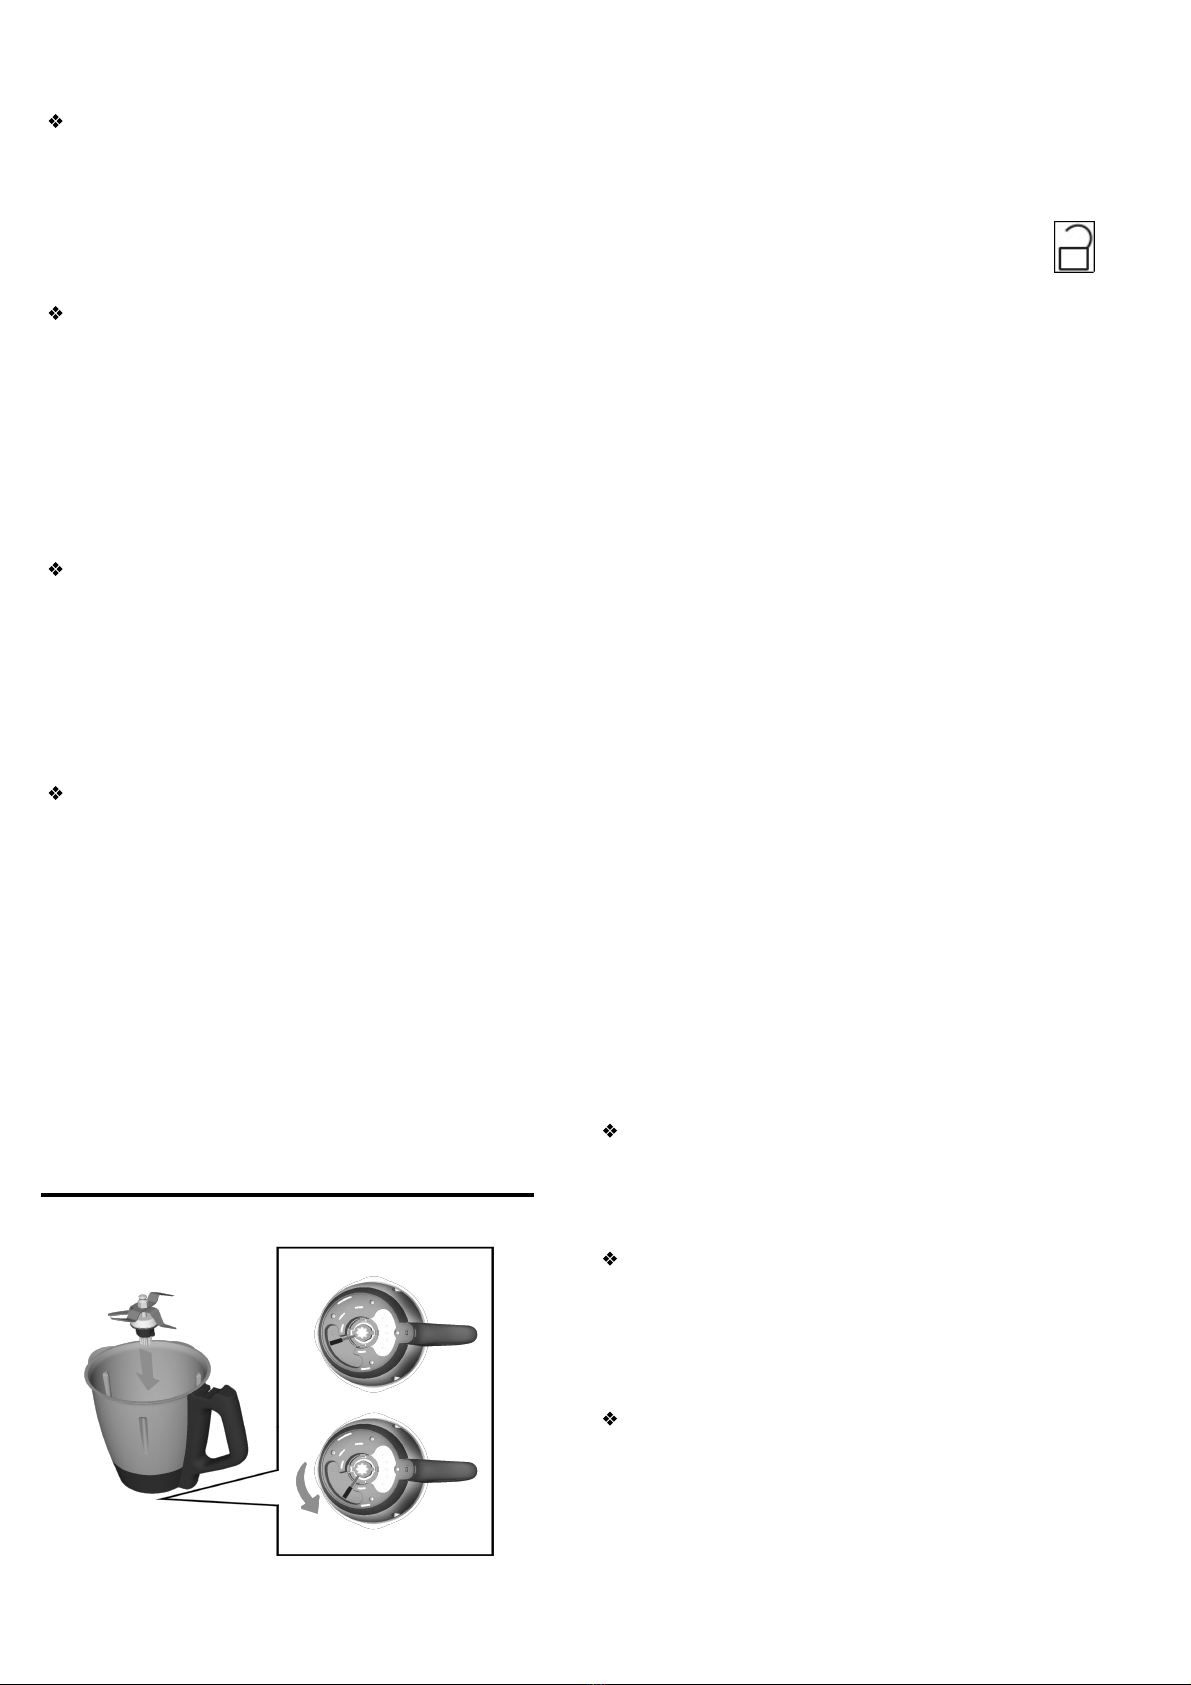
1. Blender bowl
2. Power cable with plug
3. Power socket
4. Base unit compartment for
blender bowl (with clutch)
5. Safety switch
6. Base unit
7. Temperature control
8. Speed control
9. On / Off Switch
10. Reverse
11. Turbo
12. Multi-Pulse
13. Pause
14. Timer
15. Display
16. Seal for blade assembly
17. Blade assembly
18. Simmering basket
19. Whisk
20. Spatula
21. Seal for the lid of the blender
bowl
22. Lid for the blender bowl
23. Transparent lid cap
24. LED Light
25. Feeding Tube
2. Intended purpose
Heinzelmann CHEF-X is used to mix, emulsify, grind, homogenize, cream, infuse, puree, whip, whisk, beat,
stir, chop, mash, stew, brown, and cook. These user instructions describe the basic functions such as mixing
and chopping.
WARNING! Risk of material damage!
Do not use the appliance to chop hard food such as bones or nutmegs.
3. Overview

7
4. Items supplied
1 Base unit |6
1 Blender bowl |1 with:
Blade assembly |17
Lid for the blender bowl |22
Transparent lid cap |23
LED Light |24 (see LED light instructions
inside the LED light packing)
1 Simmering basket |18
1 Whisk |19
1 Spatula |20
1 copy of the user instructions
1 copy of the quick user guide
5. Unpacking and setting up
1. Remove all packing material.
2. Check to ensure that all parts are present
and undamaged. In case of incomplete
delivery (e.g lid for the blender bowl, etc) or
damages, contact supplier immediately.
3. Clean the appliance prior to its first use! (see
“|9. Cleaning”)
NOTE: when in operation for the first time, some
odour may be generated by the appliance. This
is normal and harmless. Please ensure adequate
ventilation.
6. Product registration &
Warranty
Please scan the QR code or visit https://
www.heinzelmannpro.com/en/product-
registration for product registration.
Heinzelmann CHEF-X comes with a 12-month
warranty against manufacturing defect,
excluding naturally normal wear and tear, and
provided the appliance has been used and
maintained in accordance with the instructions
and has not been abused or misused in any way.
We cannot accept any liability for the following
damages
ignorance or non-observance of these
Instruction manual.
if not using the original packing during
transport.
7. Operating the appliance
For safety reasons, the settings described in this
chapter, can only be selected when the
appliance has been assembled completely.
7.1 Power supply
Connect the power cable with plug |2 to the
power socket |3 of the base unit |6 and then
plug in power cable with plug |2 into a
suitable wall socket. The wall socket must
continue to be easily accessible after the
appliance is plugged in.
Power indication turns red to indicate
appliance connected to power. An acoustic
signal indicates power connection.
7.2 Switching the appliance ON and OFF
Press On/Off switch |9 to switch on the
appliance. An acoustic signal sounds
indicates the appliance turned on.
Press switch |9 for prolonged time to turn the
appliance OFF.

8
7.3 Operation
Button /
Component
Function
Notes
Connecting to the
power supply
Machine is in stand-by mode when red
LED lights up.
Press |9 to switch on the machine.
On/Off |9
The appliance is ready for operation
when green LED lights up.
Press for prolonged time to turn the unit
appliance off.
Select a desired function to start the
operation.
When idle, the appliance will be
automatically switched off after 15
minutes for energy saving purpose.
Turbo |11
Press to start turbo function. Turbo
function is not available if a
temperature is selected.
Keep the button pressed as long as the
function is needed.
Whisk |19 should not be used in Turbo
function.
Please keep the transparent lid cap on
when the turbo function is used.
Reverse |10
Blade operates in counter-clockwise
direction (blunt side of blade) for
stirring.
Green LED next to reverse button lights
up to indicate reverse is activated.
Press to activate and press again to de-
activate.
Reverse operates in intervals.
Multi-Pulse |12
The machine operates in alternating
speeds.
Green LED next to Multi-Pulse lights up to
indicate Multi-Pulse is activated.
For temperature above 70°C, the
function is limited to speed 1&2 for
safety reason.
Press to start.
Whisk |19 should not be used in Multi-
Pulse function.
Multi-Pulse operates in intervals.

9
Pause |13
Temporary stop of speed, heating and
timer.
Lid can be opened after acoustic signal
sounds.
Close lid and press pause again, the unit
resumes with the same speed and heat
settings, and timer continues to count
up / down.
Press to activate and press again to de-
activate.
Wait for the LED light above pause to
turn GREEN and acoustic signal before
opening the lid.
Warning
If lid was opened before the LED turns
GREEN, the appliance will be locked for 90
seconds for safety reason. After 90
seconds you can select the desired
settings (heat, speed, timer) again.
Temperature |7
Select desired temperature.
In order to start the heating process, a
speed must be selected, minimum to
use speed 1 or Reverse.
Some functions are limited for
temperature above 70°C for safety
reason.
For temperature 70°C or above, it is
mandatory to set the timer first. Please
select temperature, time then speed to
start the operation.
Speed |8
Select desired speed.
Whisk can only be used in speed 1-4.
Timer |14
To set count down timer for the desired
process .
The appliance stops after set time is
elapsed.

10
7.4 Setting the temperature
Turn the temperature control |7 to set the cooking
temperature:
The adjustable temperature ranges from 37
°C to 130 °C.
If count down function is not used, the display
can show up to 90 minutes for counting up
purpose.
During operation, the set time can be
changed.
7.6 Setting the speed
Turn the speed control |8 to set the desired
speed.
The speed can be adjusted in 10 increments.
CAUTION:
Whisk can only be used in speed 1-4. On the
display |15, a respective indication appears if
speed 5 or above is selected.
When mixing liquids at speed 10, the blender
bowl |1 must not contain more than 1 litre,
otherwise liquid might be ejected (see
“8.Using the blender bowl”). For speed
settings less than 10, the blender bowl |1 can
be filled up to maximum of 2 litres.
Always put the lid cap in lock position under
high speed operation (over Speed 4).
In order to start the heat-up process, a speed
setting must be selected.
Once the desired temperature is selected, the
temperature turns green to show the
appliance is heating up. When desired
temperature is reached, the temperature
turns red. An acoustic signal indicates the
completion.
Whenever cooking for a long time (over 30
mins) under low speed (below speed 3), put
the lid cap upside down.
7.5 Setting the time
For temperature below 70°C, it is not mandatory
to set the timer.
For temperature 70°C or above, it is mandatory
to set the timer. The timer will blink to show such
setting is needed before selecting speed to start.
The adjustable time ranges from 1 second to 90
minutes.
The adjustment takes place as below interval:
up to 1 minute in intervals of seconds,
as of 1 minute in 30-second intervals,
as of 10 minutes in intervals of minutes.
The time set is shown on the display |15.
During operation, the speed setting can be
changed.
7.7 Reverse (Anti-clockwise rotation)
The anti-clockwise rotation is used for gentle
stirring of food not to be chopped.
The anti-clockwise rotation speed is fixed and
cannot be changed.
IMPORTANT – the unit immediately operate at
the same speed setting prior to pressing
reverse as selected on the speed knob dial.
Reverse to provide gentle stirring and stop
stirring at intervals.
If count down function is not used, the display
can show up to 90 minutes for counting up
purpose.
During operation, the set time can be
changed.
After setting the desired time, counting
down starts. Once the time set is elapsed,
the appliance stops automatically. An
acoustic signal indicates the completion.
11
7.8 Turbo function
Once turbo button is pressed, speed is increased
to maximum speed.
CAUTION :
When mixing liquids in turbo function, the
blender bowl |1 must not contain more than 1
litre, otherwise liquid might be ejected.
Never use this function when the whisk |19 is
used.
The button is blocked in all temperature
settings.
Press for as long as you need the function.
7.10 Pause
Press Pause to temporarily stop the operation for
checking or adding ingredients. Only open the lid
when the LED above pause button turns GREEN
and a sound appears.
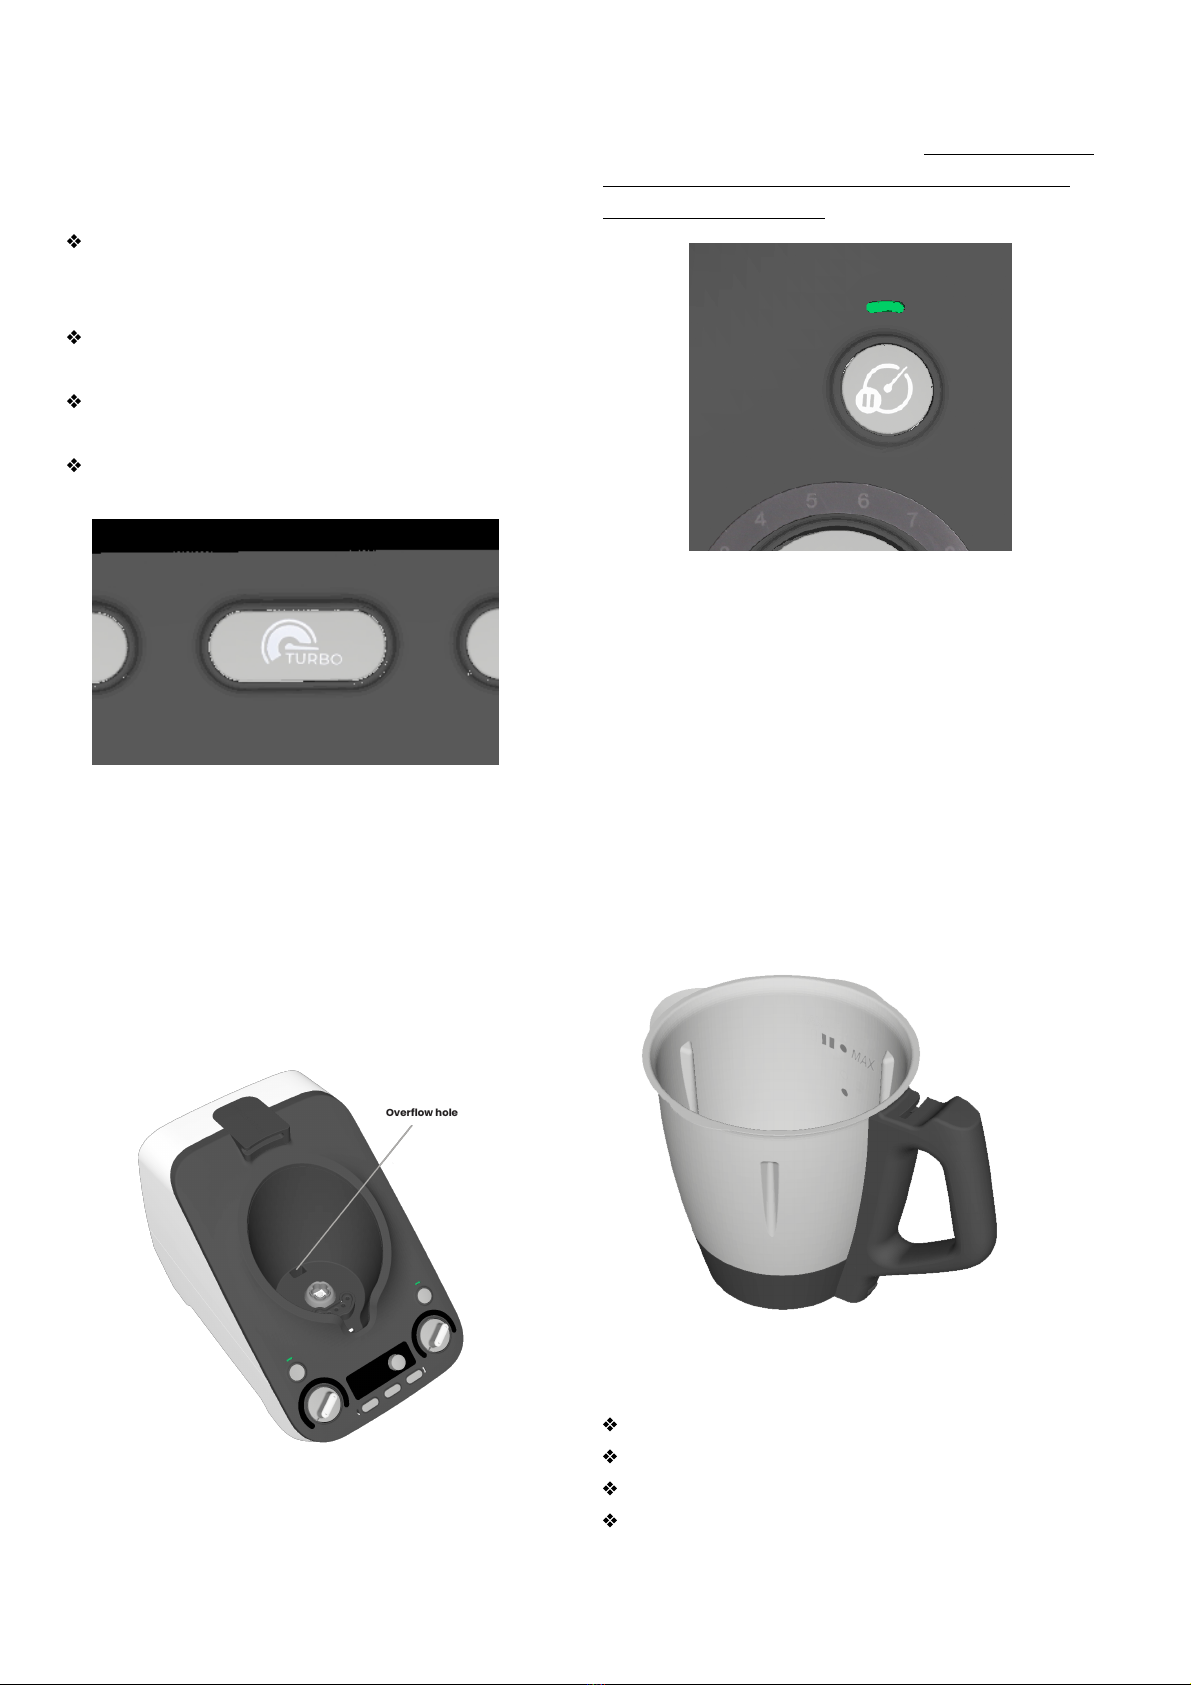
7.9 Overflow
In the Base |6 there is an overflow hole.
Should liquid escape from the blender bowl |1,
this will not collect in the base unit |6, but can
escape via the overflow hole onto the surface
below
After closing the lid, press Pause again and the
appliance will start operating at the selected
setting, timer will continue to count up or down.
7.11 Multi-Pulse
The machine operates in alternating speed, for
settings 1-7. Green LED next to Multi-Pulse lights
up to indicate Multi-Pulse is activated.
8. Using the blender bowl
8.1 Markings inside the blender bowl
On the inside, the blender bowl |1 is provided with
markings regarding the filling volume:
Bottom marking: approx. 0.5 litre
Marking I: approx. 1 litre
Centre marking: approx. 1.5 litre
Max: approx. 2 litre
12
CAUTION:
When mixing liquids at speed 10 or with
button Turbo |11, the blender bowl |1 must not
contain more than 1 litre, otherwise liquid may
be ejected. For speed settings of less than 10,
the blender bowl |1 may only be filled up to a
maximum of 2 litres.
Always follow guidance to chop / grind very
hard ingredients e.g. crystal sugar max. 200g
in 1 time: Do not use high speed (over speed 8
or turbo) and do not consecutively operate
more than 30 seconds,otherwise damaged
unit and blade may be occurred.
NOTE:
For some applications, the blender bowl |1
should not contain an insufficient amount of
liquid, so that the appliance can function
properly. Thus, for whipping cream, for
instance, you should use at least 200 ml and
when beating egg white use at least two
eggs.
To chop, grate, pulverize and mix the volume
of ingredients should never exceed half of the
bowl.
8.2 Using and removing the blade assembly
The blender bowl |1 must not be used without the
blade assembly |17, since the blade assembly |17
seals the blender bowl |1 on the bottom.
DANGER! Risk of injury from cutting!
Please remember that the blades of the blade
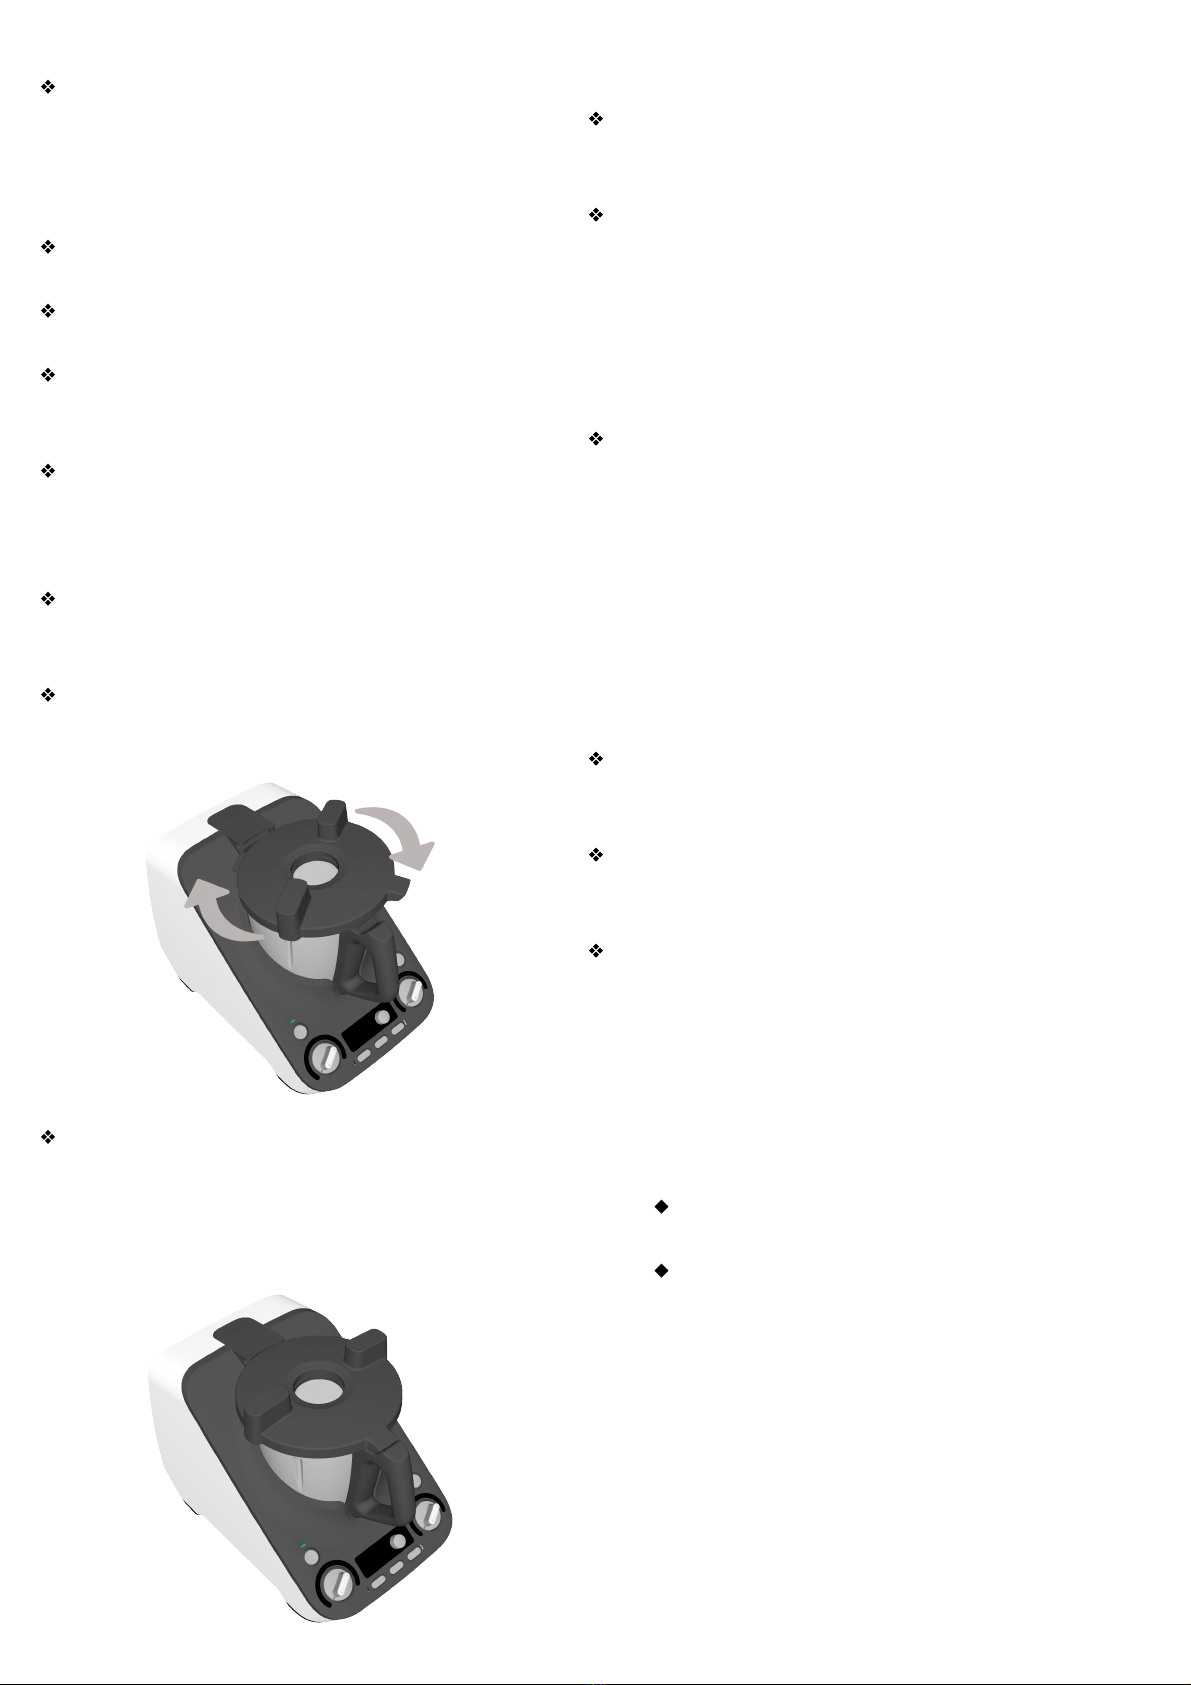
1. Position the blender bowl |1 horizontally.
2. Press the unlocking lever |25 on the underside
of the blender bowl |1 so that it points to the
open lock symbol.
3. Pull out the blade assembly |17 carefully
towards the top.
In order to insert the blade assembly |17, proceed
as follows:
1. Position the blender bowl |1 horizontally.
2. Insert the blade assembly |17 from the top.
3. Please take note that the two cams at the
bottom of the blade assembly |17 must be
pushed through the two recesses in the
underneath the blender bowl |1
4. To lock the blade assembly |17, move the
unlocking lever |25 on the underside of the
blender bowl |1 so that it points to the closed
lock symbol.
CAUTION : ensure that the seal for the blade
assembly |17 is positioned correctly, otherwise
liquid may leak from the blender bowl.
8.3 Insert the blender bowl
1. Place the blender bowl |1 into the base for the
blender bowl |4.
2. Press the blender bowl |1 slightly downward
until the cog wheel of the blade assembly |17
locks in place in the clutch |4.
NOTES:
If the blender bowl |1 cannot be pressed
downward, “wobble” slightly so that the cog
wheel of the blade assembly |17 in the blender
bowl |1 will slide into the gear ring / clutch |4.
Should the blender bowl |1 is not positioned
correctly, a safety mechanism prevents the
functioning of the appliance.
8.4 Insert and remove the whisk
The whisk |19 serves to combine liquid foods,
e.g. to whip cream, beat egg white, emulsify
(e.g. mayonnaise). The whisk |19 is put onto the
blade assembly |17.
13
The wings of the whisk |19 are located in the
space between the blades. To remove the
whisk |19, pull it out upward.
Caution
The whisk |19 must only be used with speed
settings 1 to 4.
The Multi-Pulse button |12 must not be pressed
if the whisk |19 is used.
When using the whisk |19, the spatula |20 must
not be used, since it might get into the whisk |
19.
When adding food, ensure that it will not block
the whisk |19.
8.5 Put on the lid of the blender bowl
The lid for the blender bowl |22 can only be
placed on if the blender bowl |1 was inserted
correctly.
Put the lid for the blender bowl |22 slightly
twisted onto the blender bowl |1.
Press and turn the lid |22 clockwise with both
hands until It is firmly closed.
Only when the lid |22 is correctly closed, the
appliance can start.
NOTES:
In order to facilitate the closing of the lid
somewhat, put a few drops of oil on a cloth and
rub it on the seal |21.
To make the lid |22 properly lock in place, it is
helpful to press lightly while closing the lid.
8.6 Use the transparent lid cap for lid opening, and
add ingredients without opening the lid
The transparent lid cap |23 is used to close the lid of
the blender bowl |1 and to measure ingredients.
In order to close the blender bowl |1, place the
transparent lid cap |23 with the opening at the
bottom into the lid |22 and lock it in place by
turning it clockwise.
CAUTION :
Prior to removing the transparent lid cap |23, you
must reduce the speed to setting 1, 2 or 3, so that no
food can be ejected.
In order to add ingredients while appliance is in
operation, the transparent lid cap |23 can be
removed for a short period of time.
To measure ingredients, turn the transparent lid
cap |23 upside down and fill in the food. The
values can be read in ml from the outside.
8.7 Cooking and steaming with the simmering
basket
1. Fill at least 500 ml of water into the blender bowl |
1. Only fill water into the blender bowl |1 that the
maximum filling volume of 2 litres will not be
exceeded when the food is added.
If the entire food is covered by water, it will
be cooked.
If the food is not completely covered by
water, it will be steamed.
2. Fill food into the simmering basket |18.
3. Place the simmering basket |18 into the blender
bowl |1.
14
4. Close the blender bowl |1 with the lid |22 and
the transparent lid cap |23.
5. Use the timer |14 to set the desired time.
6. Use the temperature controller |7 to set the
desired temperature, e.g. 100 |°C for cooking.
7. Select speed setting 1 to have an even
distribution of the heat in the water. The
appliance starts to operate.
8. After the set time has elapsed, a signal
sounds and the unit stops operation.
CAUTION :
Do not use any kitchen utensil to stir the
ingredients. The utensil might get into the
blades and cause damage.
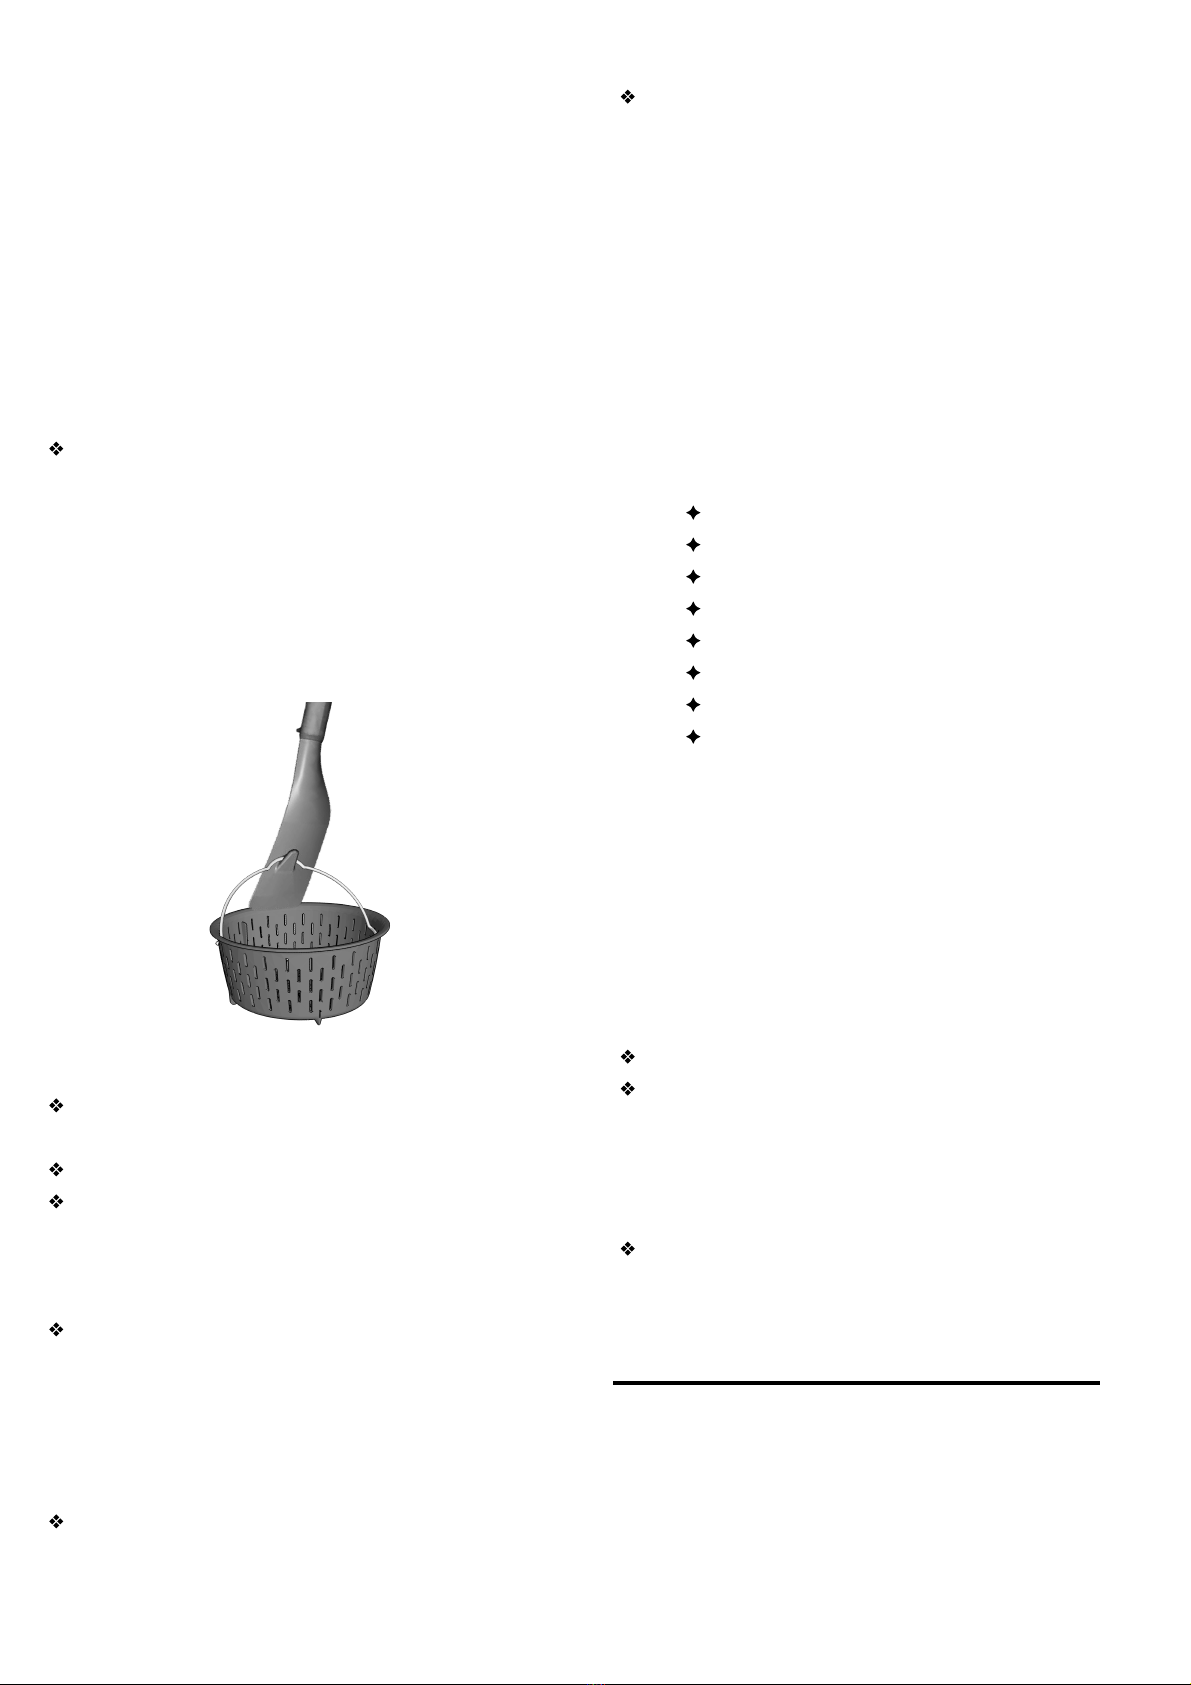
The hook on the rear of the spatula |20 can be
used to remove the hot simmering basket |18.
Simply hook on the metal bracket of the
simmering basket |18 and pull it out upwards.
9. Cleaning
Disconnect the main plug |2 from the wall
socket before any cleaning.
Never immerse the base unit |6 in water.
Before removing the blade assembly |17, rinse
the blender bowl |1 with water and remove
scraps of food from the blades so that the
blade assembly |17 can be removed safely.
When washing manually, the water should be
sufficiently clear so that you can see the
blade assembly |17 easily to avoid injuries
caused by the very sharp blades.
CAUTION :
Never use any abrasive, corrosive or
scratching cleaning agents. These might
damage the appliance.
NOTE:
Certain food or spices (e.g. curry) may
discolour plastic parts. This is not a defect with
the appliance and harmless to health.
9.1 Cleaning the base unit
1. Use clear water and wipe with a clean cloth.
Clean the outside of the base unit |6 with a
damp cloth.
2. Do not use the base unit |6 until it is completely
dry again.
9.2 Cleaning in the dishwasher
The following parts are dishwasher-safe:
Blender bowl |1
Transparent lid cap |23
Lid for blender bowl |22
Seal for the lid of the blender bowl |21
Blade assembly |17
Simmering basket |18
Whisk |19
Spatula |20
Never use a dishwasher to clean the following
parts: - Base unit |6
9.3 Cleaning, checking and replacing seals
Remove seals from blade assembly |17, and seal
for the lid of the blender bowl |21 for cleaning and
check them for damage. Pay attention to changes
(e.g. porous material or tears).
Both seals can be cleaned in the dishwasher.
Damaged seals must be replaced with new
ones. You can reorder new seals (see “13.How
to order accessories”).
CAUTION :
Prior to the next use, damaged seals must be
inserted again or replaced with new ones. An
operation without seals in place is not
permitted.
Blade assembly |17
1. Remove the blade assembly |17 from the
blender bowl |1 (see “8.2 Using and removing
the blade assembly”).
2. Pull seal off the blade assembly |17.

15
3. Insert the cleaned seal or a new one.
4. Before using the appliance again, reinsert the
blade assembly |17.
Lid of the blender bowl |22
1. Pull seal |21 off the underside of the lid of the
blender bowl |22.
2. Insert the cleaned seal |21 or a new one in the
lid for the blender bowl |22.
9.4 Cleaning the blender bowl
Multi-Pulse function can be used to clean the food
residue on blender bowl and blade assembly.
9.5 Descaling
When steaming with hard water, limescale may
build up on the parts used, especially in the
blender bowl |1.
Normal cleaning
In most cases, the limescale deposits are removed
by cleaning in the dishwasher or by hand.
Slight limescale deposits
1. Remove slight limescale deposits, which
cannot be removed with normal cleaning by
hand or in the dishwasher, with a cloth on
which you put some household vinegar.
2. Rinse with clear water.
Major limescale deposits
CAUTION :
Do not use commercially available descaling
agent, not even glacial acetic acid or vinegar. Use
the following gentle method.
1. Prepare a mixture of 50% white household
vinegar and 50% boiling water.
2. Fill this mixture into the blender bowl |1 or put
other furred-up parts into a container with this
mixture.
3. Allow the mixture to react for 30 minutes.
NOTE: more extended reaction periods do not
improve the limescale deposits but may damage
the parts permanently.
4. Rinse with clear water.
5. Allow the parts to dry completely before using
them again.
9.6 Storage
Store the appliance protected against dust and
dirt.
10. Maintenance
Regular maintenance
1. Inspect your CHEF—X and its accessories
regularly (including mixing bowl, blade, cable
and mixing bowl sealing ring) for possible
damage.
2. Do not use your CHEF-X with damaged
accessories.
3. To prevent any damage to CHEF-X, regularly
check that the air intakes are not obstructed.
4. To improve ventilation when CHEF-X is not in
use, leave the measuring cup off the mixing
bowl lid.
5. Prolonged stewing or contact with acidic
substances could lead to rust. Therefore,
please carefully check for debris from your
cooking ingredients
6. The mixing bowl and mixing blade set may be
damaged if they are soaked in water, other
liquids, or residual food for a prolonged period
of time. Therefore, please wash and dry them
in a timely manner after use.
7. Mixing blade set, bowls and accessories are
consumables, and are subject to normal
wear. Please replace them in a timely manner
by considering their frequency of use and
general condition to ensure perfect results.
8. Use water sparingly to prevent moisture from
entering the base unit.

16
11. Trouble shooting
11.1 Malfunctions during operation
Malfunction
Cause
Remedy
Appliance does not start
Blender bowl |1 is not positioned
correctly
Insert blender bowl |1 correctly (see
“8.3 Insert the blender bowl”).
Lid |22 has not been placed
correctly onto the blender bowl |1.
Place lid |22 correctly.
No power supply
Check if main plug and sockets are
functioning correctly.
Liquid underneath the appliance
The blade assembly |17 has not
been inserted correctly so that the
blender bowl |1 is leaking.
Insert blade assembly |17 correctly
(see “8.2 Using and removing the
blade assembly)
Seal for the blade assembly is
defective.
Insert new seal (see “9.3 Cleaning,
checking and replacing seals”).
Liquid escaped from the blender
bowl |1 flowing onto the surface
through the overflow hole |10 of the
base unit |12. (see “Overflow” on
page 49)
When mixing liquids at speed 10 or
with button Turbo |11, the blender
bowl |1 must not contain more than
1 litre, otherwise liquid may be
ejected. For speed settings of less
than 10, the blender bowl |1 may
only be filled up to a maximum of 2
litres.
Liquid escapes at the lid |22 of the
blender bowl |1
Seal |21 has not been inserted
correctly.
Insert seal |21 correctly (see “9.3
Cleaning, checking and replacing
seals”).
Seal |21 is defective.
Insert new seal |21 (see “9.3
Cleaning, checking and replacing
seals”).
Parts of the appliance are
discoloured.
Certain food or spices (e.g. curry)
may discolour plastic. This is not a
defect with the appliance.
Remedy unnecessary, since not
harmful to health.

17
11.2 Warning messages on the display
Display
Cause
Remedy
Lid Opened
Lid |22 have not been placed
correctly onto the blender
bowl |1.
Close lid |22 correctly (see
“8.5 Put on the lid of the
blender bowl” ).
Lock in Red
Security unit in lock down for
90 sec.
Lid was opened during
operation or without
pressing Pause.
The appliance is overloaded.
The contents in the blender
bowl are too much/dense
and the appliance may
overheat if continues.
Please reduce the loading
volume in the blender bowl.
E003
The appliance is overheated.
Unplug and let the
appliance cool down
completely. Afterwards, it is
ready for use.
12. Discarding & Environment
When decommissioning the appliance, the product must not be disposed of with other household waste.
Instead, it is your responsibility to dispose to your waste equipment by handing it over to a designated
collection point. Failure to follow this rule may be penalized in accordance with applicable regulations on
waste disposal. The separate collection and recycling of your waste equipment at the time of disposal will
help conserve natural resources and ensure that it is recycled in a manner that protects human health
and the environment. For more information about where you can drop off your waste for recycling, please
contact your local waste collection company. The manufacturers and importers do not take responsibility
for recycling, treatment and ecological disposal, either directly or through a public system.
18
13. Technical specifications
Model:
HMCX02
Voltage:
220 -240V ~
Frequency:
50/60 Hz
Protection class:
I
Power rating:
1300W
(Motor: 1400W, Heating: 1050W)
Capacity of blender bowl |1
2 litres
Subject to technical modification.
14. How to order accessories
On our website you can find information regarding accessories and spare ports that can be reordered
shop.heinzelmannpro.com
18
NID Concepts Limited
We reserve the right to alter at any time without notice the technical specifications of this
appliance. None of the information contained in this document is of a contractual nature.
Modifications may be made at any time.
© All rights reserved for all countries by NID Concepts Limited.
Scan the QR Code or Visit here
www.heinzelmannpro.com/en/manual to view
the instruction manual in different languages
Table of contents
Other Heinzelmann Kitchen Appliance manuals


