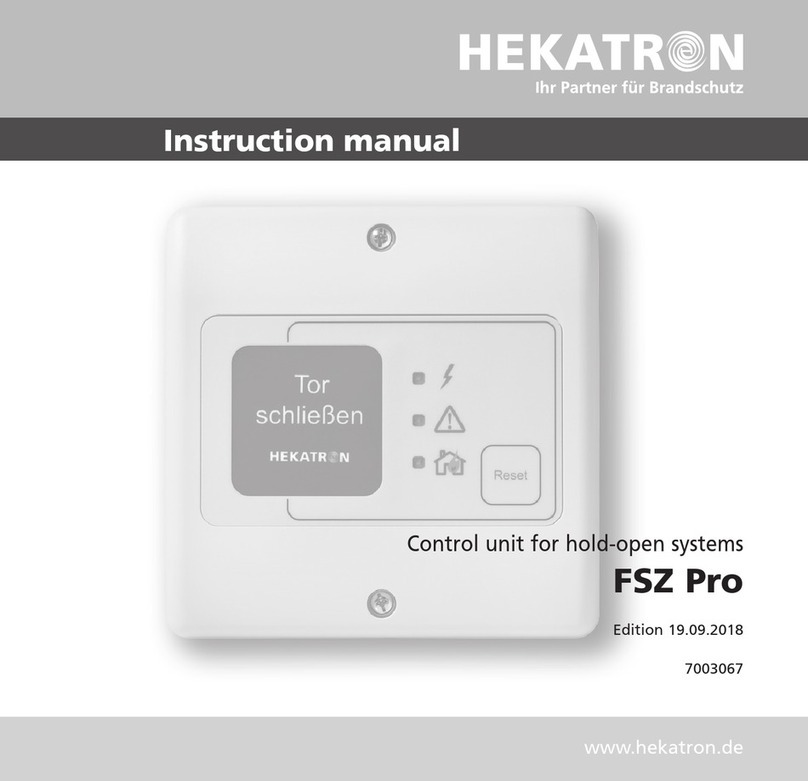
Hekatron FSZ Basis User manual

2

3
Contents
1 General safety information and protective measures ......... 5
2 Scope of delivery ...................................... 6
3 Warranty ............................................ 6
4 Product description .................................... 7
5 FSZ Basis – technical data ............................... 8
6 Current requirements .................................. 9
7 Installing the FSZ Basis ................................ 10
8 FSZ Basis – applications ................................ 11
9 Electrical installation .................................. 12
9.1 Installation instructions ........................................ 12
9.2 Control unit FSZ Basis for hold-open systems ....................... 14
9.3 Termination module AM 142 .................................... 16
9.4 FSZ Basis – operation ........................................... 17
9.5 Hold-open system according to DIN EN 14637 ....................... 19
9.6 Connection configurations according to DIBt and DIN EN 14637 ........ 20
9.7 Signalling of the FSZ Basis ...................................... 27
10 Commissioning and acceptance ......................... 30
10.1 Acceptance testing ............................................ 30
10.2 Maintenance instructions ....................................... 31
10.3 Monthly functional test ........................................ 31
10.4 Annual testing and maintenance ................................. 31
10.5 Functional test ............................................... 32

4
11 Maintenance ........................................ 33
11.1 Obligatory documentation requirement ........................... 33
12 Annex ............................................. 34
12.1 Order data ................................................... 34
12.2 Drilling template ............................................. 34
12.3 Technical support and application support ......................... 34

5
1 General safety information and protective measures
1 General safety information and protective measures
The present documentation describes the function of the FSZ Basis with the hardware and software
version applicable at the date of issue of this document.
Information for Germany
The test regulations of the Deutsches Institut für Bautechnik and the respective type approval must
be observed and followed while projecting, assembling, installing and operating hold-open systems
on fire barriers.
The information contained in this Instruction Manual is based on these regulations.
Ensure proper use!
– The technical data specified for the equipment must be observed.
– Modifications or changes to the equipment are not permitted.
– The equipment must be used only for its intended purpose in an undamaged and perfect condition.
– No other spare parts than those available from the manufacturer must be used.
– The allowed components of the hold-open system are listed in a separate type approval.
Hold-open systems are subject to the duty of servicing required according to DIN 31051 and DIN 14677.
More information can be found in the respective type approval document of the hold-open system.
If the use of the system is changed, it must be verified whether the legal provisions, requirements
and state of the art are appropriately taken into account.
Specialised staff must be provided for projecting, assembling and commissioning.
When working on electrotechnical installations, special regulations must be complied with.
Such work may only be carried out by authorised qualified electricians.

6
2 Scope of delivery
2 Scope of delivery
On delivery, the FSZ Basis features the following components:
1 x FSZ Basis
1 x instruction manual
1 x assembly kit consisting of 2 screws and 2 dowels
1 x cable gland kit consisting of:
- one M20 cable gland for the power supply cord
- three M16 glands for connection of the peripheral equipment,
e.g. ORS 142, electromagnetic door retainers, etc.
1 x module for the integrated release button,
labelled “Tür schließen” (Close door) and “Tor schließen” (Close gate)
1 x termination module AM 142 (only for version 31-5400002-01-xx and 31-5400002-05-xx)
3 Warranty
In case of non-compliance with the information contained in this Instruction Manual, any claims for
guarantee and liability of the manufacturer will become invalid. In particular, the device or its com-
ponents may only be repaired by authorised personnel. It is not allowed to dismount or manipulate
the device. If the device is manipulated nevertheless, any warranty claims become void.
The information and warranty conditions in the general terms and conditions of
Hekatron Vertriebs GmbH, Brühlmatten 9, D-79295 Sulzburg, shall apply.

7
4 Product description
4 Product description
The hold-open control unit, FSZ Basis, is preferably used to supply hold-open systems with voltage.
It is characterised by the following features:
– Integrated manual release button conforming to standard and reset button
– Tested according to DIN EN 14637
– Distinction between fault causes via the LED flash code on the keypad
– Alarm storage can be activated via DIP switch
– Line surveillance can be activated via DIP switch
– Two smoke switch stubs can be connected with activated line surveillance
– Relay with potential-free alternating contact at the user‘s free disposal
– Short-circuit-proof primary pulsed switching power supply unit with stabilised output voltage
– Power supply with overtemperature shutdown

8
5 FSZ Basis – technical data
5 FSZ Basis – technical data
Nominal voltage 230 V AC
Nominal current consumption 0.08 A eff.
Rated frequency 50/60 Hz
Power consumption 13.8 VA
Nominal output voltage 24 V DC
Residual ripple 200 mVSS
Output current max. 400 mA
Output power 9.6 W
Relay
Switching voltage AC
Switching current AC
Switching voltage DC
Switching current at 30 V DC
Switching current at 24 V DC
1 alternating contact, potential-free
max. 250 V AC
max. 5 A AC
max. 30 V DC
max. 3 A DC
max. 5 A DC
Operating ambient temperature -10 °C to +50 °C
Storage temperature -10 °C to +60 °C
Ambient conditions humidity
(continuous, without condensation) ≤34 °C
10 ... 95 % RH
Ambient conditions humidity
(continuous, without condensation) > 34 °C
max. 35 g/m³
min. 10 % RH
Degree of protection with exposed assembly IP 65
Degree of protection with cable entry from behind IP 30
Safety class "I"
Housing PC-ABS housing
Colour signal white according to RAL 9003
Installation exposed assembly
Installation position as desired

9
6 Current requirements
Cable entries 6 x M16 and 2 x M20
Dimensions HxWxD 146 mm x 146 mm x 60.5 mm
Weight 420 g
DIBt approval Z-x.x-xxxx
VdS approval according to DIN EN 14637 G 213091
6 Current requirements
The FSZ Basis provides a total output current of 400 mA. This output current can be completely
used for the required components of the hold-open system. The current required for the hold-open
system consists of the sum total of all currents of the components connected.
Example calculation:
The hold-open system comprises the following components:
Smoke switch 3 x ORS 142 3 x 22 mA 66 mA
Electromagnetic door
retainer
2 x THM 425 2 x 63 mA 126 mA
Total current requirements 192 mA
The total current must not exceed 400 mA. The current consumption of the various components of
the hold-open system is specified in the related product documents.

10
7 Installing the FSZ Basis
7 Installing the FSZ Basis
The safe installation of the FSZ base requires only 2 holes (see annex drilling template). The FSZ
Basis is therefore delivered including two screws and dowels.
The installation position can be selected as desired. The FSZ accessories kit – which must be ordered
separately – includes two mounting adapters for installation of the FSZ Basis in a switch cabinet or
on a top-hat rail. The mounting adapters can be mounted on the rear of the FSZ Basis at the points
provided.
Mounting points for top-hat rail adapter
Fig. 1: Mounting points for top-hat rail adapter

11
8 FSZ Basis – applications
8 FSZ Basis – applications
The FSZ Basis allows setting up a hold-open system in three different configurations:
1. According to DIBt without line surveillance
A +24-V wire jumper must be fitted to connector 5 in the last detector to be connected (see Fig. 5).
If no manual button (HAT) is connected, a wire bridge must be implemented to the HAT connection
terminal in the FSZ Basis.
All of the components to be connected must be jointly listed in one type approval. The connection
lines of the smoke switches and manual buttons must be completely laid in a cable conduit or cable
channel. If this is not possible, the lines must be laid separately.
No more than 12 smoke switches, electromagnetic door retainers (THM) and other consumer de-
vices may be connected. The total current must not exceed 400 mA. The DIP switches 1 and 2 must
be set to OFF.
2. According to DIBt with line surveillance
The line surveillance function must be activated via DIP switch 1 (EN 14637). One termination mod-
ule AM 142 or a magnet for ORS 142 must each be connected in the last detector to be connected
and in the manual button (see Fig. 7 resp. Fig. 8). If no manual button is connected the termination
module AM 142 must be connected to the HAT connection terminal in the FSZ Basis.
All of the components to be connected must be jointly listed in one type approval.
No more than 12 smoke switches, electromagnetic door retainers (THM) and other consumer
devices must be connected to one stub. The total current must not exceed 400 mA. The DIP switch 1
must be set to ON. Depending on the connection DIP switch 2 must set to ON or OFF.
3. According to DIN EN 14637
The line surveillance function must be activated via DIP switch 1 (EN 14637). One termination
module AM 142 or a magnet for ORS 142 must each be connected in the last detector and in the
manual button (see Fig. 7 resp. Fig. 8). If no manual button is connected the termination module
AM 142 must be connected to the HAT connection terminal in the FSZ Basis.
All of the components to be connected must be jointly listed in the device list according to
DIN EN 14637 and in one type approval.

12
9 Electrical installation
In single stub operation, a maximum of 6 smoke switches may be installed on the stub. With 2-stub
operation, a maximum of 9 smoke switches may be installed, whereby a maximum of 6 smoke
switches are permitted on one stub. The remaining available power can be consumed by any num-
ber of THM and other consumers. The total current of 400 mA must not be exceeded. DIP switch 1
is set to ON. DIP switch 2 must be ON or OFF depending on the connection.
The type approval and the device list with accepted system components according to DIN EN 14637
can be downloaded from www.hekatron.de.
9 Electrical installation
WARNING
Risk of electric shock
The device contains unprotected contacts which may cause severe injuries through electric shock if
touched.
►The power supply cord of the device must be de-energised before assembly work is started.
9.1 Installation instructions
Installation and electrical connections may only be executed by qualified electricians or by persons
appropriately instructed with regard to electrical engineering. An interrupter (circuit breaker,
max. 10 A / tripping characteristic B) must be installed in the supply circuit. The place of installation
of the interrupter must be entered in the acceptance report.
Lines must be provided with adequate mechanical protection, properly installed and secured, and
meet the requirements present at the place of installation. For installation, the local provisions shall
have priority.
Protective conduits must generally be used in areas that are within reach of persons. On the basis
of local provisions it must be determined whether to use plastic or steel-armoured conduits. Safety
extra-low voltage lines must be laid separately from line voltage carrying lines. Therefore, separa-
tion strips must be used in cable conduits or in cable trays. Cables and lines incoming from outside

13
9 Electrical installation
must be secured upstream of their connection sites such that the connection sites are strain- and
pressure-relieved.
Cables must be laid separately inside the device. The jacket must be left on the cables all the way to
the terminals.
Cable type NYM 3x1.5 or 3x2.5 must be used for power supply connection.
Any commercially available communication cables with or without shielding may be used for the
safety extra-low voltage lines.
The cable cross-section must be configured according to the current consumption of the devices
used and to the line length.
Power supply connection:
The cross-section of the power supply cord must not exceed 2.5 mm².
Hold-open system wiring:
Recommended line type: without smoke switch in combination with a smoke
status indicator switch status indicator
IY(ST)Y 2x2x0.6 IY(ST)Y 3x2x0.6
IY(ST)Y 2x2x0.8 IY(ST)Y 3x2x0.8
Maximum line length:
The maximum length of the line to the electromagnetic door retainer must not exceed 35 m and
that to the smoke switches must not exceed 75 m.
The number of line connections should be kept as low as possible. Every required connection must
be made by means of reliable methods. Clamped connections require the use of terminals with
pinch protection.
Do not place lines directly across the printed circuit board of the FSZ Basis.

14
9 Electrical installation
9.2 Control unit FSZ Basis for hold-open systems
9.2.1 Printed circuit board with connection terminals
Mains connection
230 V AC
Potential-free
alternating contact
Connection of
smoke switch
Terminal points
Connection of
hold-open system
Connection of ext. manual
release and reset button
DIP switch for alarm storage
DIP switch for 2 stubs
DIP switch for DIN EN 14637
Fig. 2: FSZ Basis terminal assignment

15
9 Electrical installation
Labelling Connection Note/remark
L Mains phase
N Mains neutral conductor
Mains protective conductor
1 Relay, line voltage NC In the event of an alarm, fault or pow-
er failure connected with contact 2
2 Relay, line voltage COM1 Common potential-free contact
3 Relay, line voltage NO In operation connected with contact 2
+24 V Output voltage +24 V DC
GND Output voltage 0 V DC
ORS Feedback from ORS alarm loop
K Connection point terminal
B Connection point terminal
THM+ Electromagnetic door retainer +24 V
THM- Electromagnetic door retainer GND
+24 V Output voltage +24 V DC
HAT Feedback from manual release button
Reset Feedback from reset button
GND Output voltage 0 V DC

16
9 Electrical installation
9.3 Termination module AM 142
Only in the version 31-5400002-01-xx and 31-5400002-05-xx is one AM 142 included in the scope of
delivery!
9.3.1 Printed circuit board with connection terminals
Fig. 3: Termination module AM 142
9.3.2 AM 142 connection
Coming from the power supply unit or the second
to last smoke switch
Going to the last smoke switch
+ 24V yellow feedback (alarm loop)
GND white feedback (alarm loop)
+ (connected internally)
feedback (alarm loop)
black GND
red +24V
The terminating module AM 142 is not suitable for Ex areas and must therefore not be
installed in the ORS 142 Ex.

17
9 Electrical installation
9.4 FSZ Basis – operation
The FSZ Basis can be operated according to the requirements of DIBt and/or to the requirements of
DIN EN 14637. The DIP switches in the FSZ Basis must be set accordingly.
The DIP switches allow configuring the alarm storage and line surveillance features as well as using
stubs with smoke switches.
123
ON
EN 14637
2 Stiche (2 stubs)
Alarmspeicher (al. storage)
= OFF / = ON
Fig. 4: DIP switches for FSZ Basis configuration
EN 14637 – DIP 1
If the FSZ Basis is used according to DIN EN 14637, this DIP switch must be set to “ON”.
If the FSZ Basis is used according to DIBt, the system can be used with and without line surveillance.
OFF The FSZ Basis is operated without line surveillance. A wire jumper is set across contacts 1
and 5 in the last smoke switch (observe chapter 8, section 1).
ON The FSZ Basis is operated with line surveillance. The termination module AM 142 (see
Fig. 7) resp. a magnet
1) (see Fig. 8) must be installed in the last smoke switch of a stub
and at the external manual release button (observe chapter 8, section 2 und 3). Further-
more, the external manual release button (see Fig. 7) must be connected via AM 142 to
the HAT connection terminal in the FSZ Basis.
1) A magnet can only be used in combination with an ORS 142!

18
9 Electrical installation
2 stubs – DIP 2
DIP switch 2 is only evaluated if DIP switch 1 is set to “ON” at the same time.
The connection of an external manual button is not considered to be a stub.
OFF Only one stub with smoke switches is connected to the FSZ Basis. The termination
module AM 142 (see Fig. 7) resp. a magnet
1) (see Fig. 8) must be installed in the last
smoke switch (observe chapter 8, section 2 und 3). If no manual button is connected the
termination module AM 142 must be connected to the HAT connection terminal in the
FSZ Basis.
ON Two stubs with smoke switches are connected to the FSZ Basis. The termination module
AM 142 must be installed in the last smoke switch of each of the two stubs (see Fig. 9
also observe chapter 8, section 2 und 3). The total number of smoke switches must not
exceed 9. If no manual button is connected the termination module AM 142 must be
connected to the HAT connection terminal in the FSZ Basis.
1) A magnet can only be used in combination with an ORS 142!
Alarm storage – DIP 3
OFF The FSZ Basis does not store an incoming alarm. If the releasing smoke switch resets
itself or if the manual release button is no longer actuated, the FSZ Basis returns to the
operating state. After a loss of power, the FSZ Basis also returns to the original operat-
ing state provided there is no fault or alarm.
ON The FSZ Basis stores an incoming alarm. This alarm must be reset manually via the inte-
grated or an external reset button.
After a loss of power, the FSZ base returns to the previous operating state after the
voltage is on again. If the previous operating state was an alarm, this alarm is again
signalled. If the previous operating state was a fault or operation, the fault is indicated.
After a power failure, the FSZ Basis must be reset to operate again.

19
9 Electrical installation
9.5 Hold-open system according to DIN EN 14637
Any hold-open system set up and operated according to DIN EN 14637 must be classified by the
installer. Classification is based on a 6-digit code, of which the 2nd and 6th places must be entered
on site according to the hold-open device used. Places 1, 4 and 5 are specified by DIN EN 14637 and
place 3 by the respective type approval.
Classification of a Hekatron hold-open system according to DIN EN 14637:
Hold-open system DIN EN 14637 3 5 1/2/4 1 1 3
Digit 1 2 3 4 5 6
Digit 1 – Application class:
Class 3: Frequent use by the public and other persons with a low inclination to care and diligence,
i.e. cases where misuse is probable to a certain degree.
Digit 2 – Stress test of the hold-open device:
Class 5: 50,000 test cycles
Hekatron’s electromagnetic door retainers comply with this class.
Digit 3 – Door type:
Class 1: Swing doors
Class 2: Sliding gates/doors
Class 4: Automatic swing doors
According to Hekatron’s type approval, the hold-open system may be used on doors of
classes 1, 2 and 4.
Digit 4 – Use on fire/smoke control doors
Class 1: Suitable for use on fire/smoke control doors.
Digit 5 – Safety:
Class 1: All hold-open systems must fulfil a critical safety function for which reason no other class
than the highest one is defined for using this standard.
Digit 6 – Corrosion resistance:
Class 3: High resistance
Hekatron’s electromagnetic door retainers comply with this class.

20
9 Electrical installation
9.6 Connection configurations according to DIBt and DIN EN 14637
9.6.1 Connection without line surveillance (DIP 1 OFF)
The system is operated with a smoke switch stub, an external manual release button and an
external reset button.
Fig. 5: Example connection without line surveillance
Table of contents
Other Hekatron Control Unit manuals
Popular Control Unit manuals by other brands
Grundfos
Grundfos MIXIT Integration guide
Eclipse
Eclipse PulsePak installation guide
Pfeiffer Vacuum
Pfeiffer Vacuum N Series operating instructions
EKF
EKF C20-SATA technical information

STIEBEL ELTRON
STIEBEL ELTRON HSBC 200 L Administrator's Manual for Operation and Installation
jablotron
jablotron JA-120N Quick start manual

